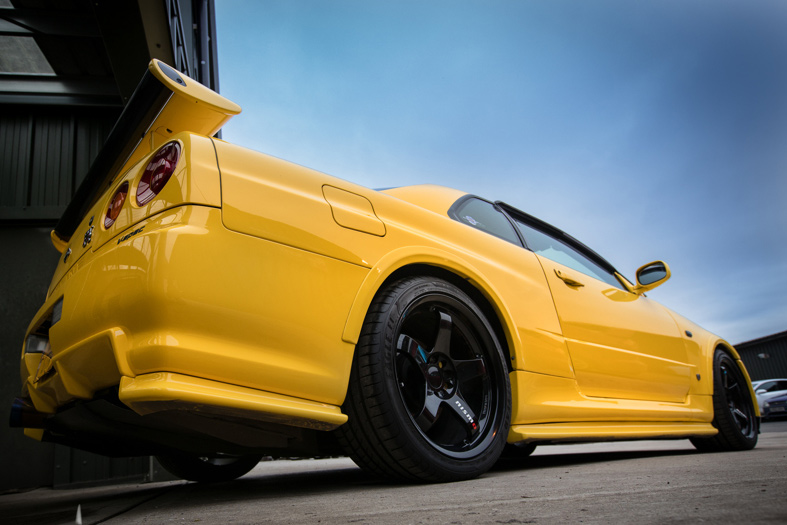
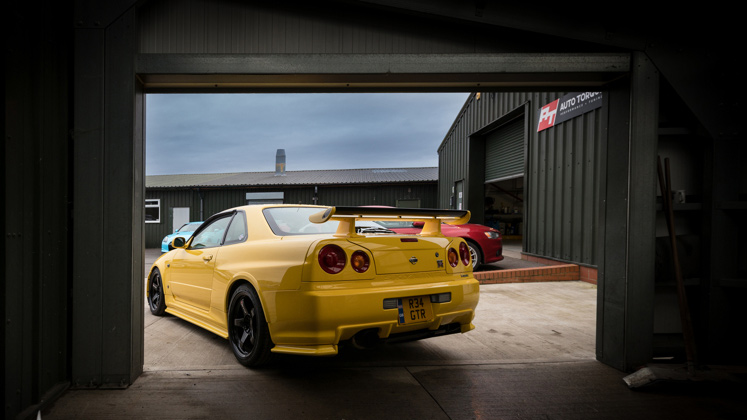
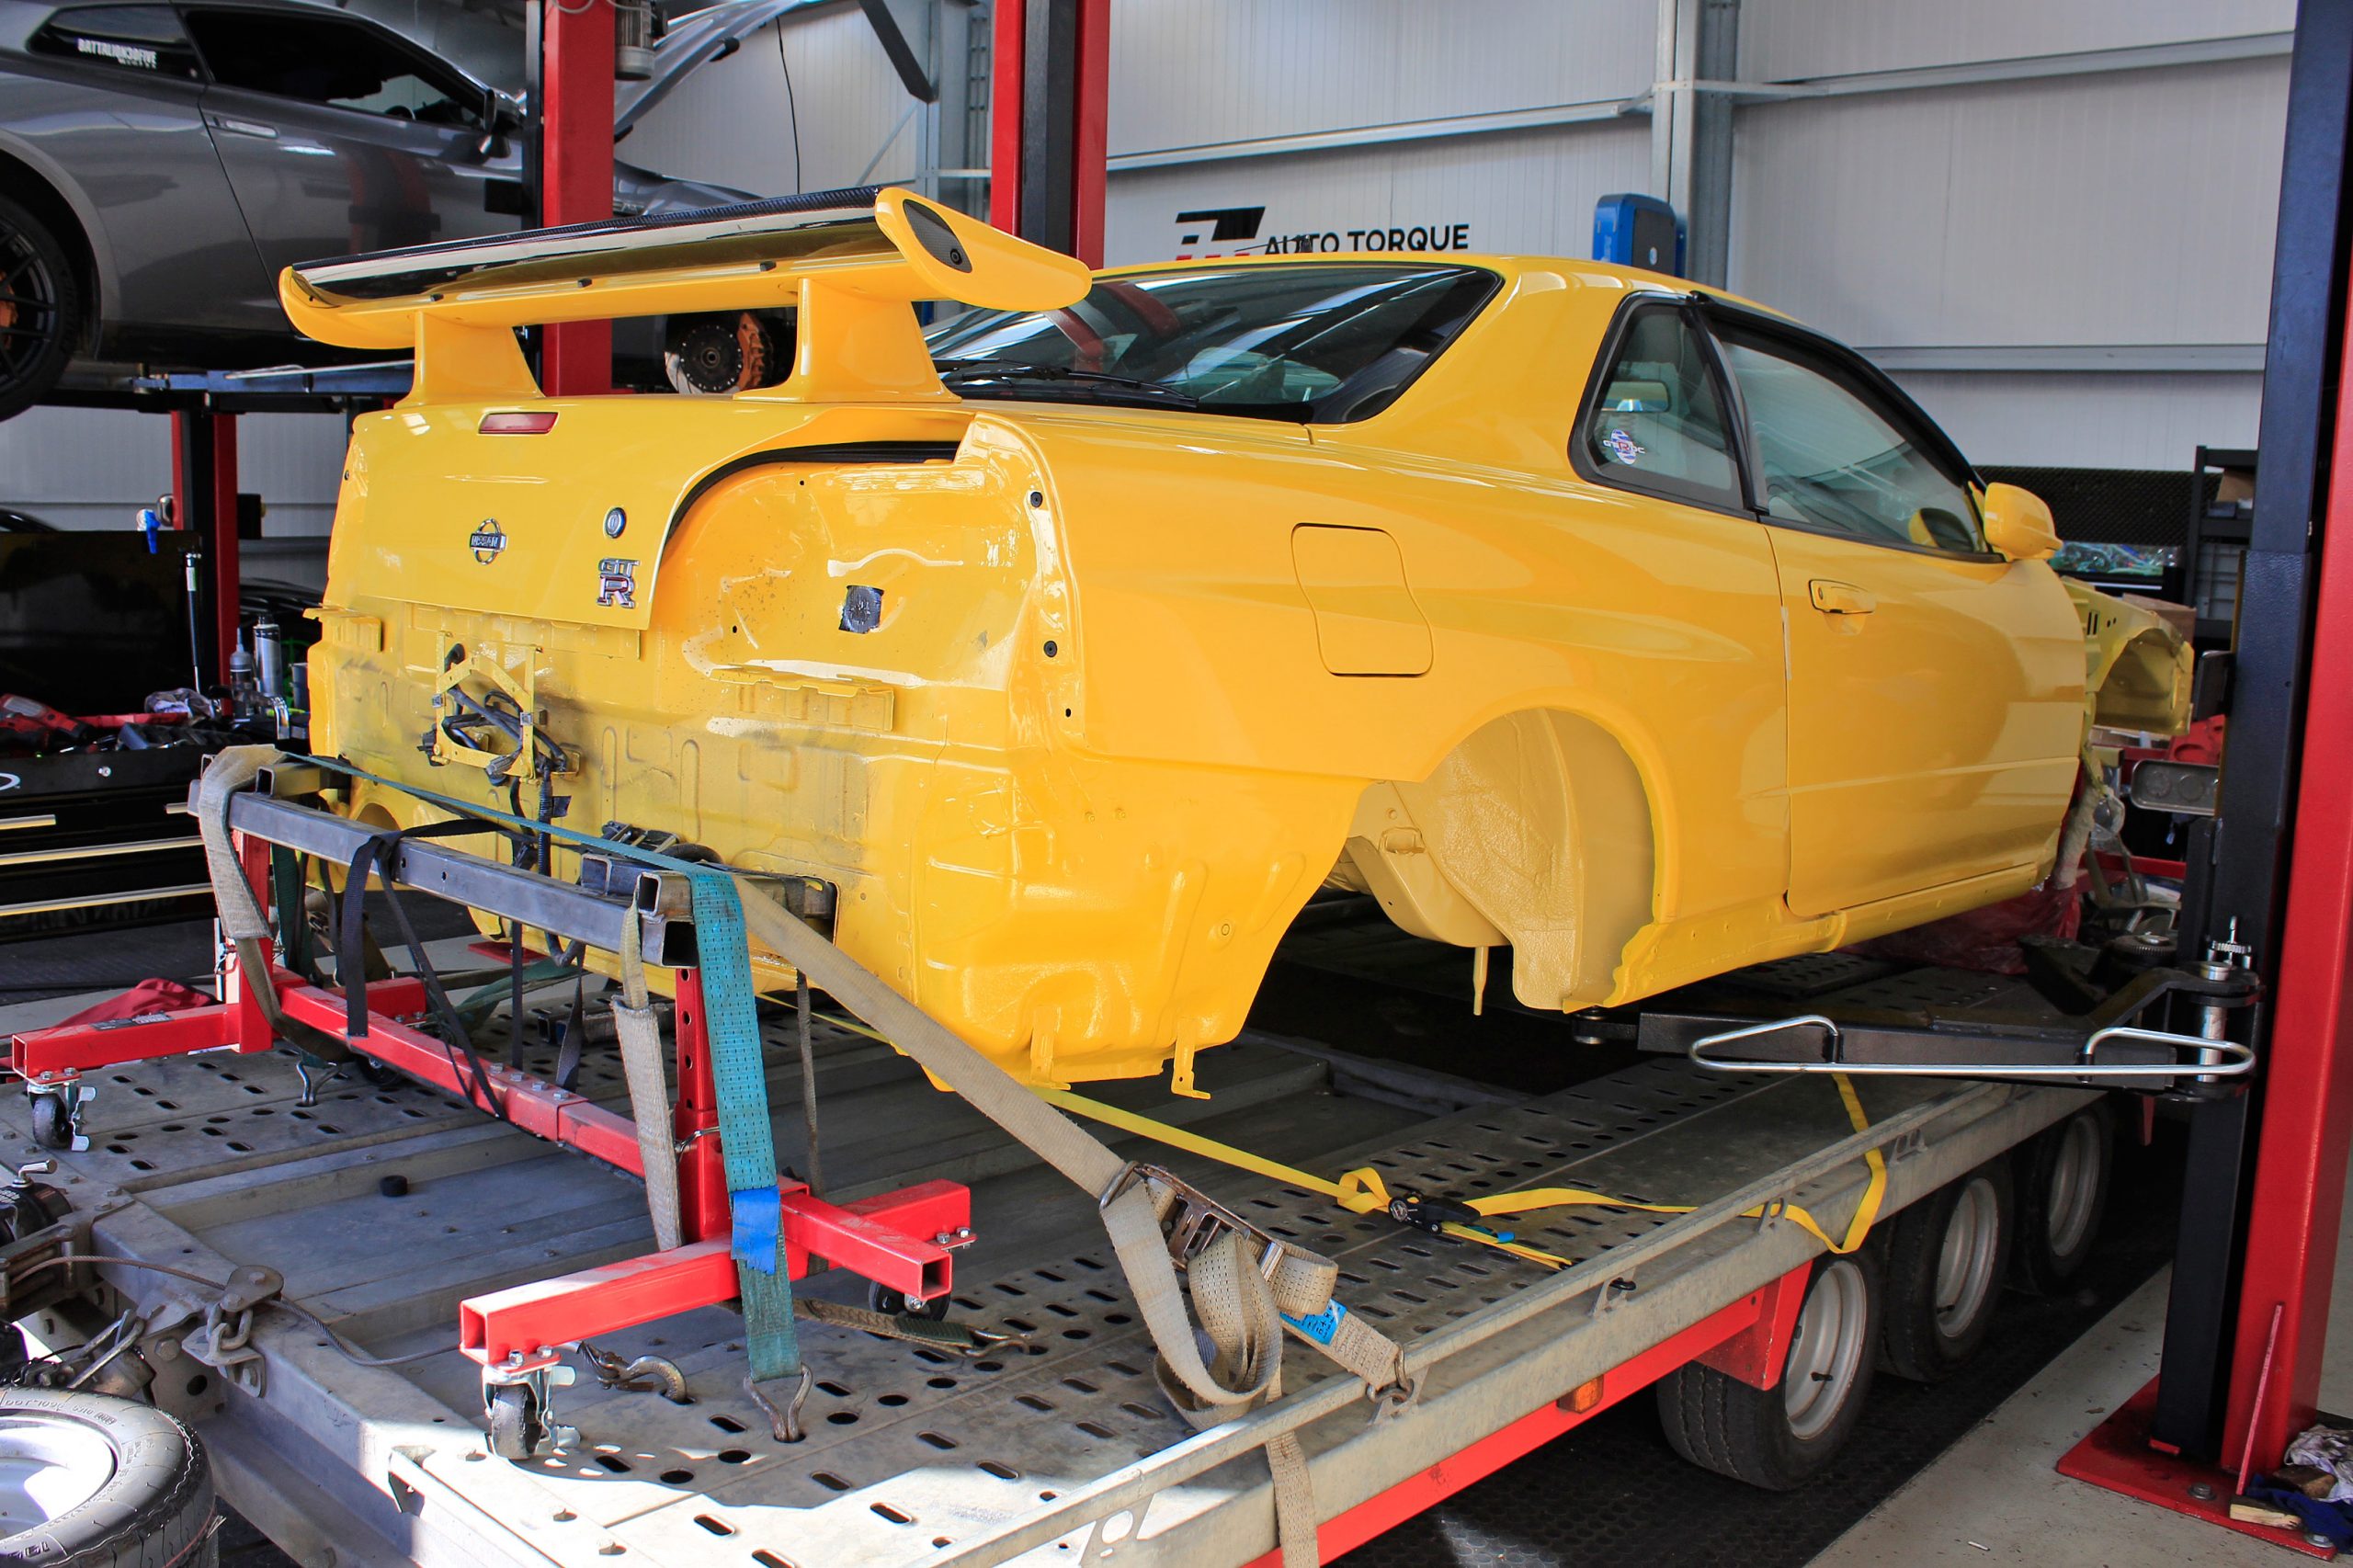
As some of you are reading this may already know this well-known example is Toni’s stunning Nissan Skyline R34 GT-R UK V Spec, being 1 of only 3 UK cars ever made. So, in short, super rare and super special, so when a long-standing customer approached us and now friend Toni to undertake the restoration, we were honored. Knowing what Toni’s eye for detail is like and passion for striving for perfection, we were very excited to take on this fantastic opportunity to showcase our work.
It Starts.....
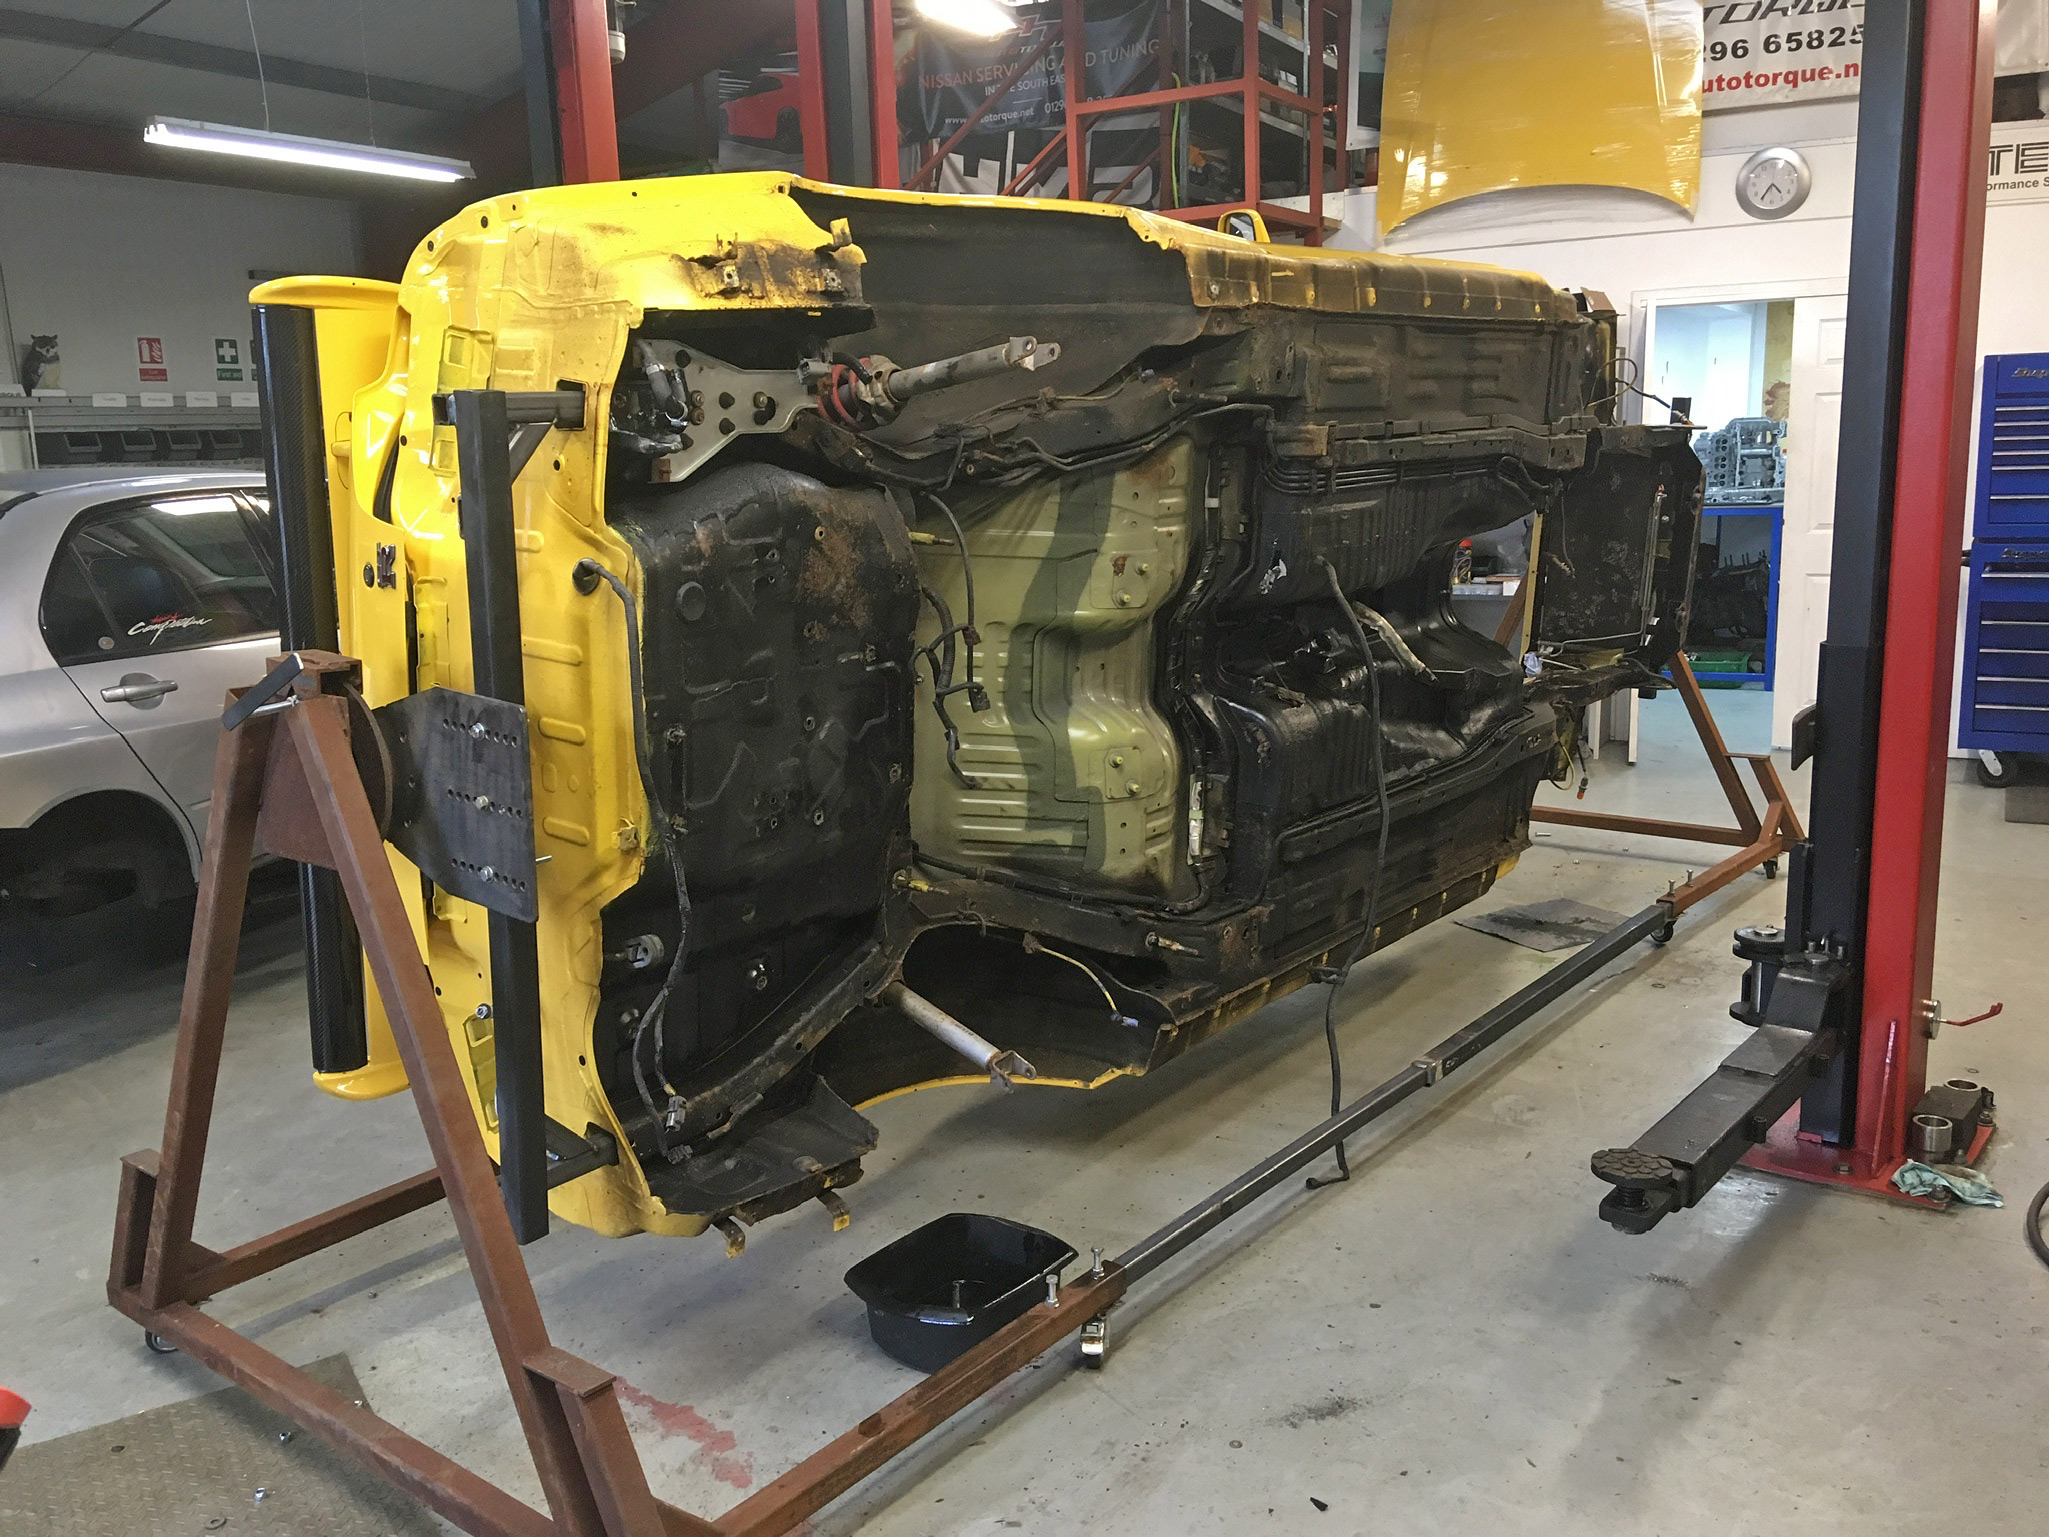
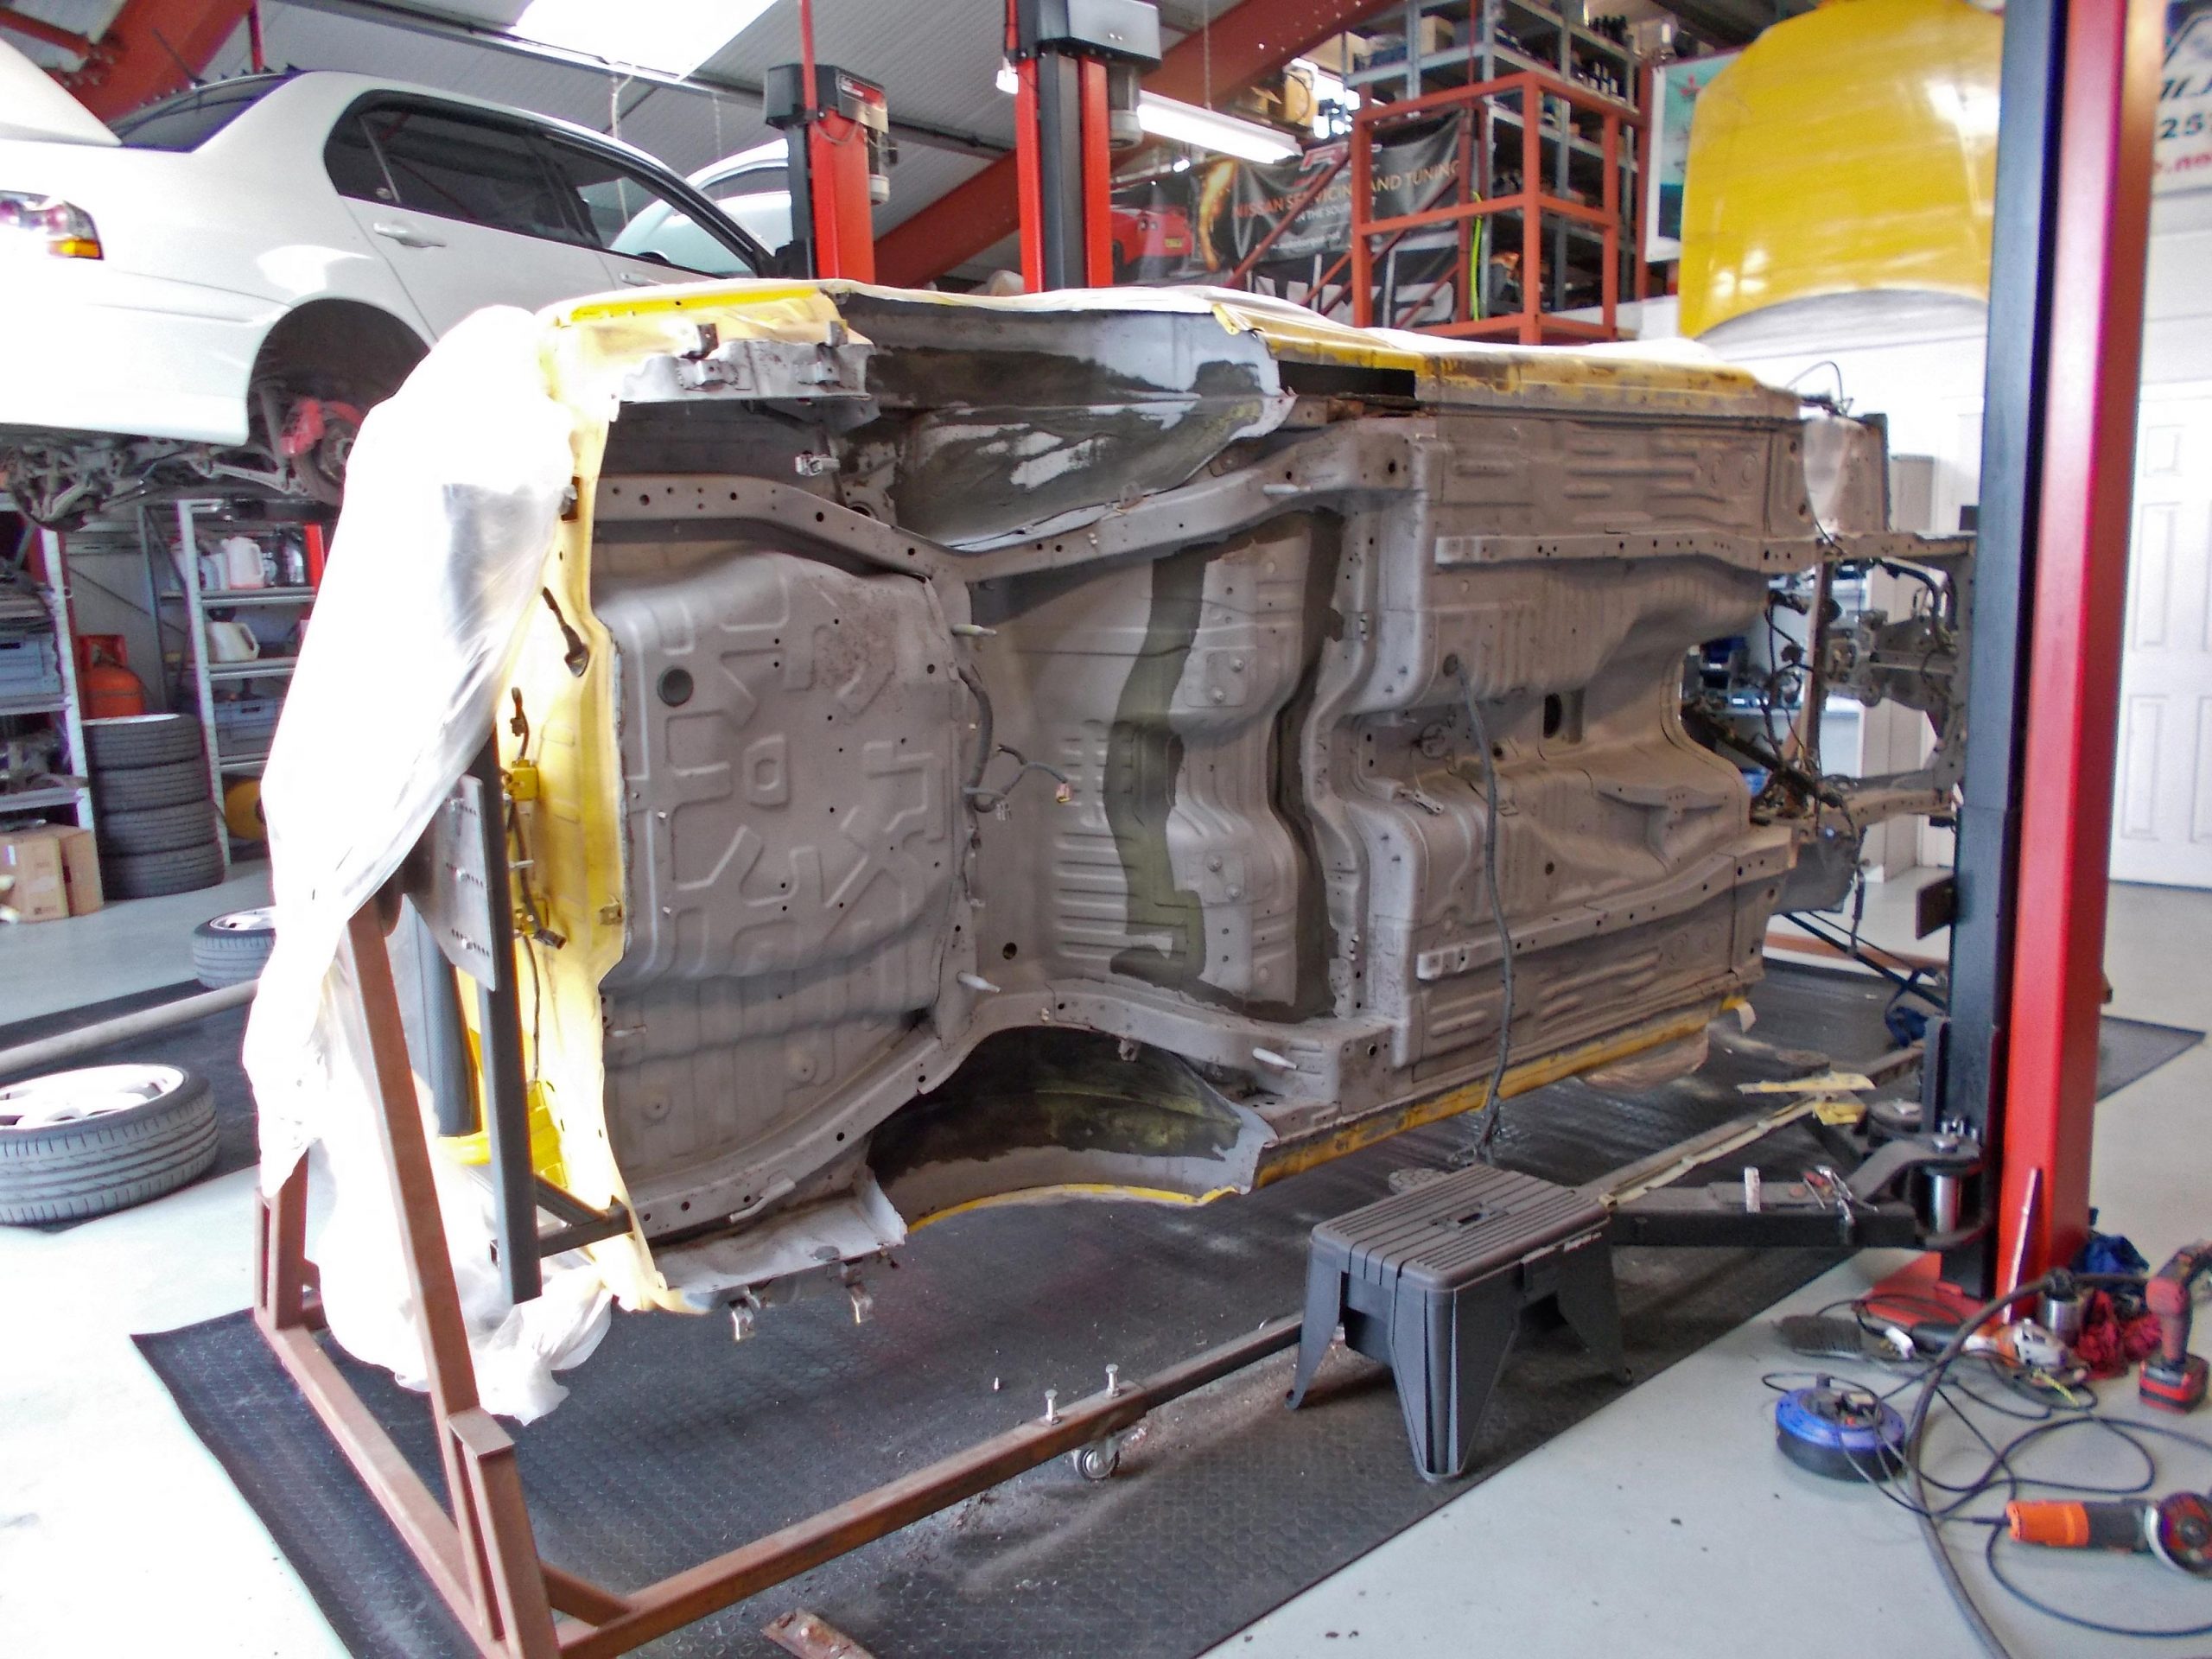
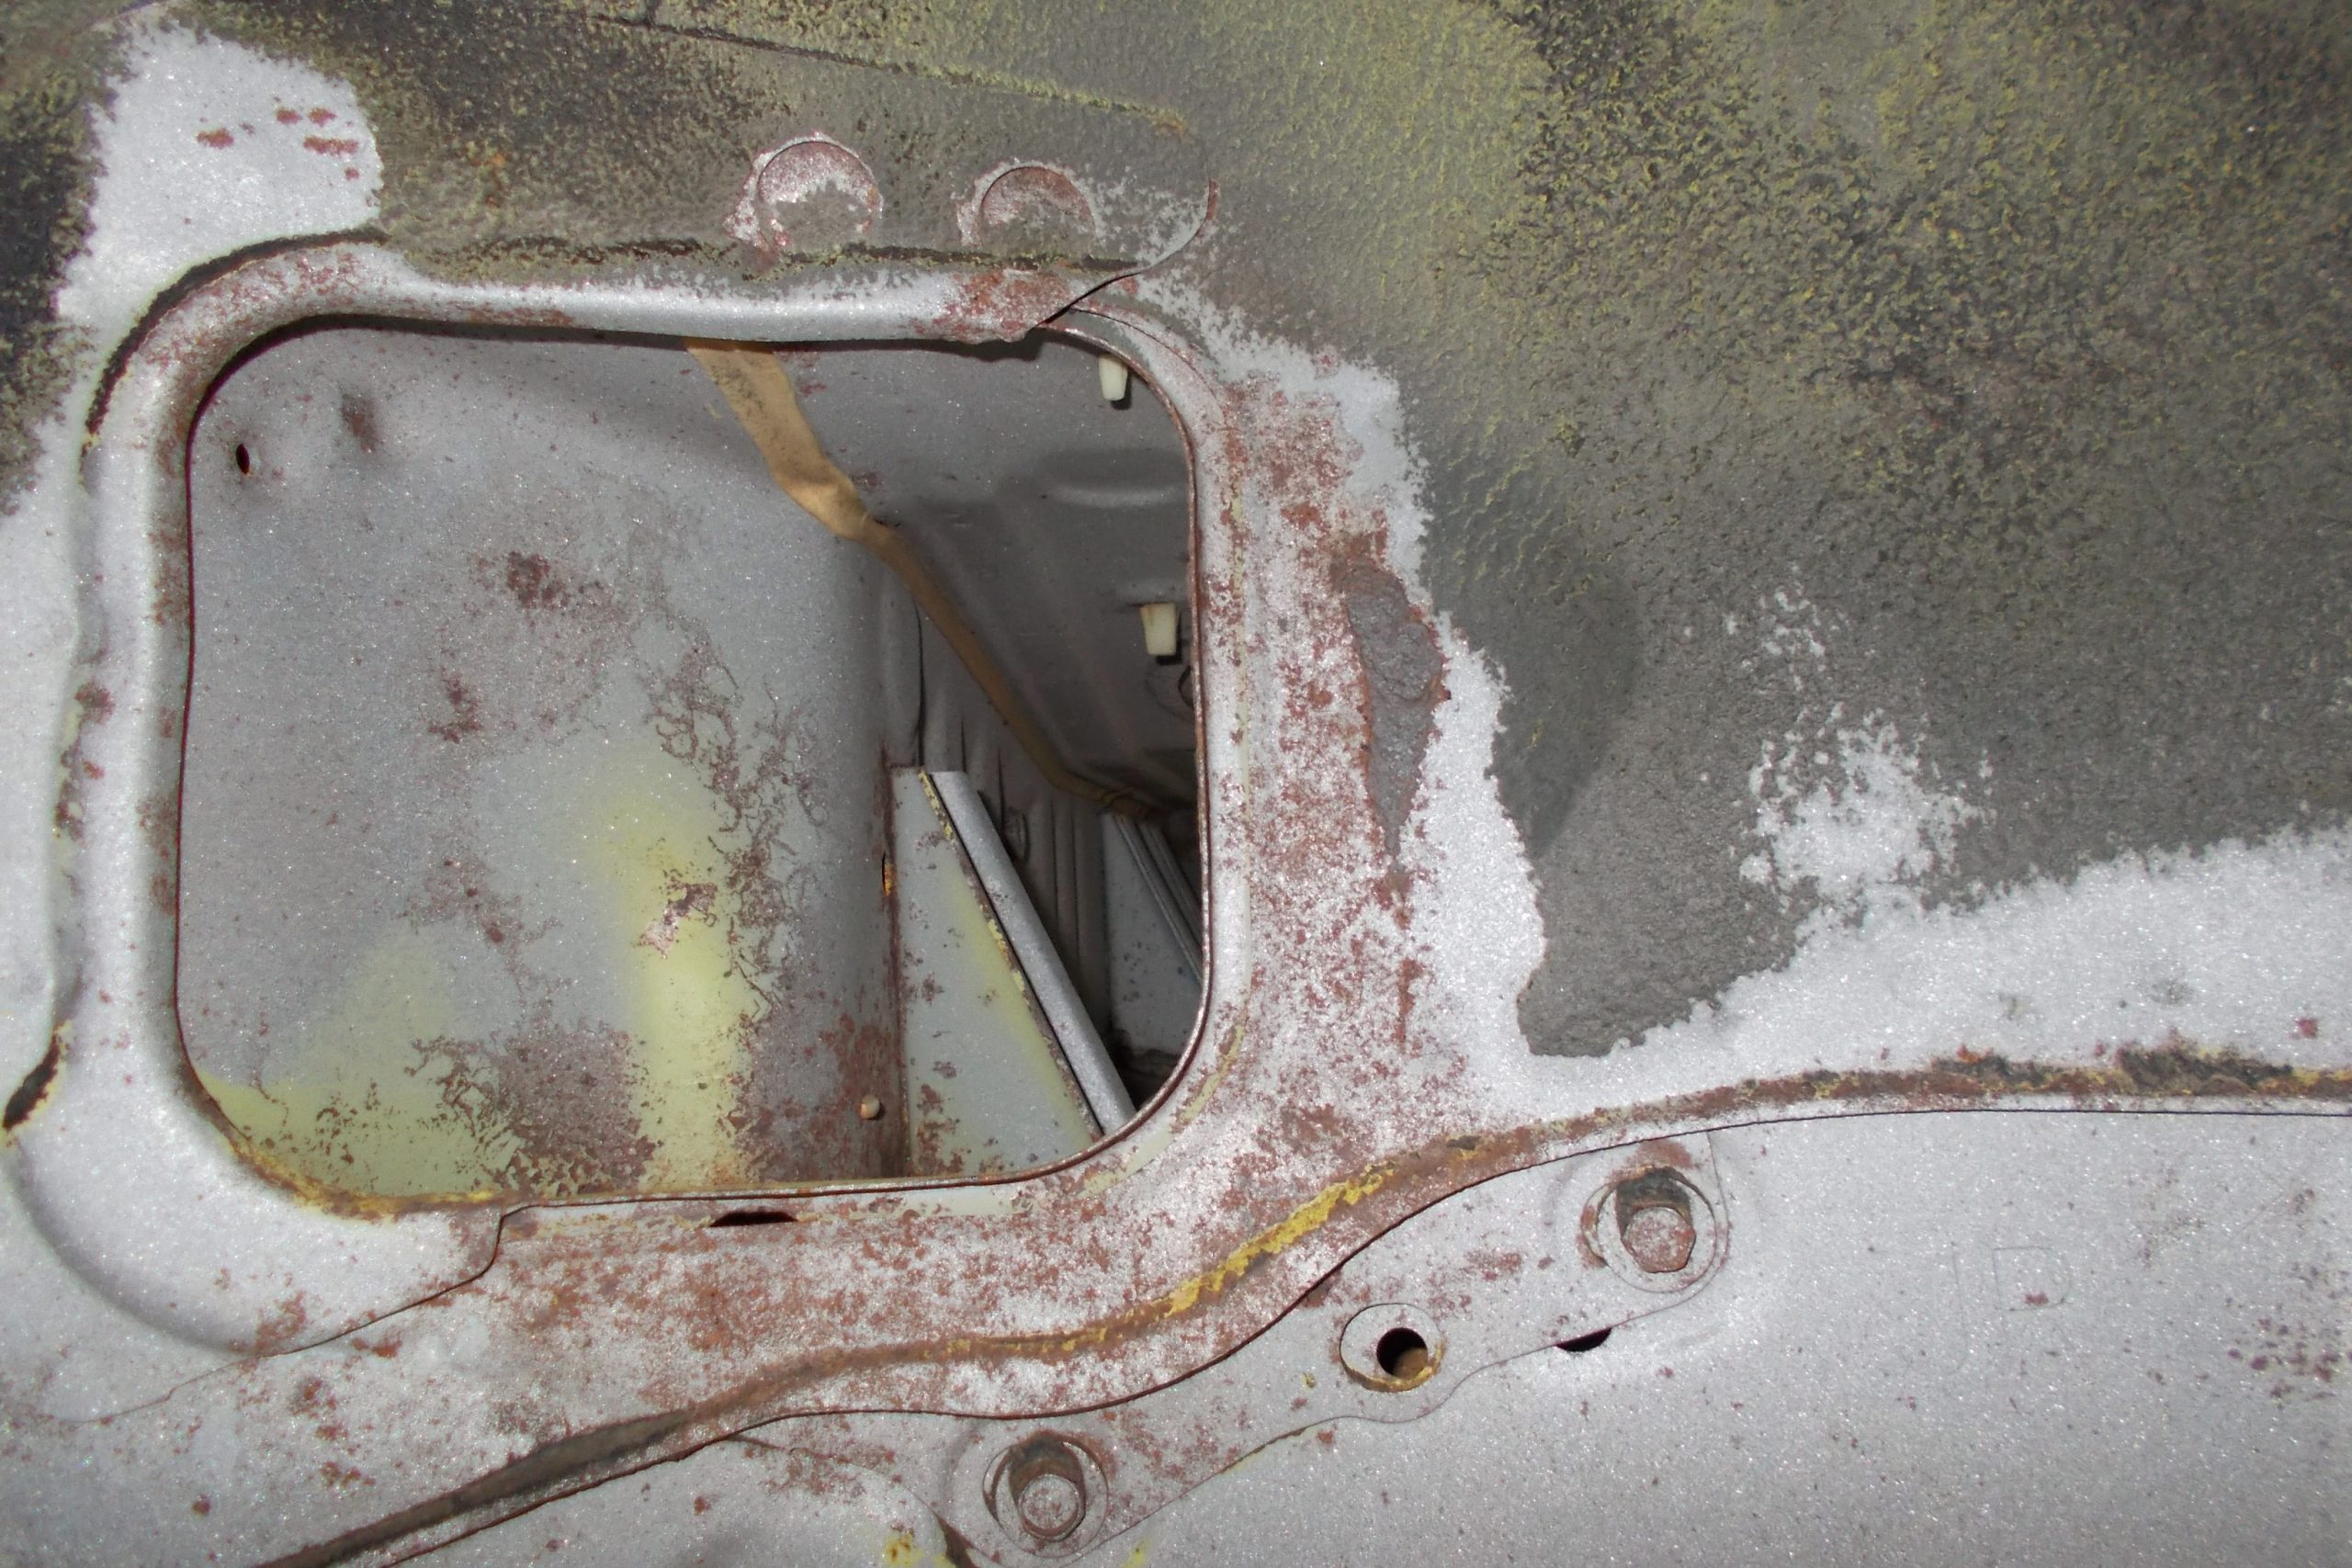
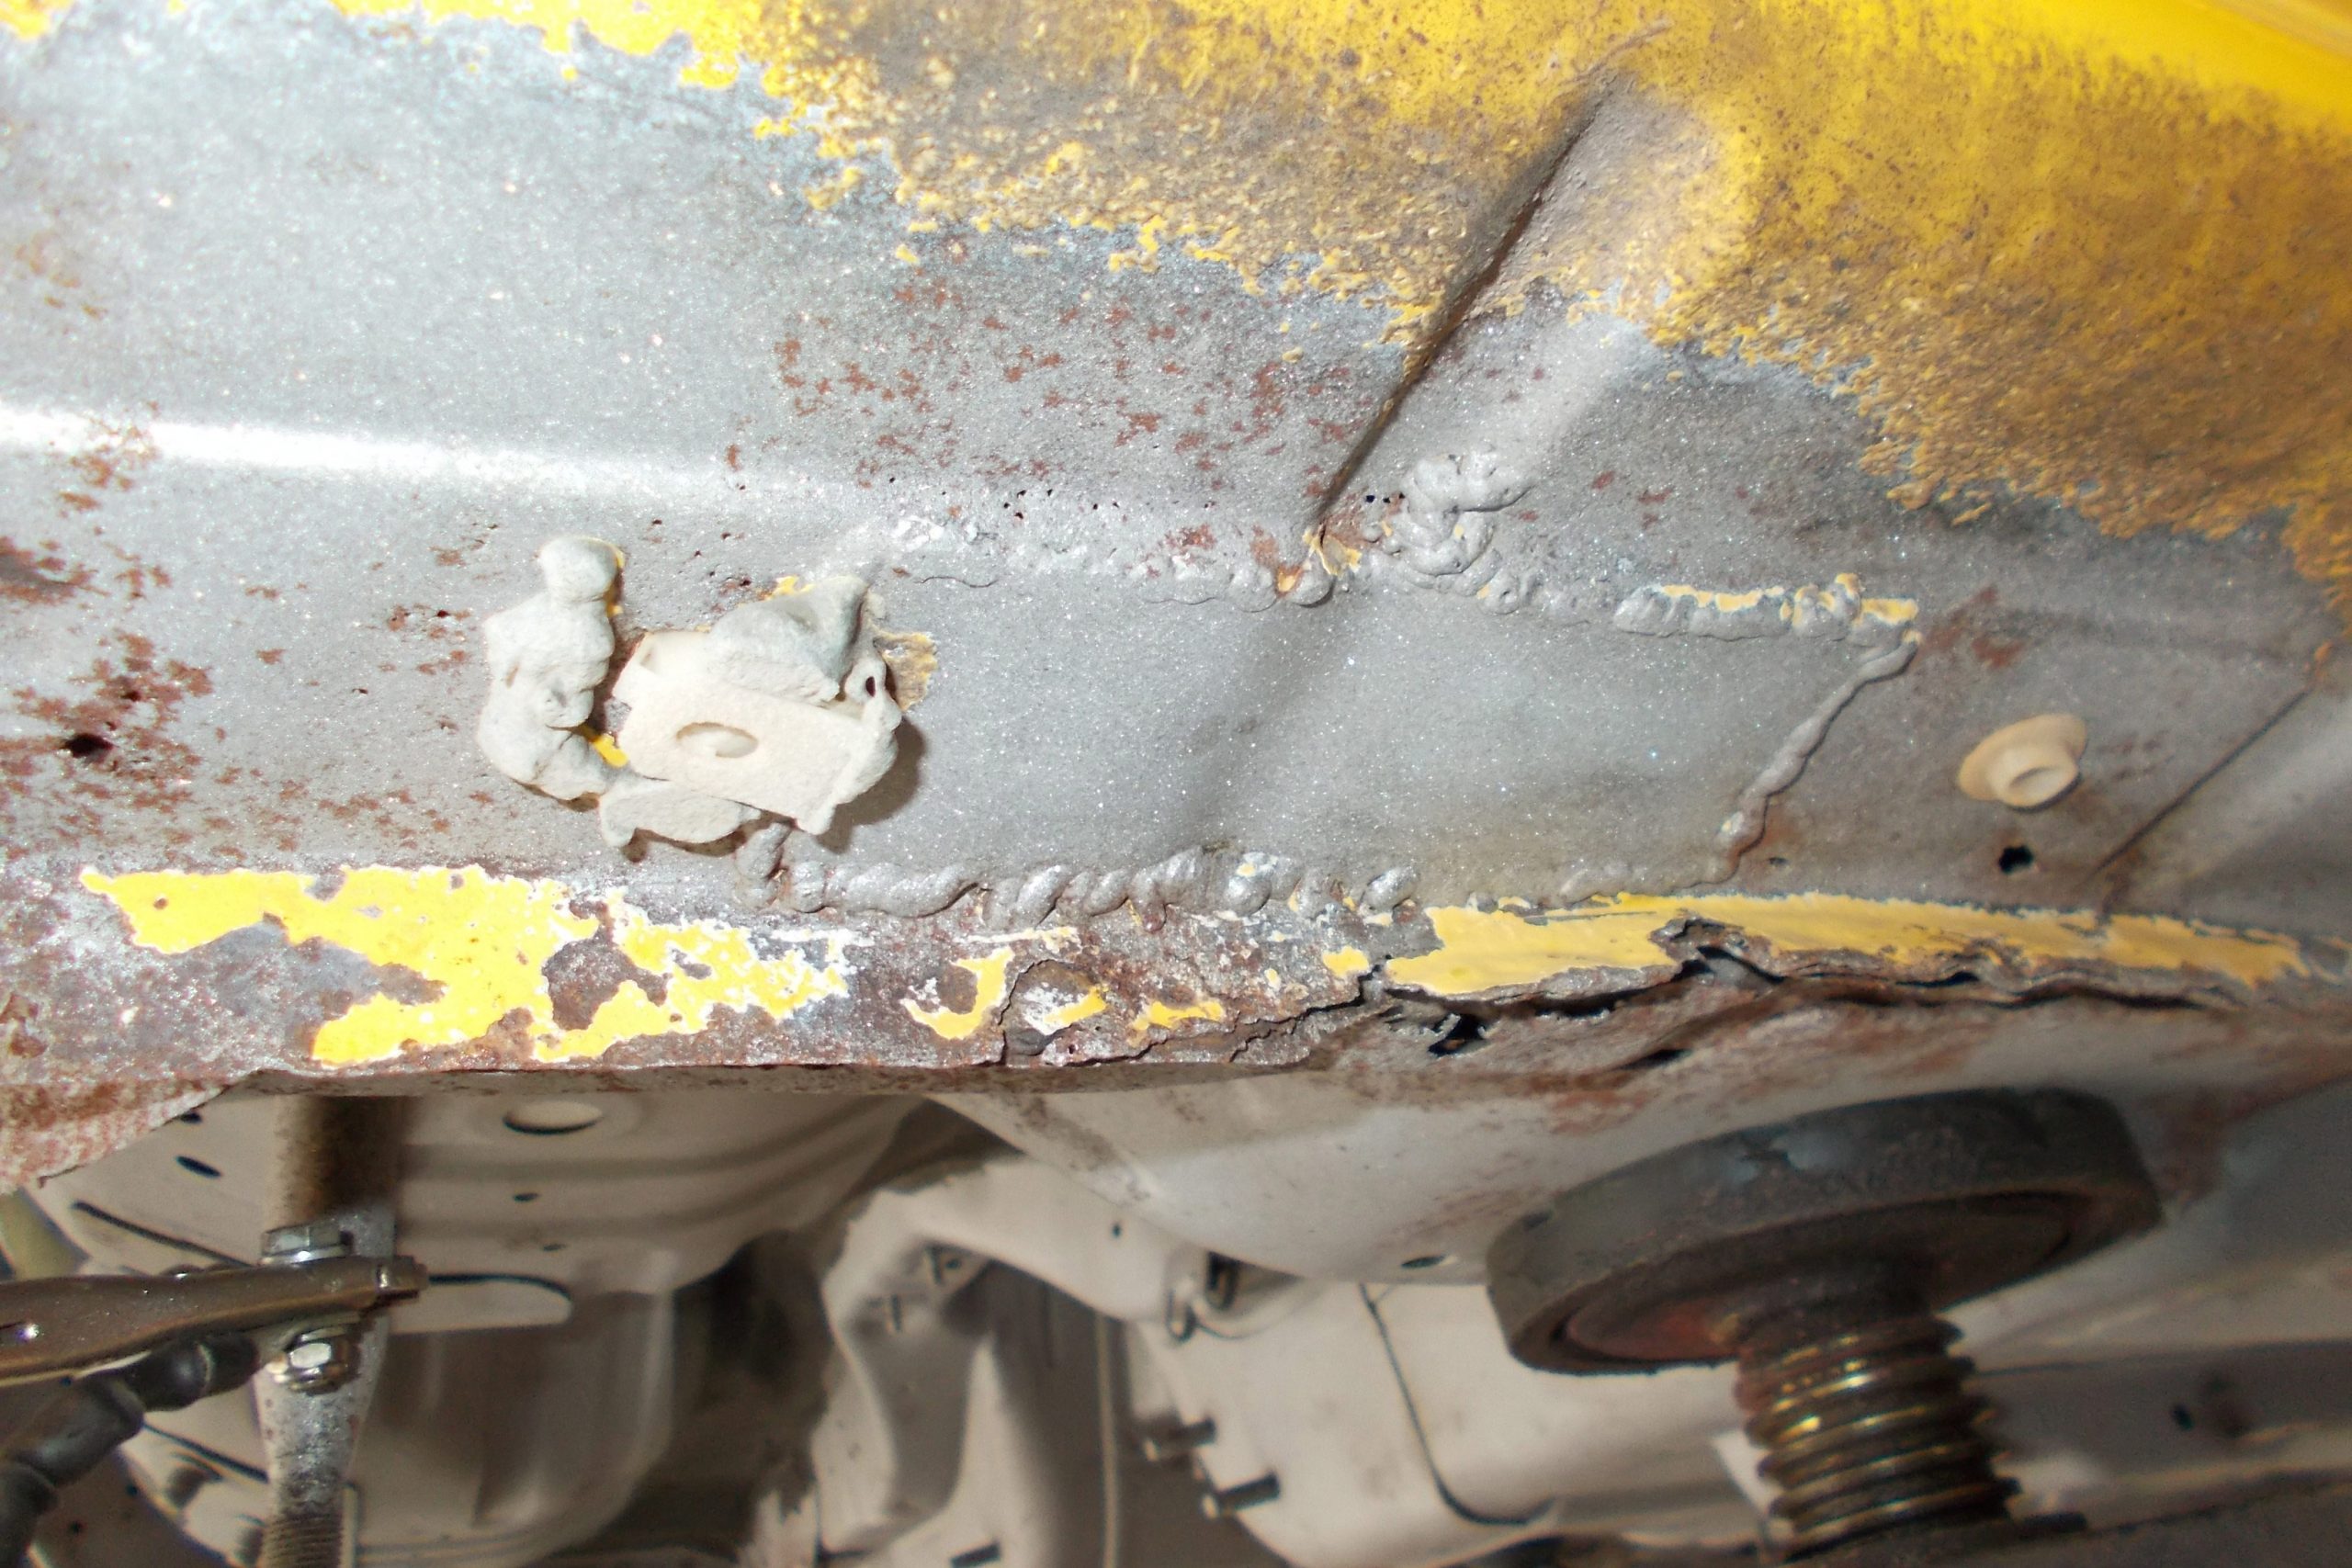
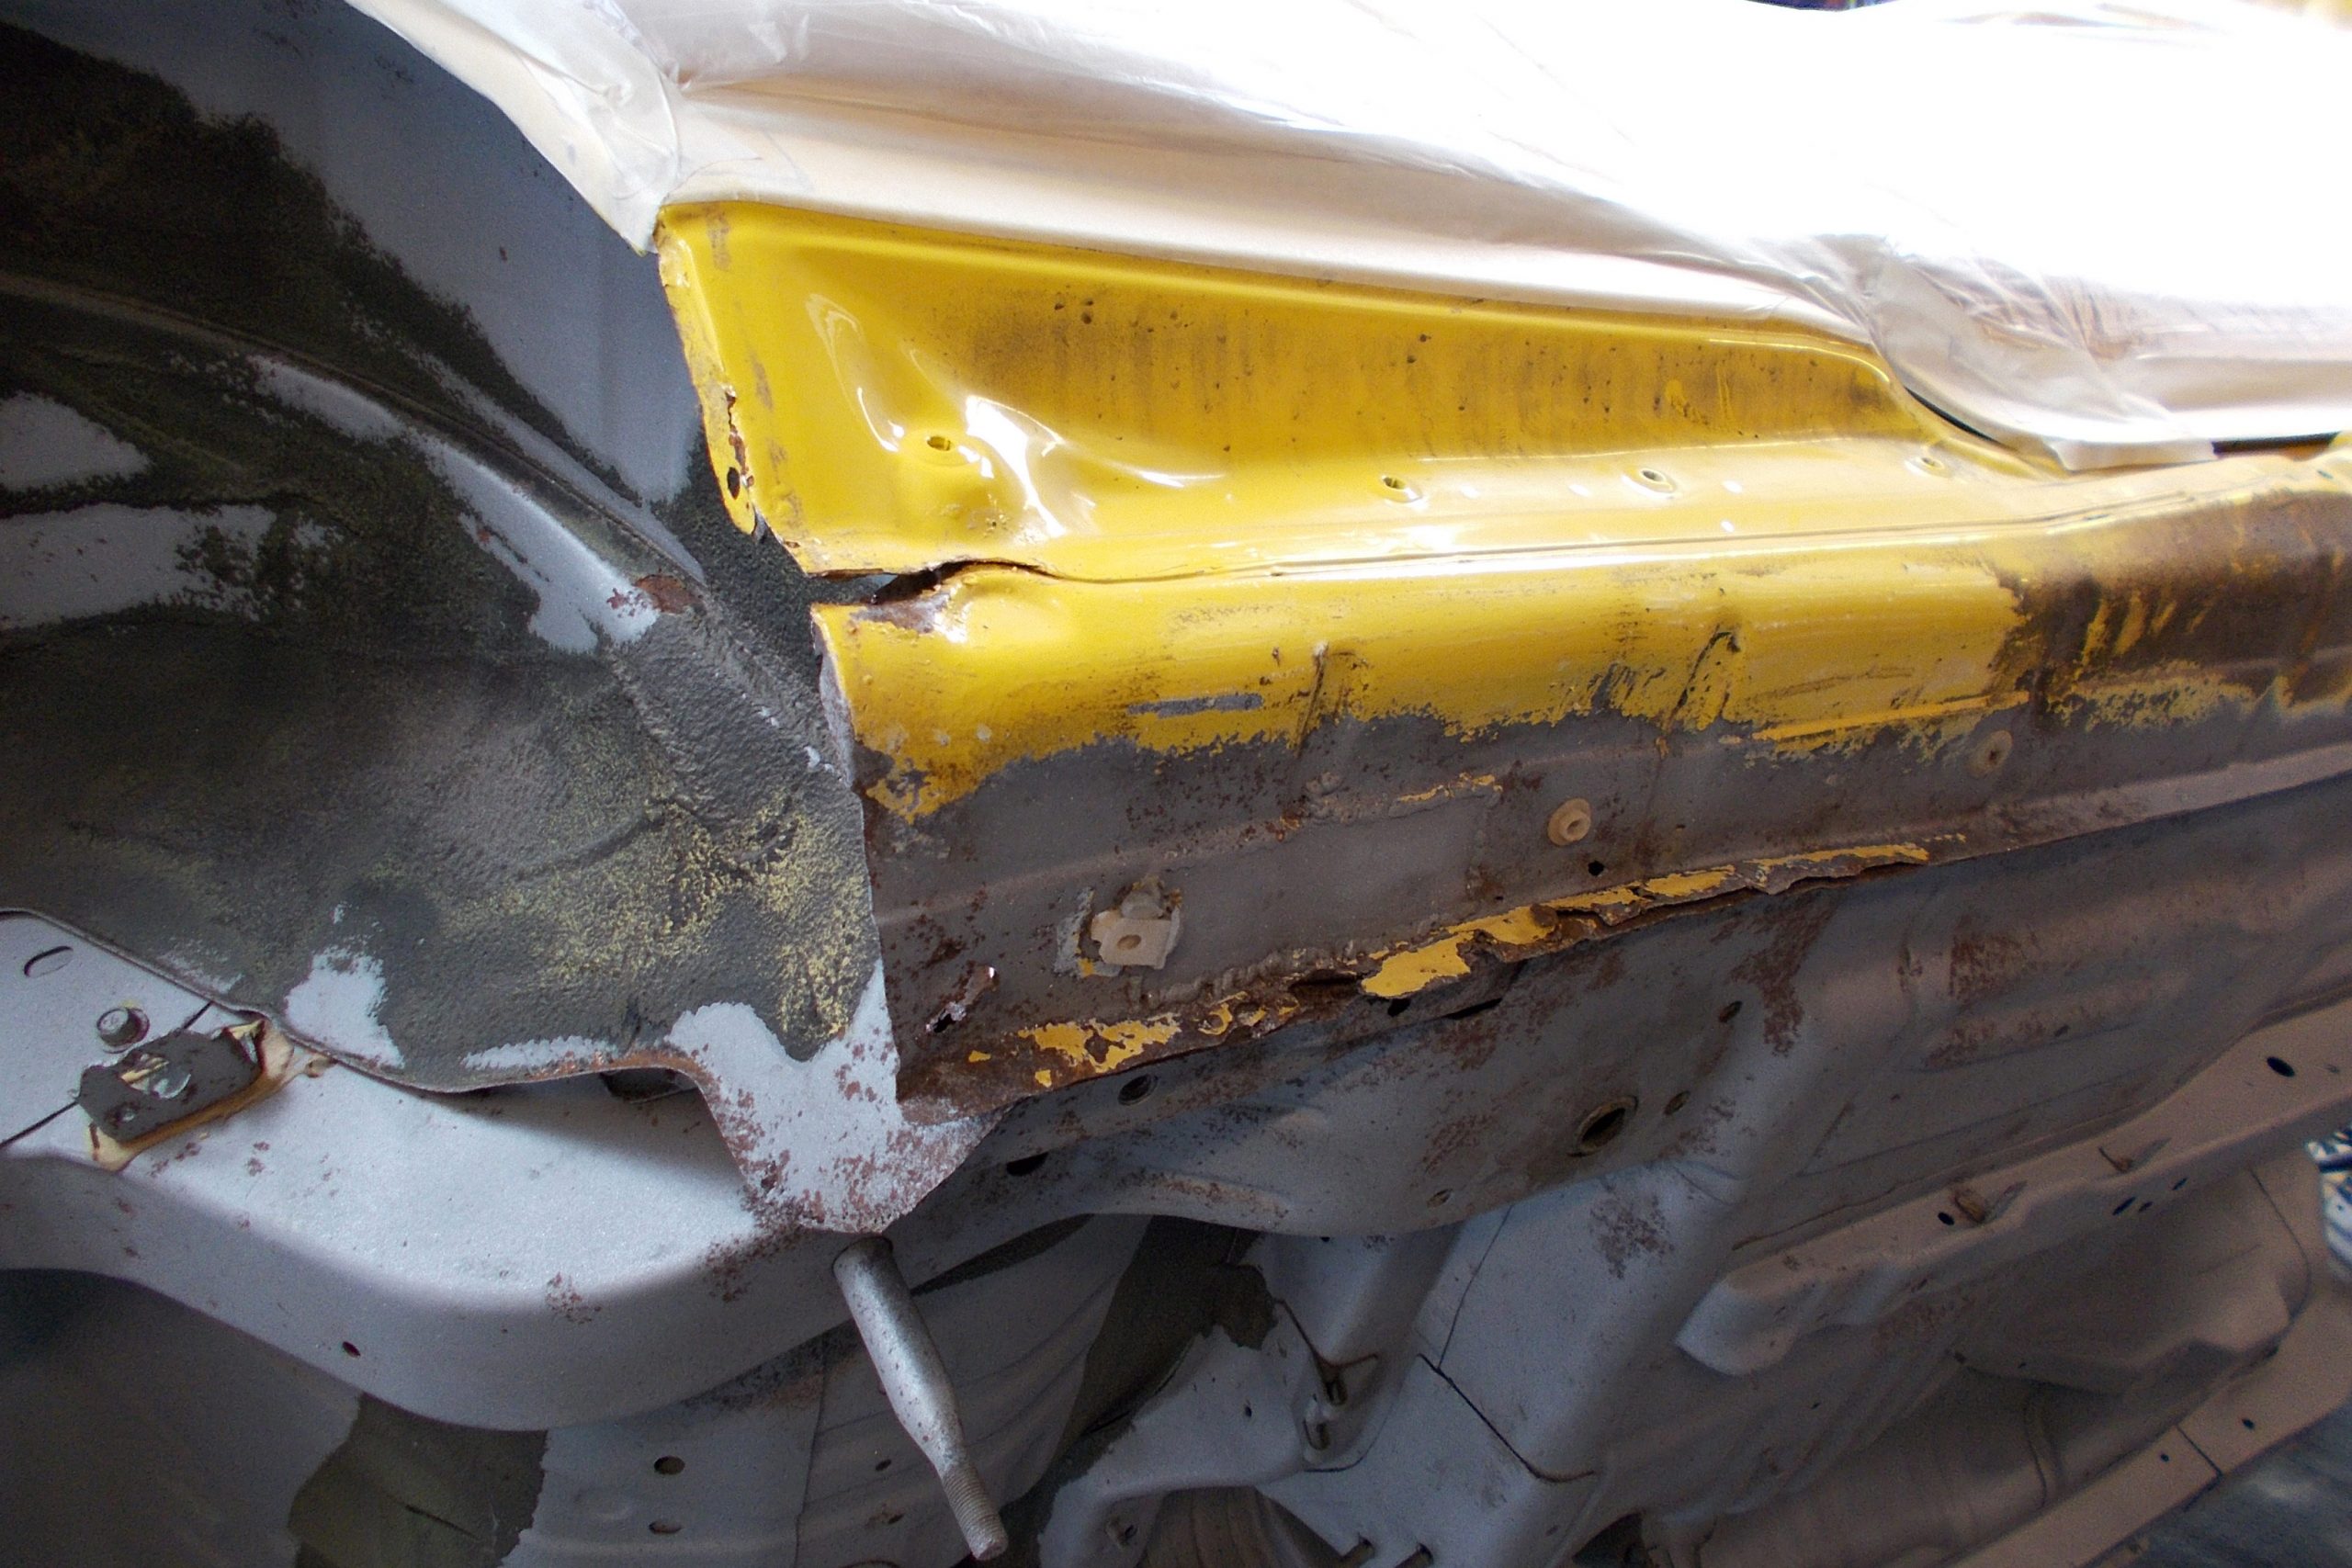
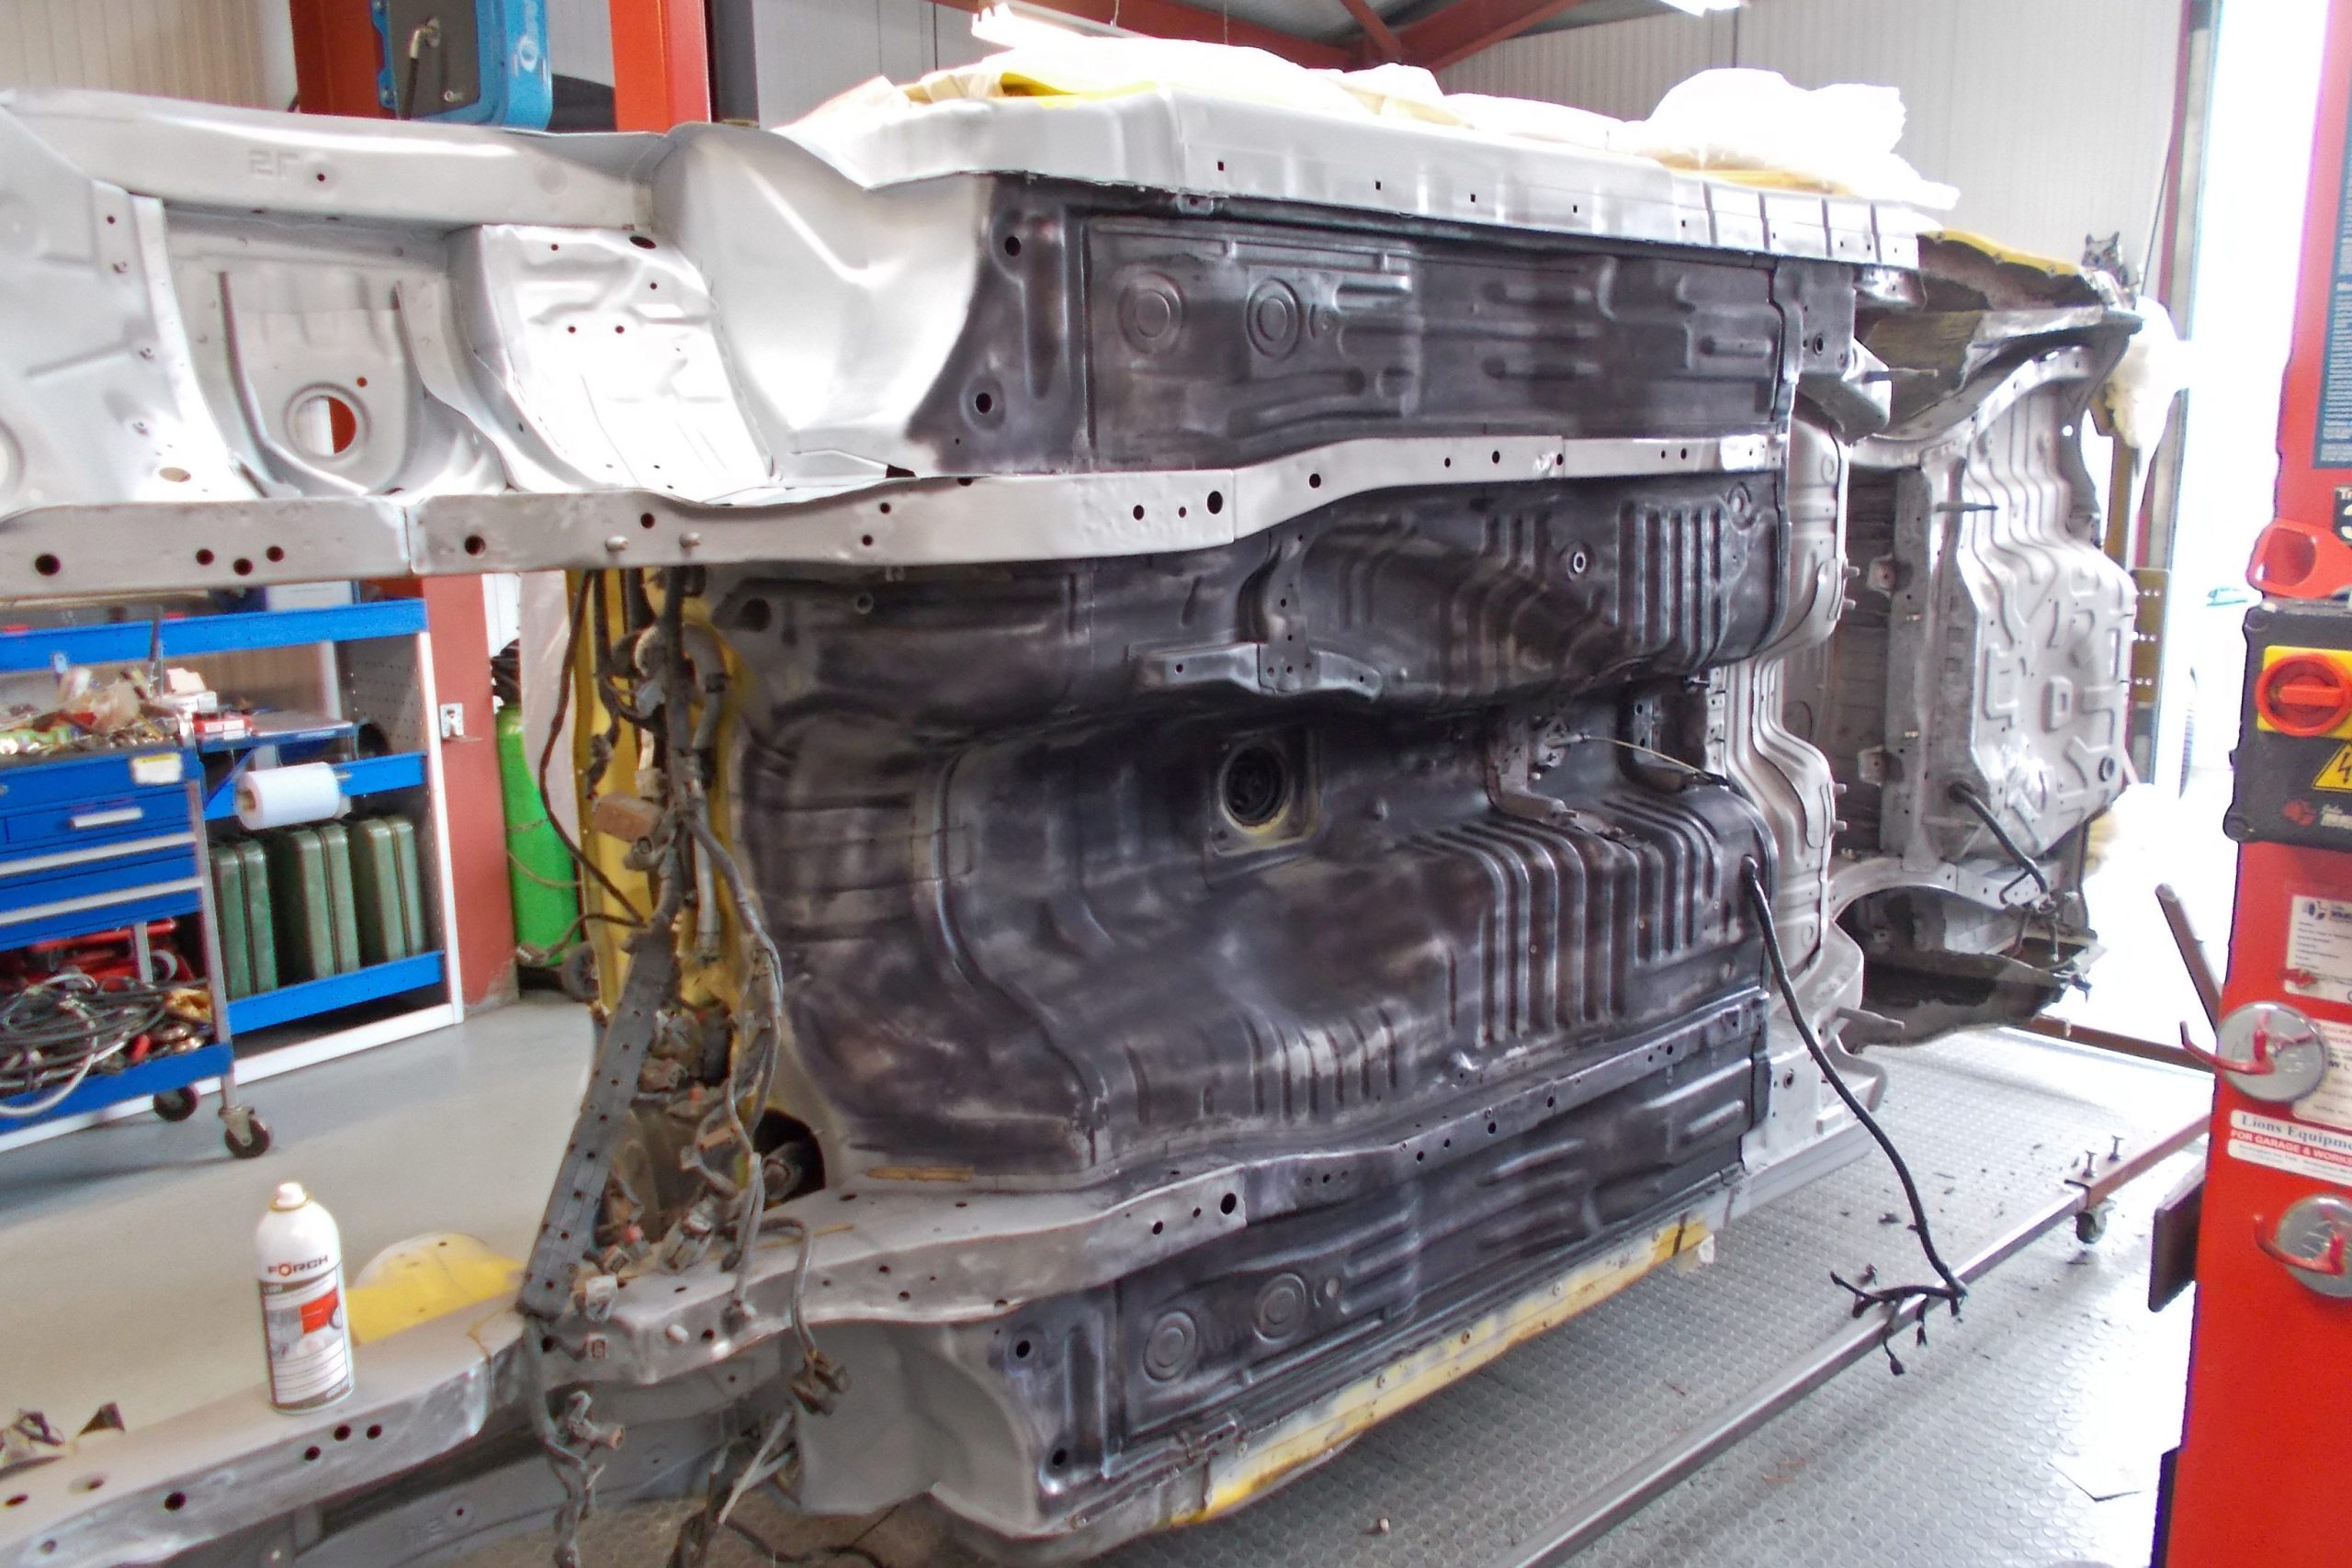
We had been looking after this exclusive and rare car for a few years before this restoration was undertaken, it is always a joy to see in our workshop. Unfortunately, it’s age and British road miles had caught up with it and was starting to show the signs underneath that immaculate bodywork. Over its 20 years, there had been previous attempts to protect it from rust, a lot of Schutz type underseal on the chassis, and Hammerite type paints on the suspension components which had all started to flake off, allowing the metal it was covering to start to rust.
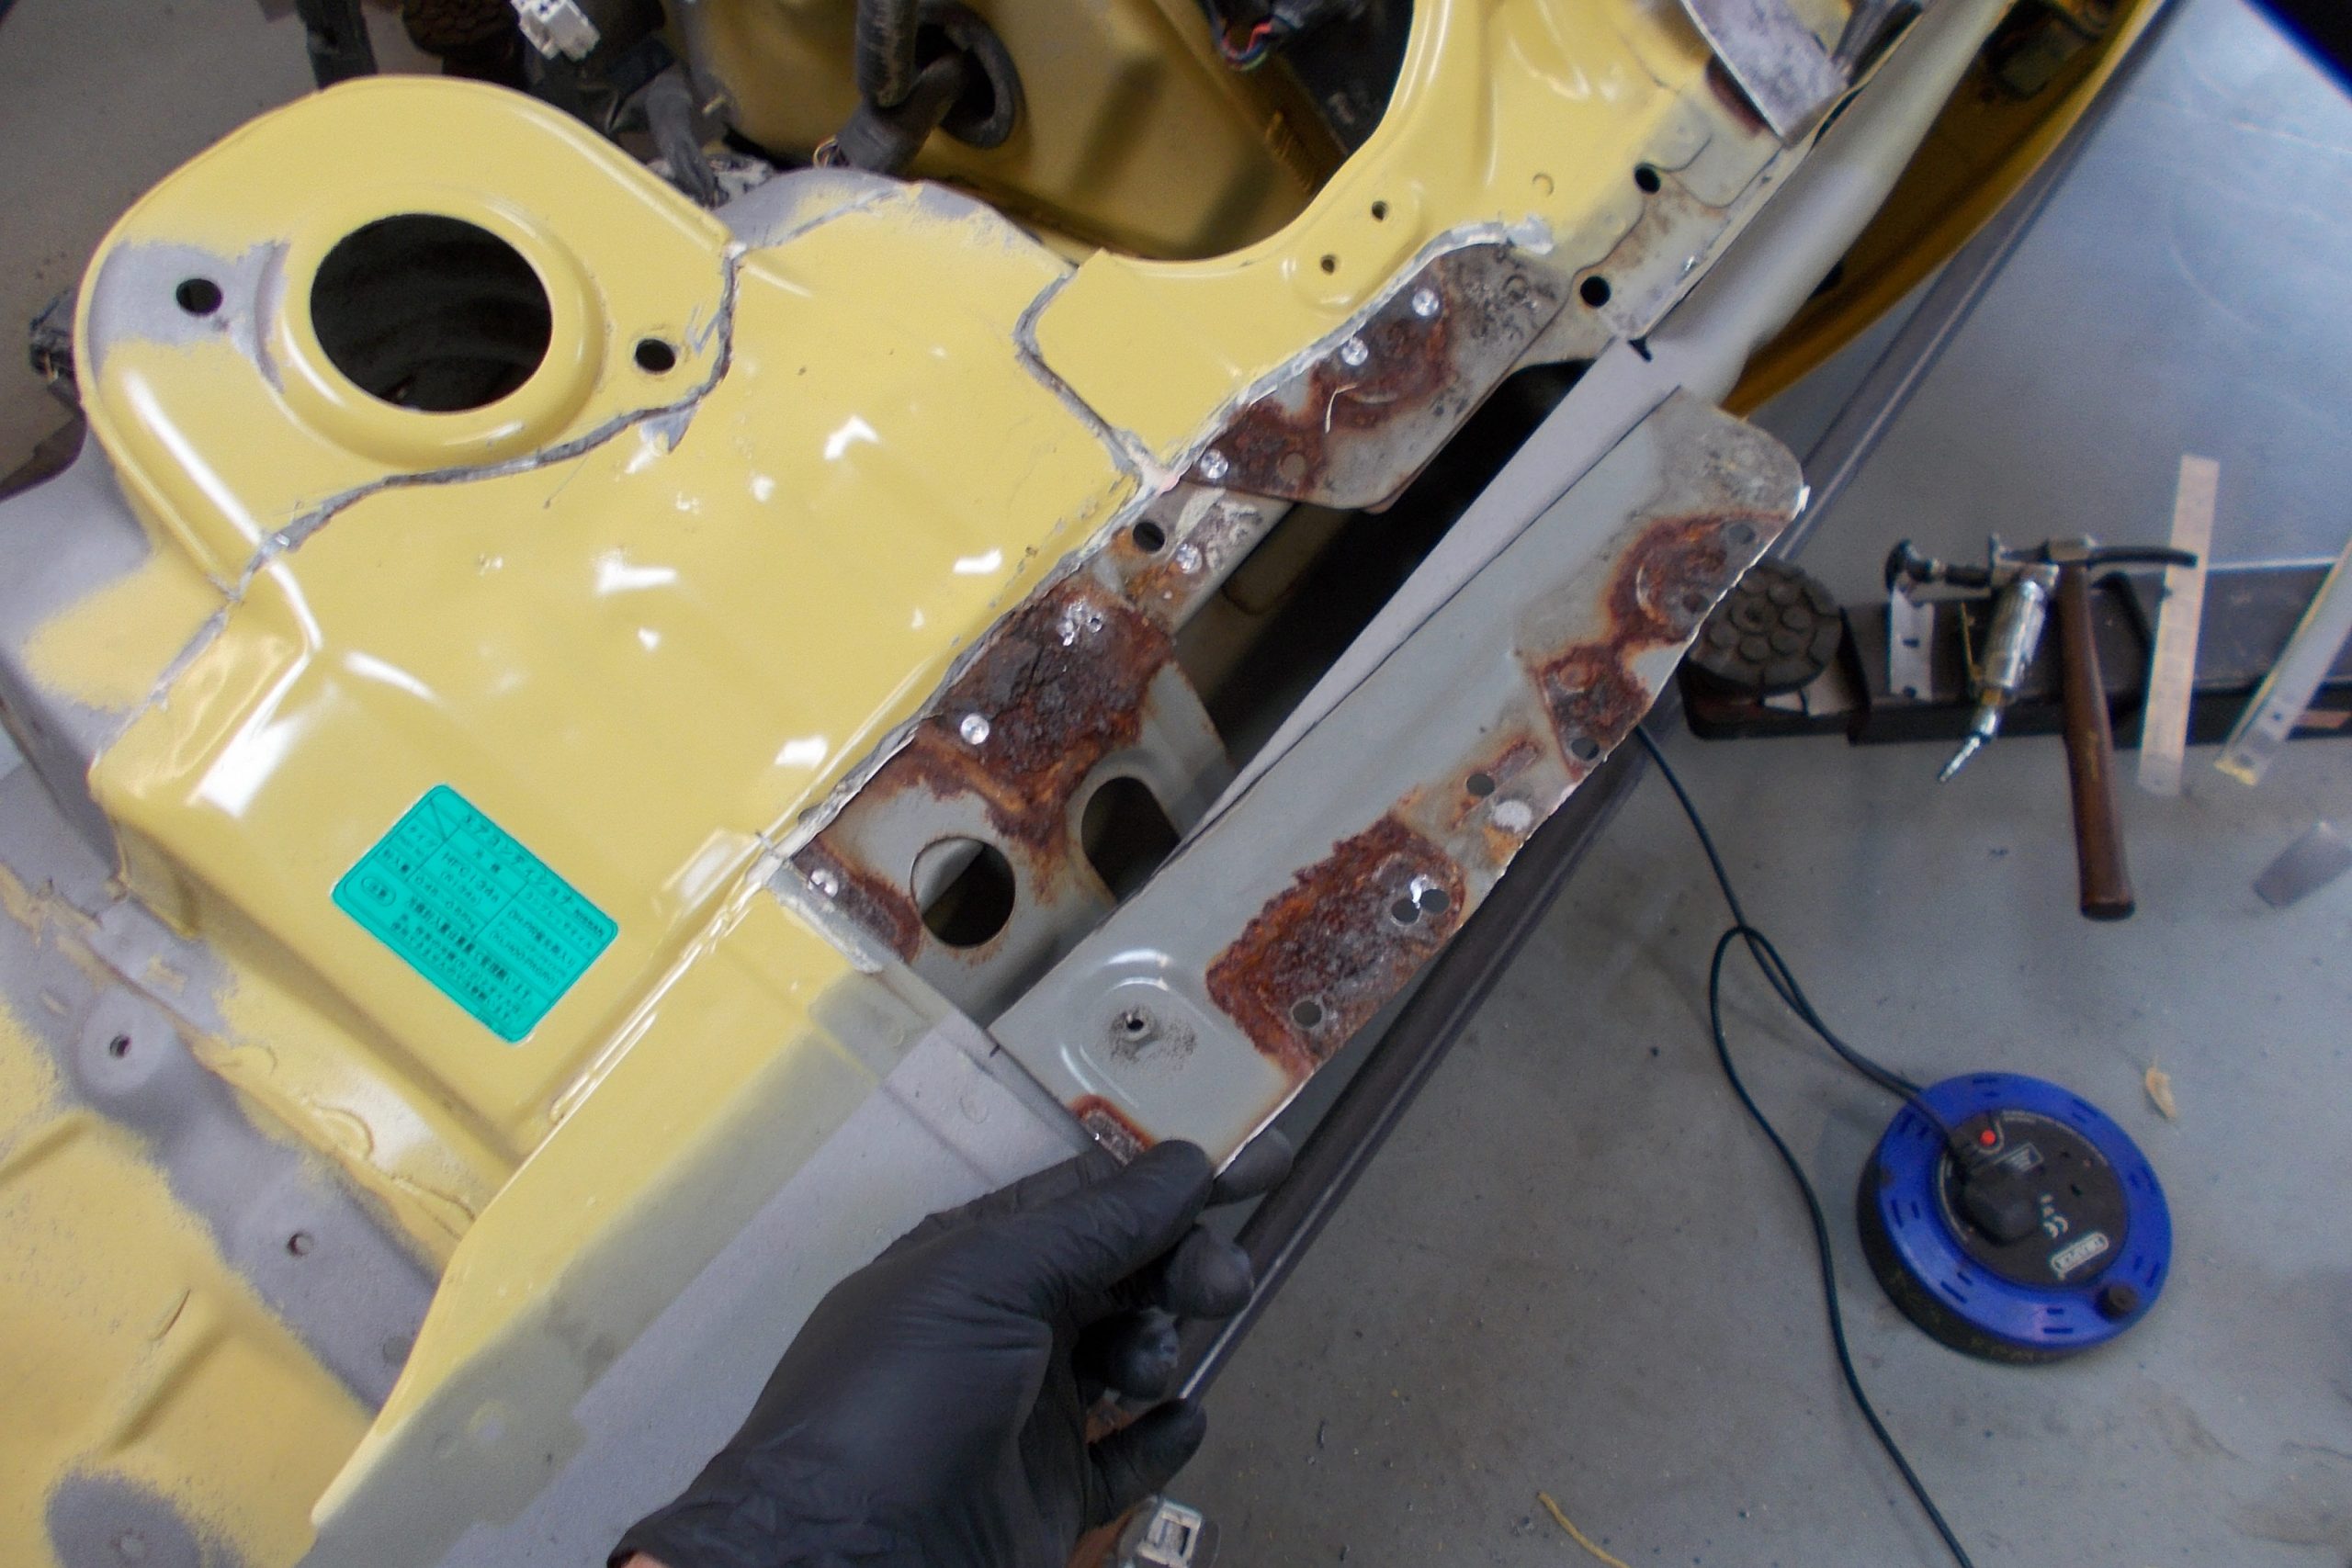
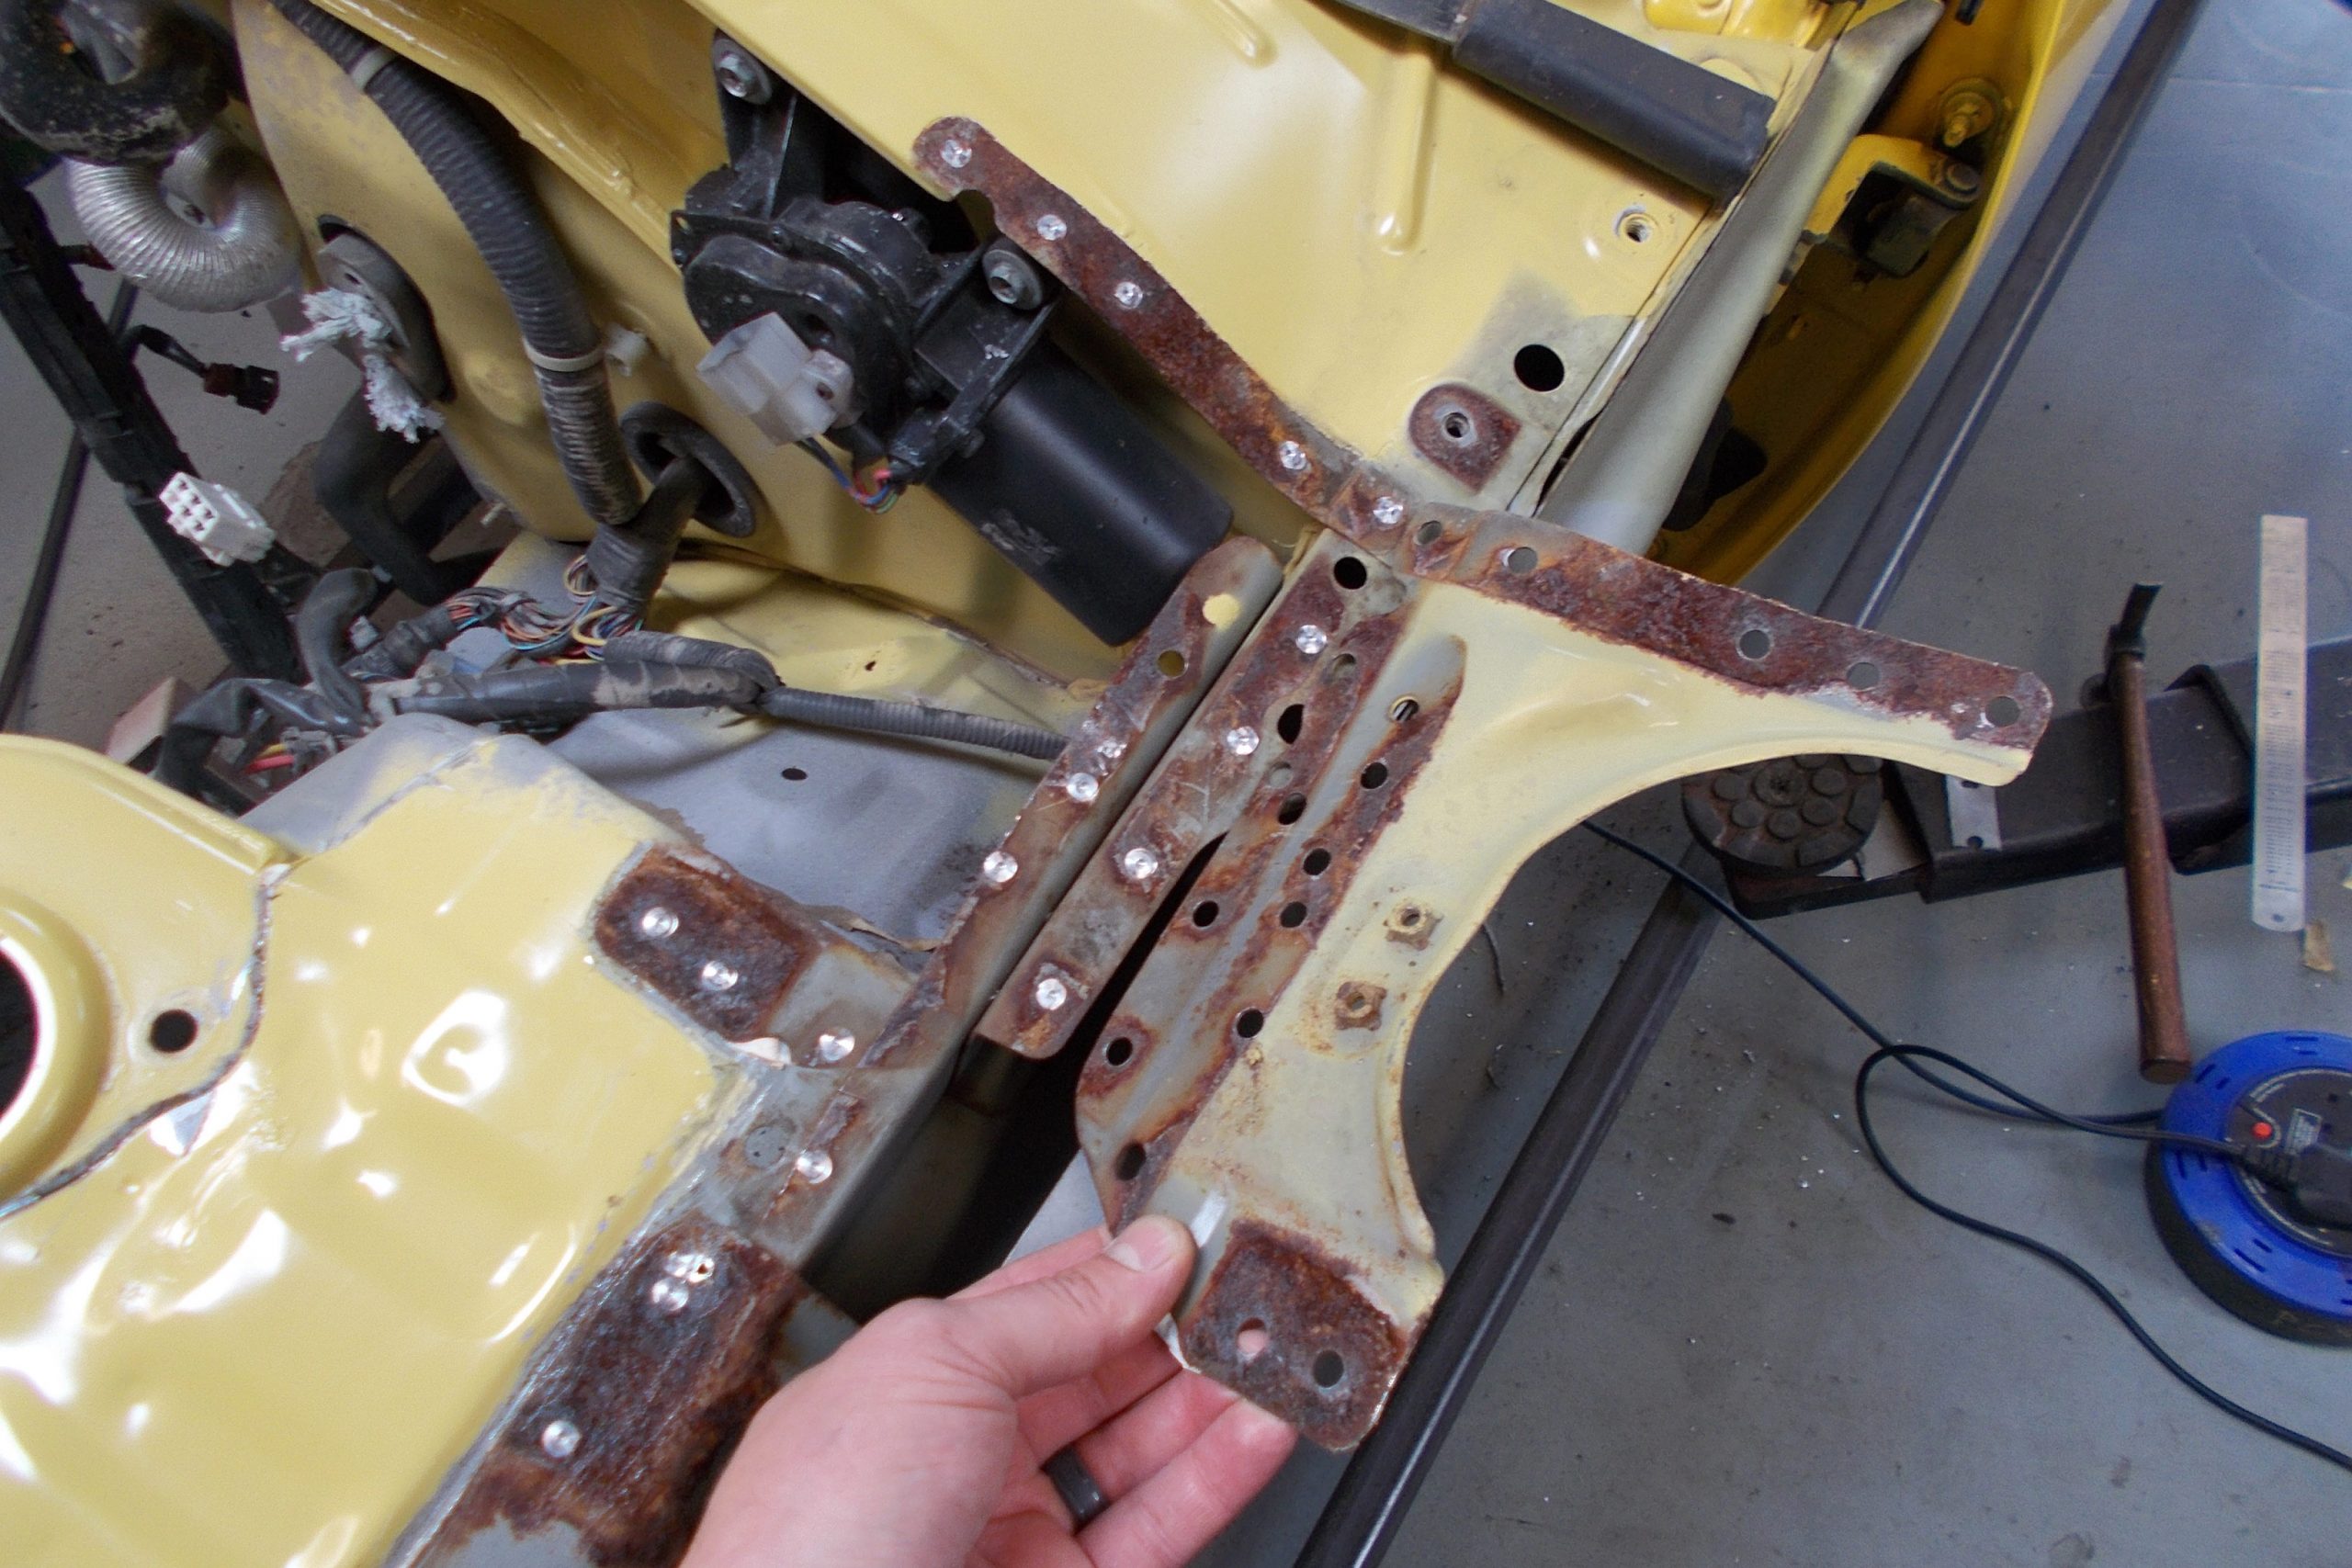
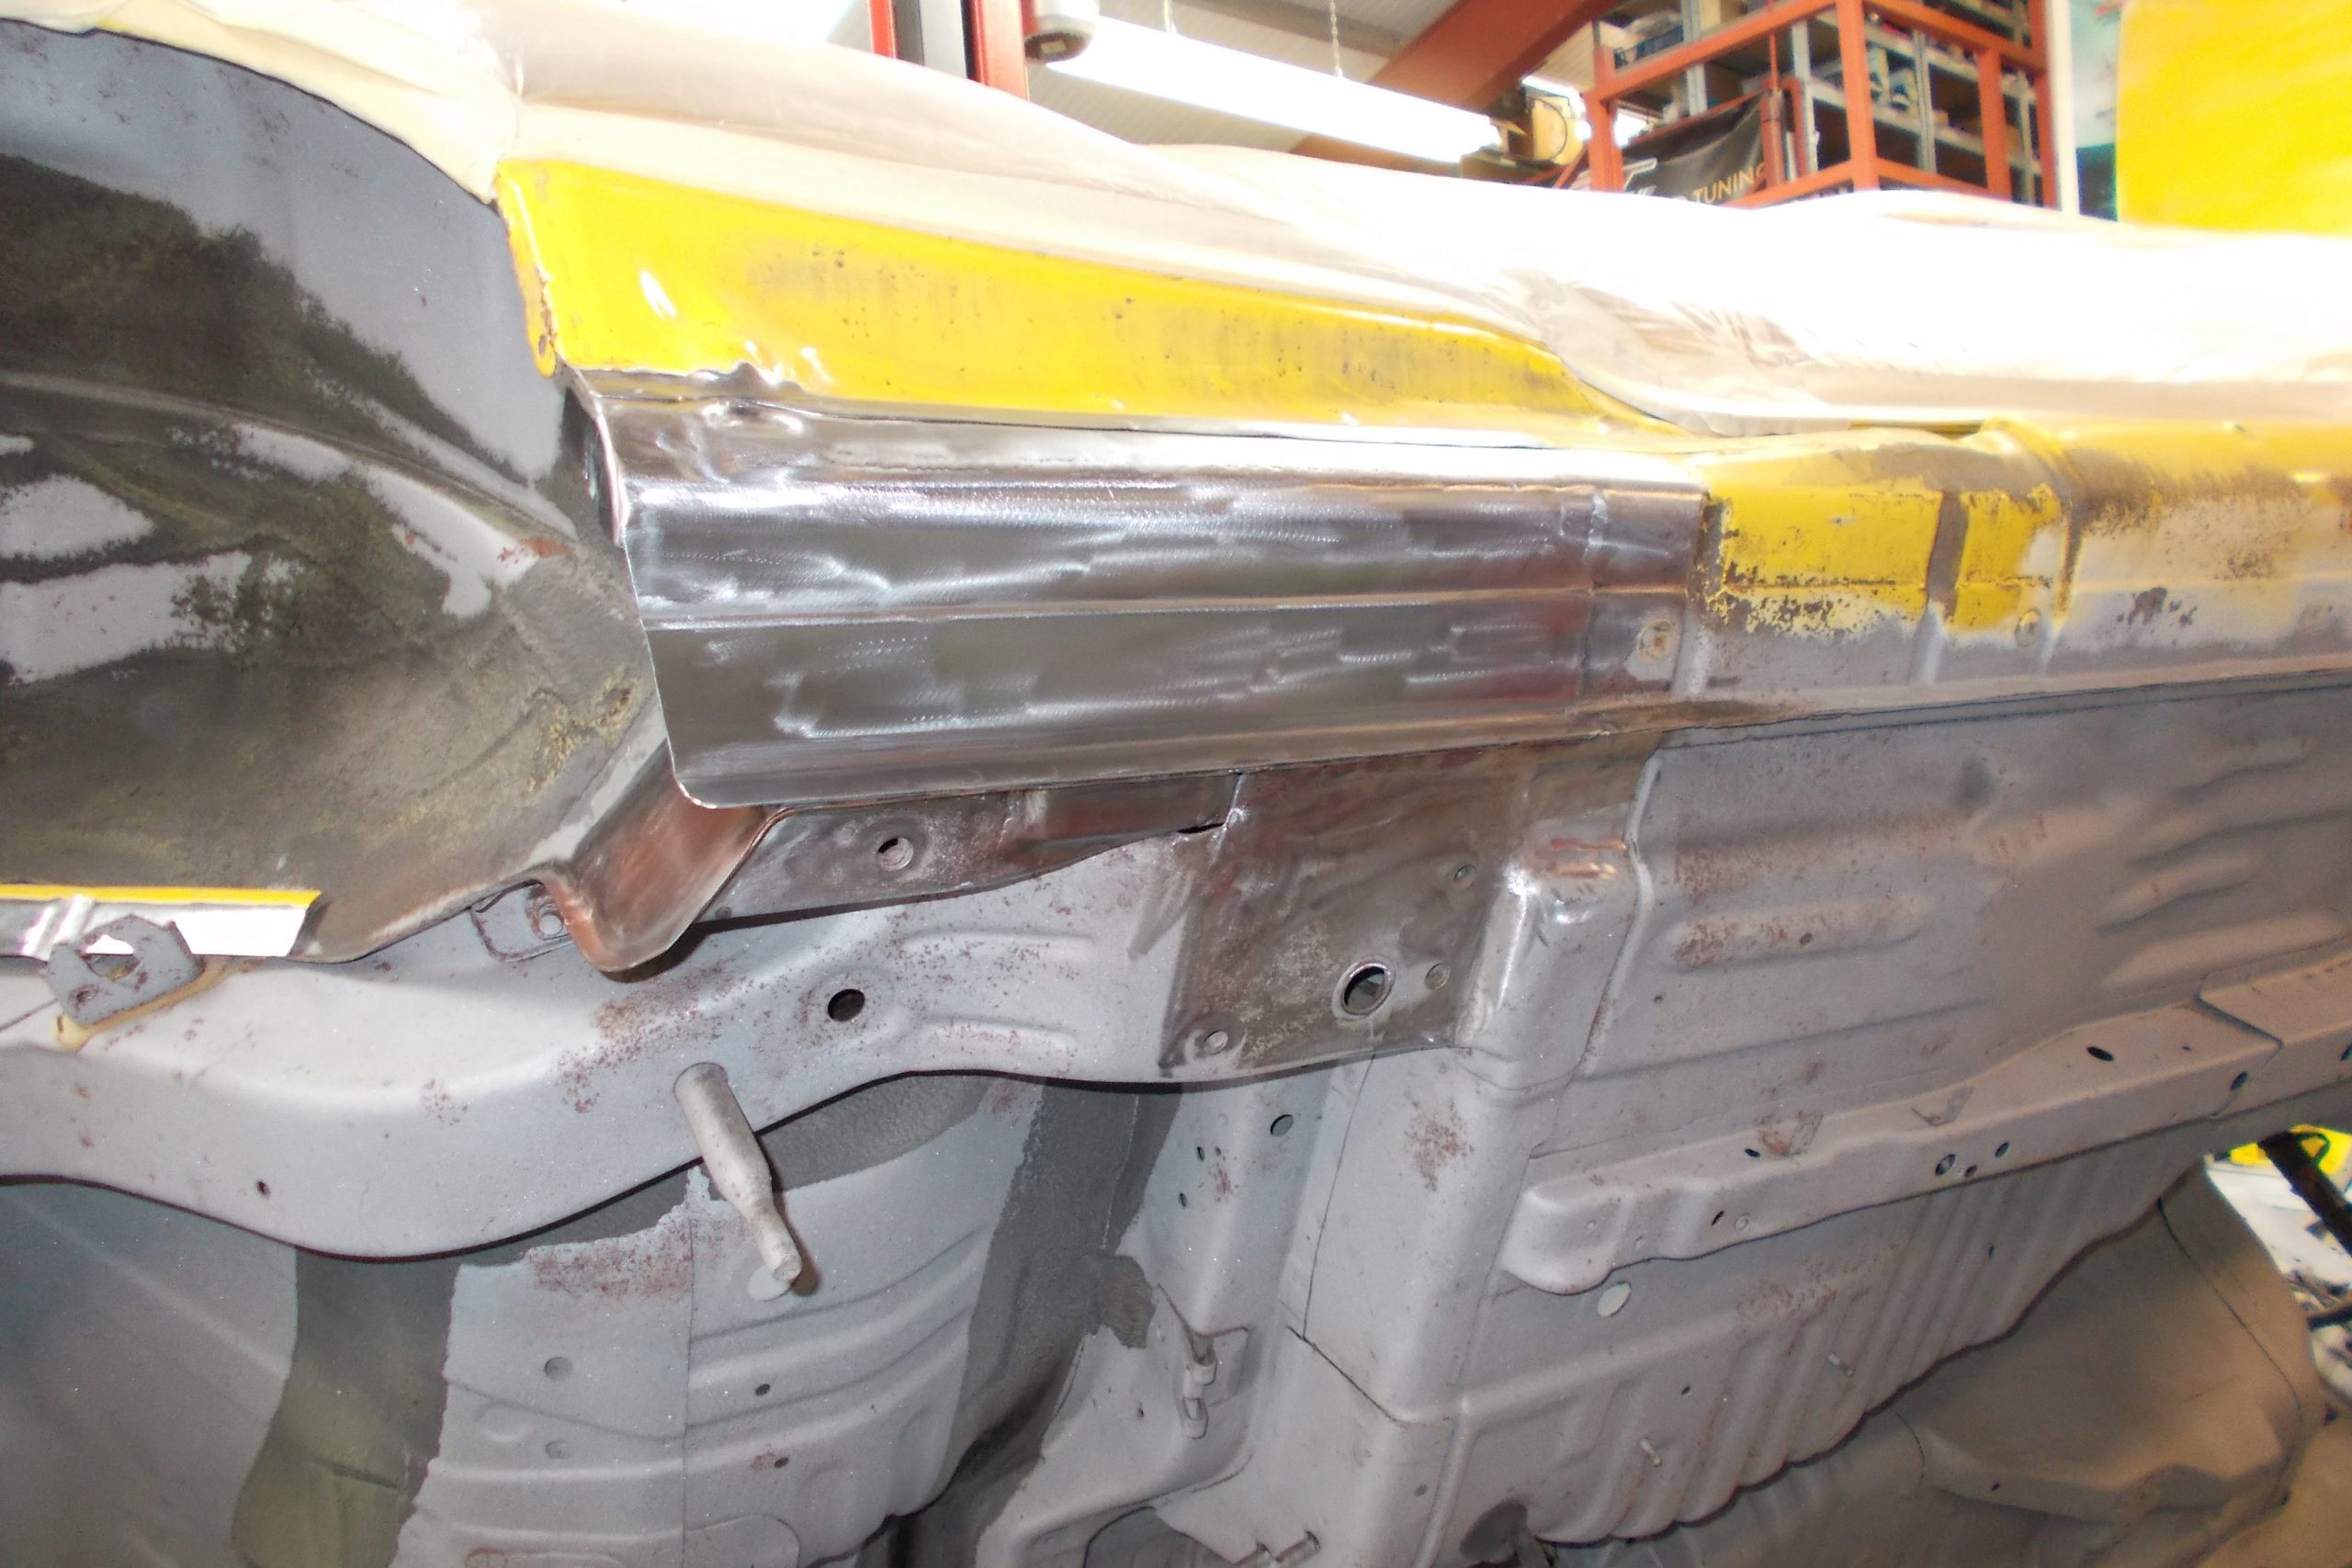
We were aware of one previous weld repair to the offside rear outer sill, and you could see one of the turret tops just starting to bulge and split. Other than this, it all, at first sight, seemed pretty solid but very crusty/scabby, which, if left untreated, would soon turn into the never-ending battle with weld repairs at every MOT time!
At first, this restoration was supposed to be a “sort the rust out and make it good for another ten years,” (like they all say) but once it was all stripped down, we showed Toni the extent of the corrosion and flaking of the previous attempts it’s soon turned to “this has to be perfect.”
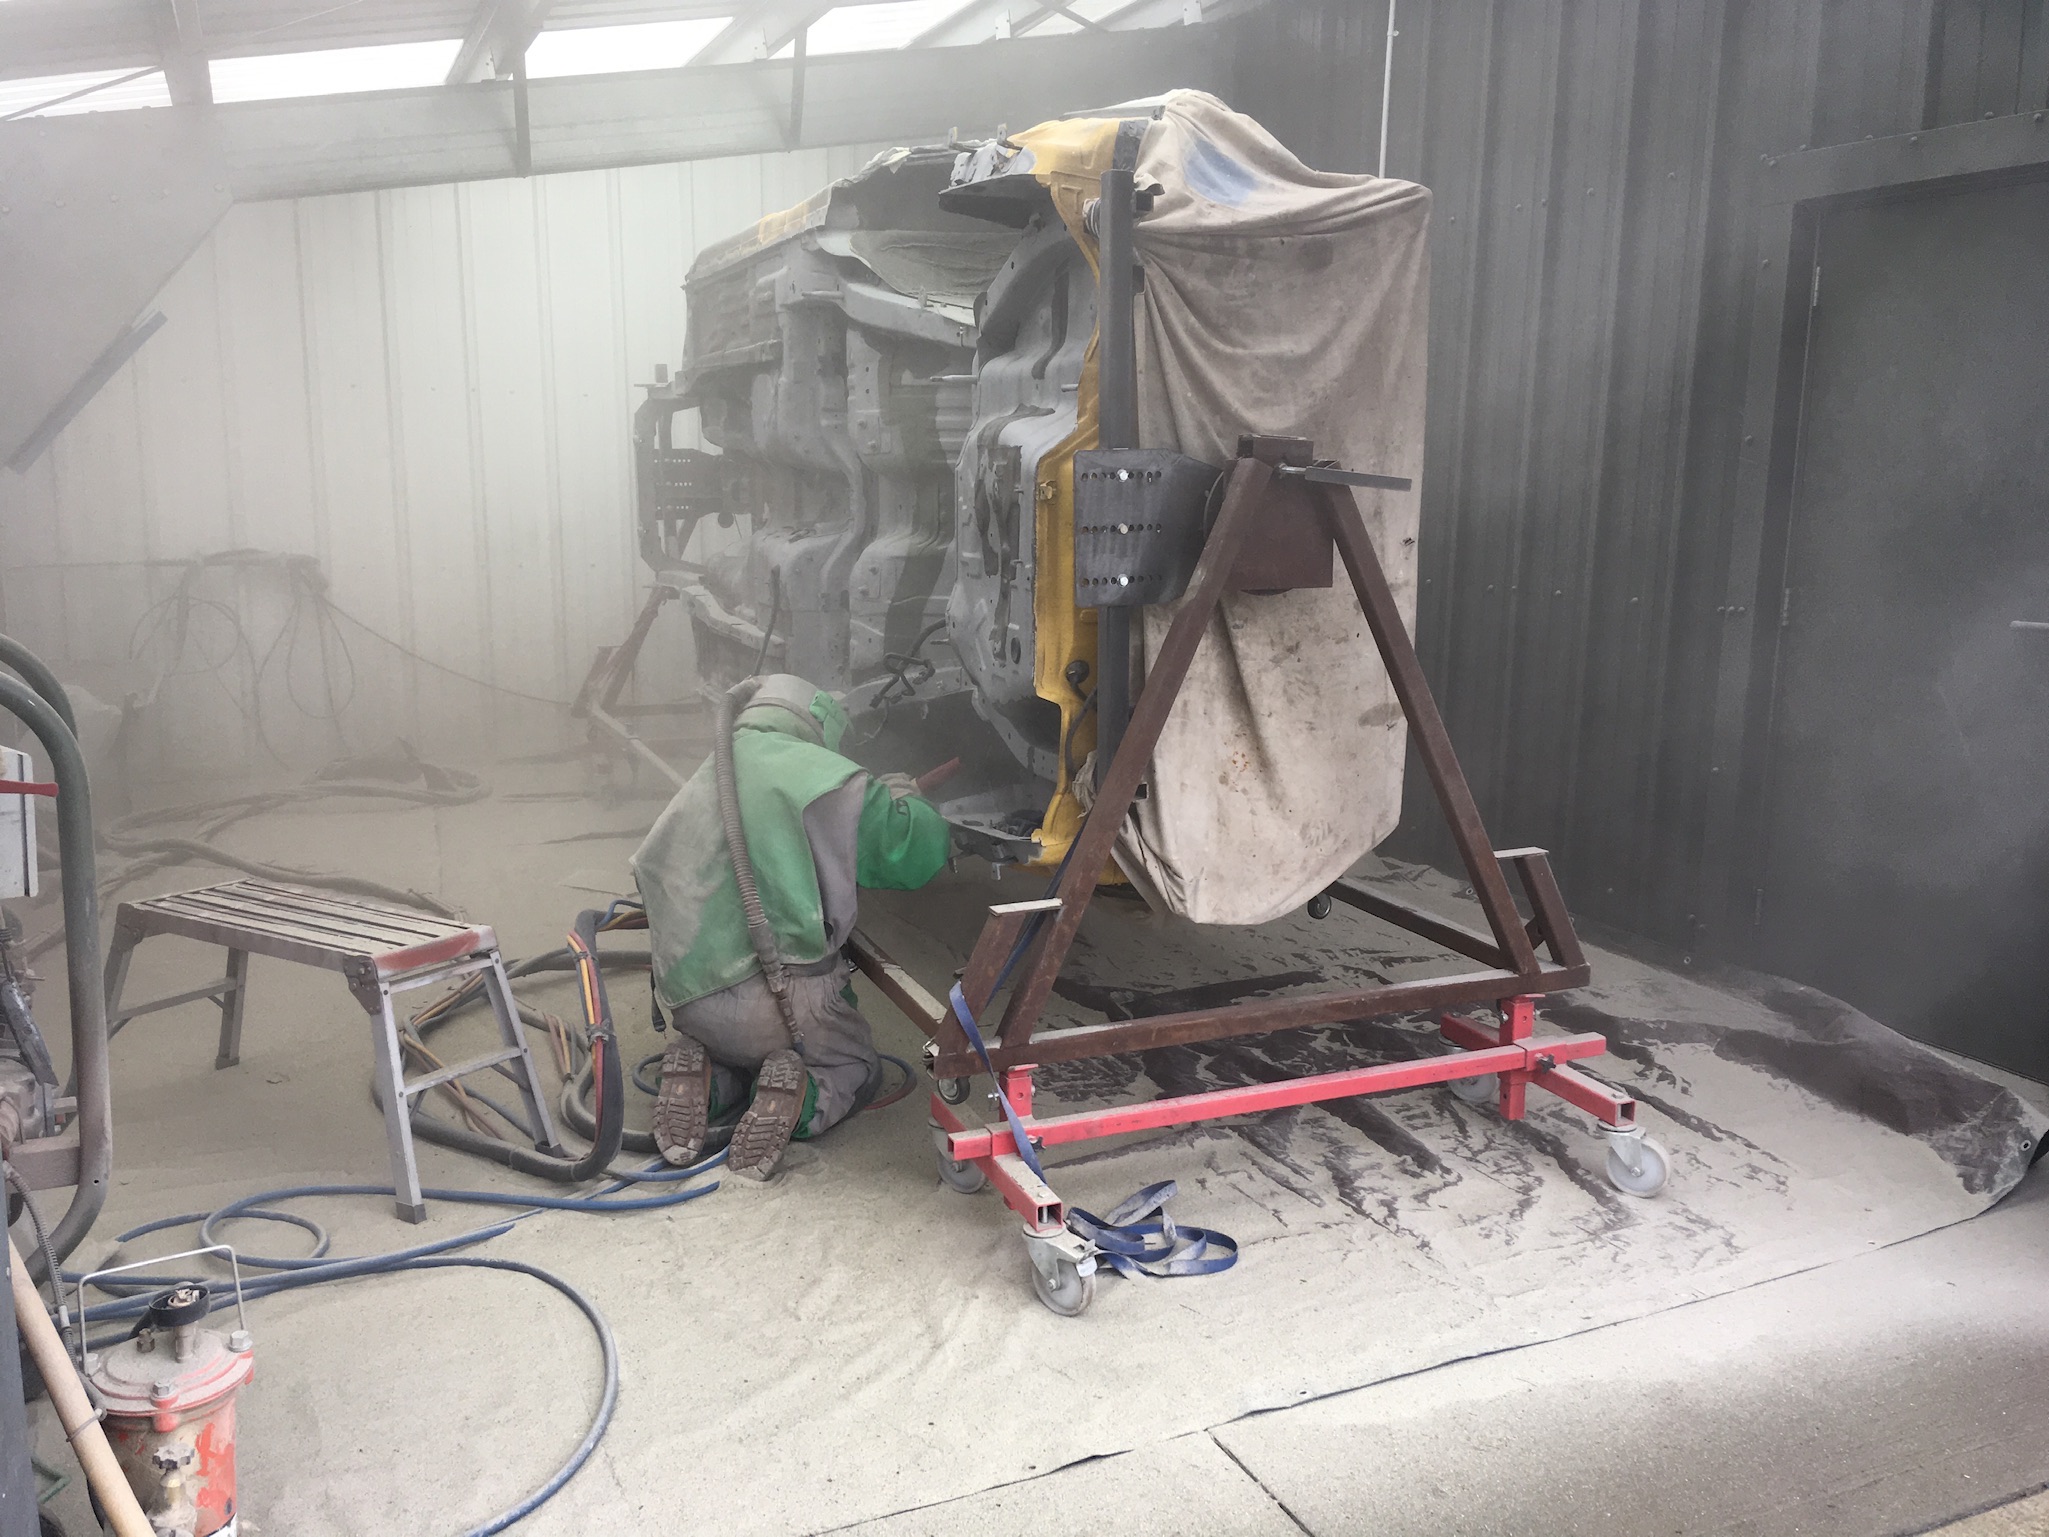
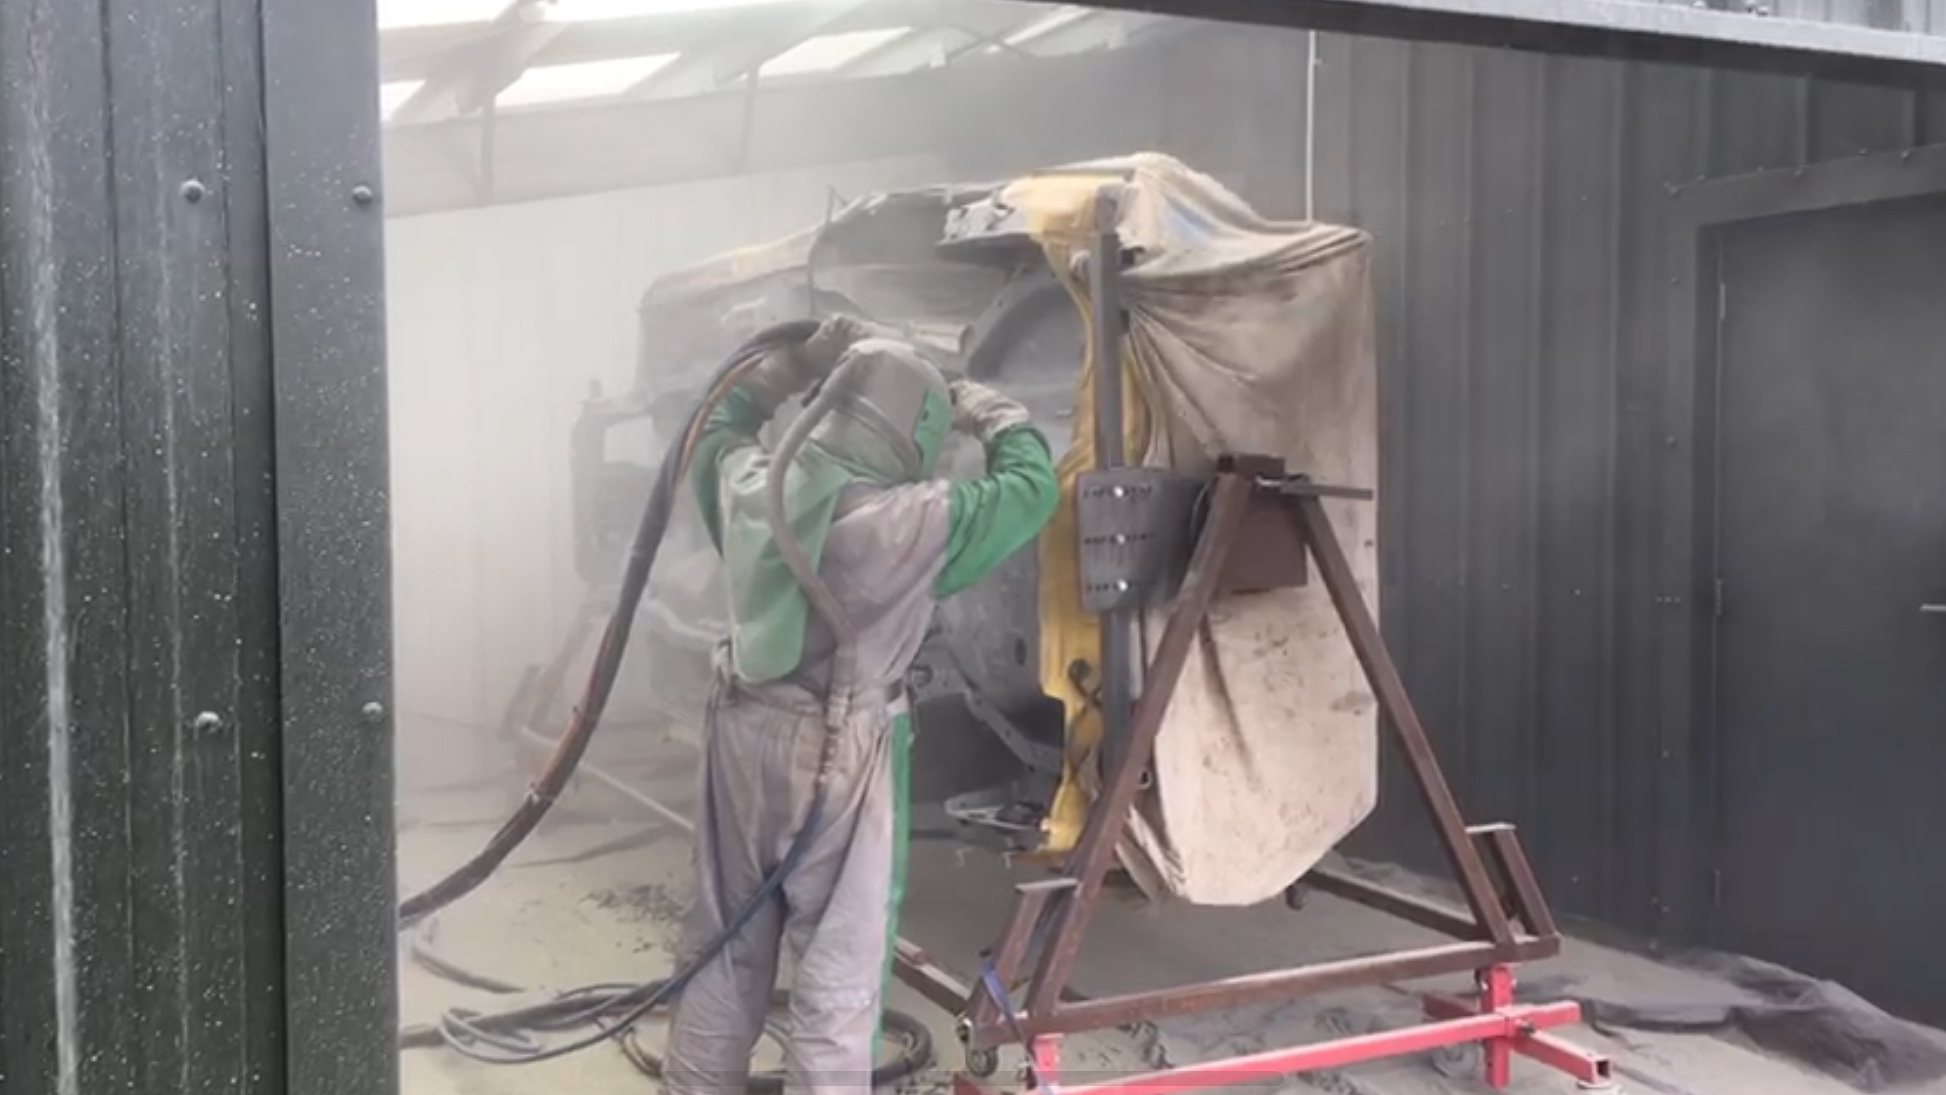
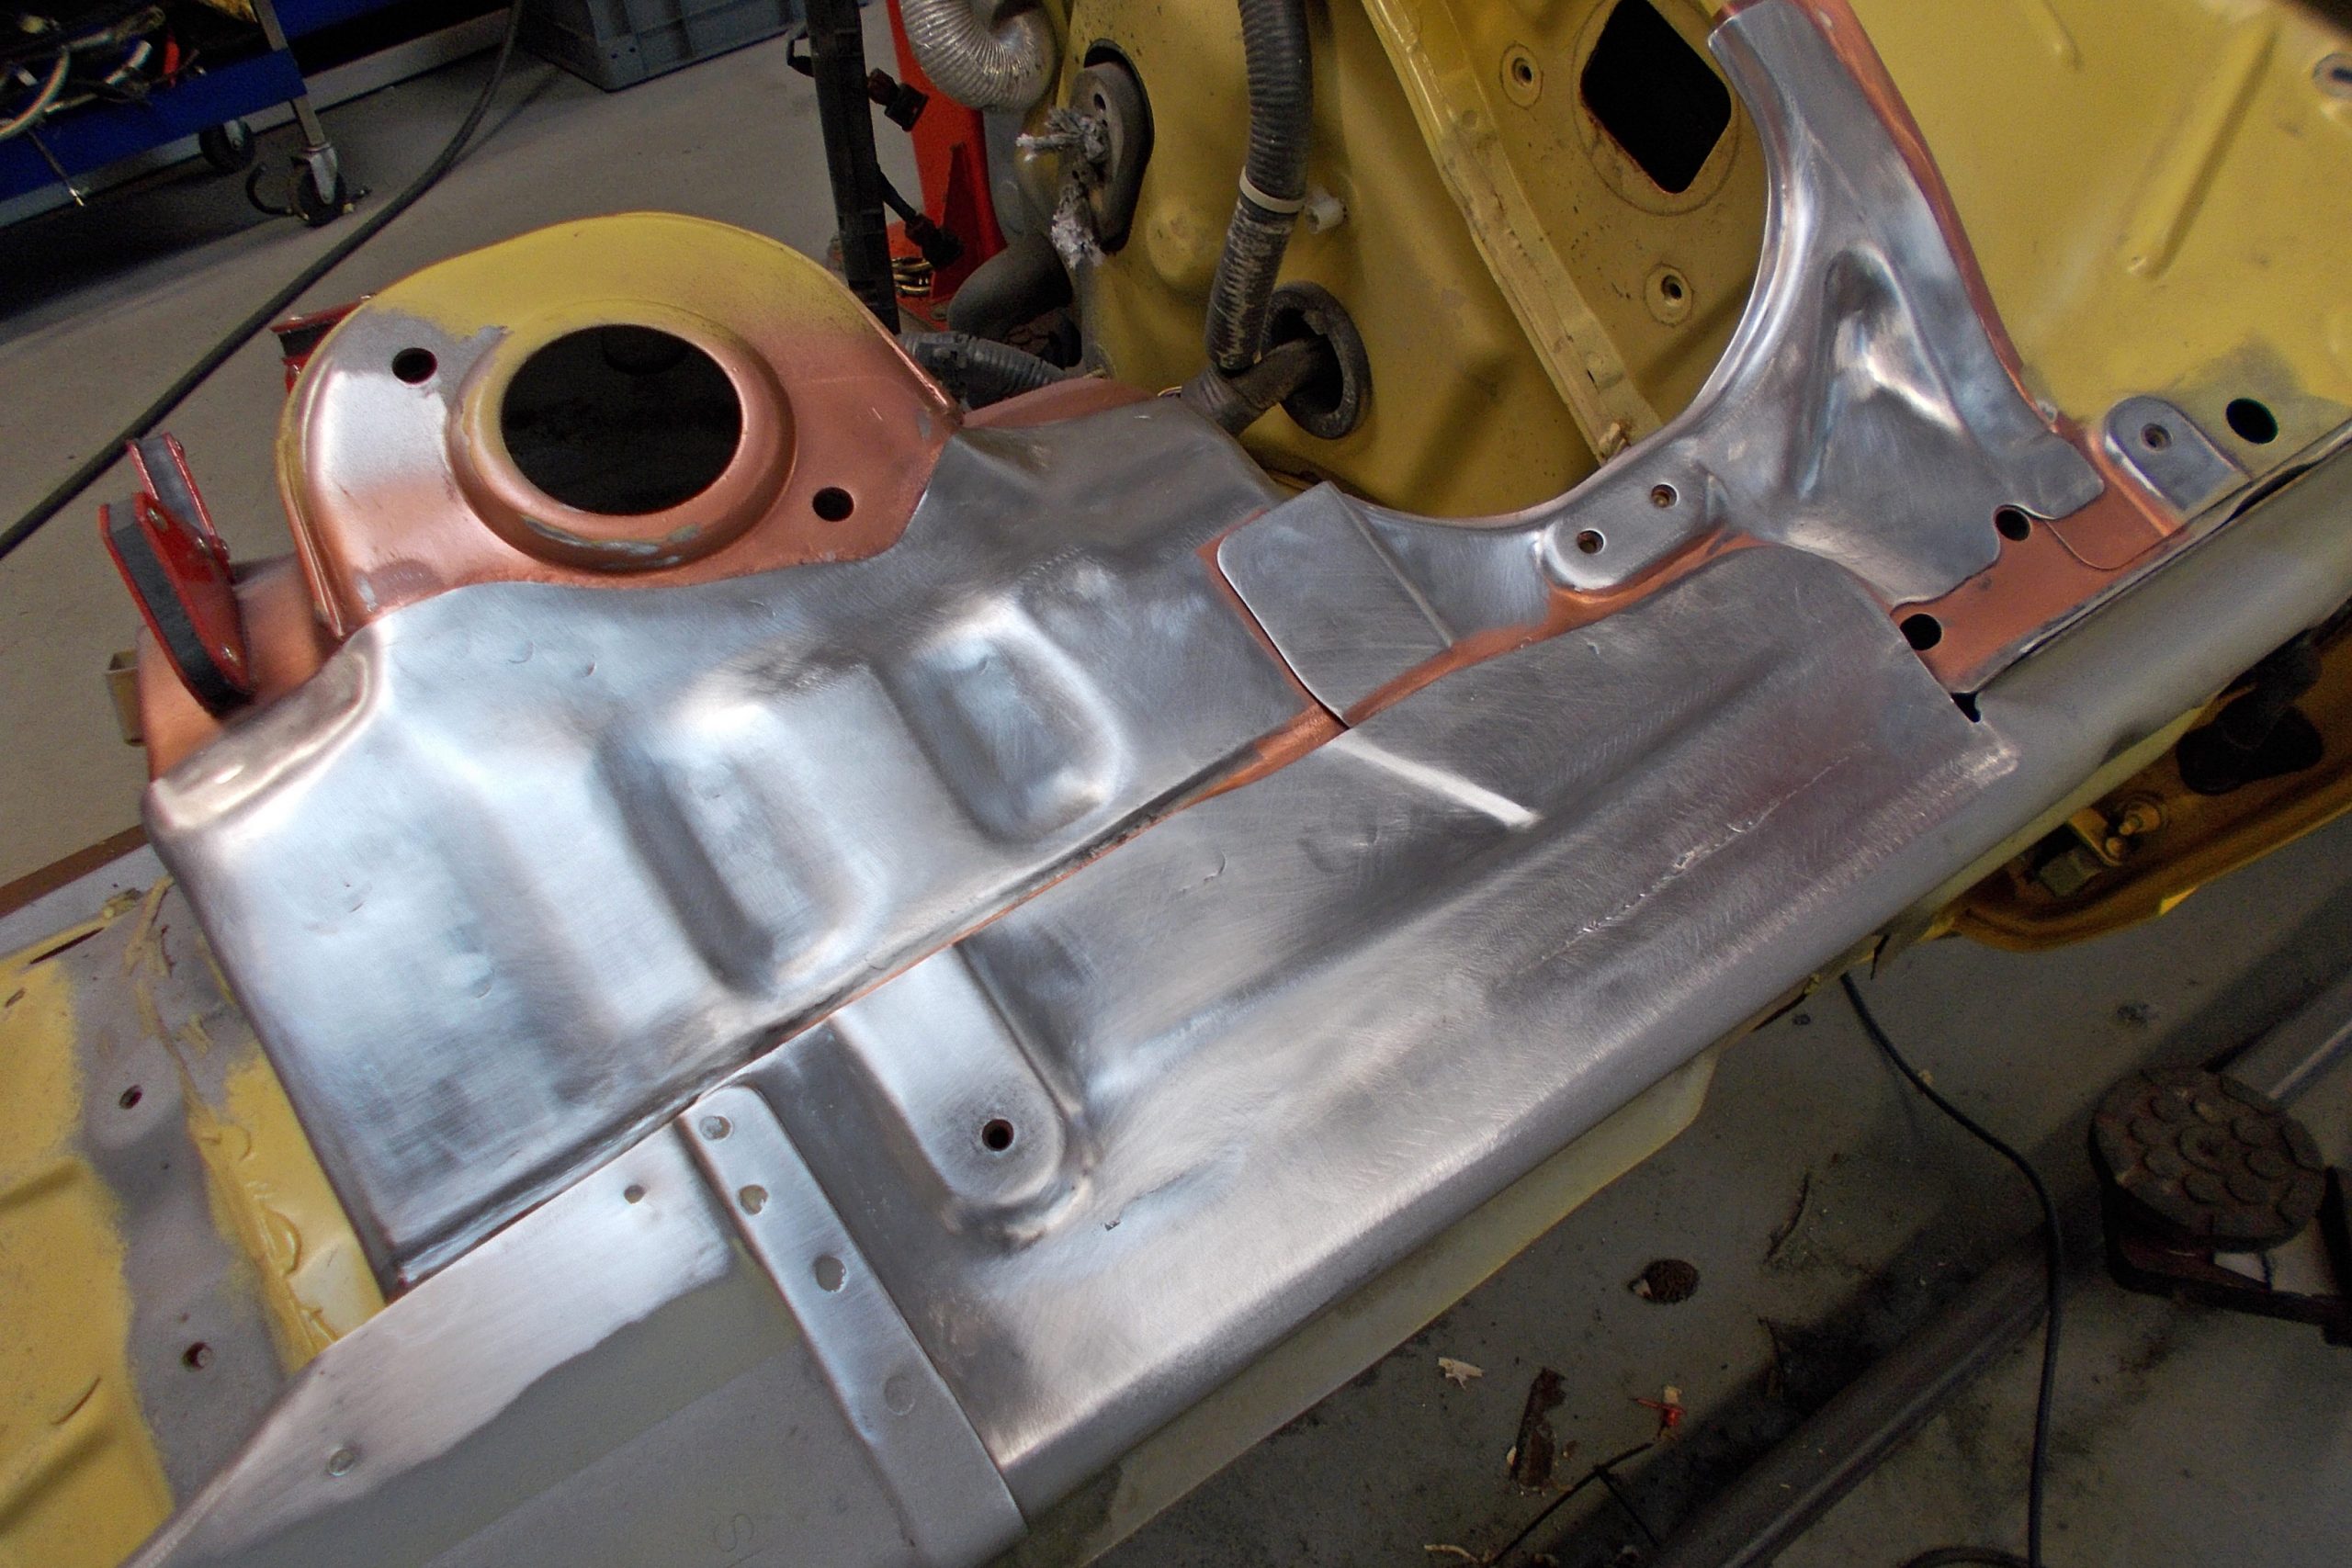
There were so many layers of underseal and surface corrosion; the only option to get it back to the bare metal was to have the chassis sandblasted (glass).
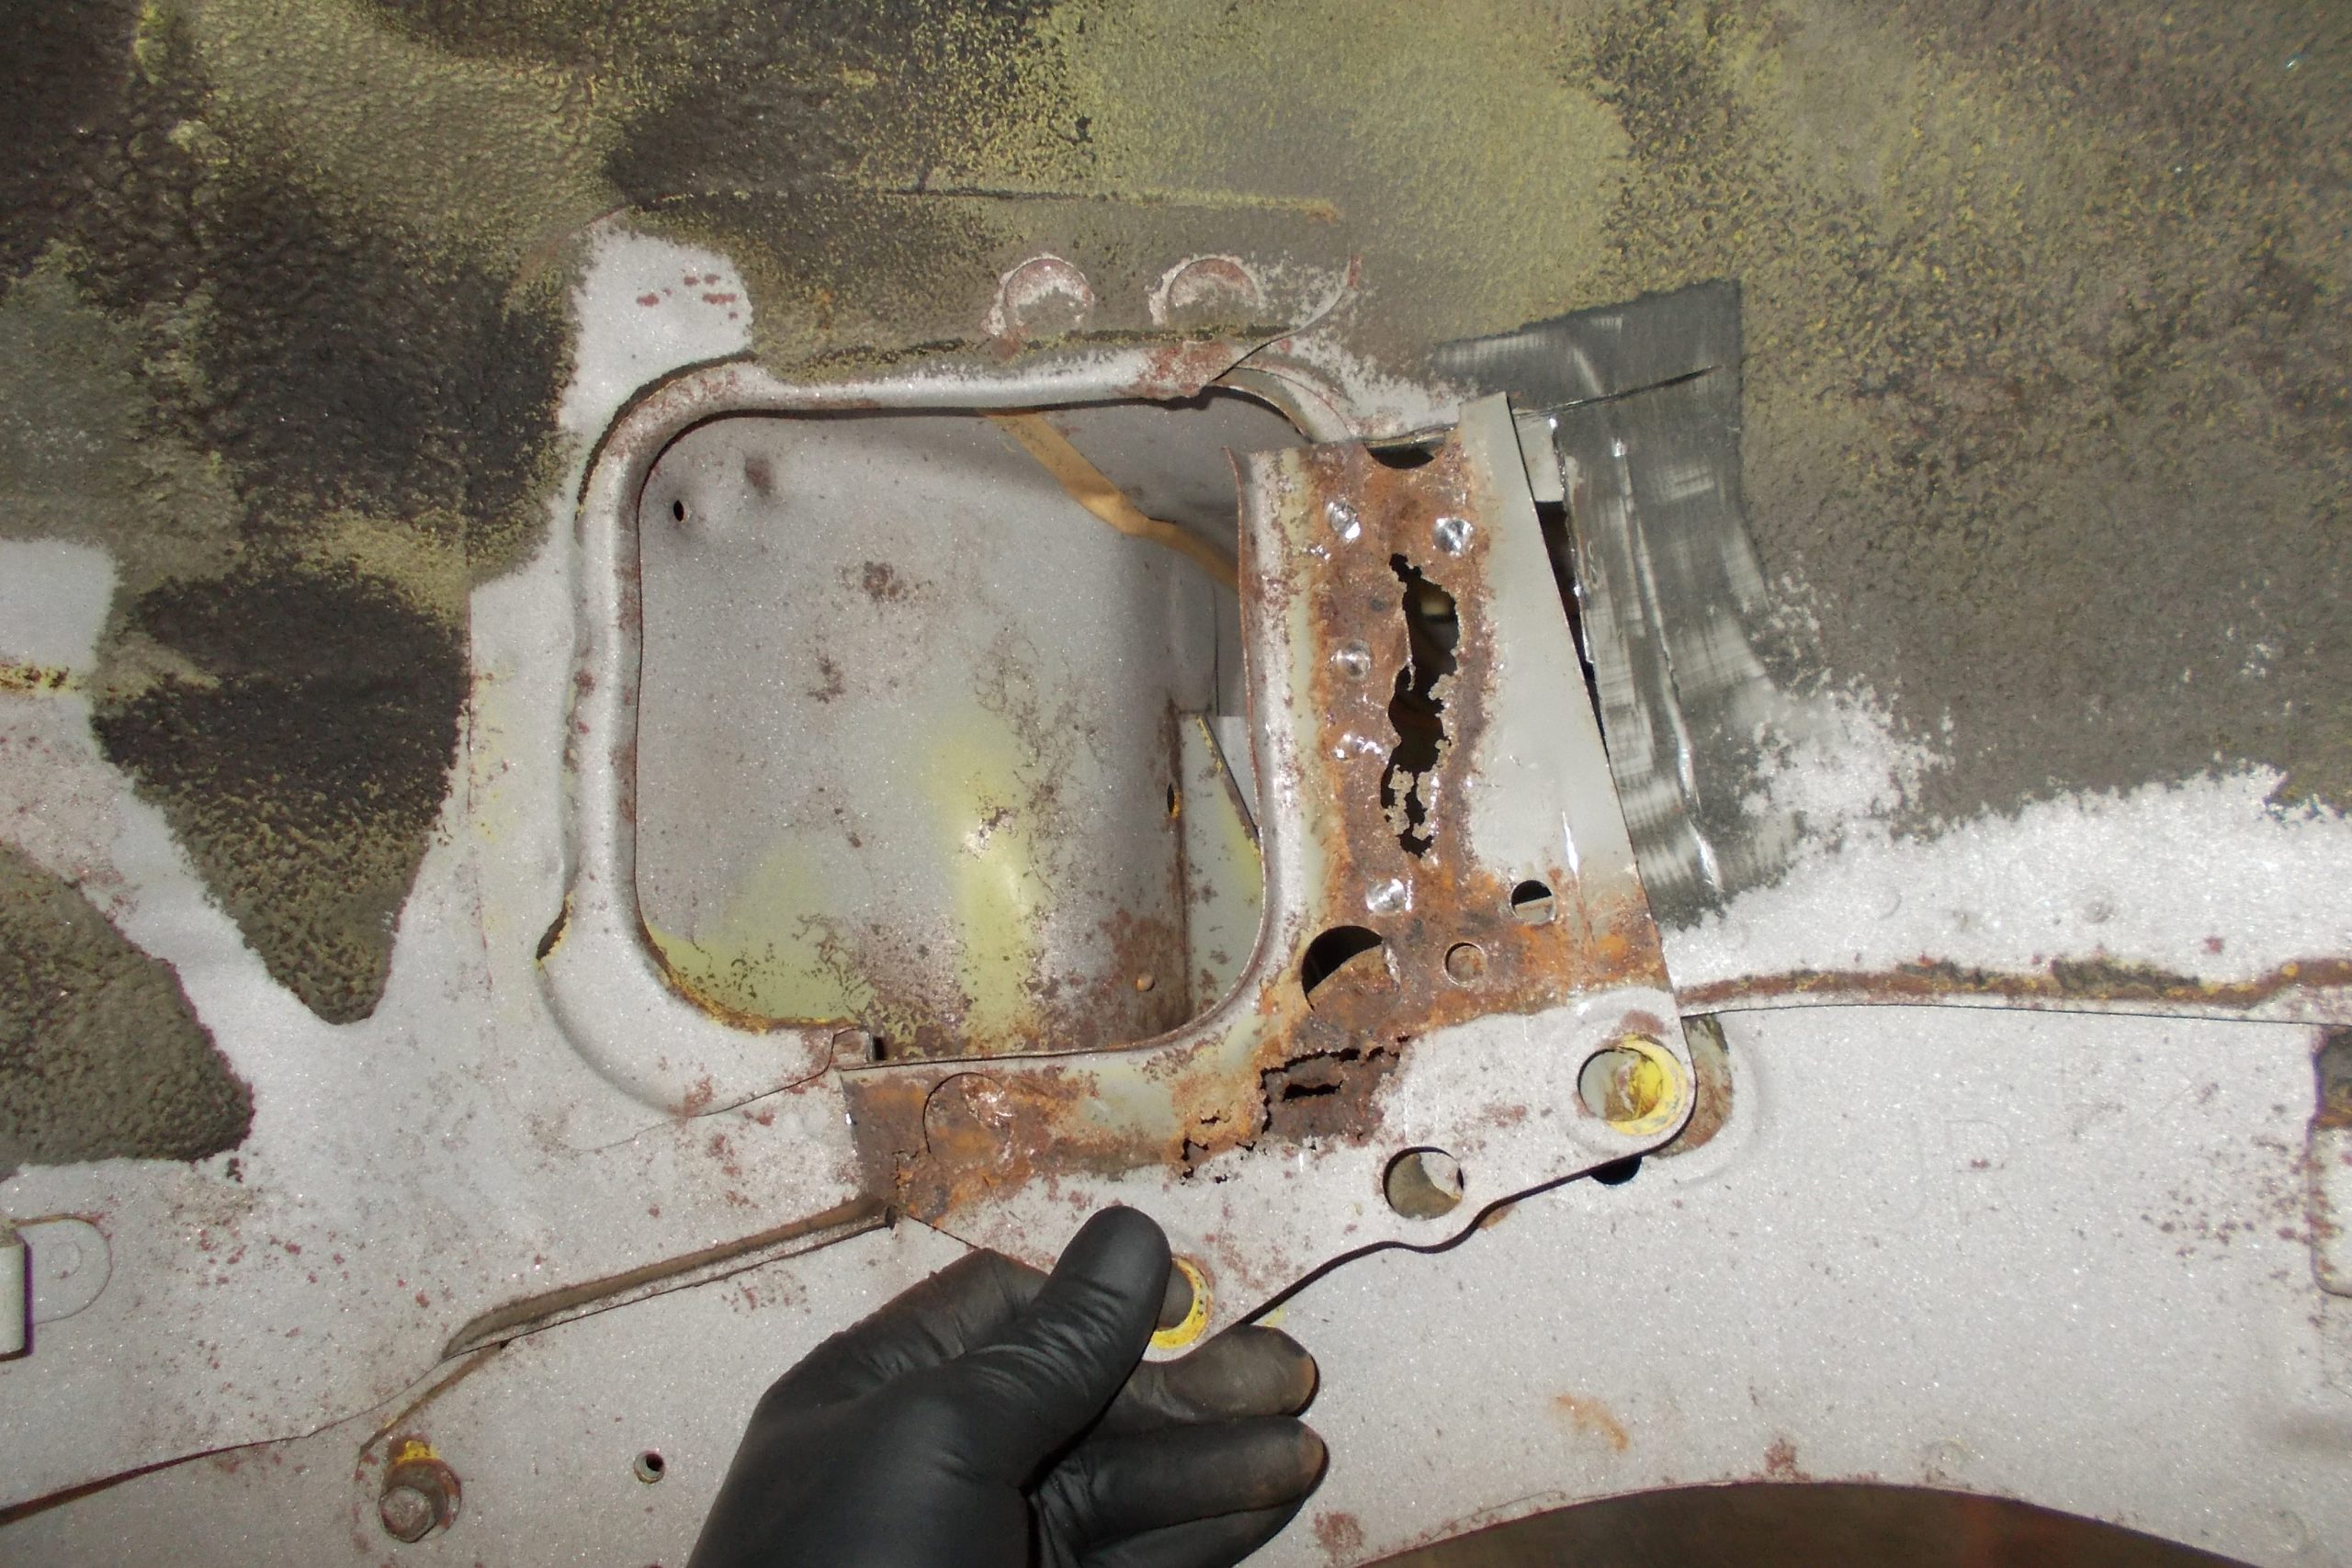
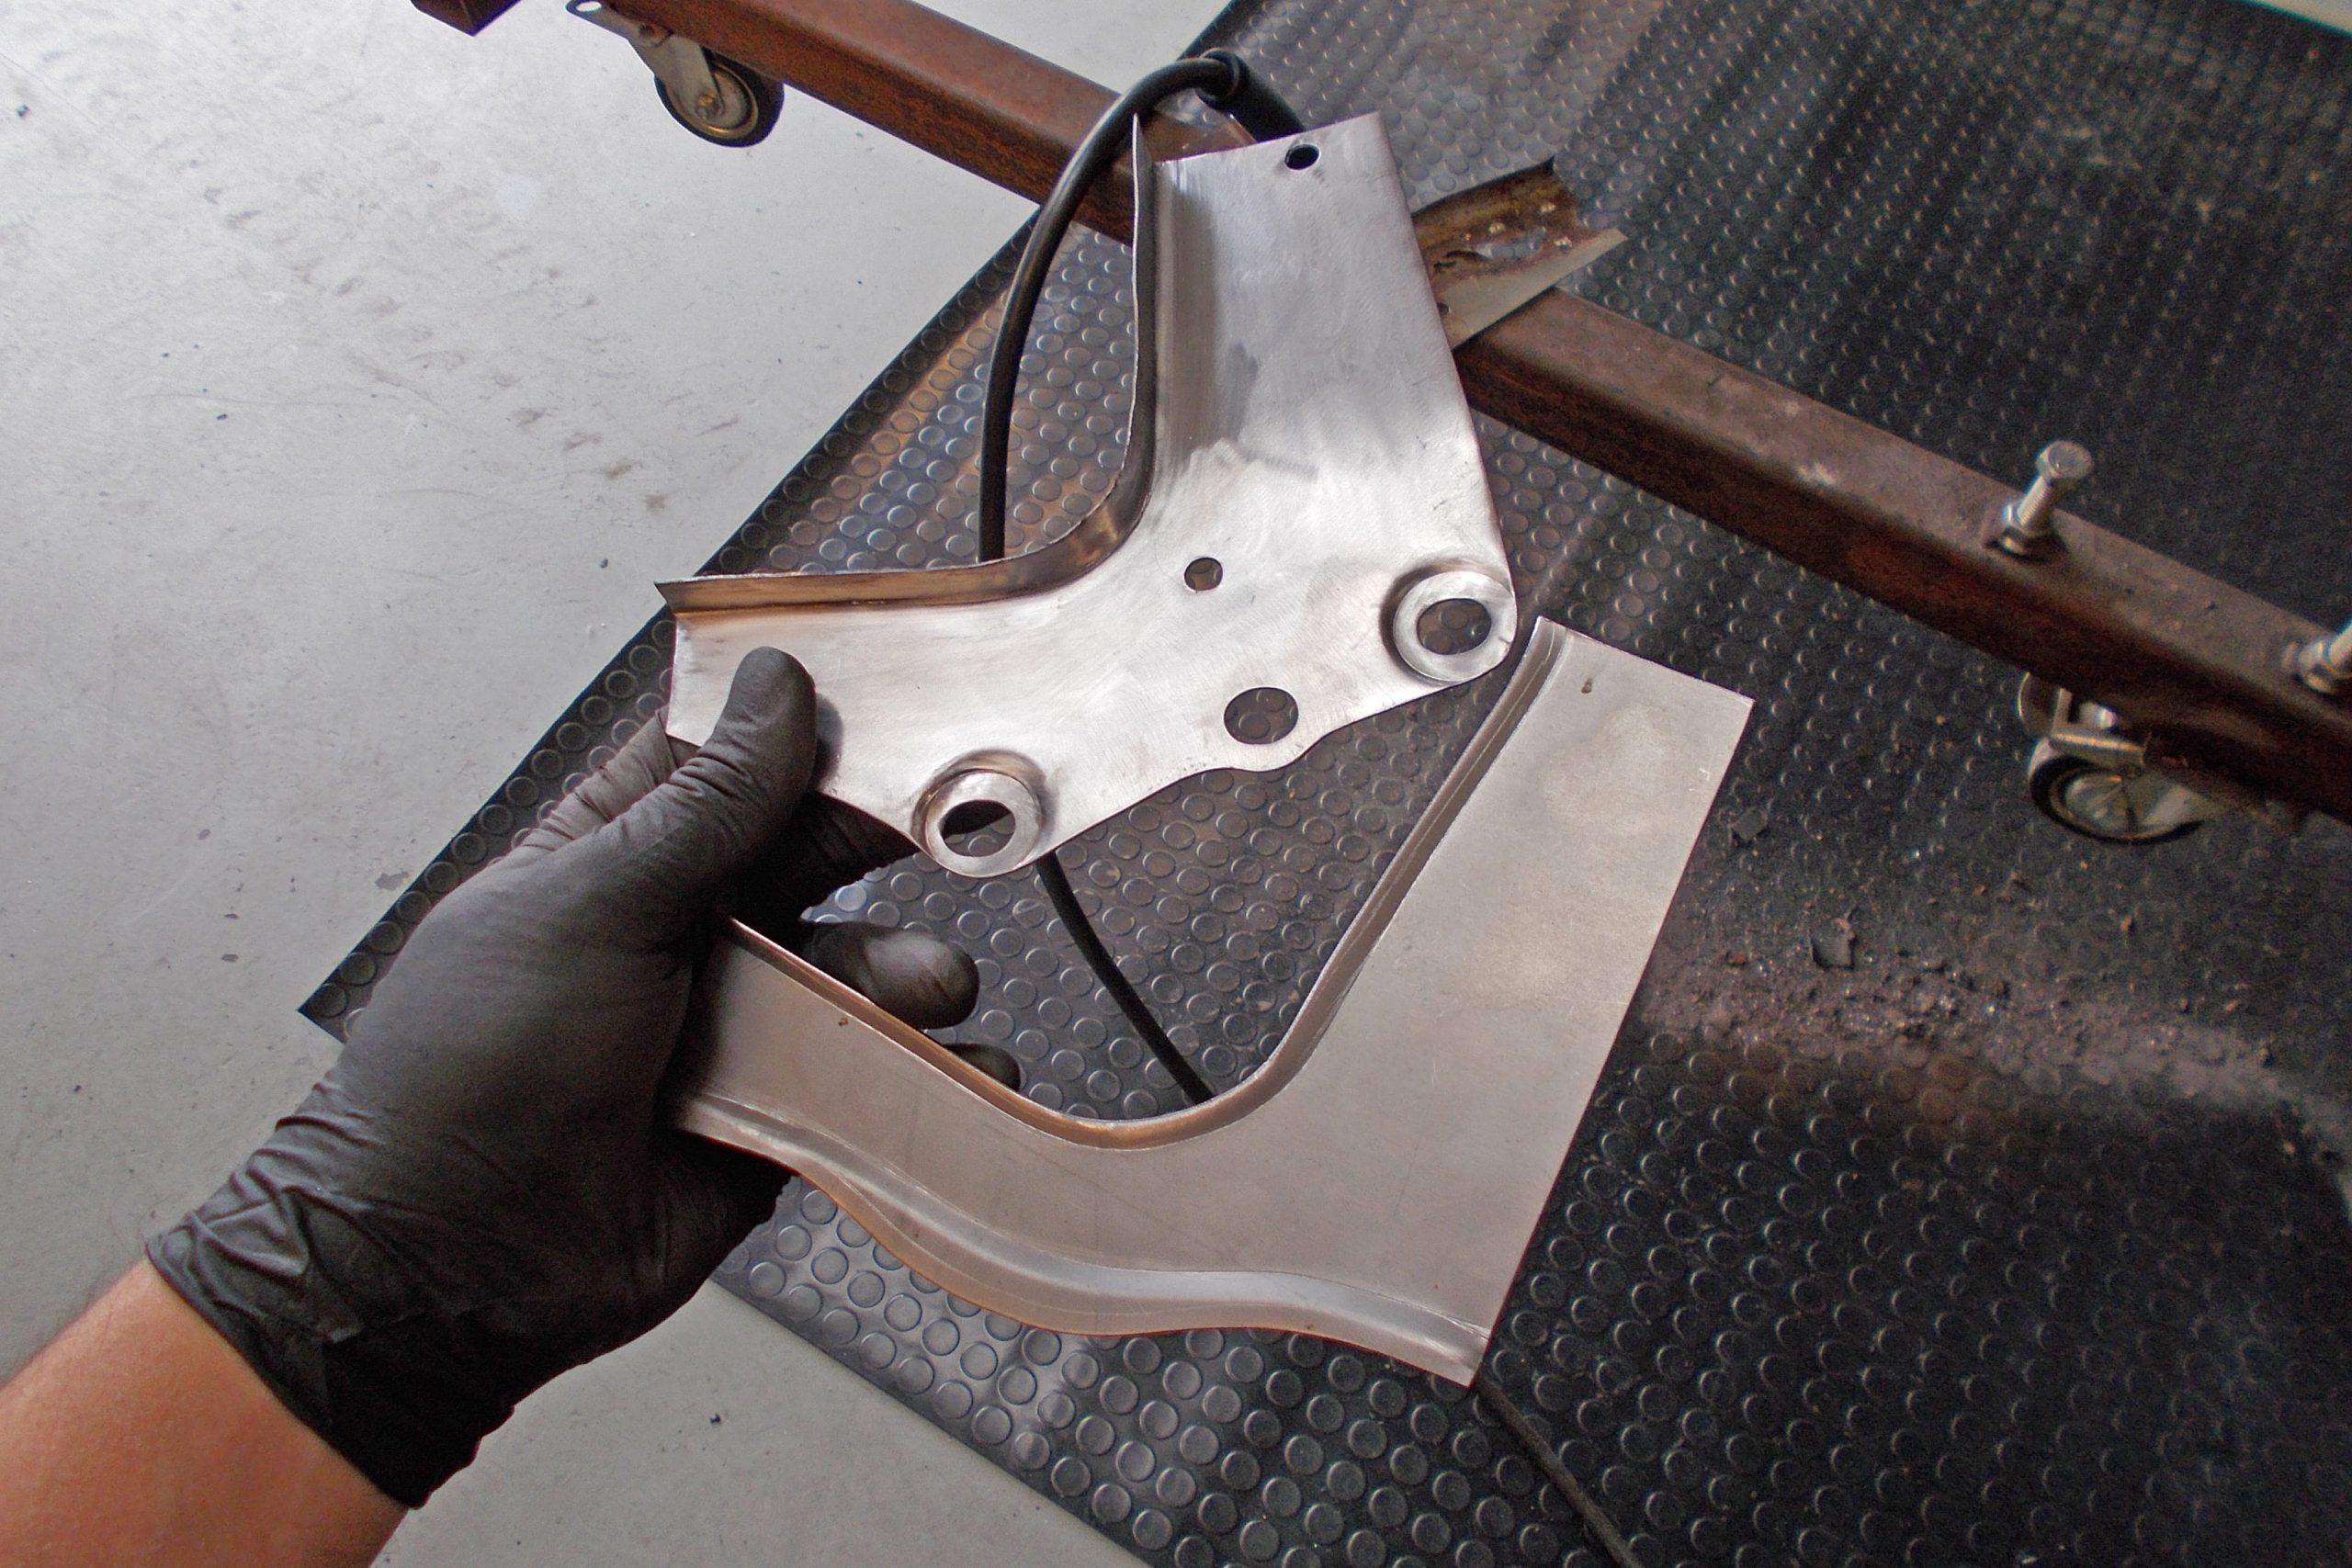
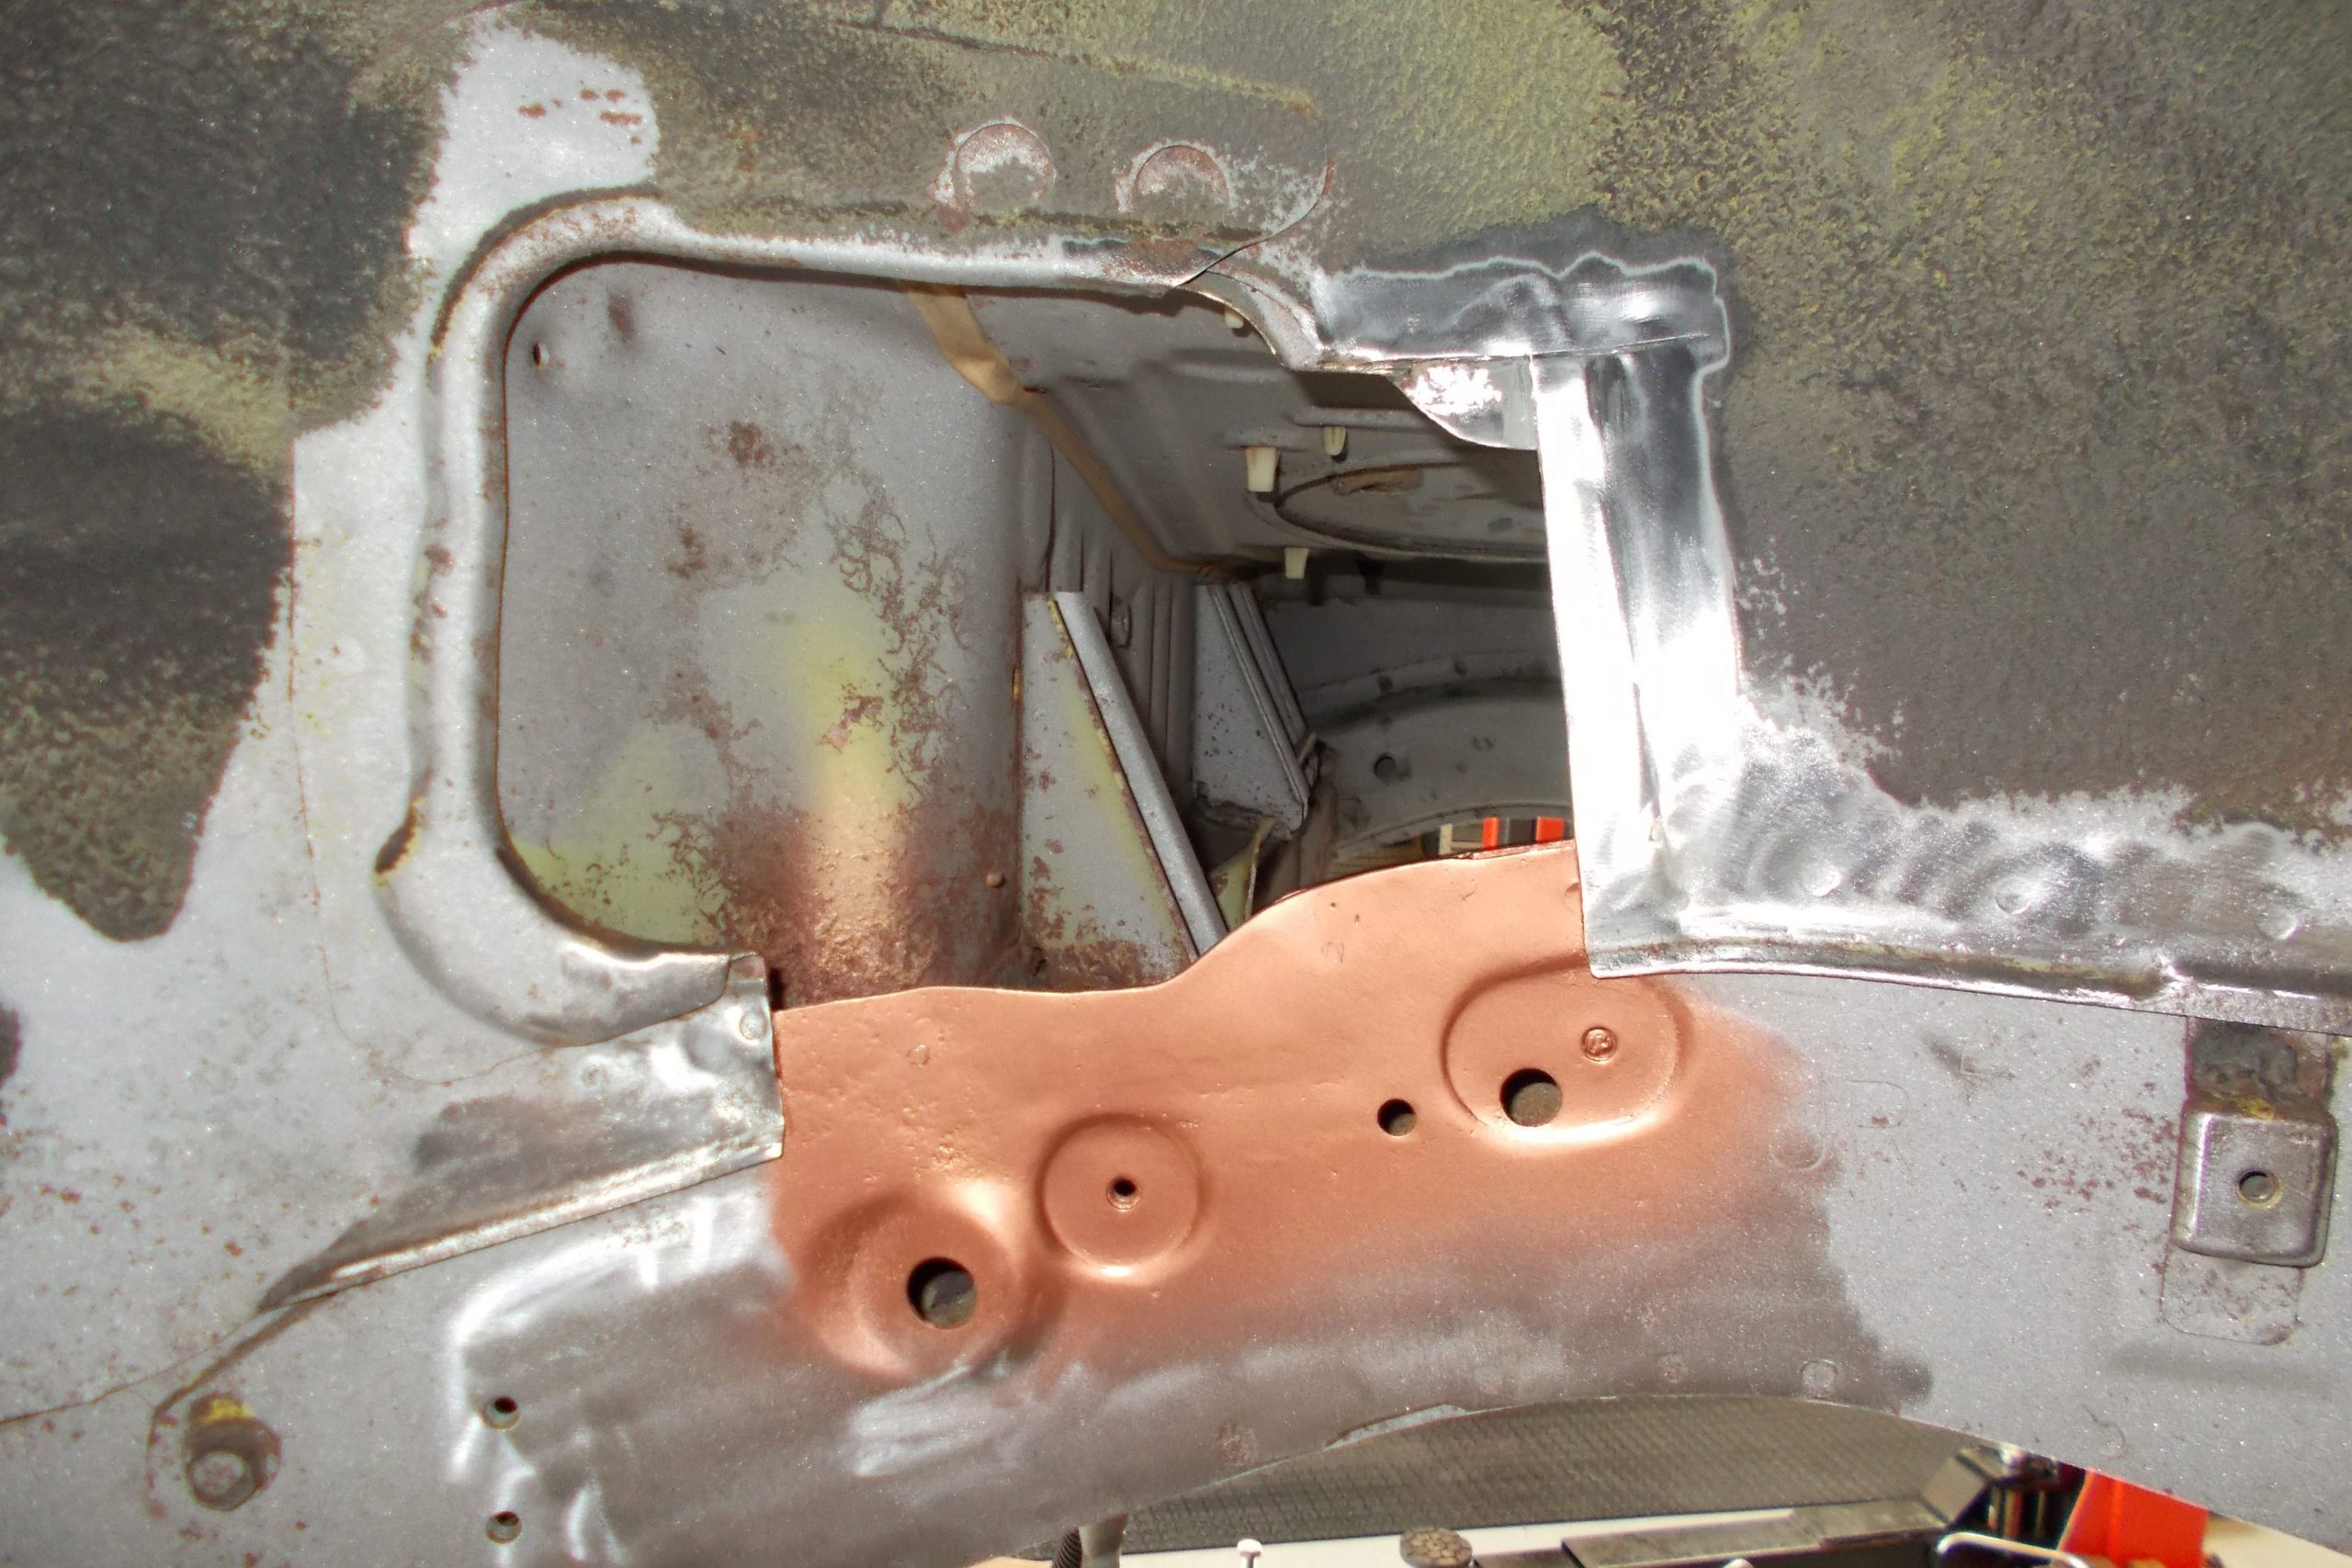
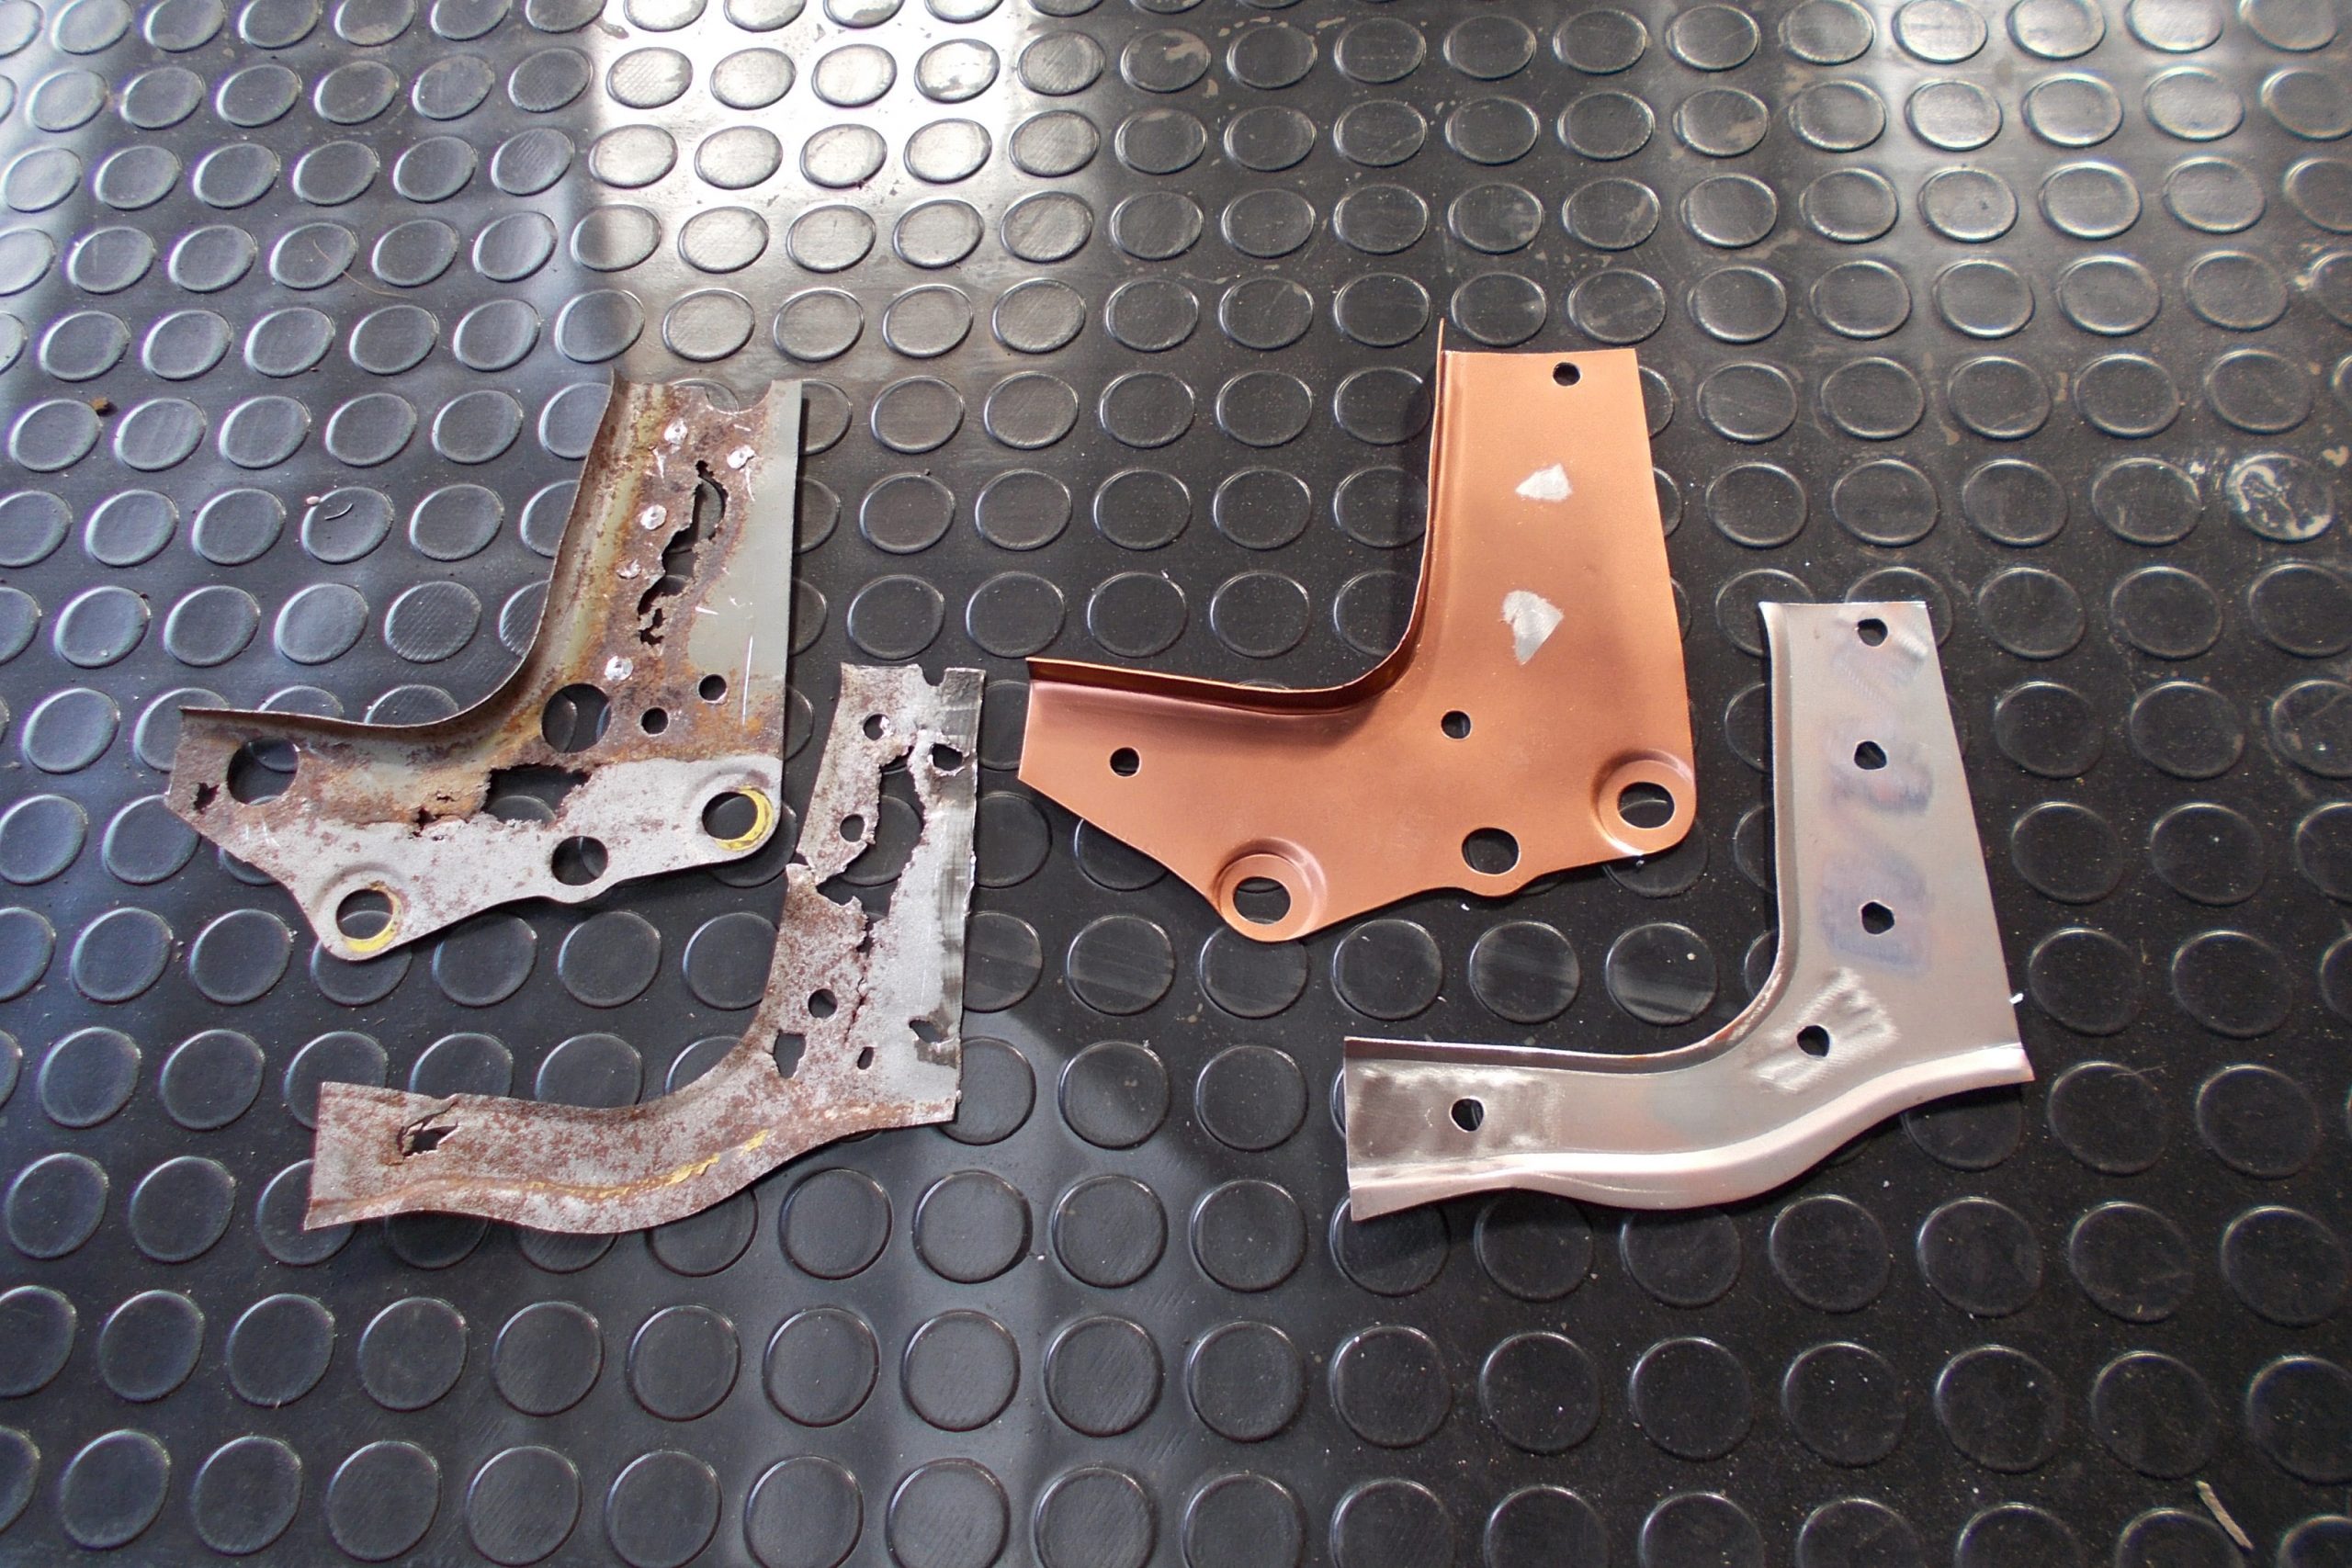
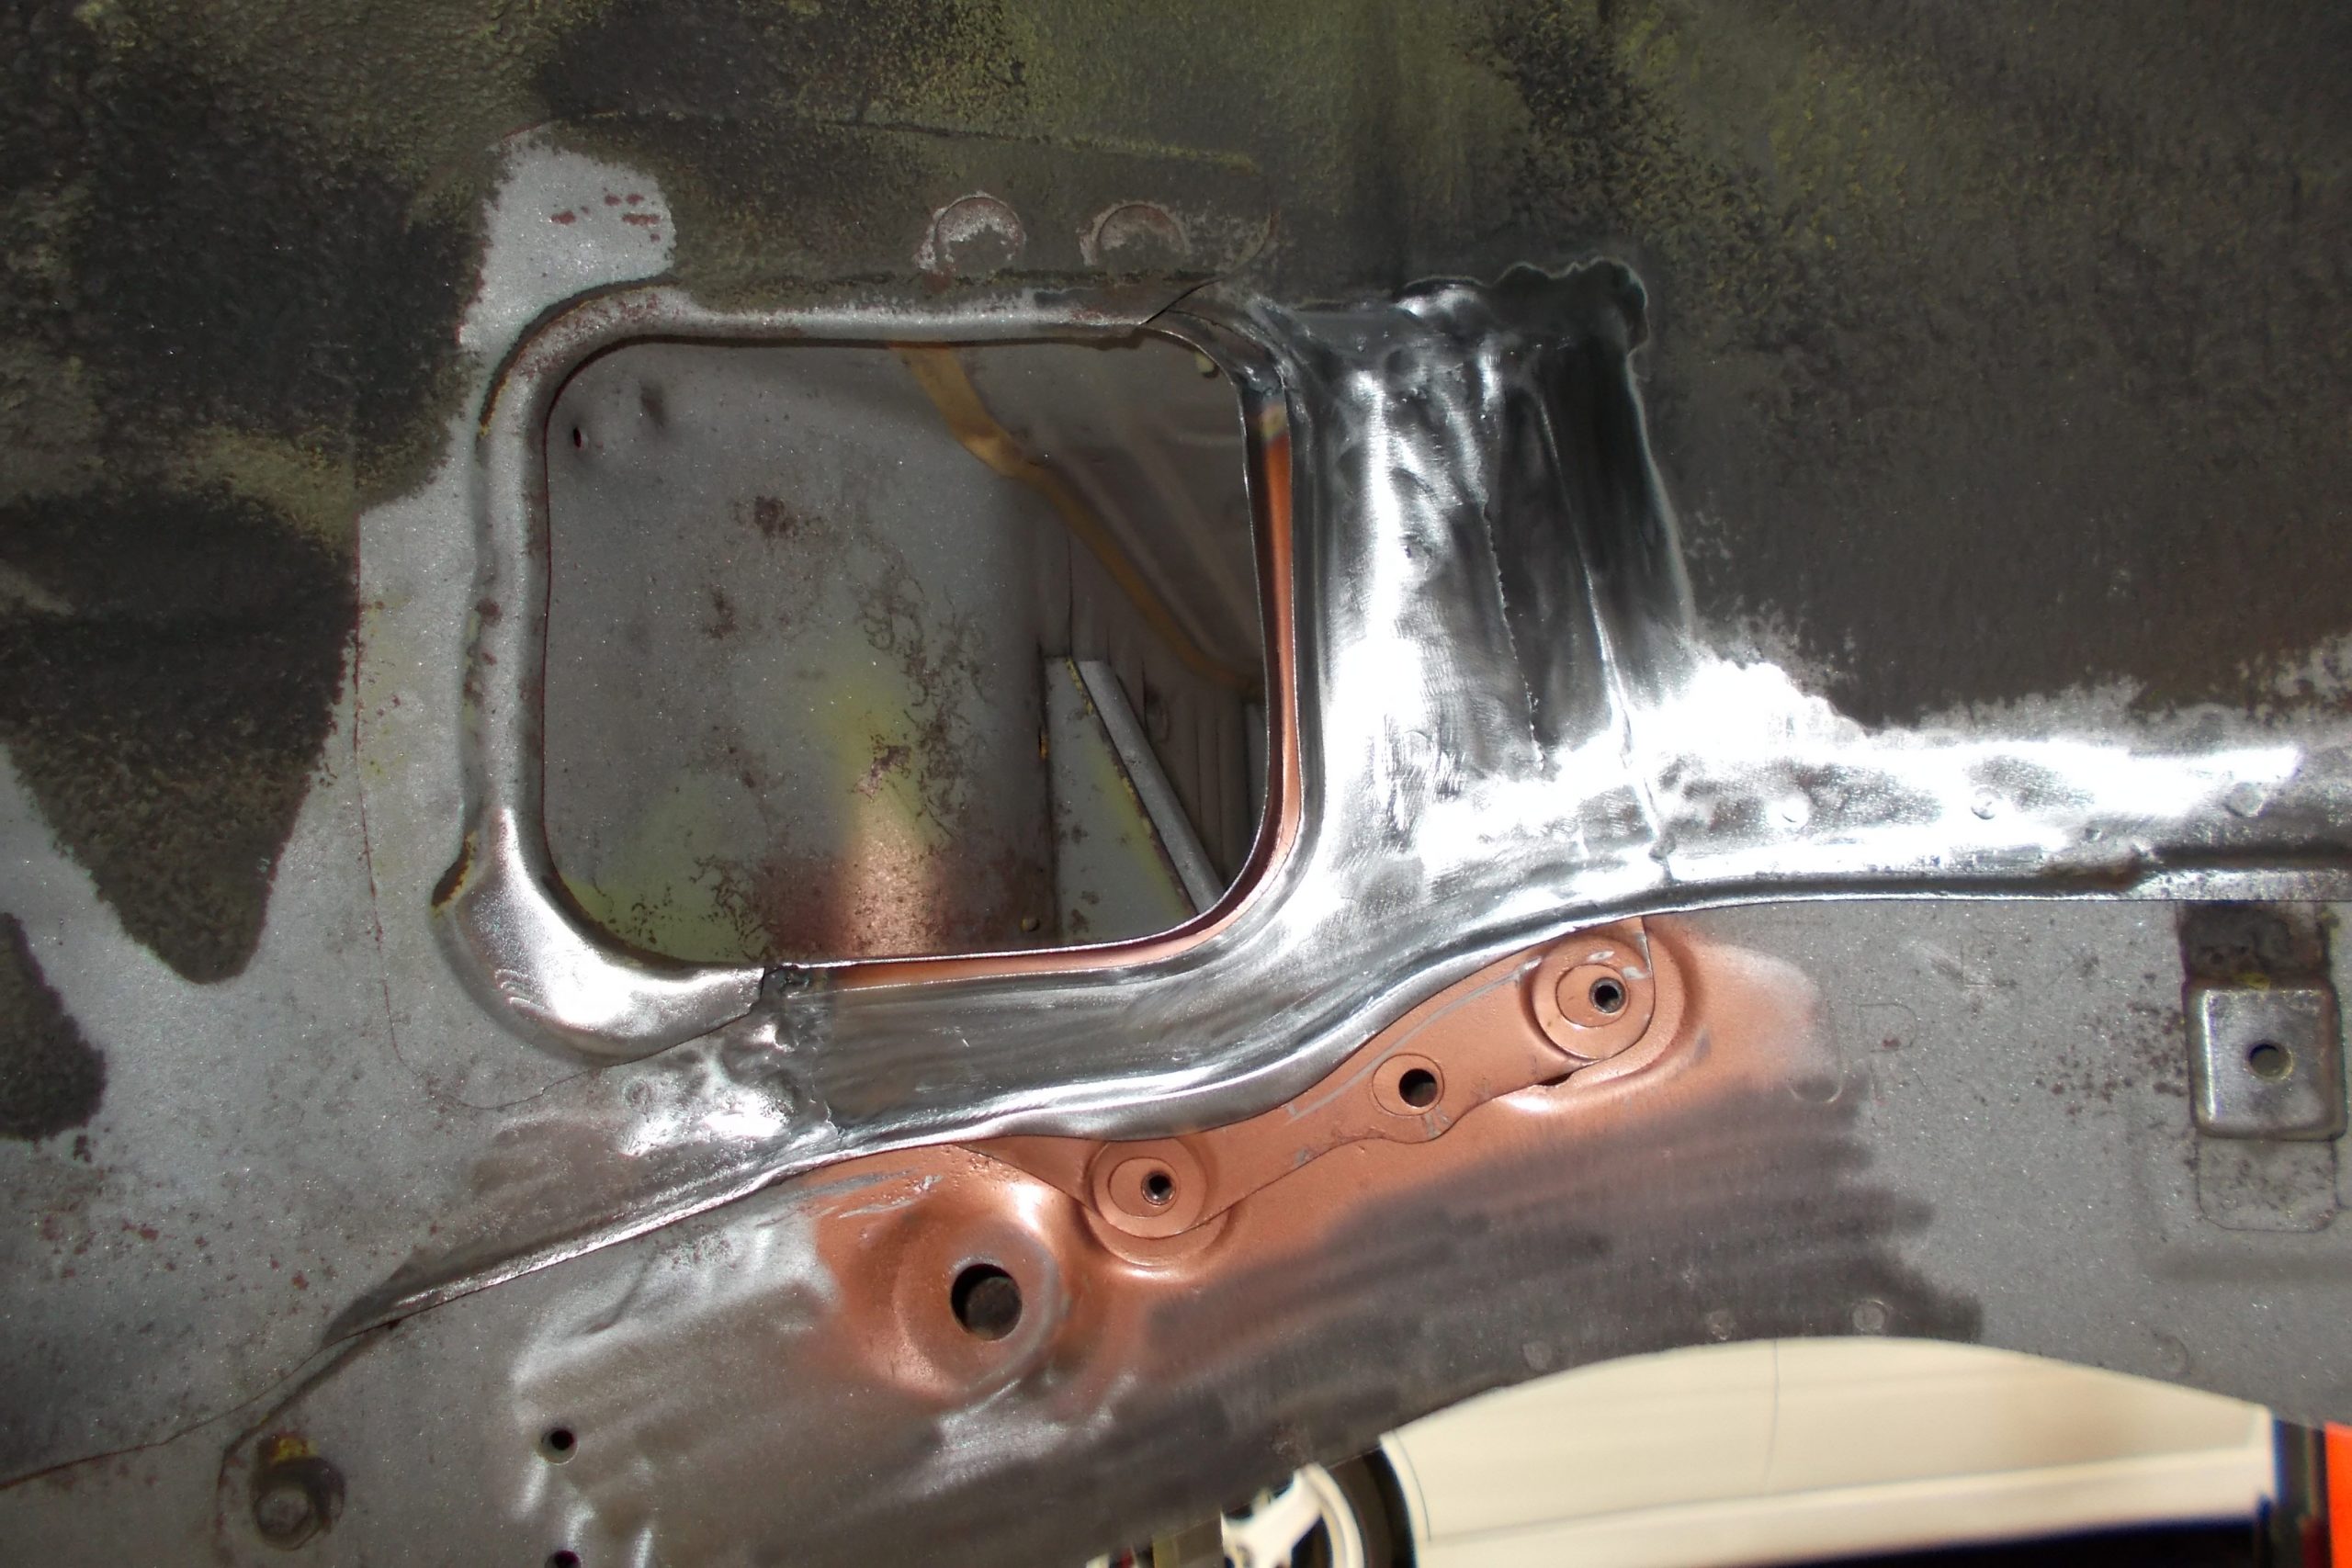
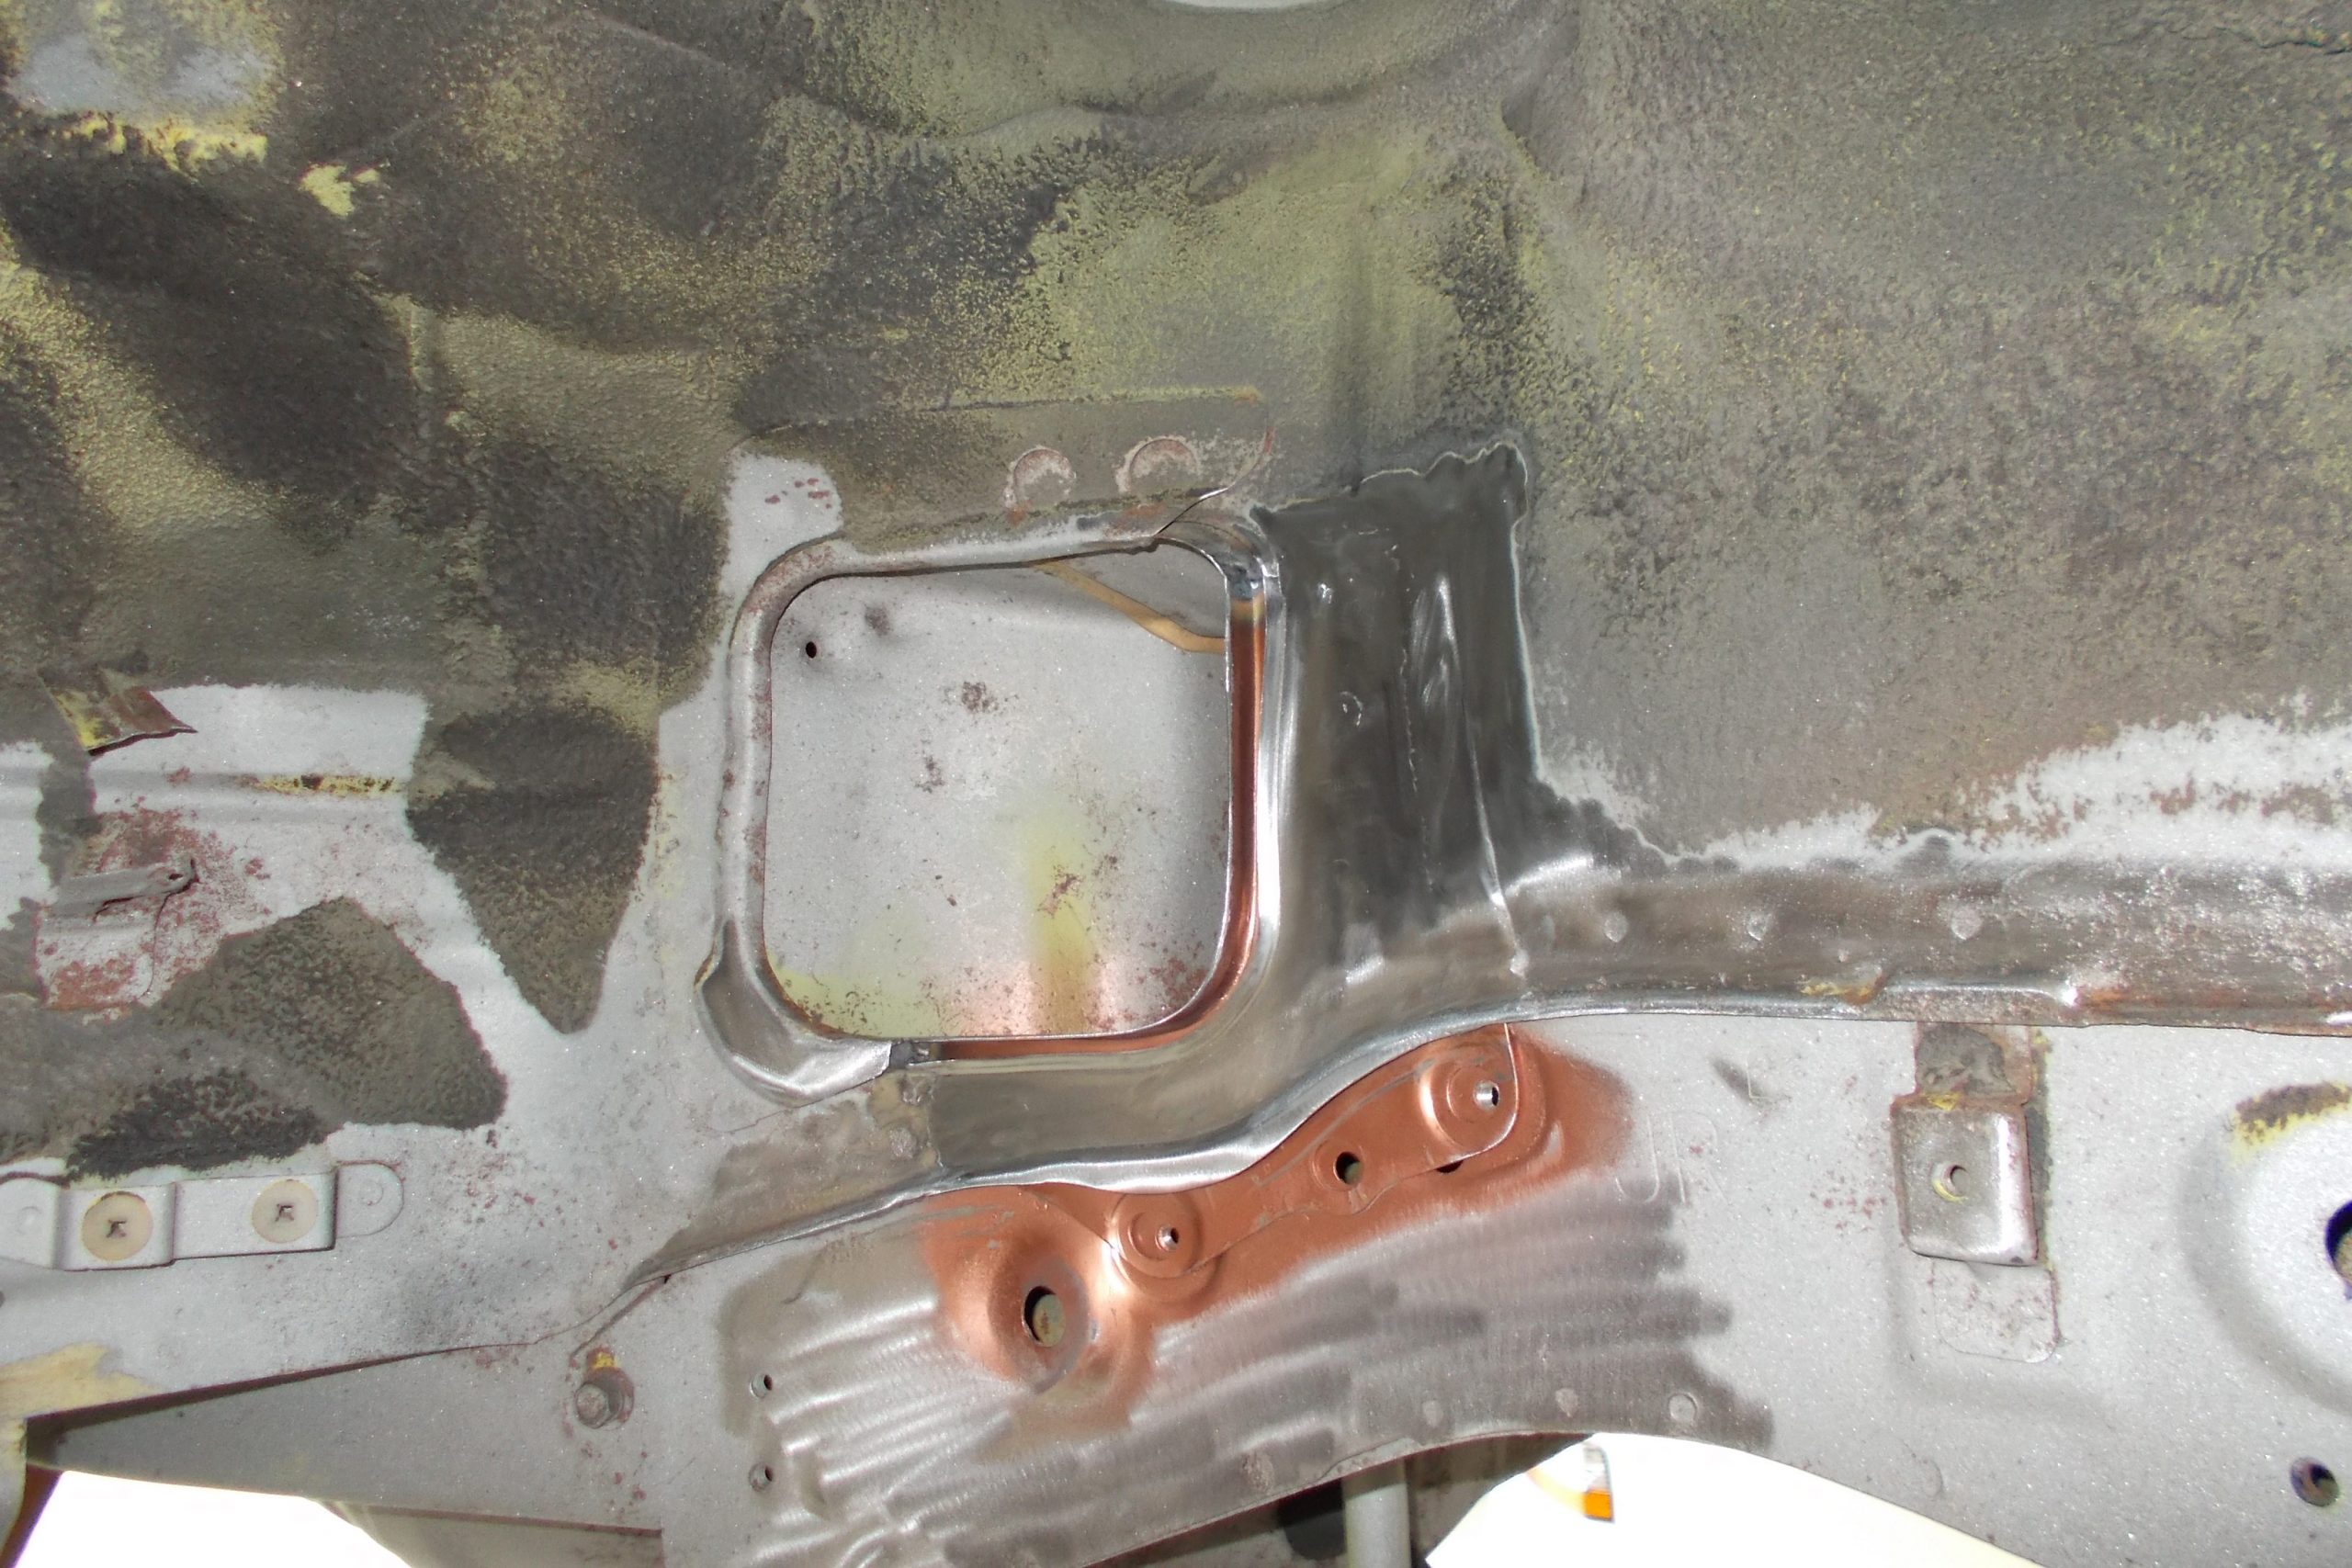
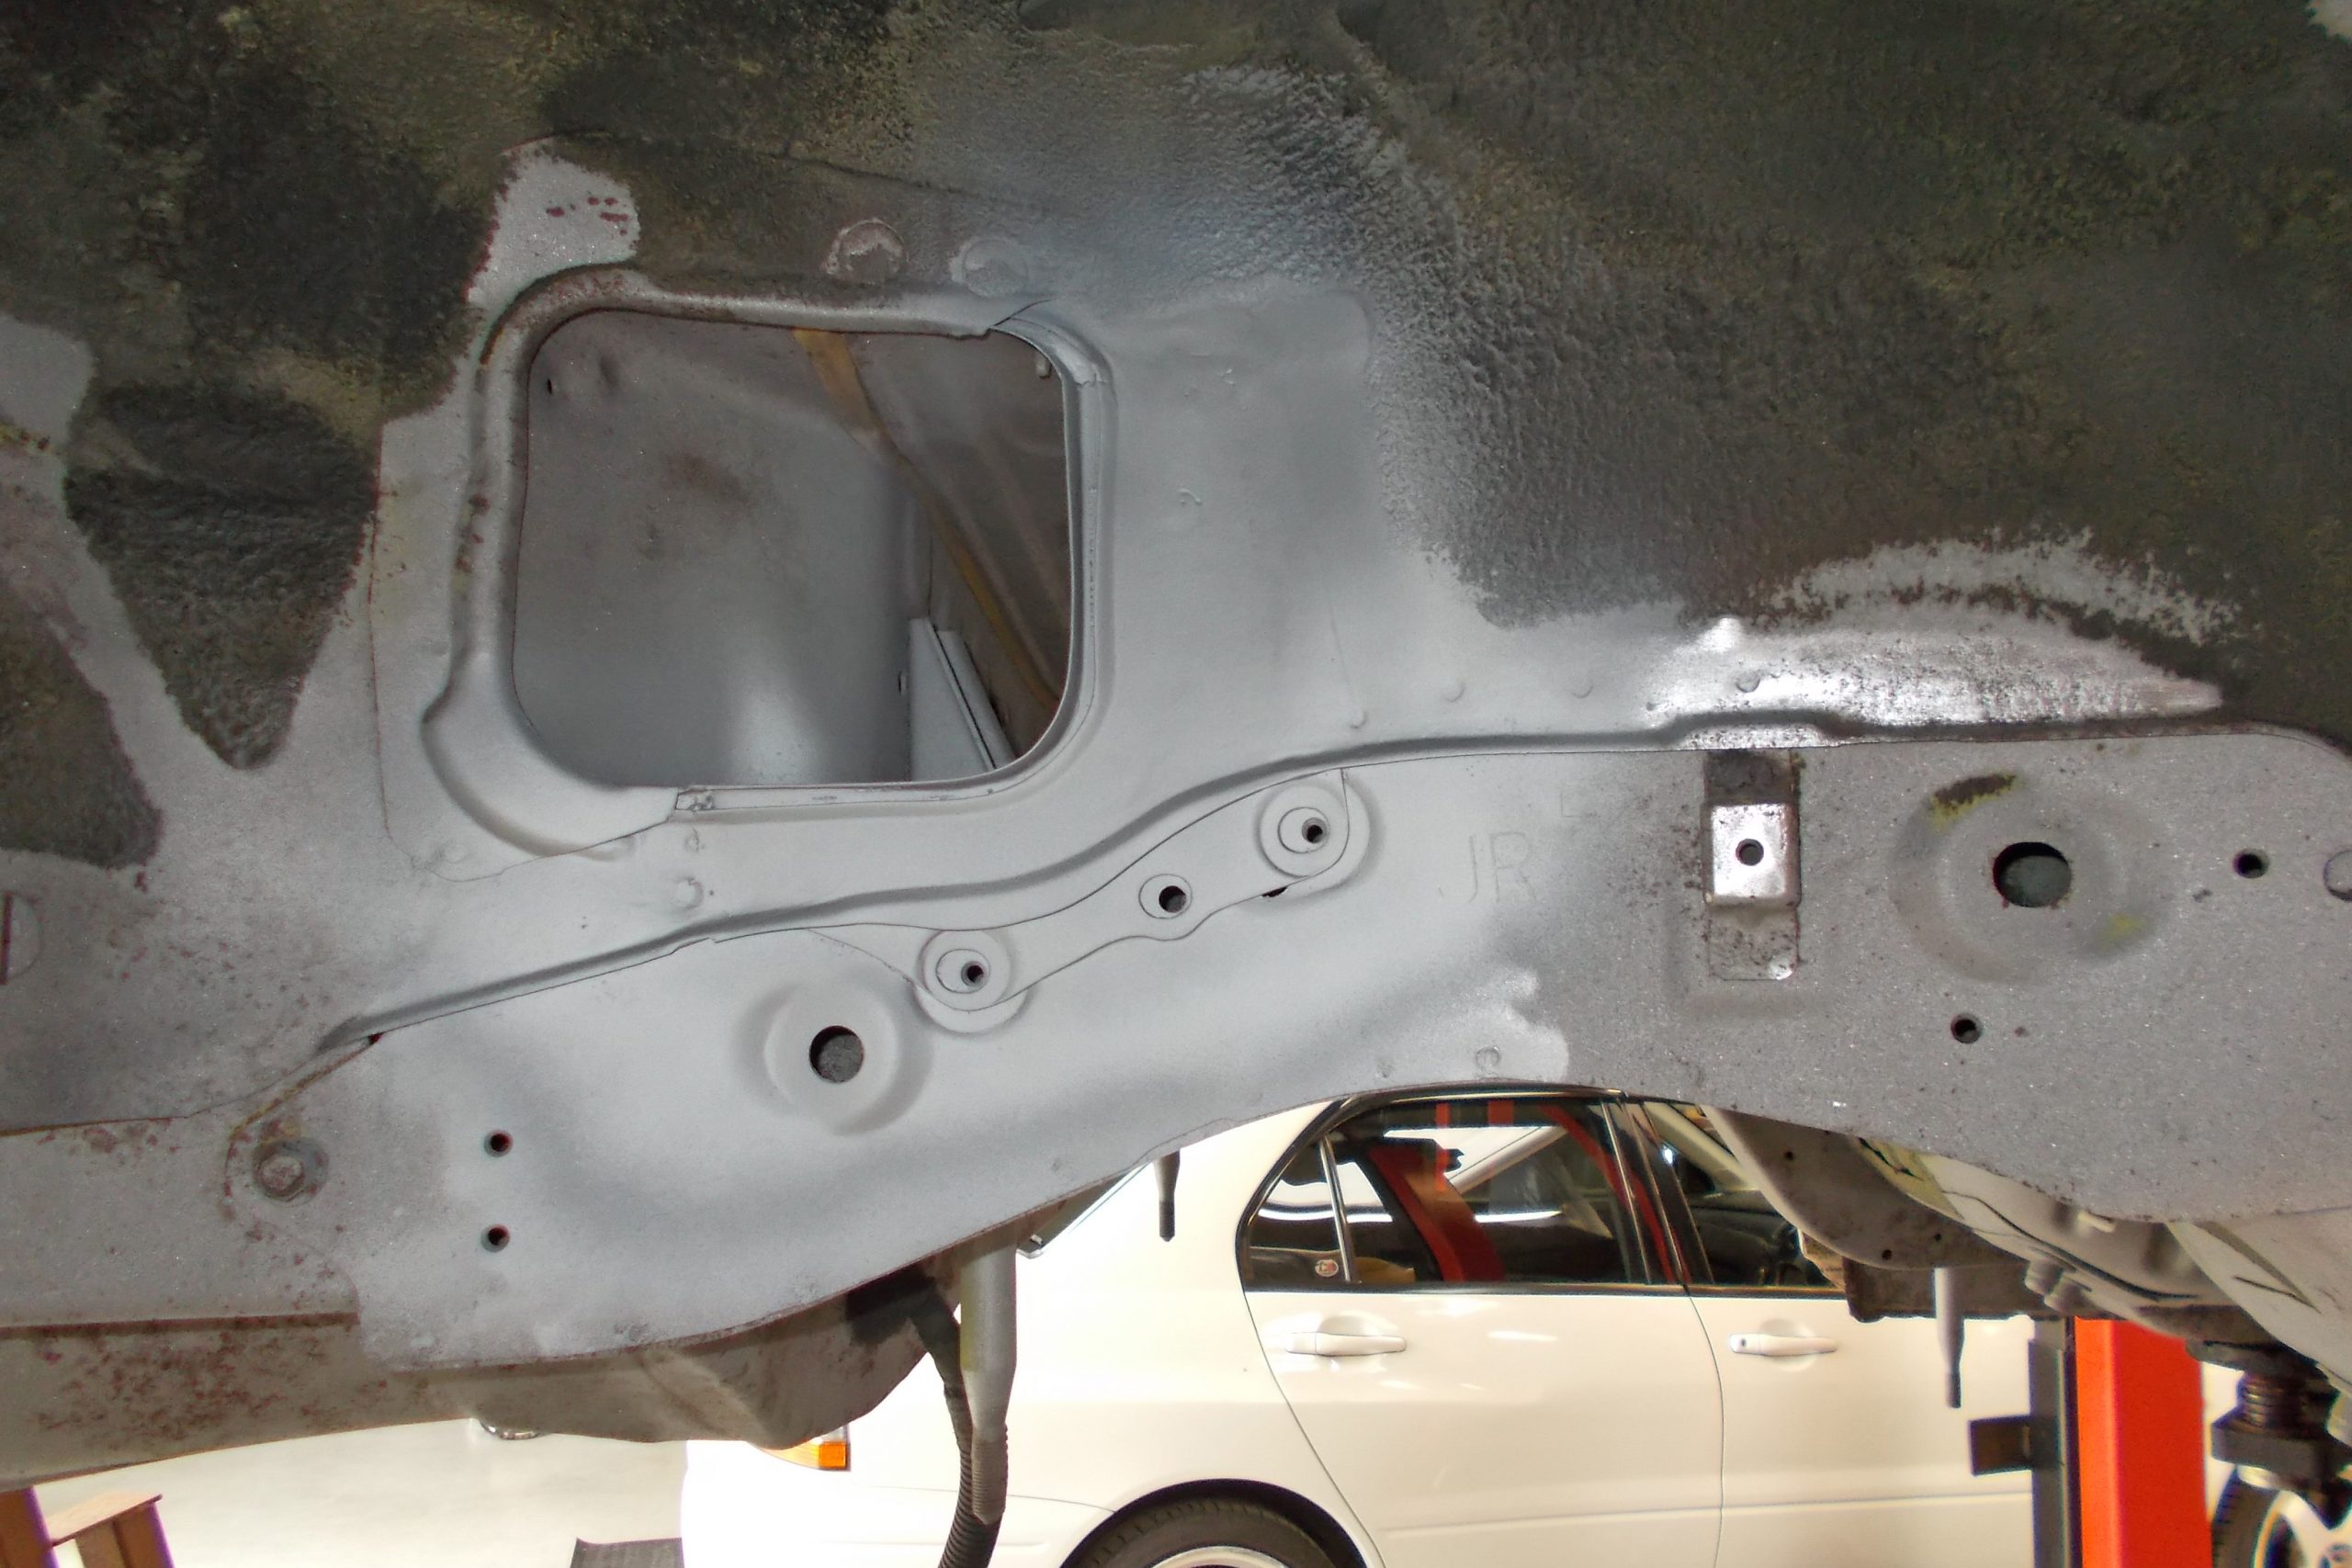
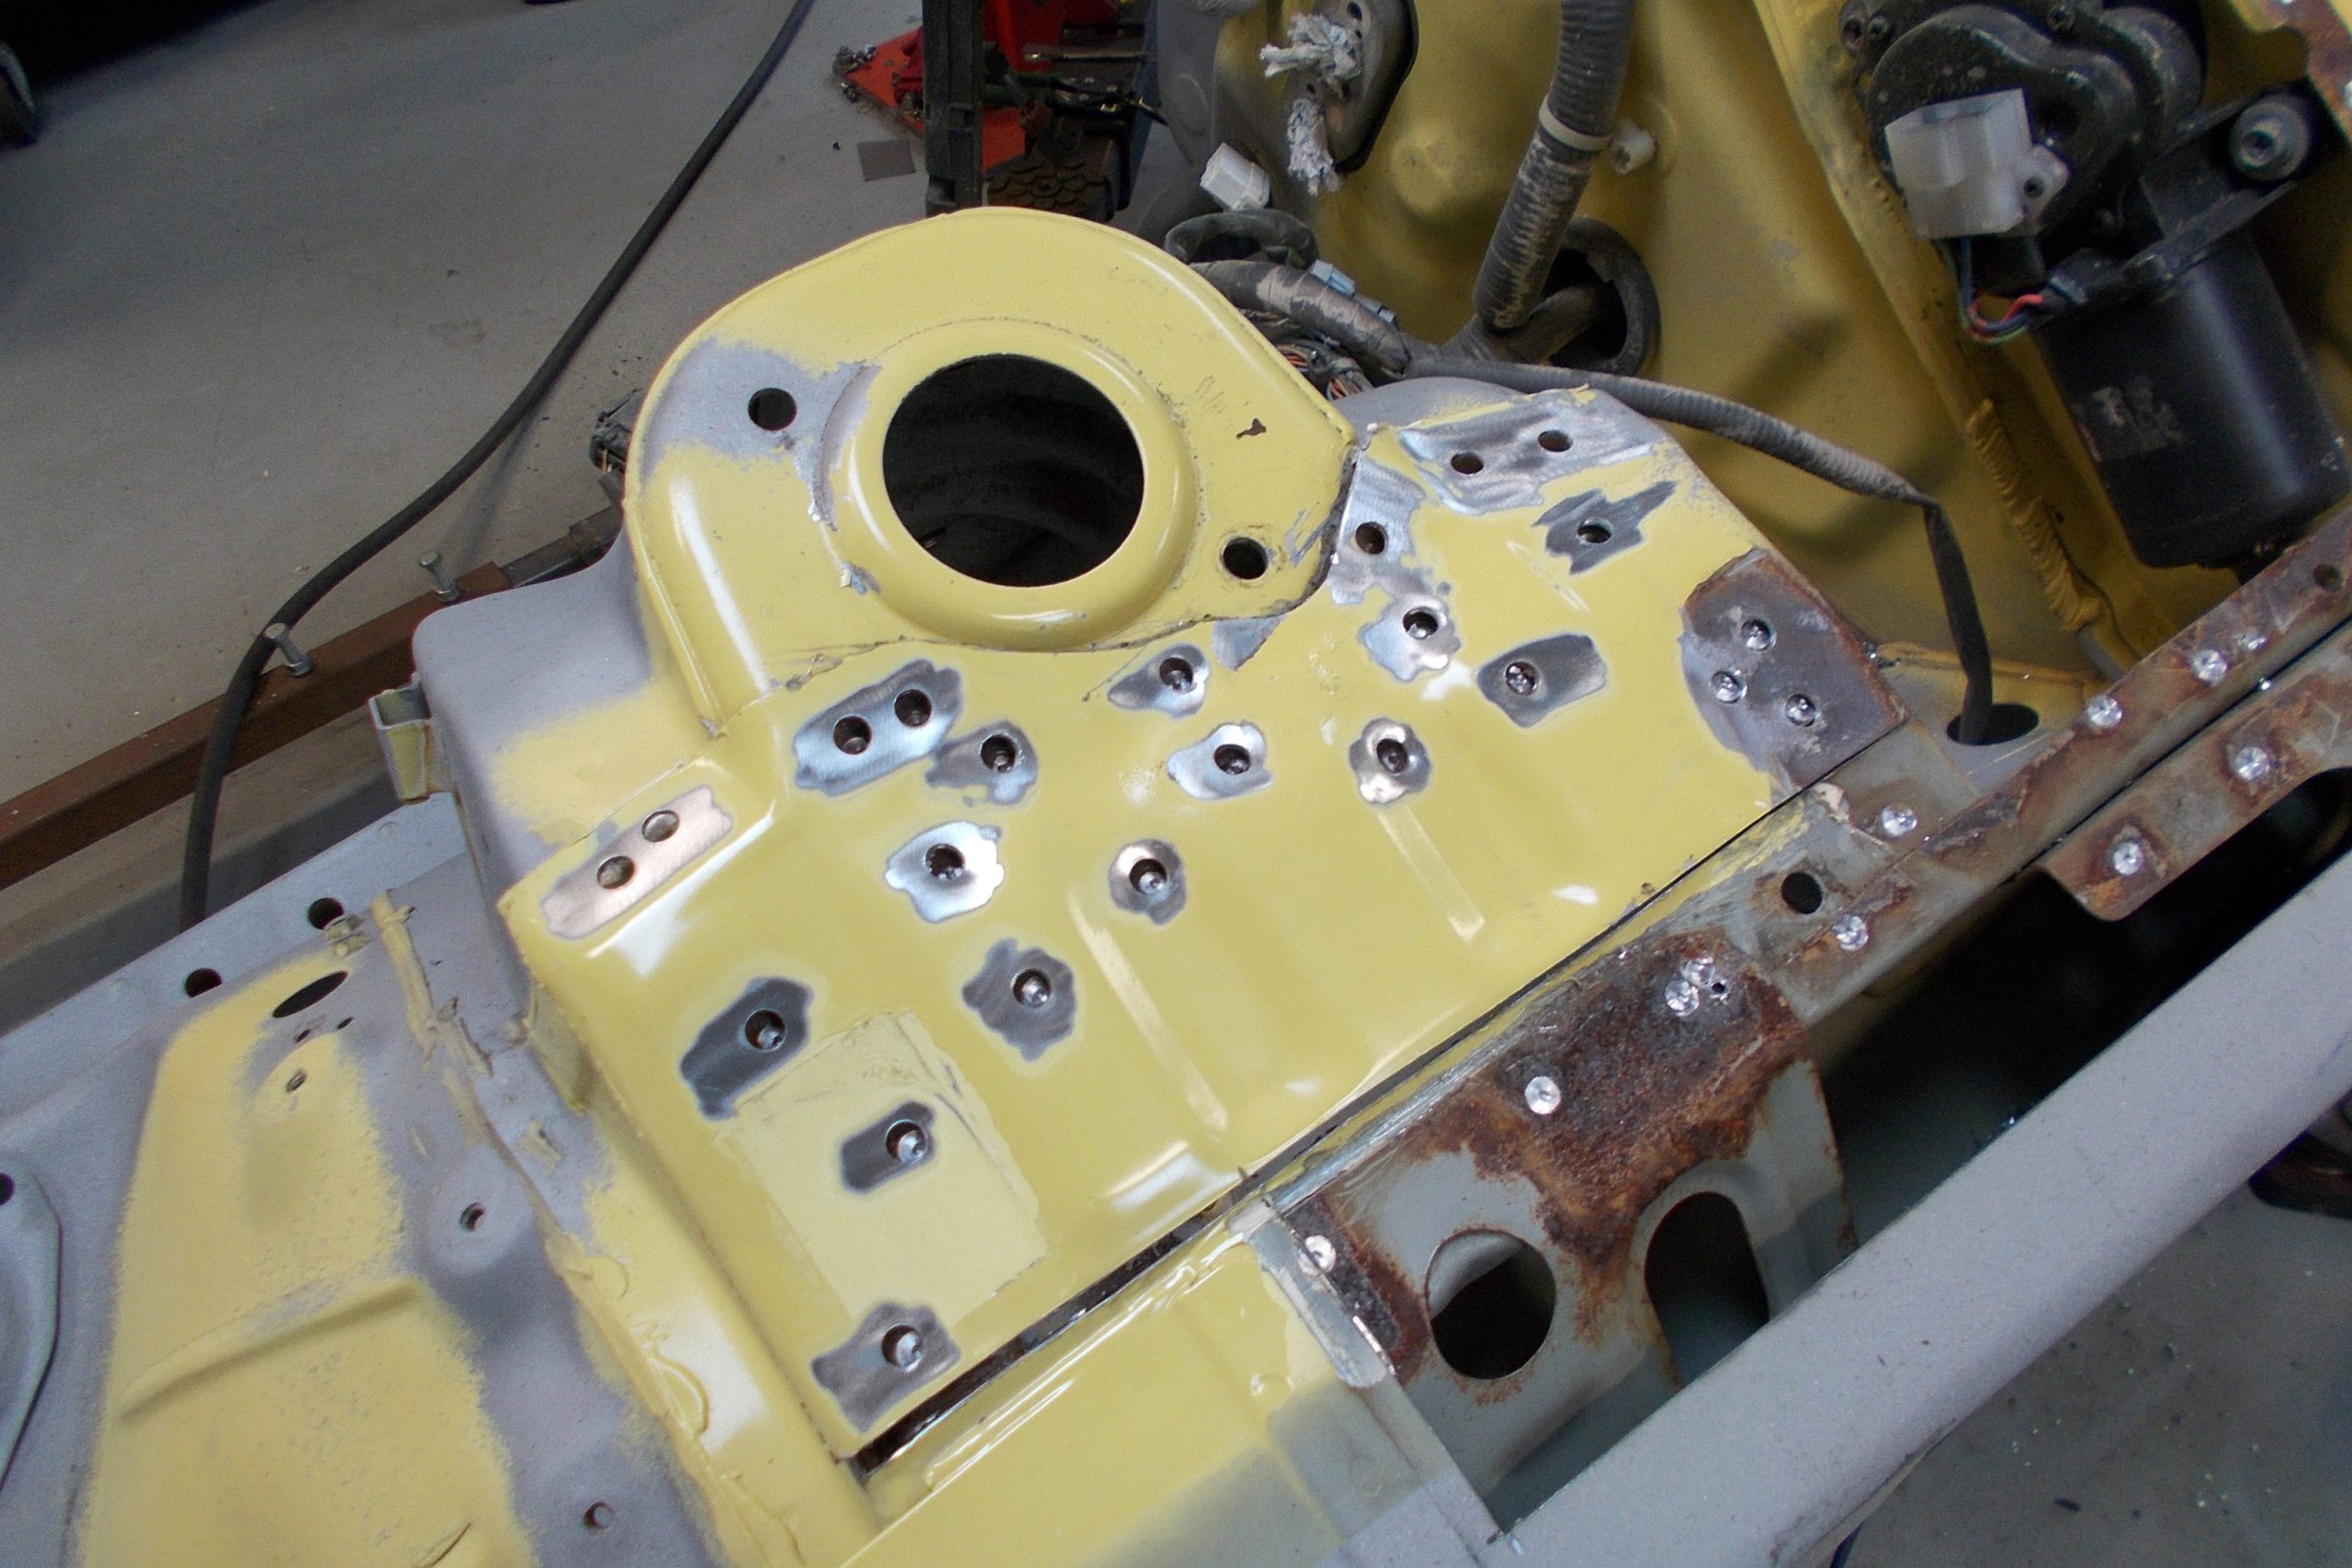
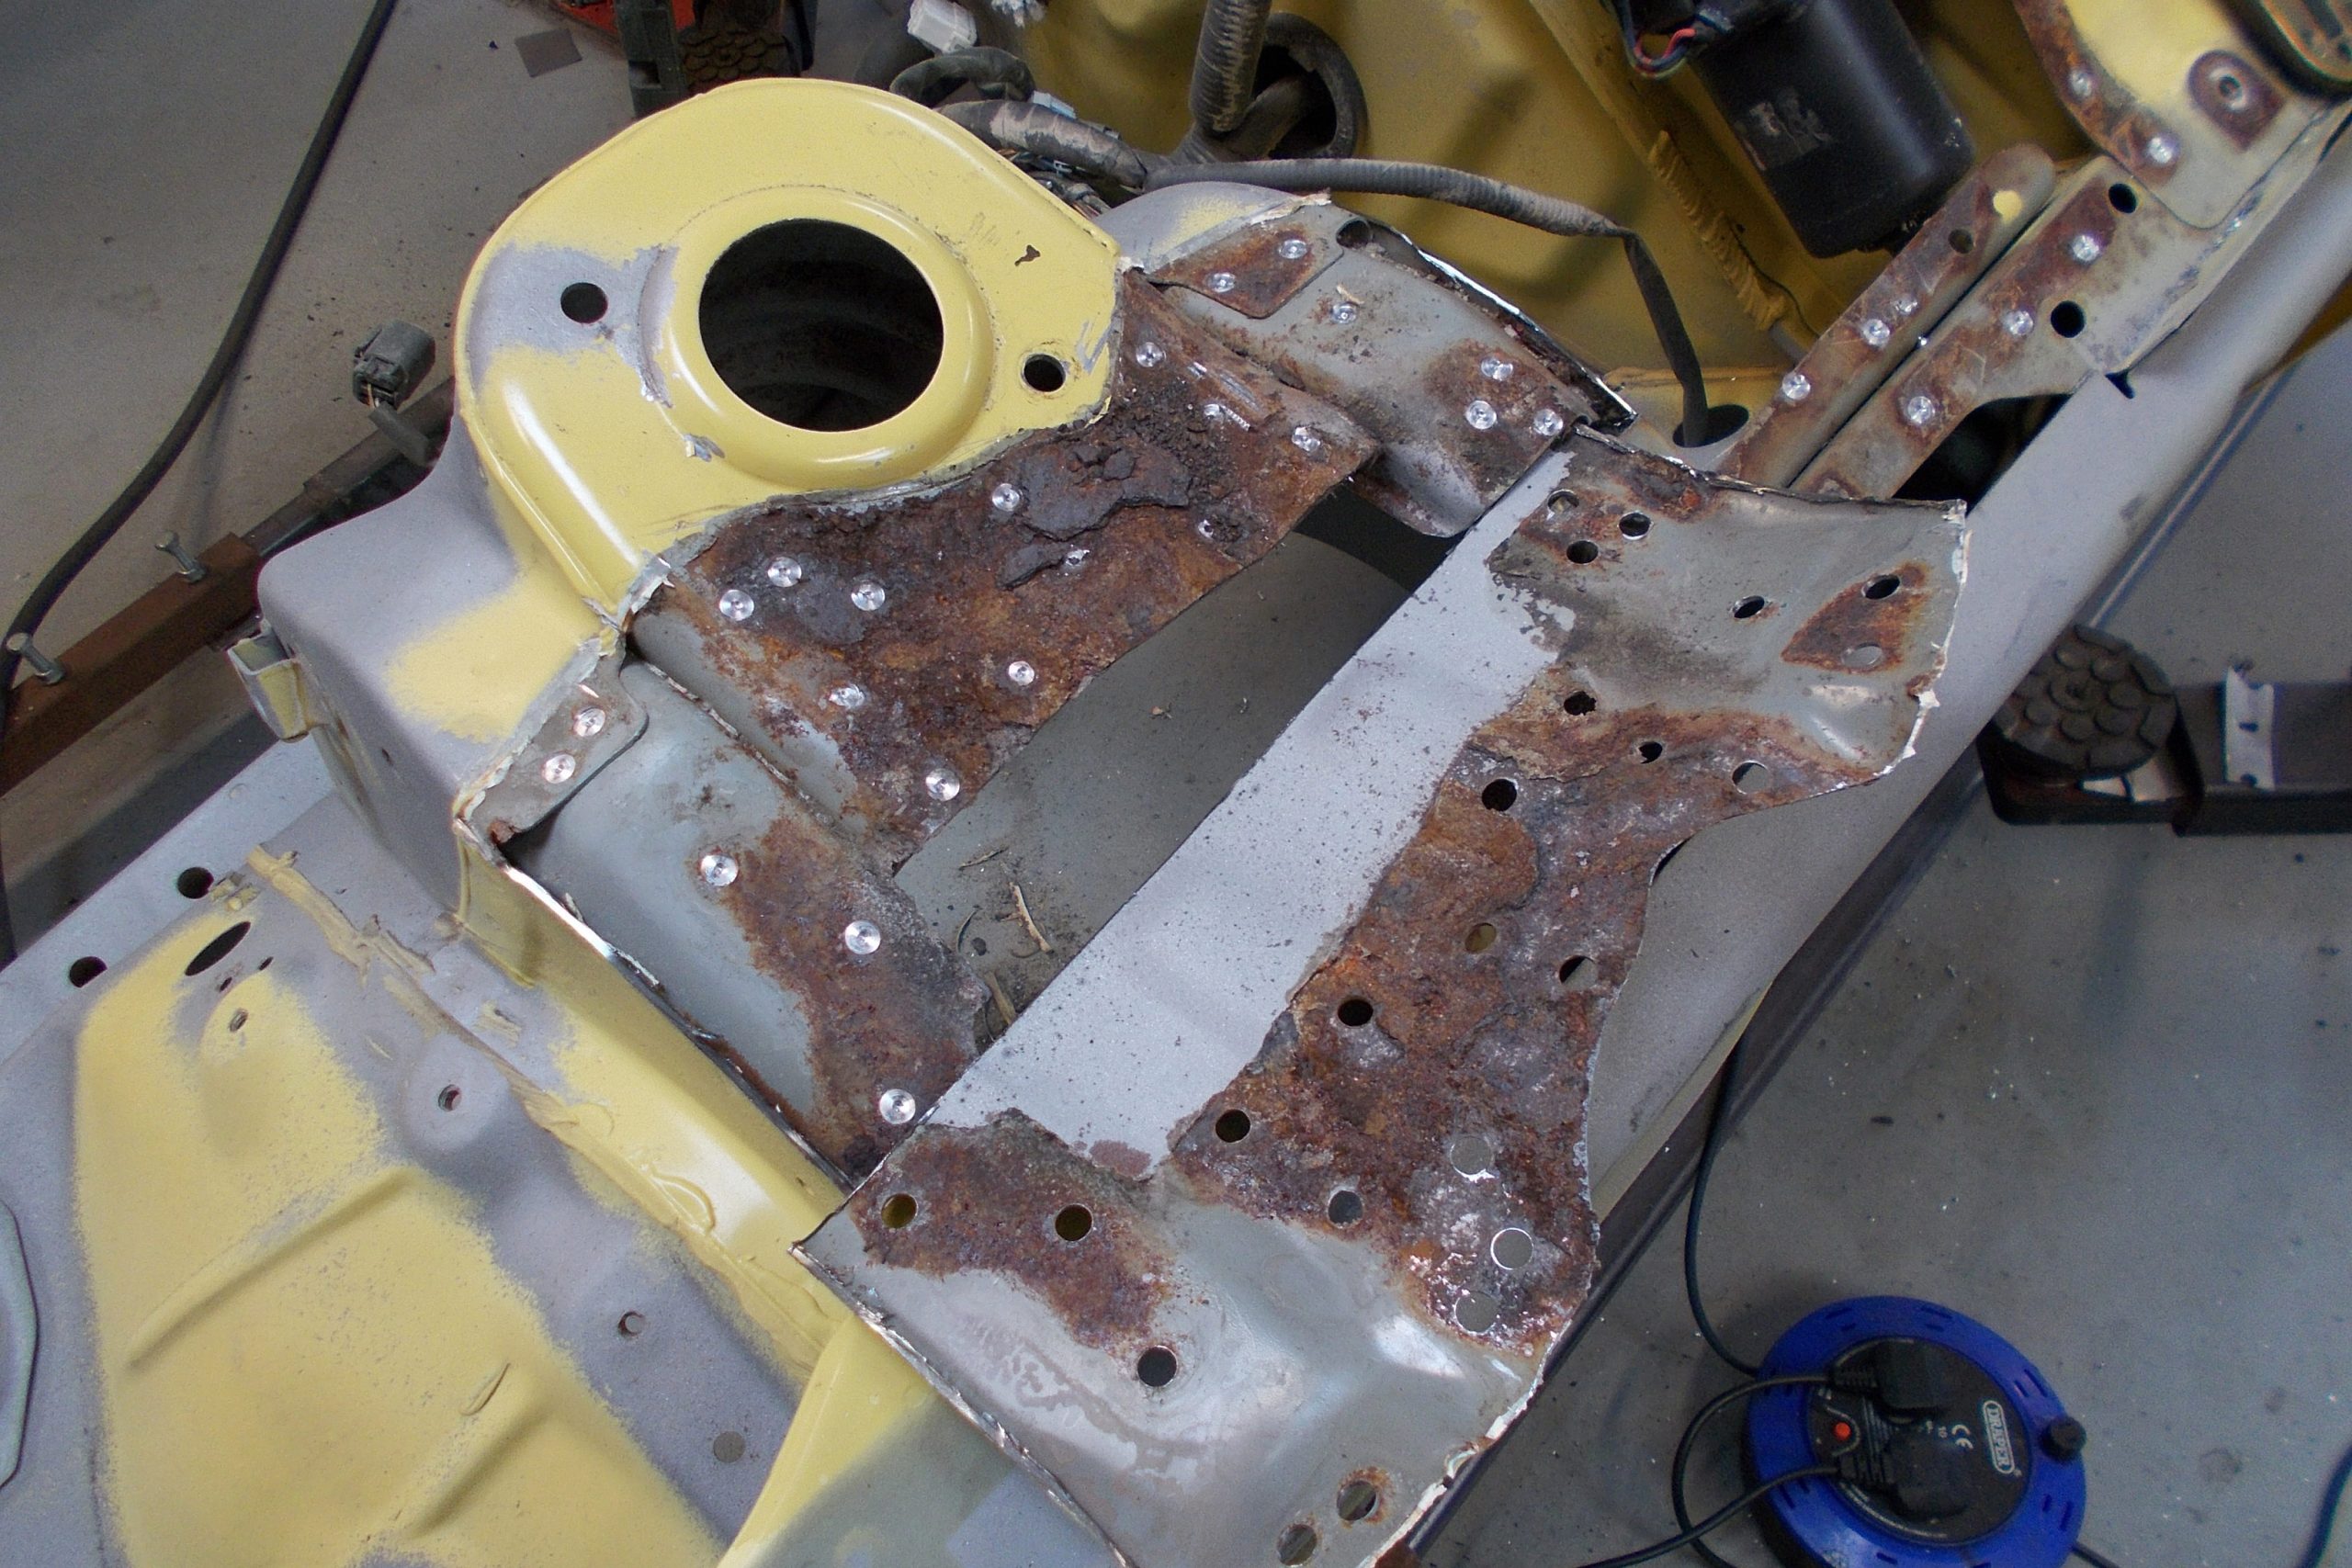
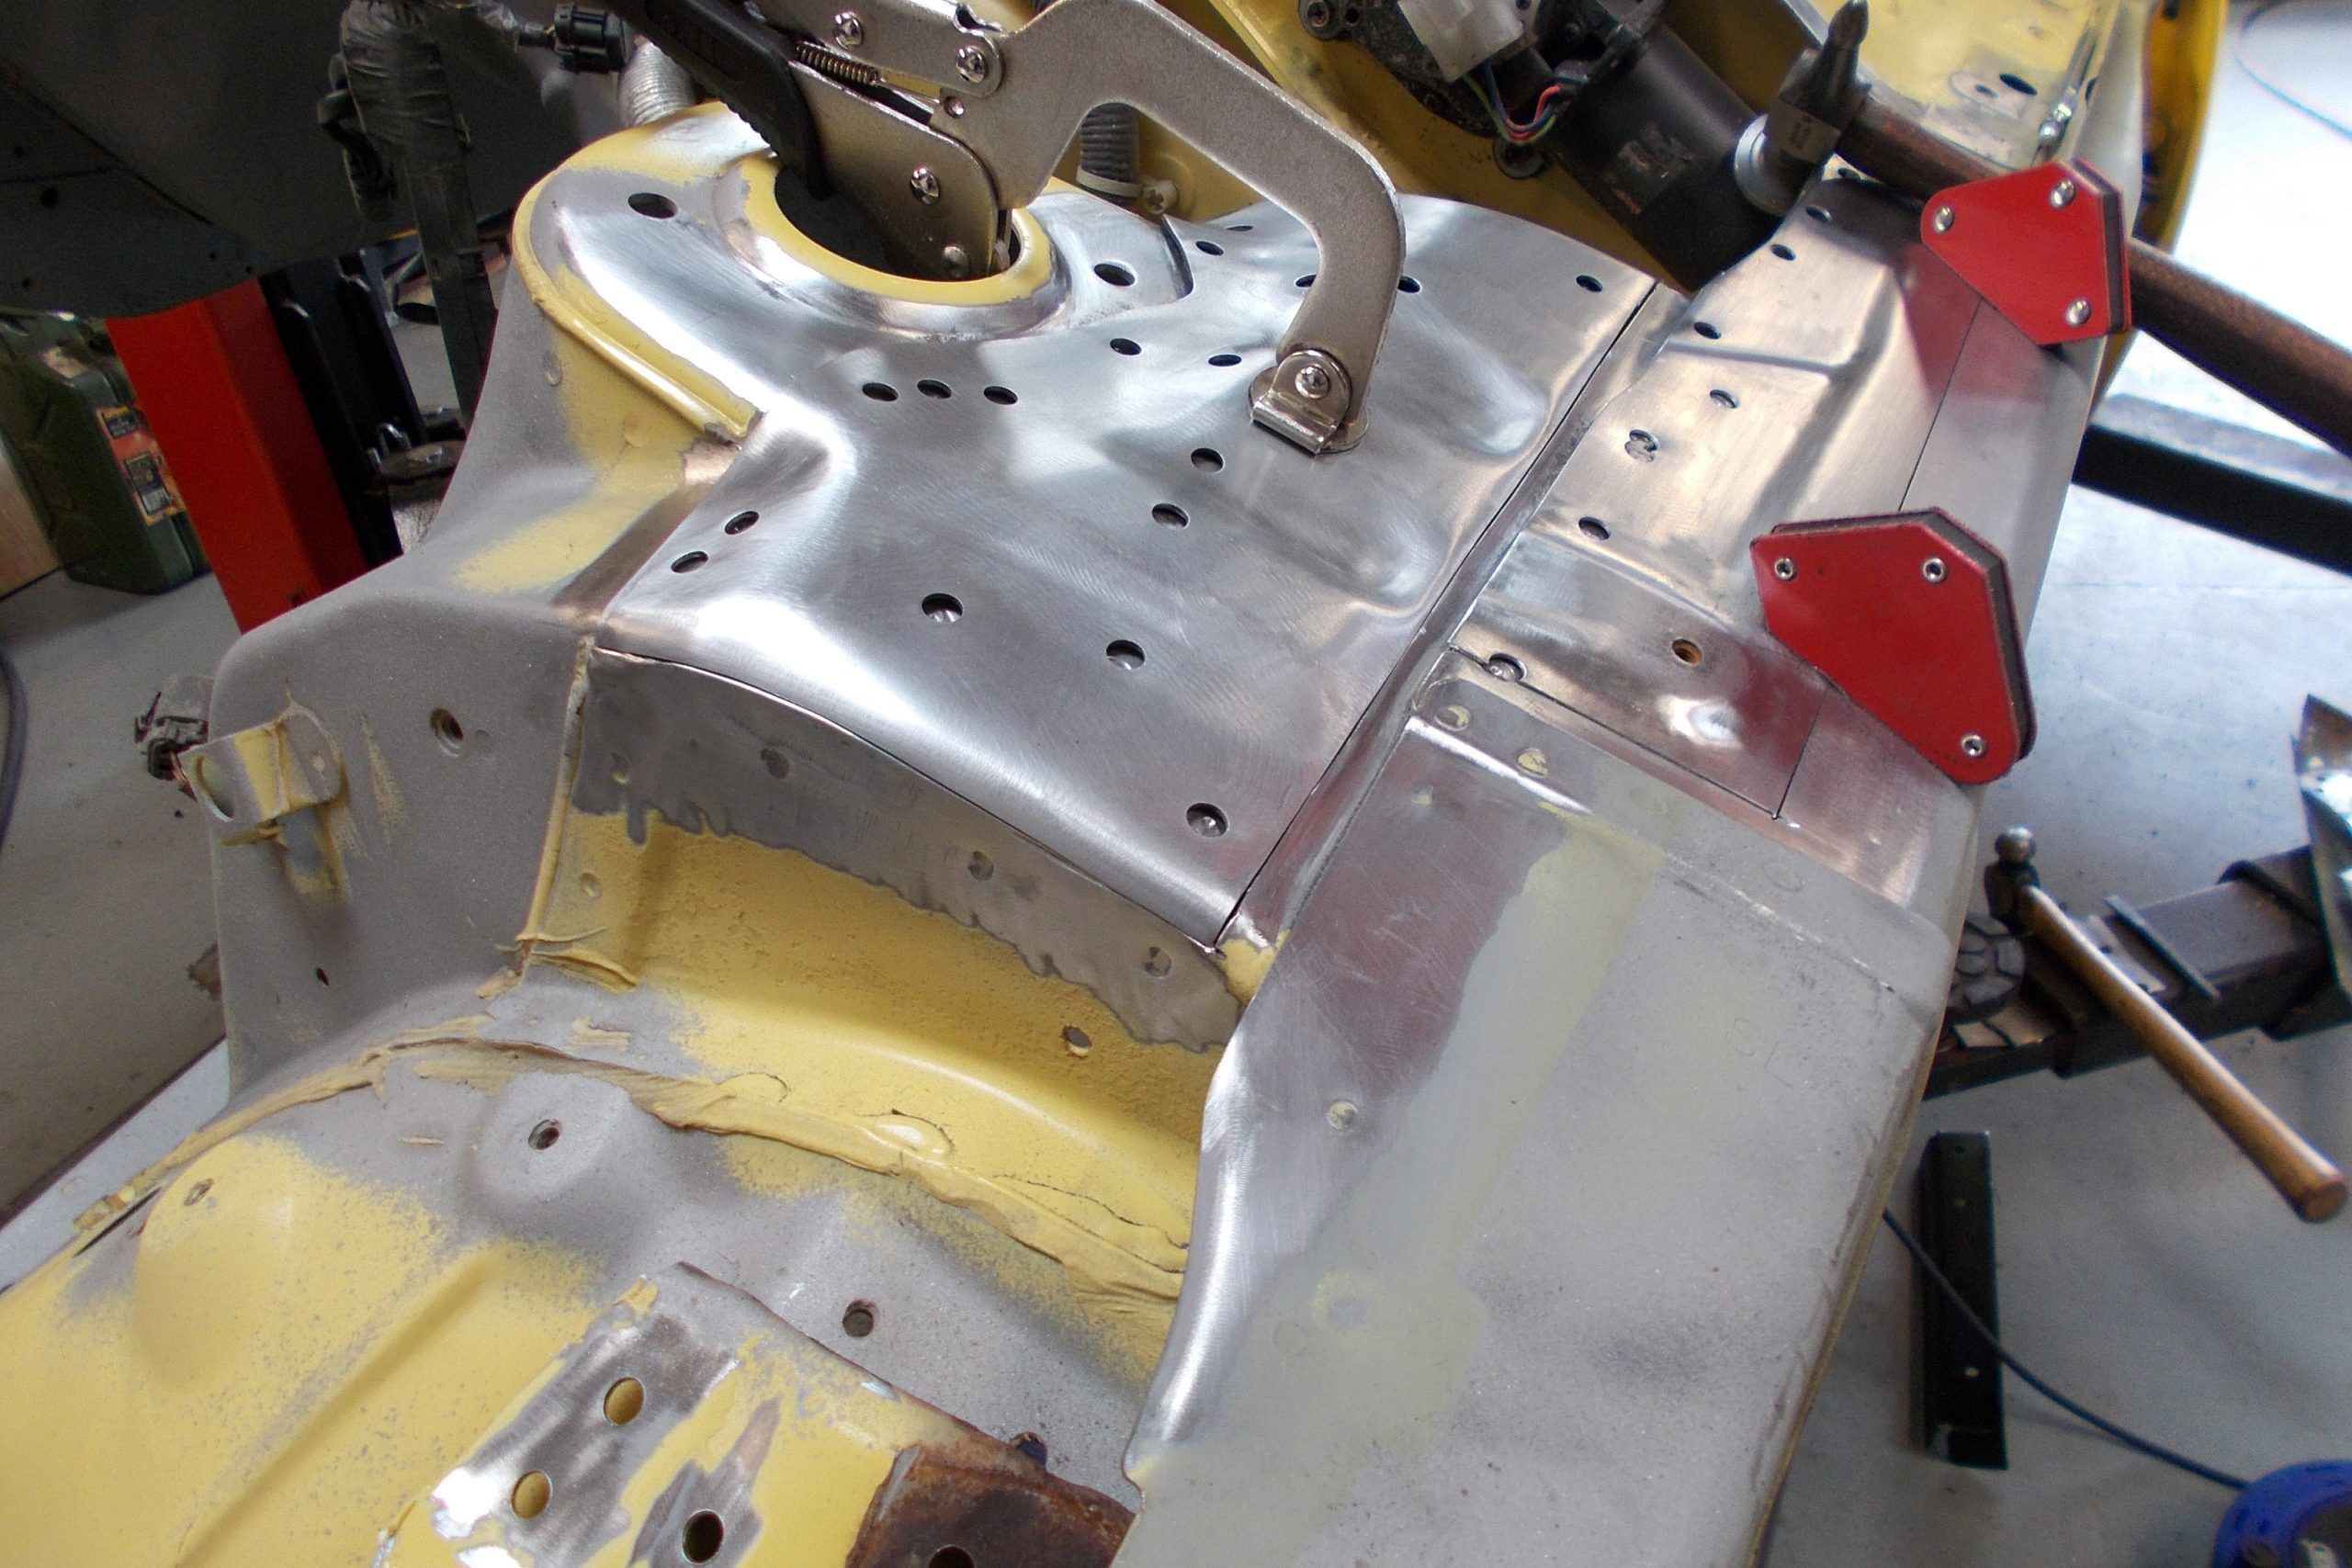
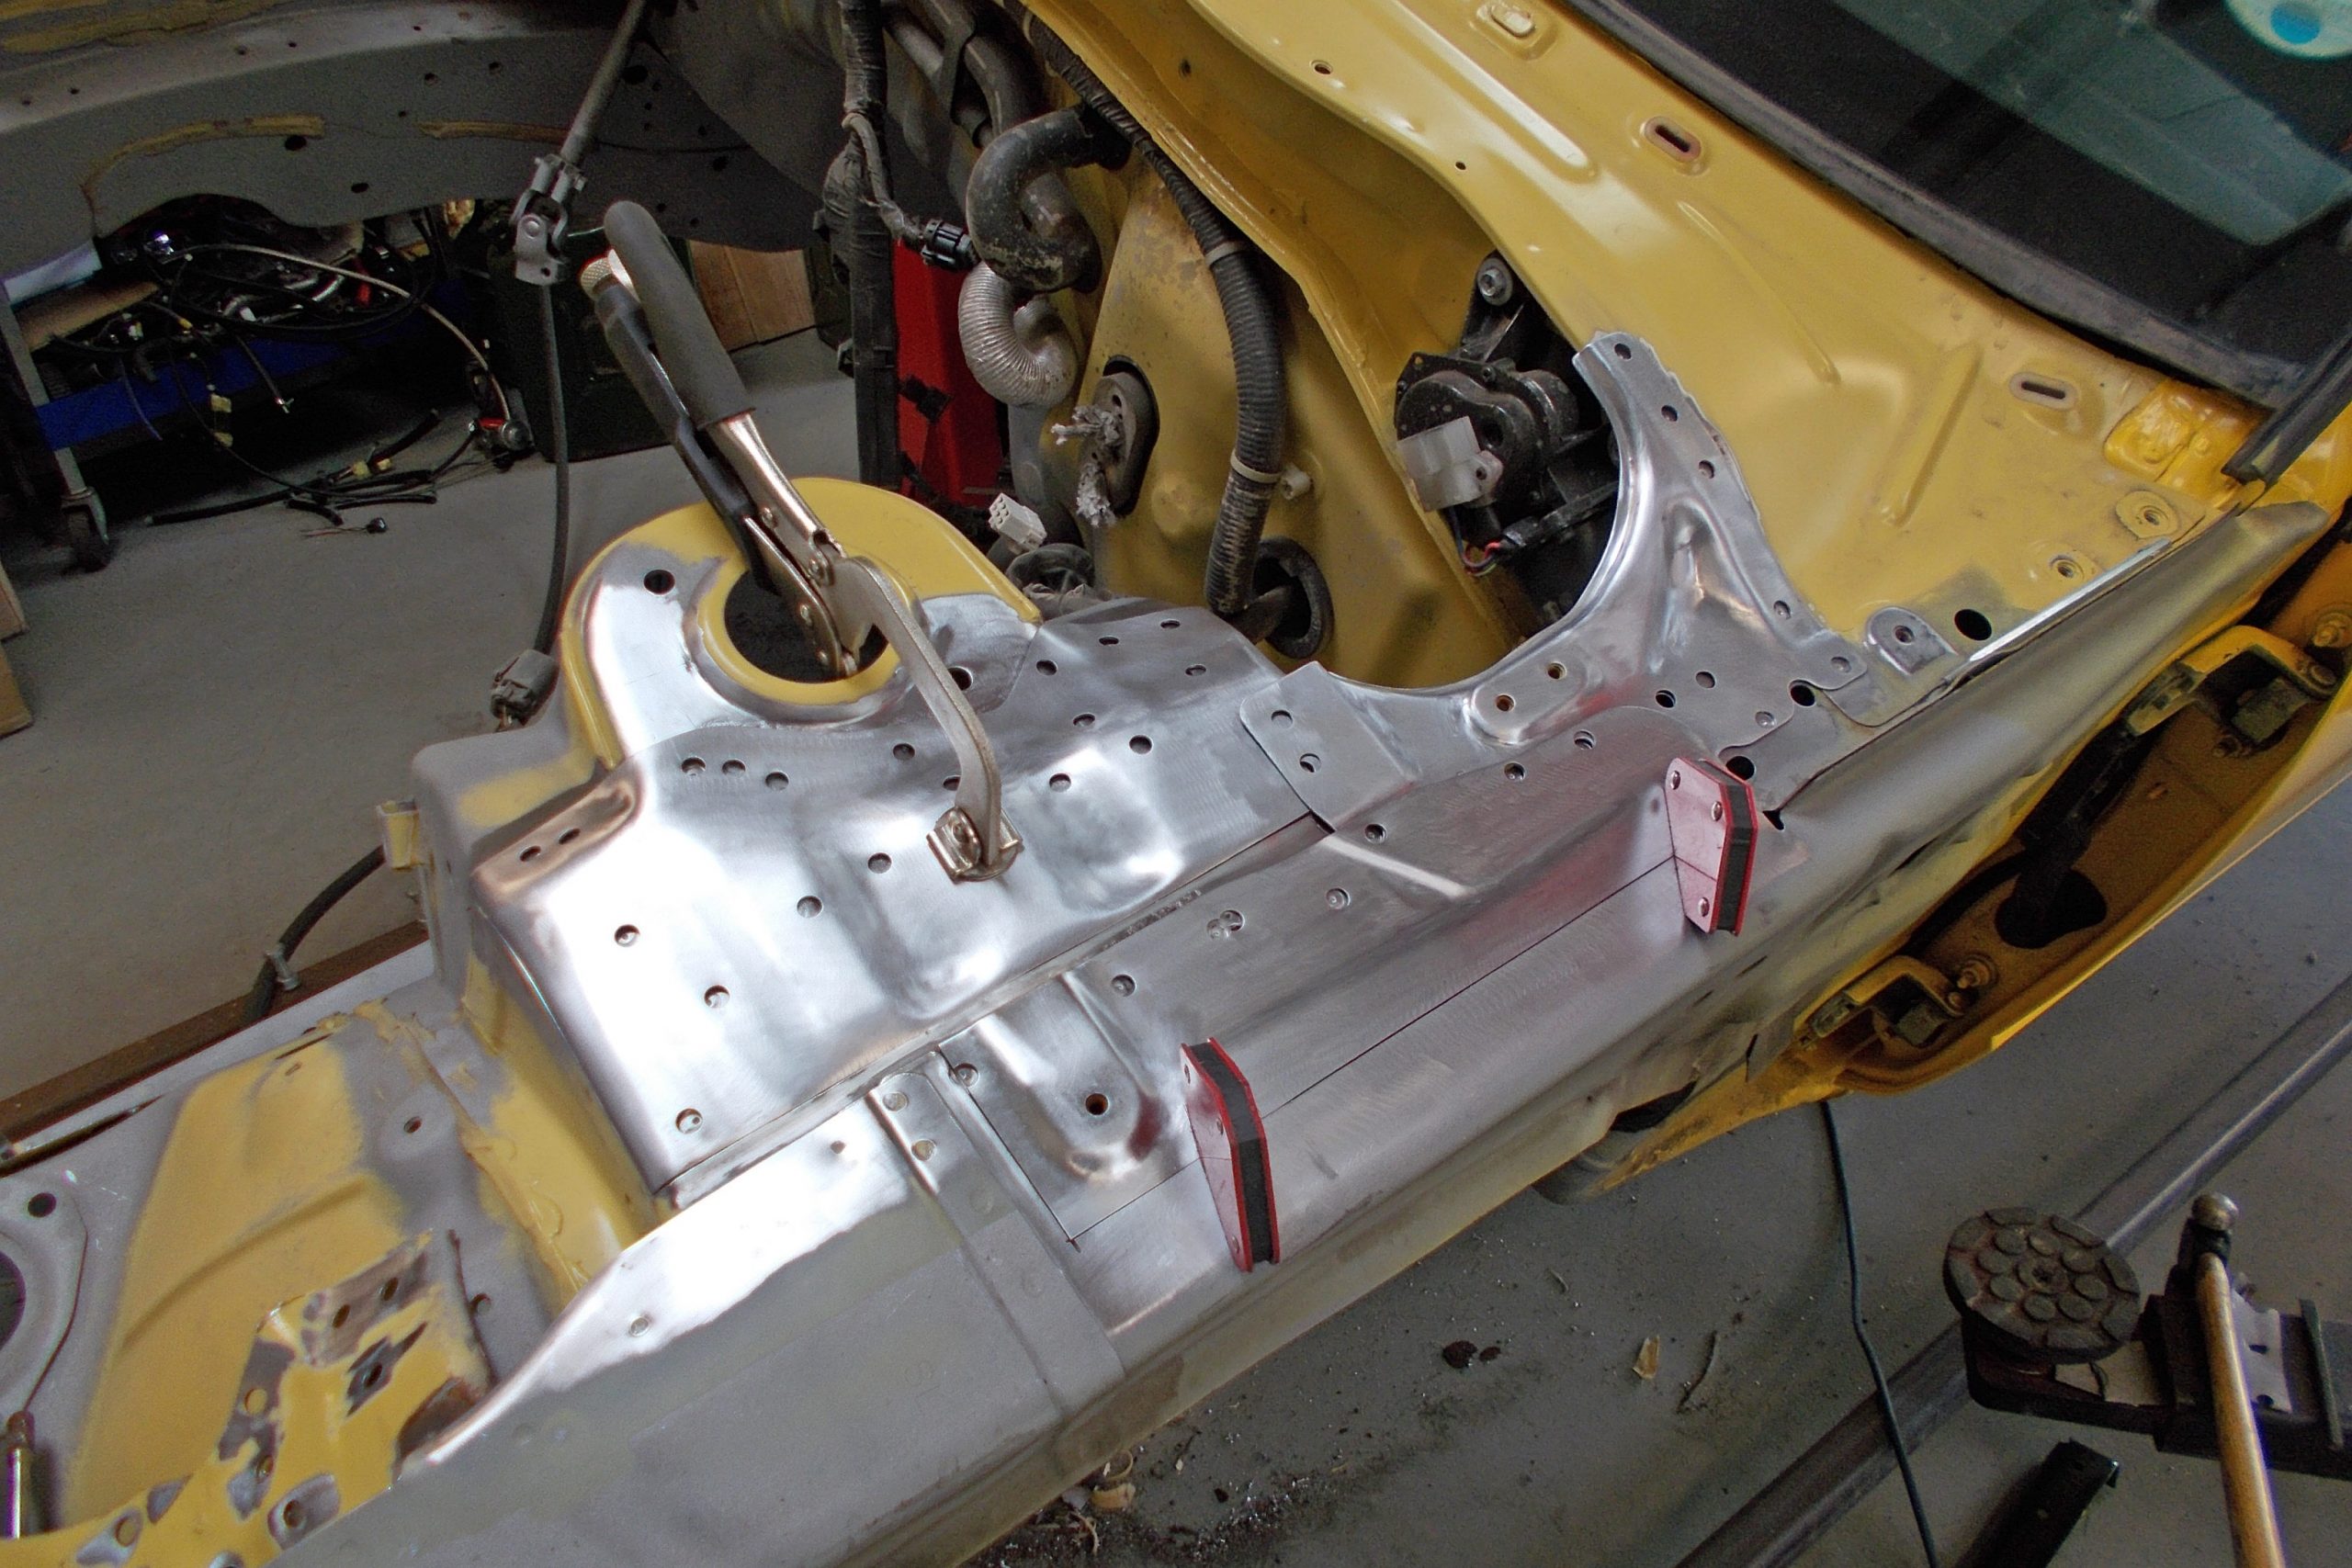
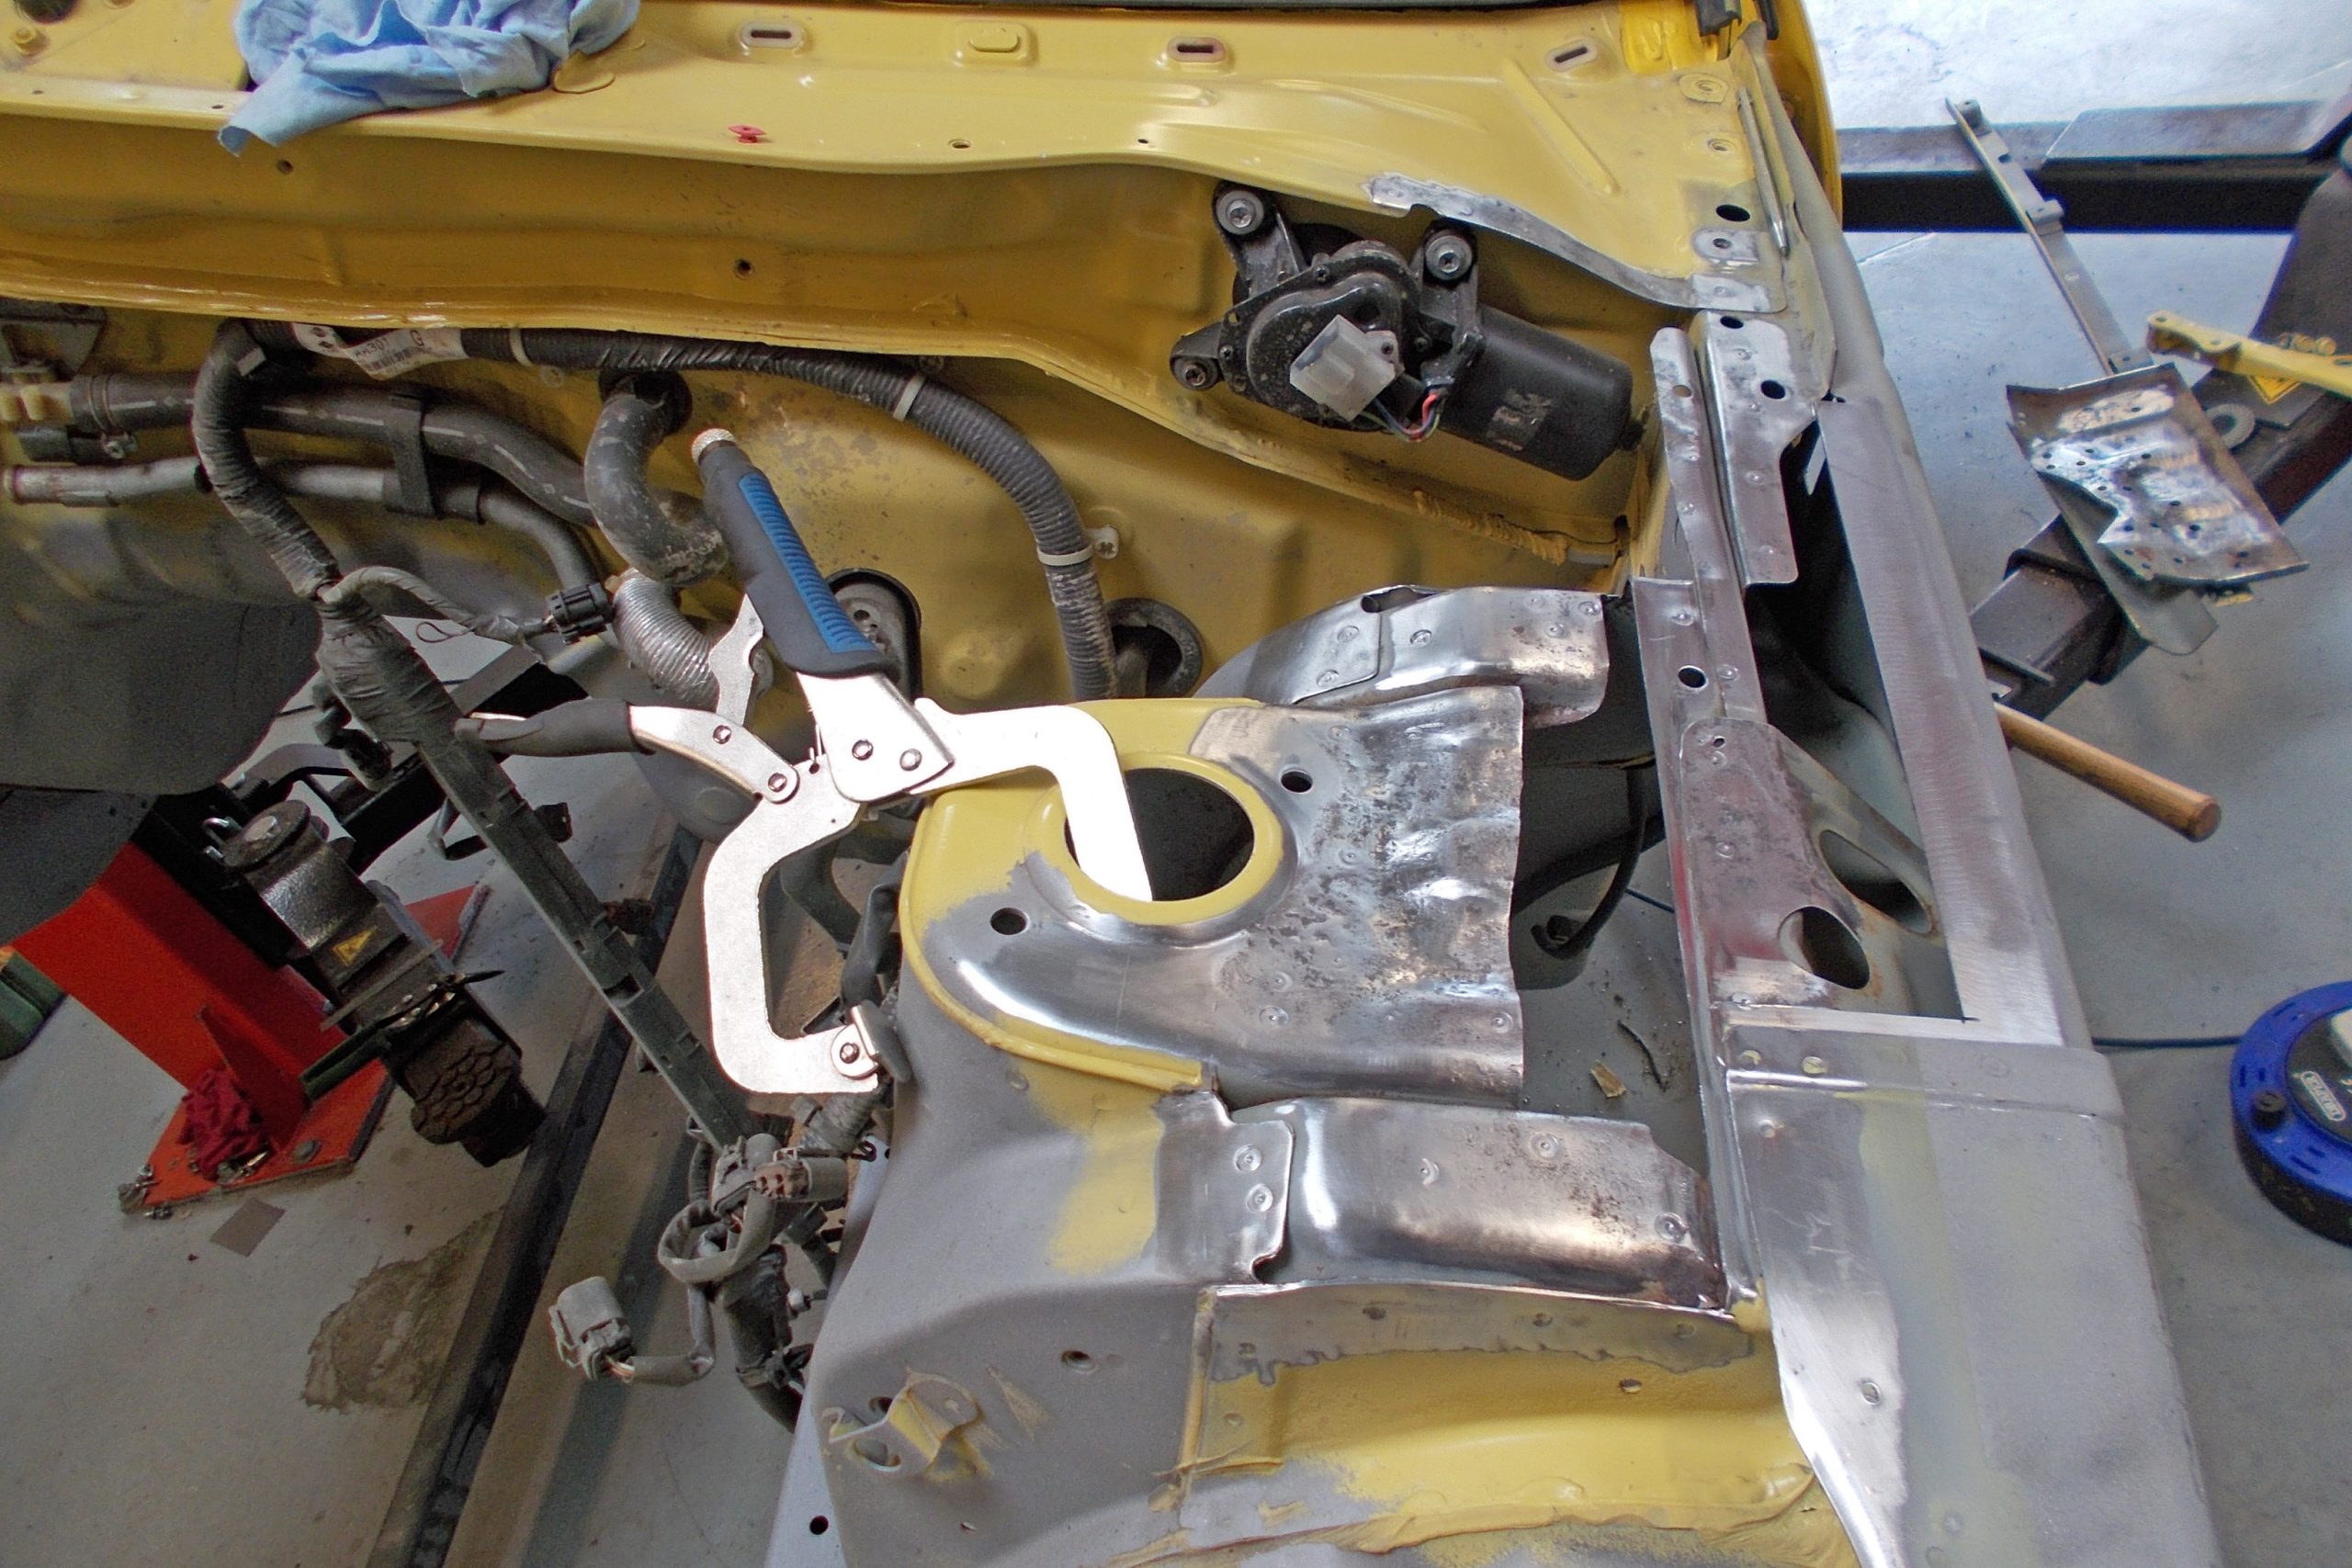
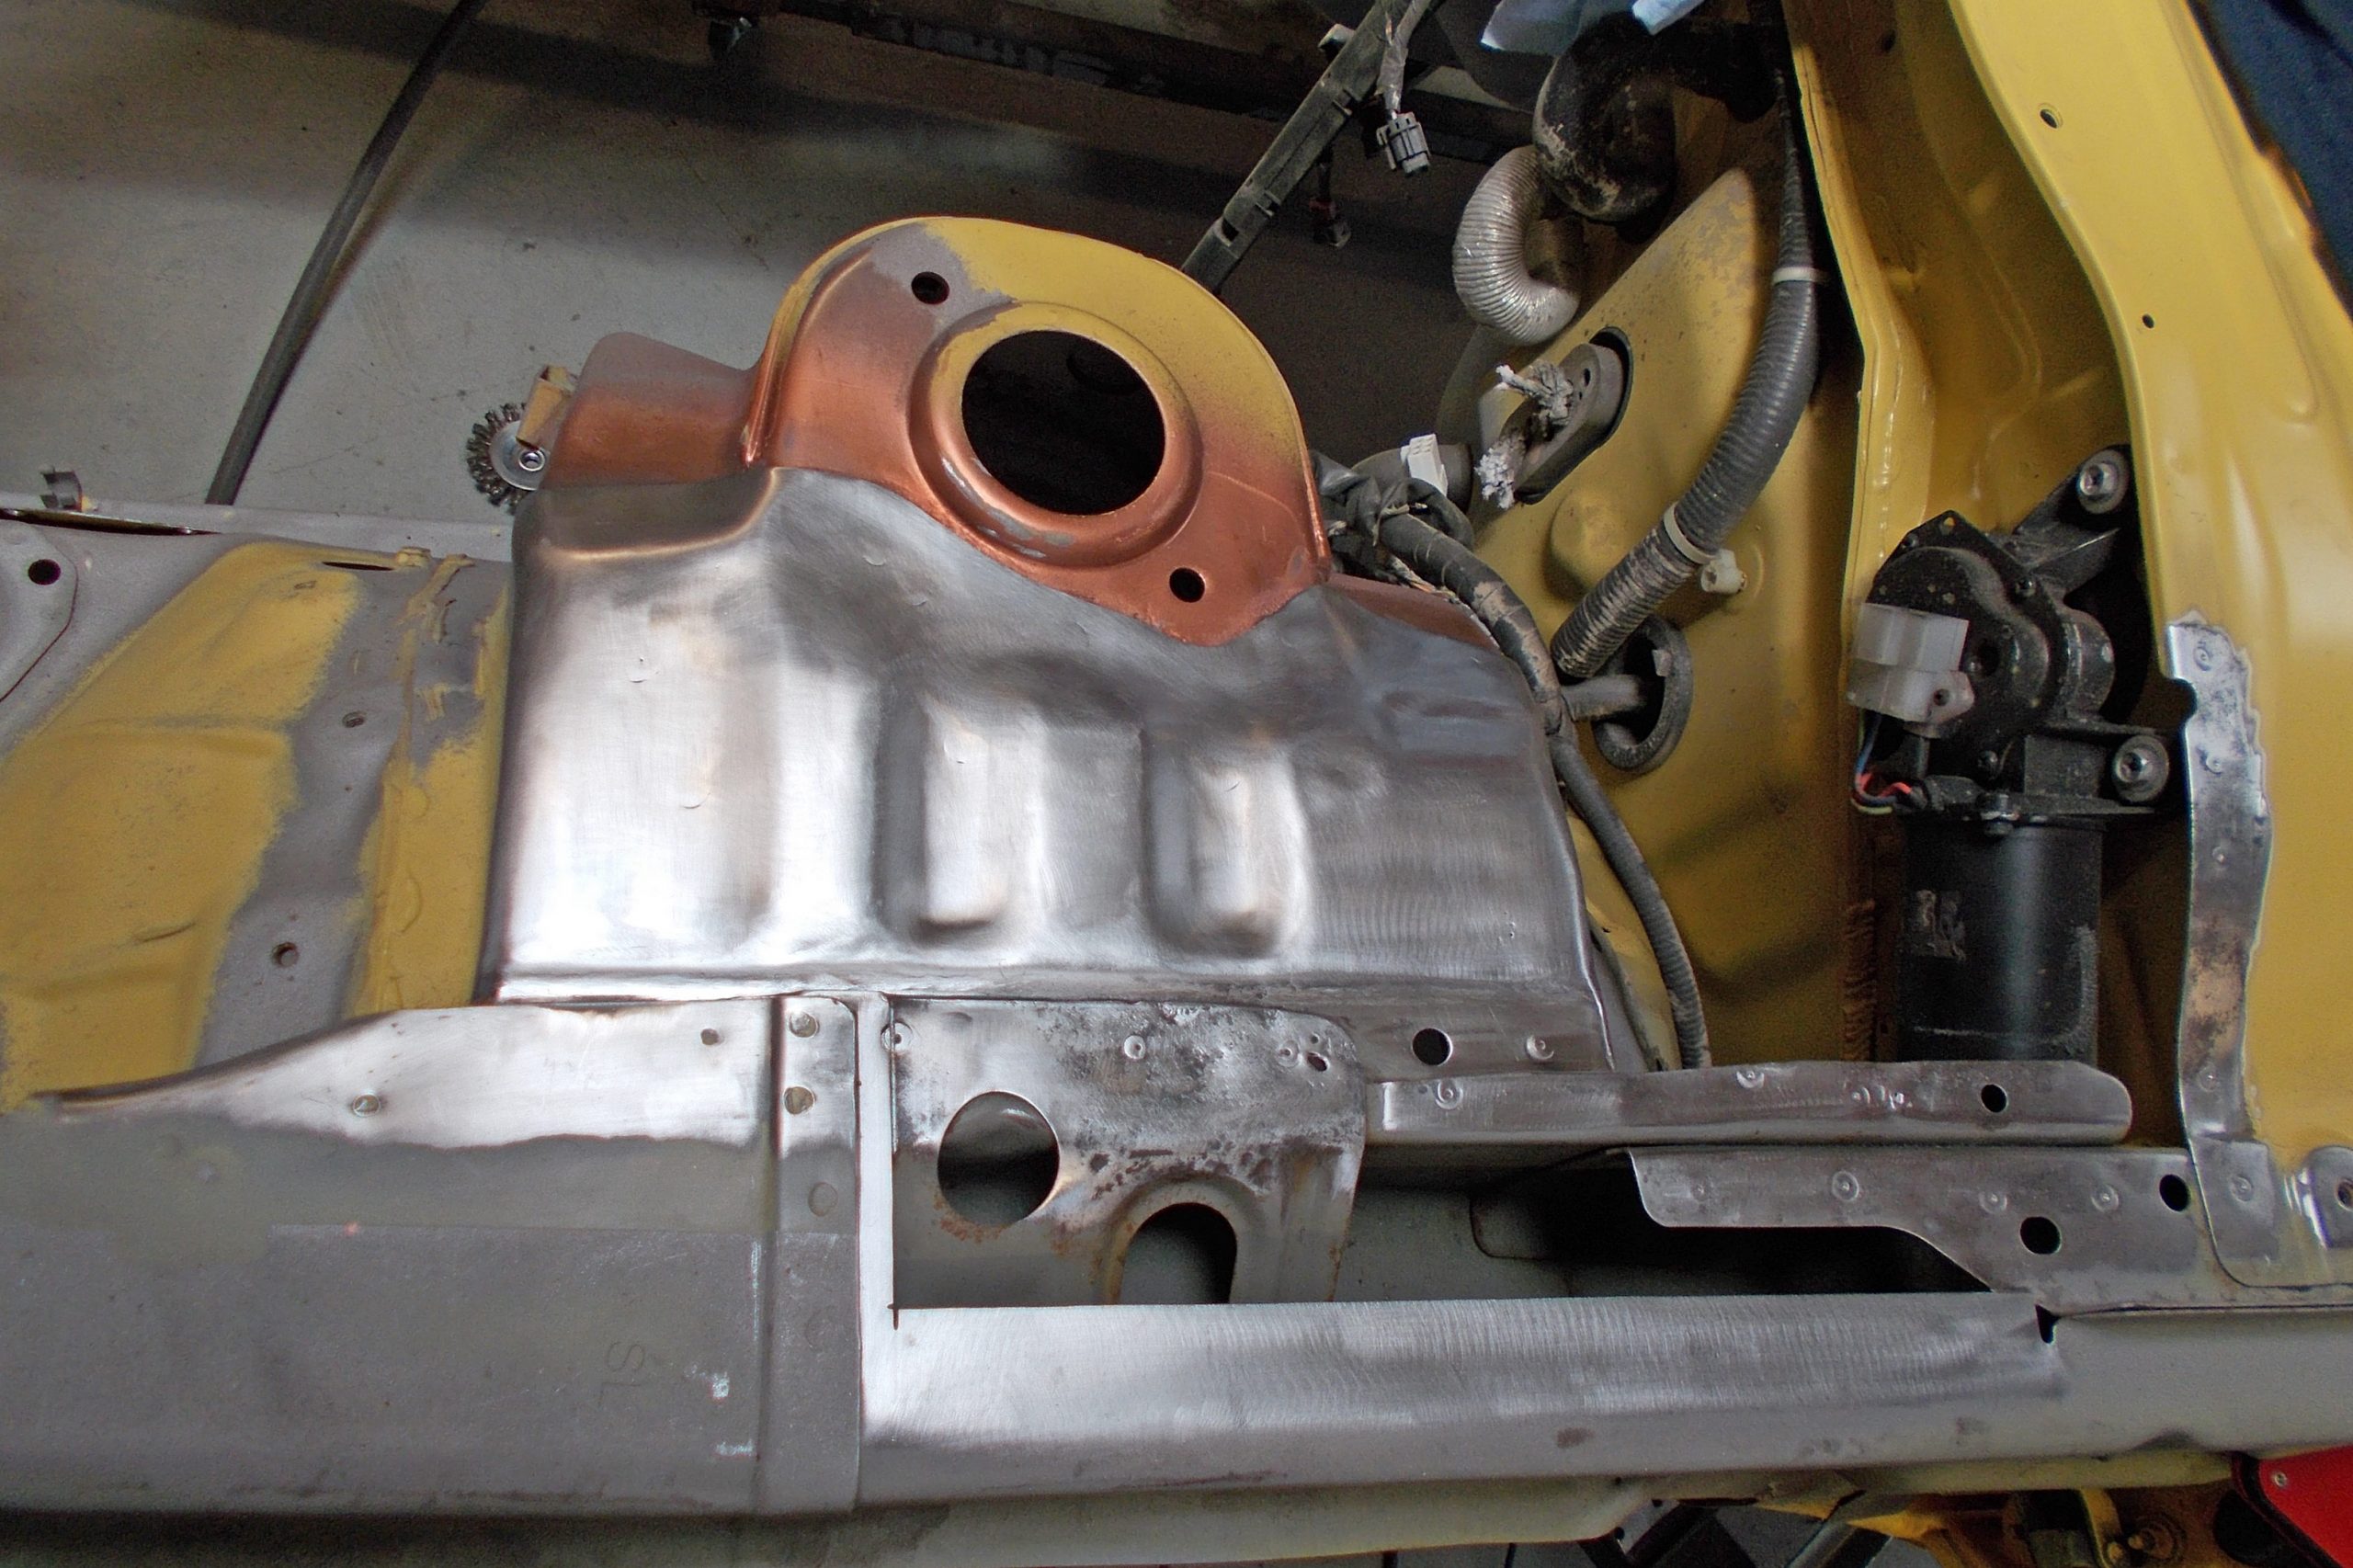
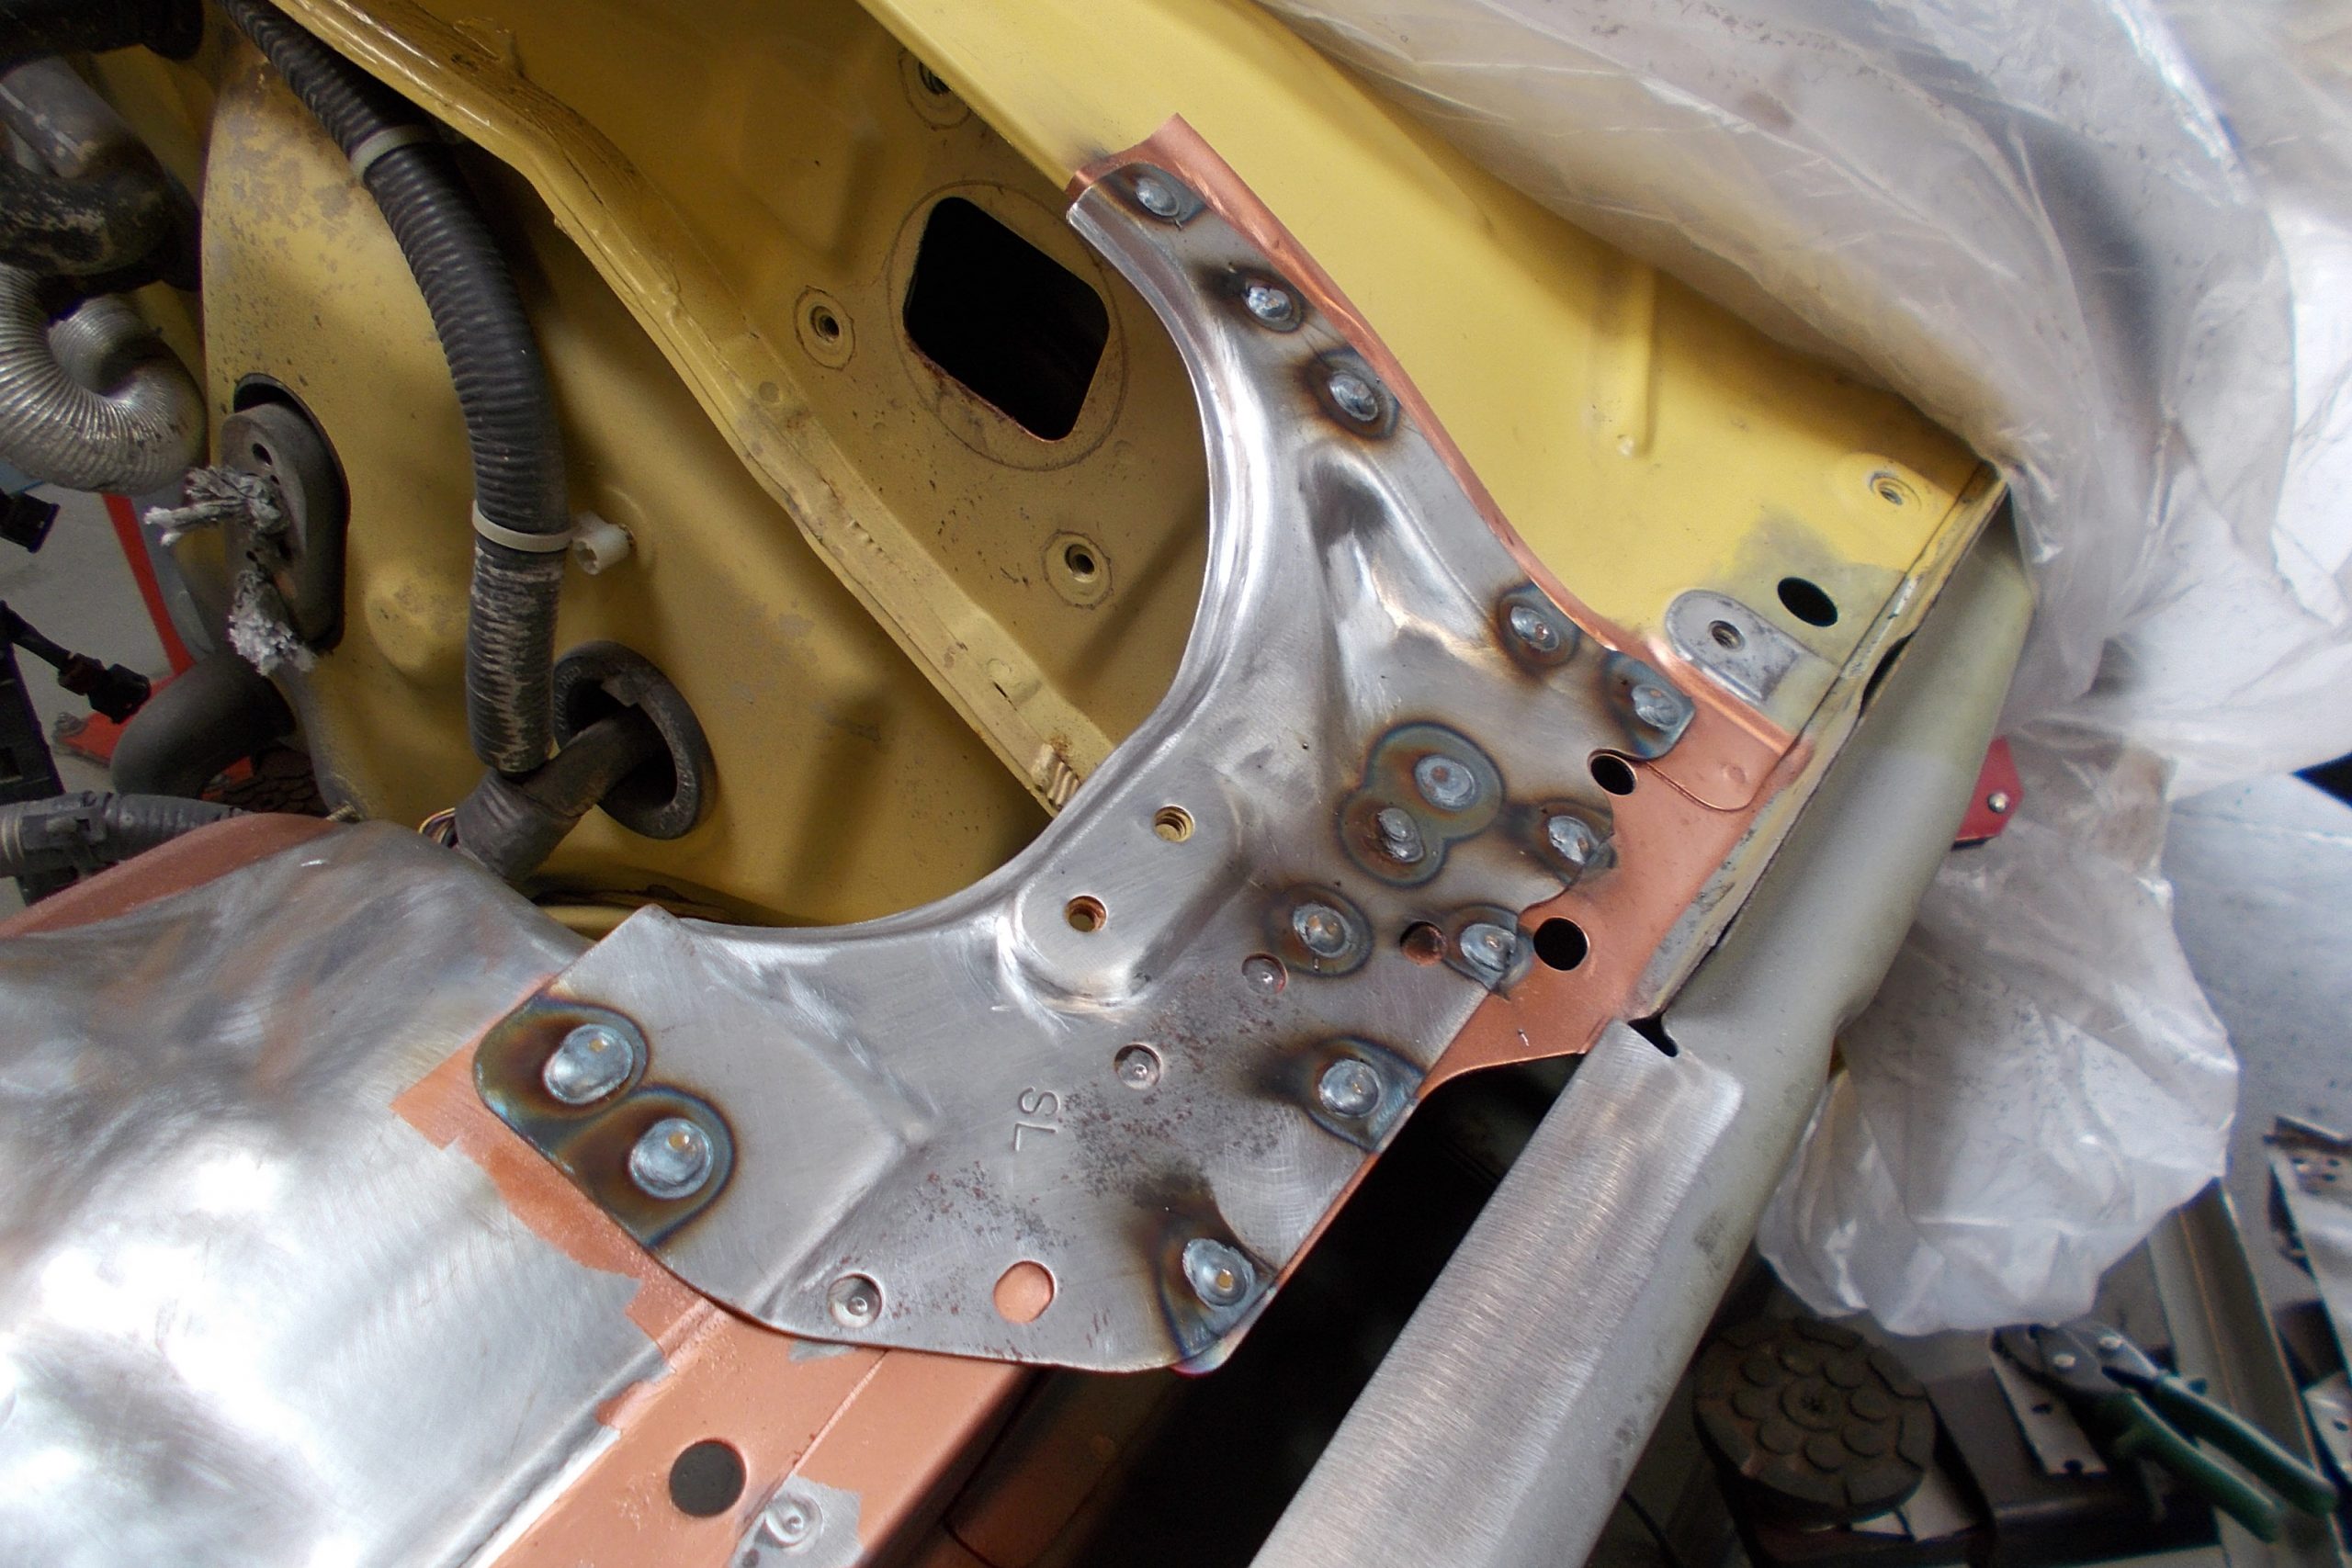
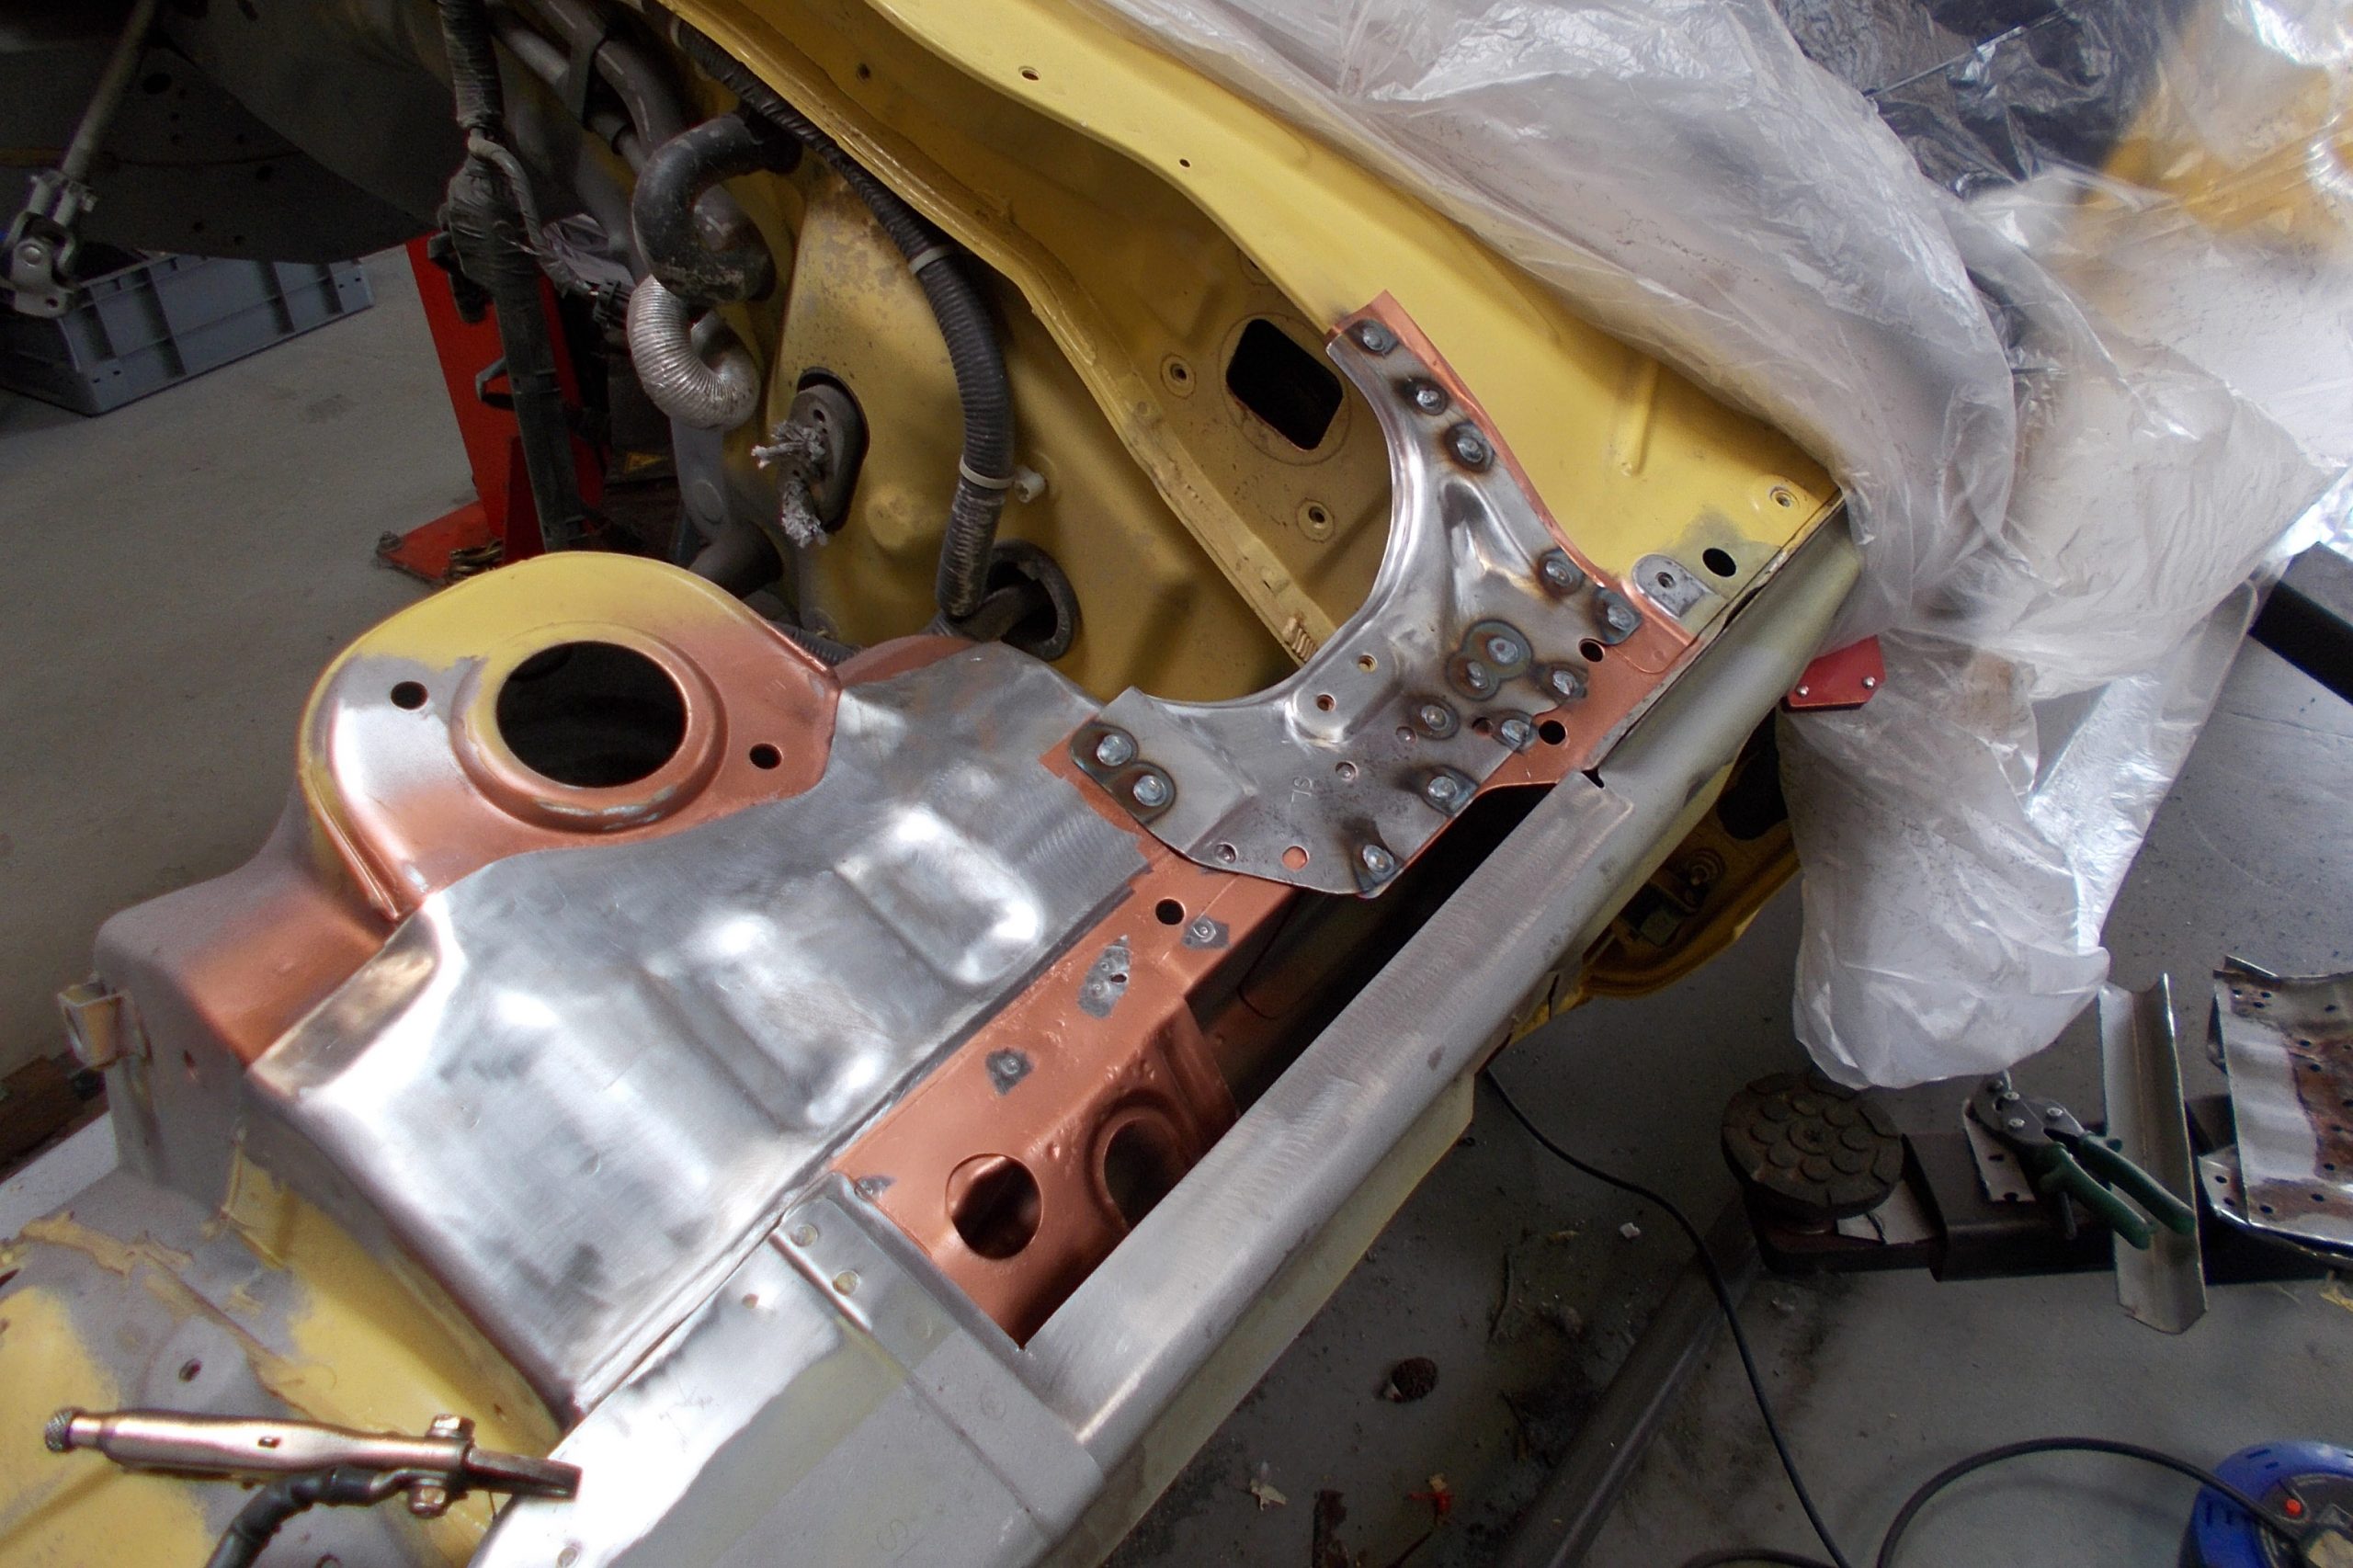
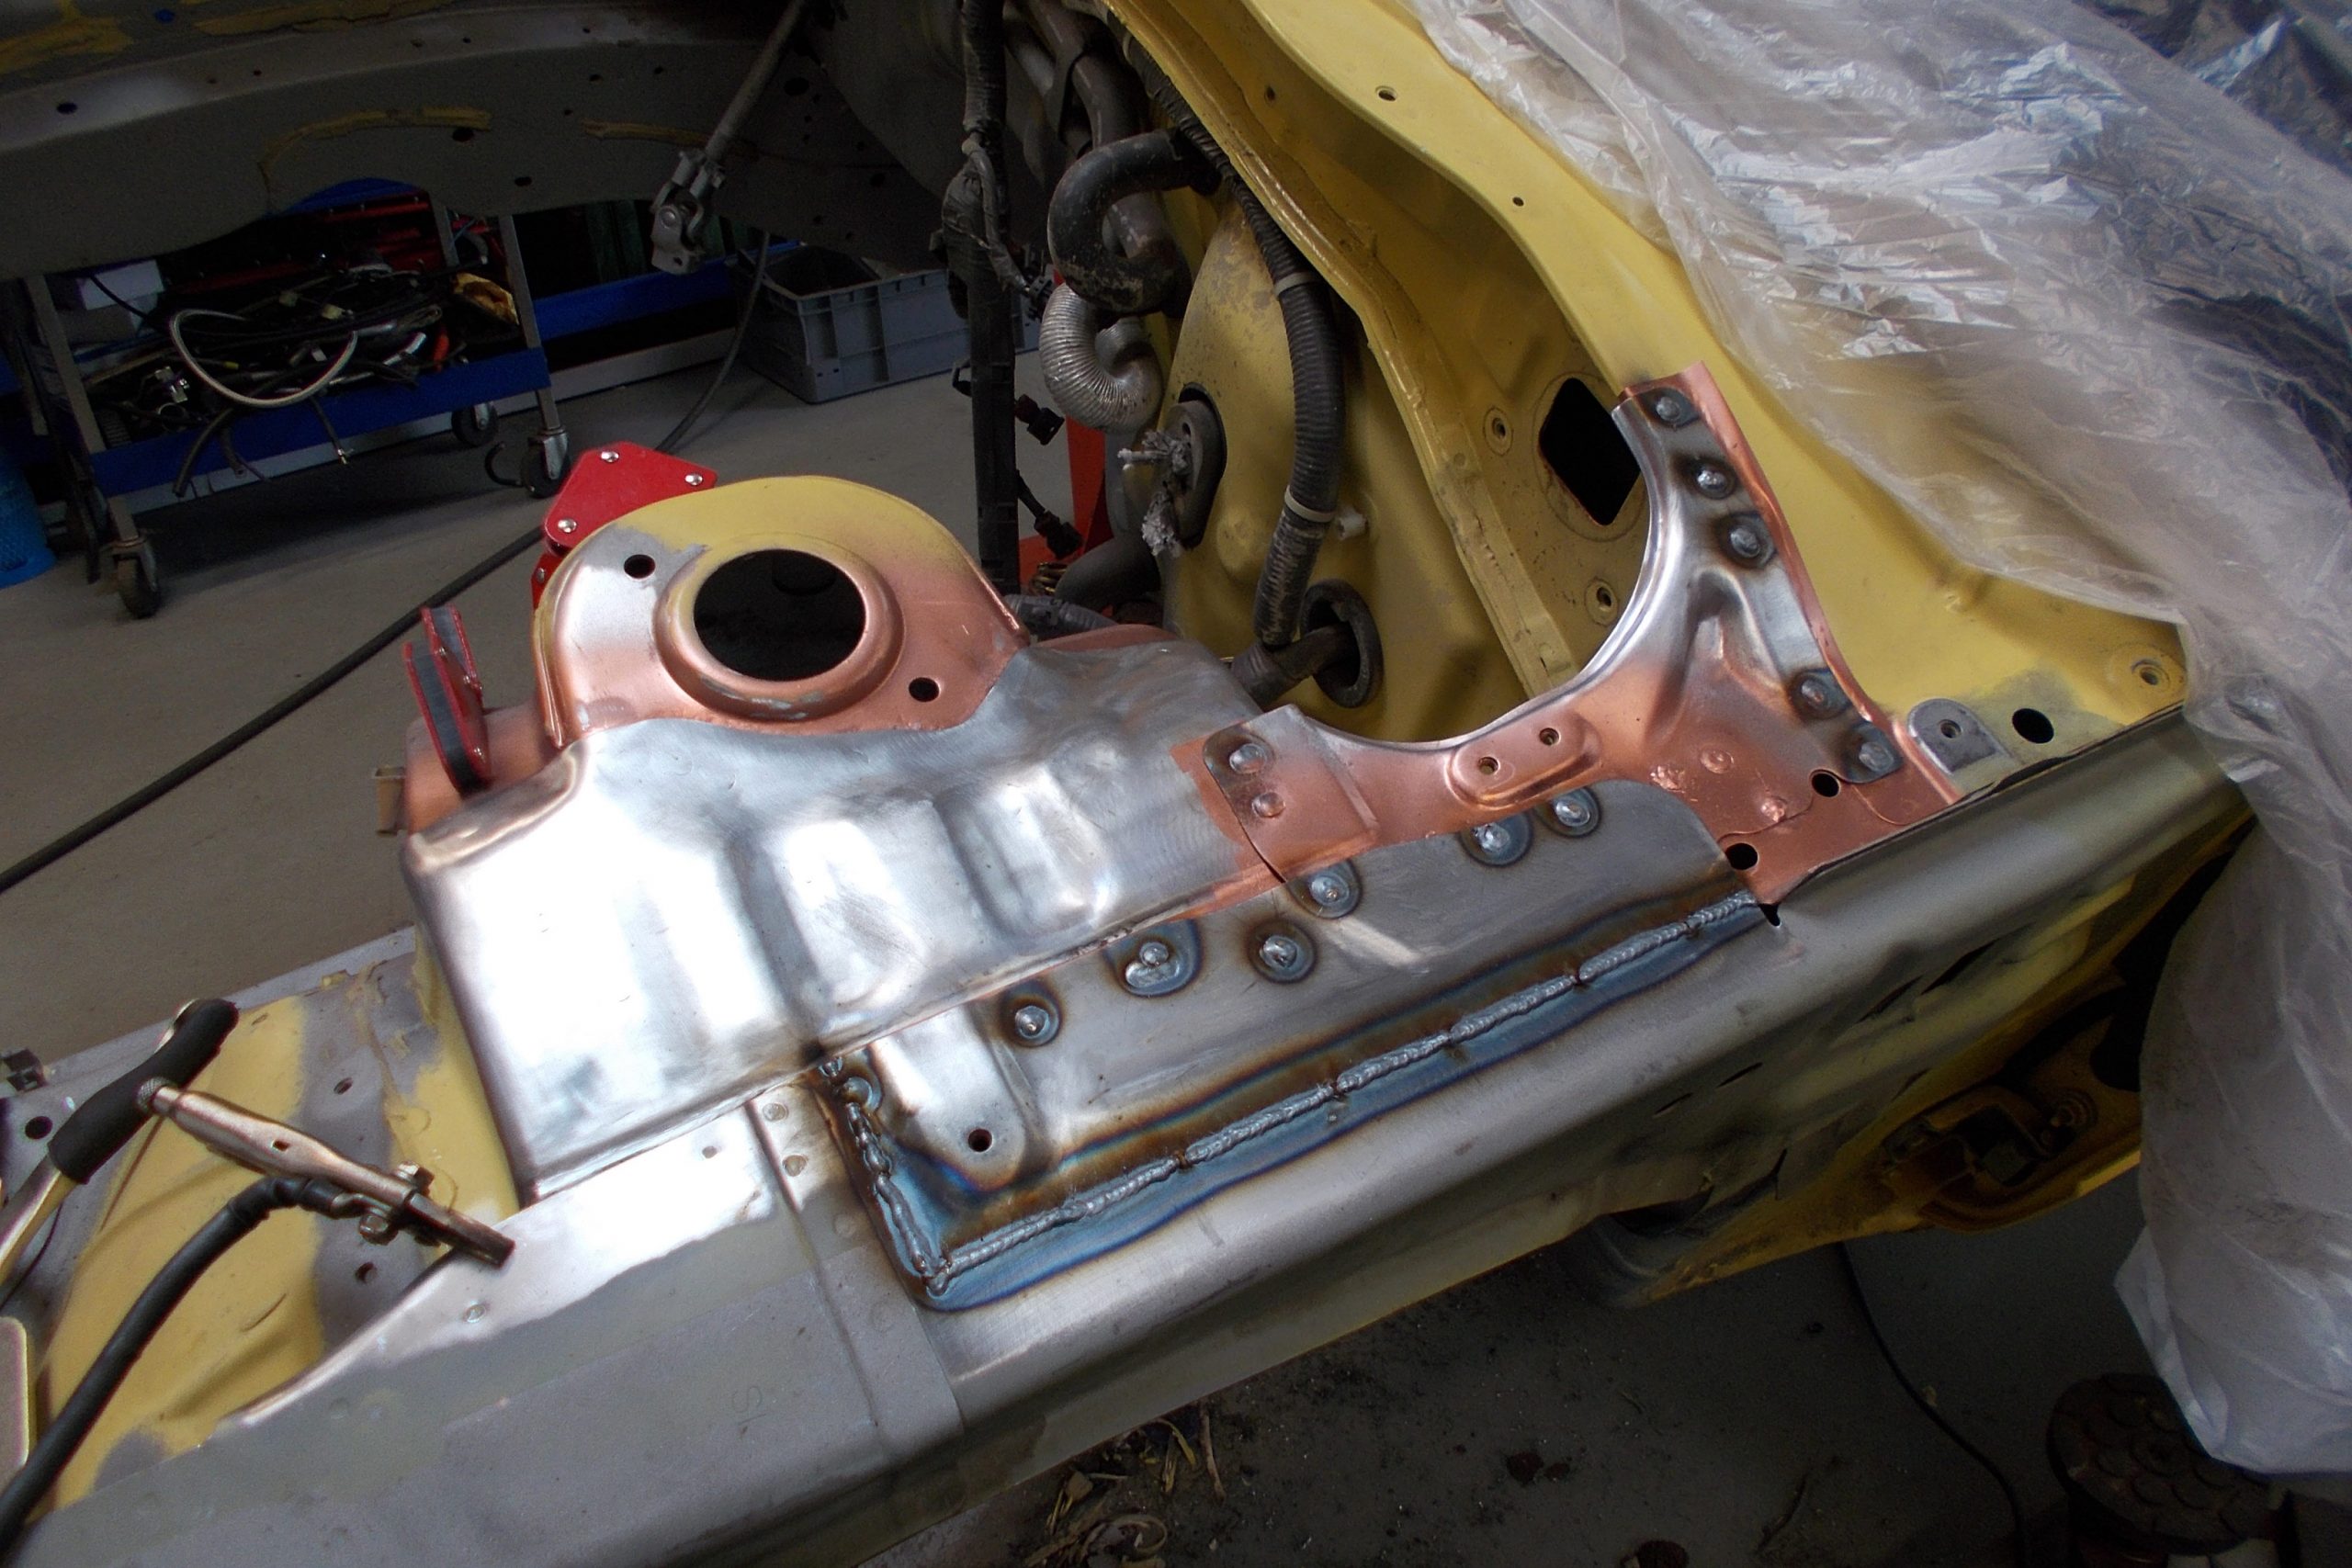
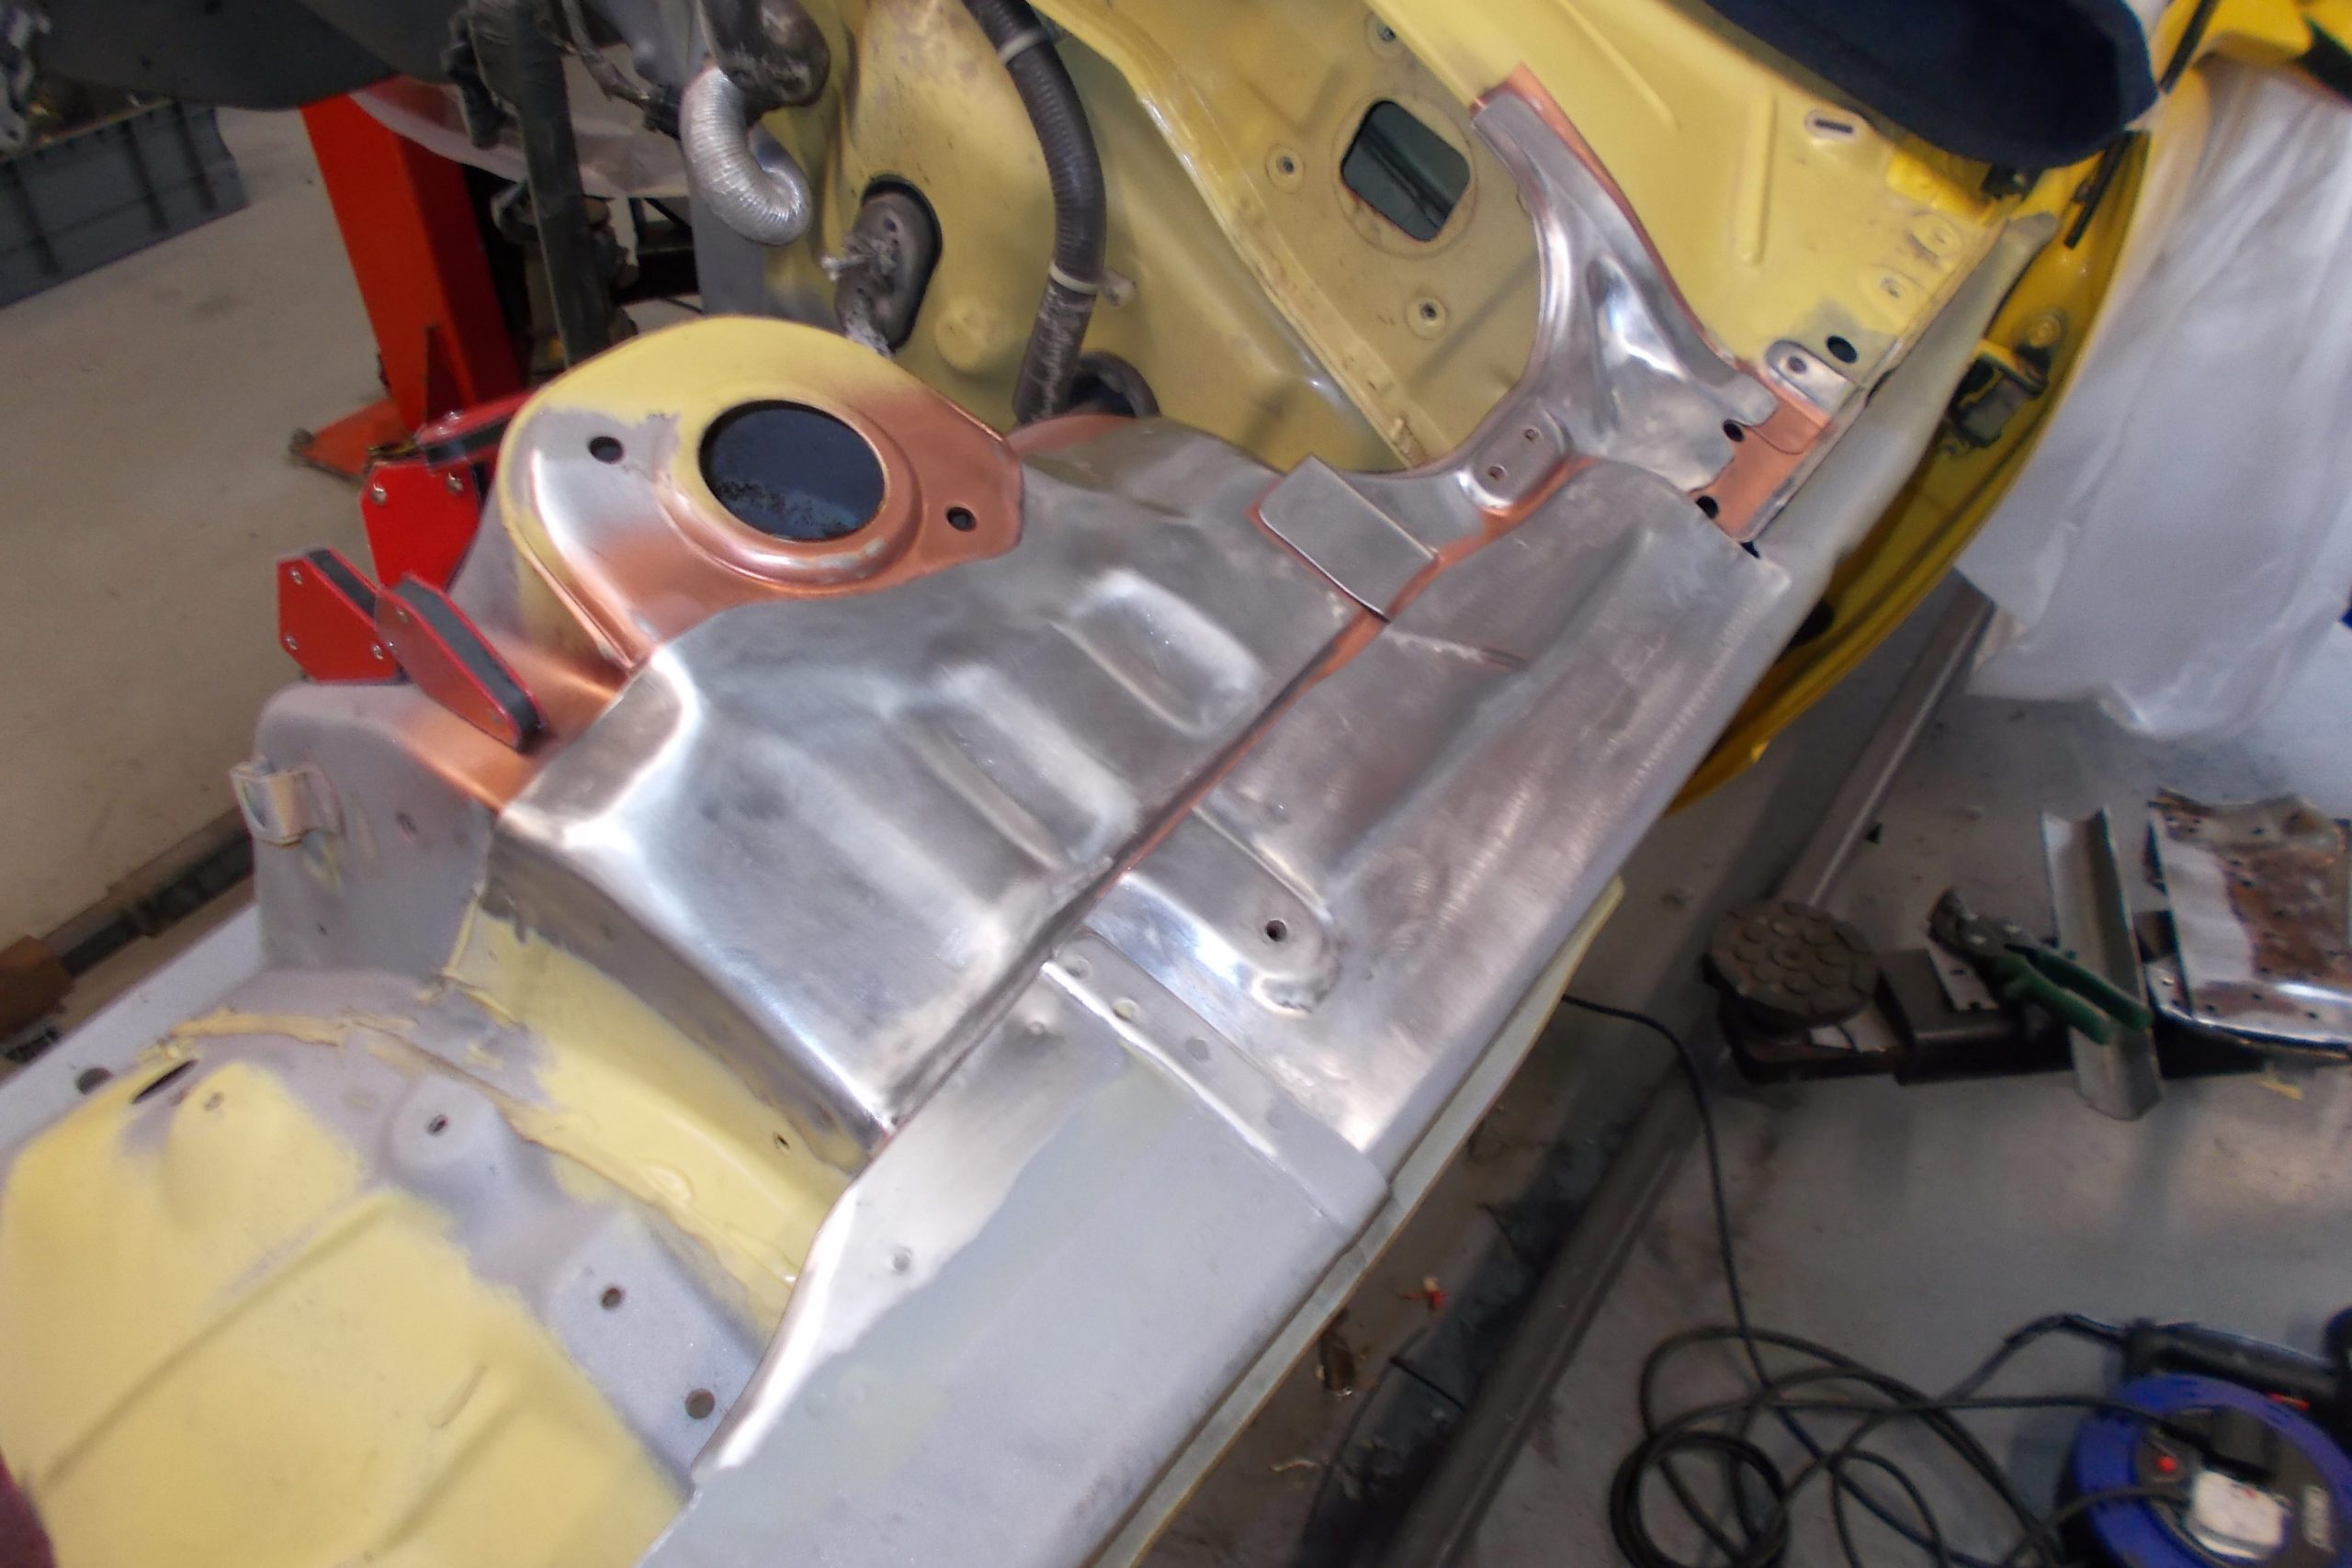
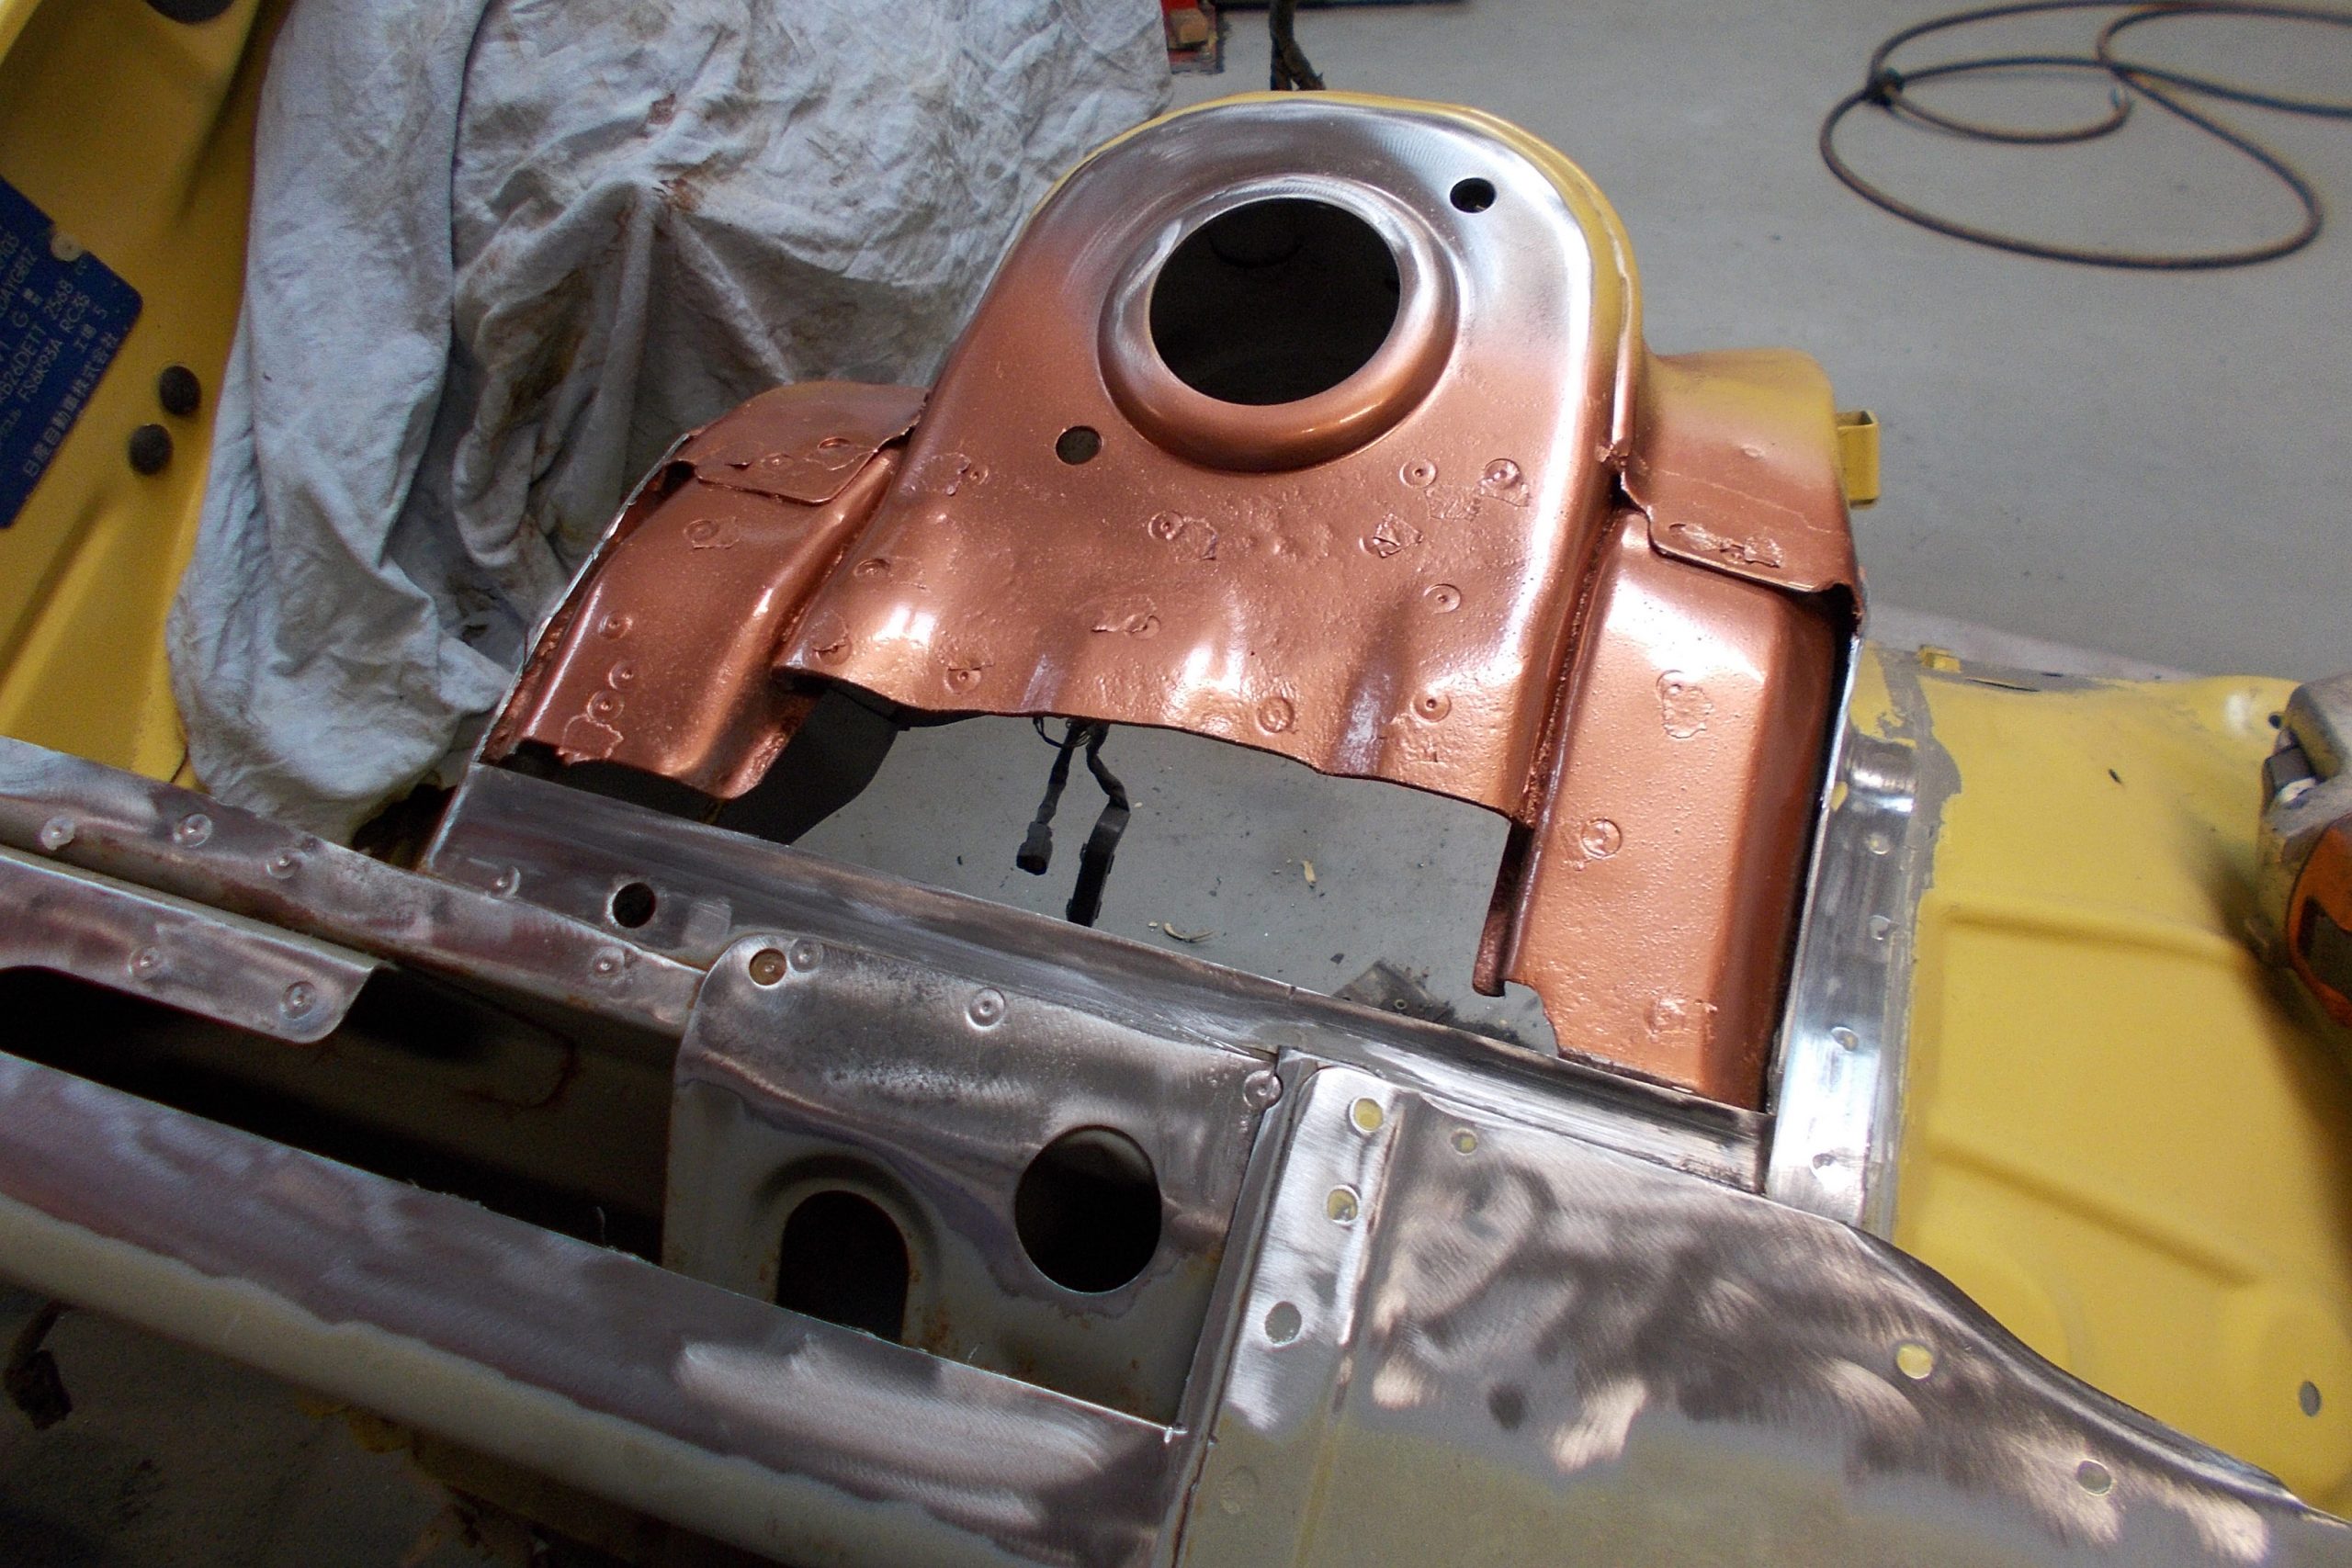
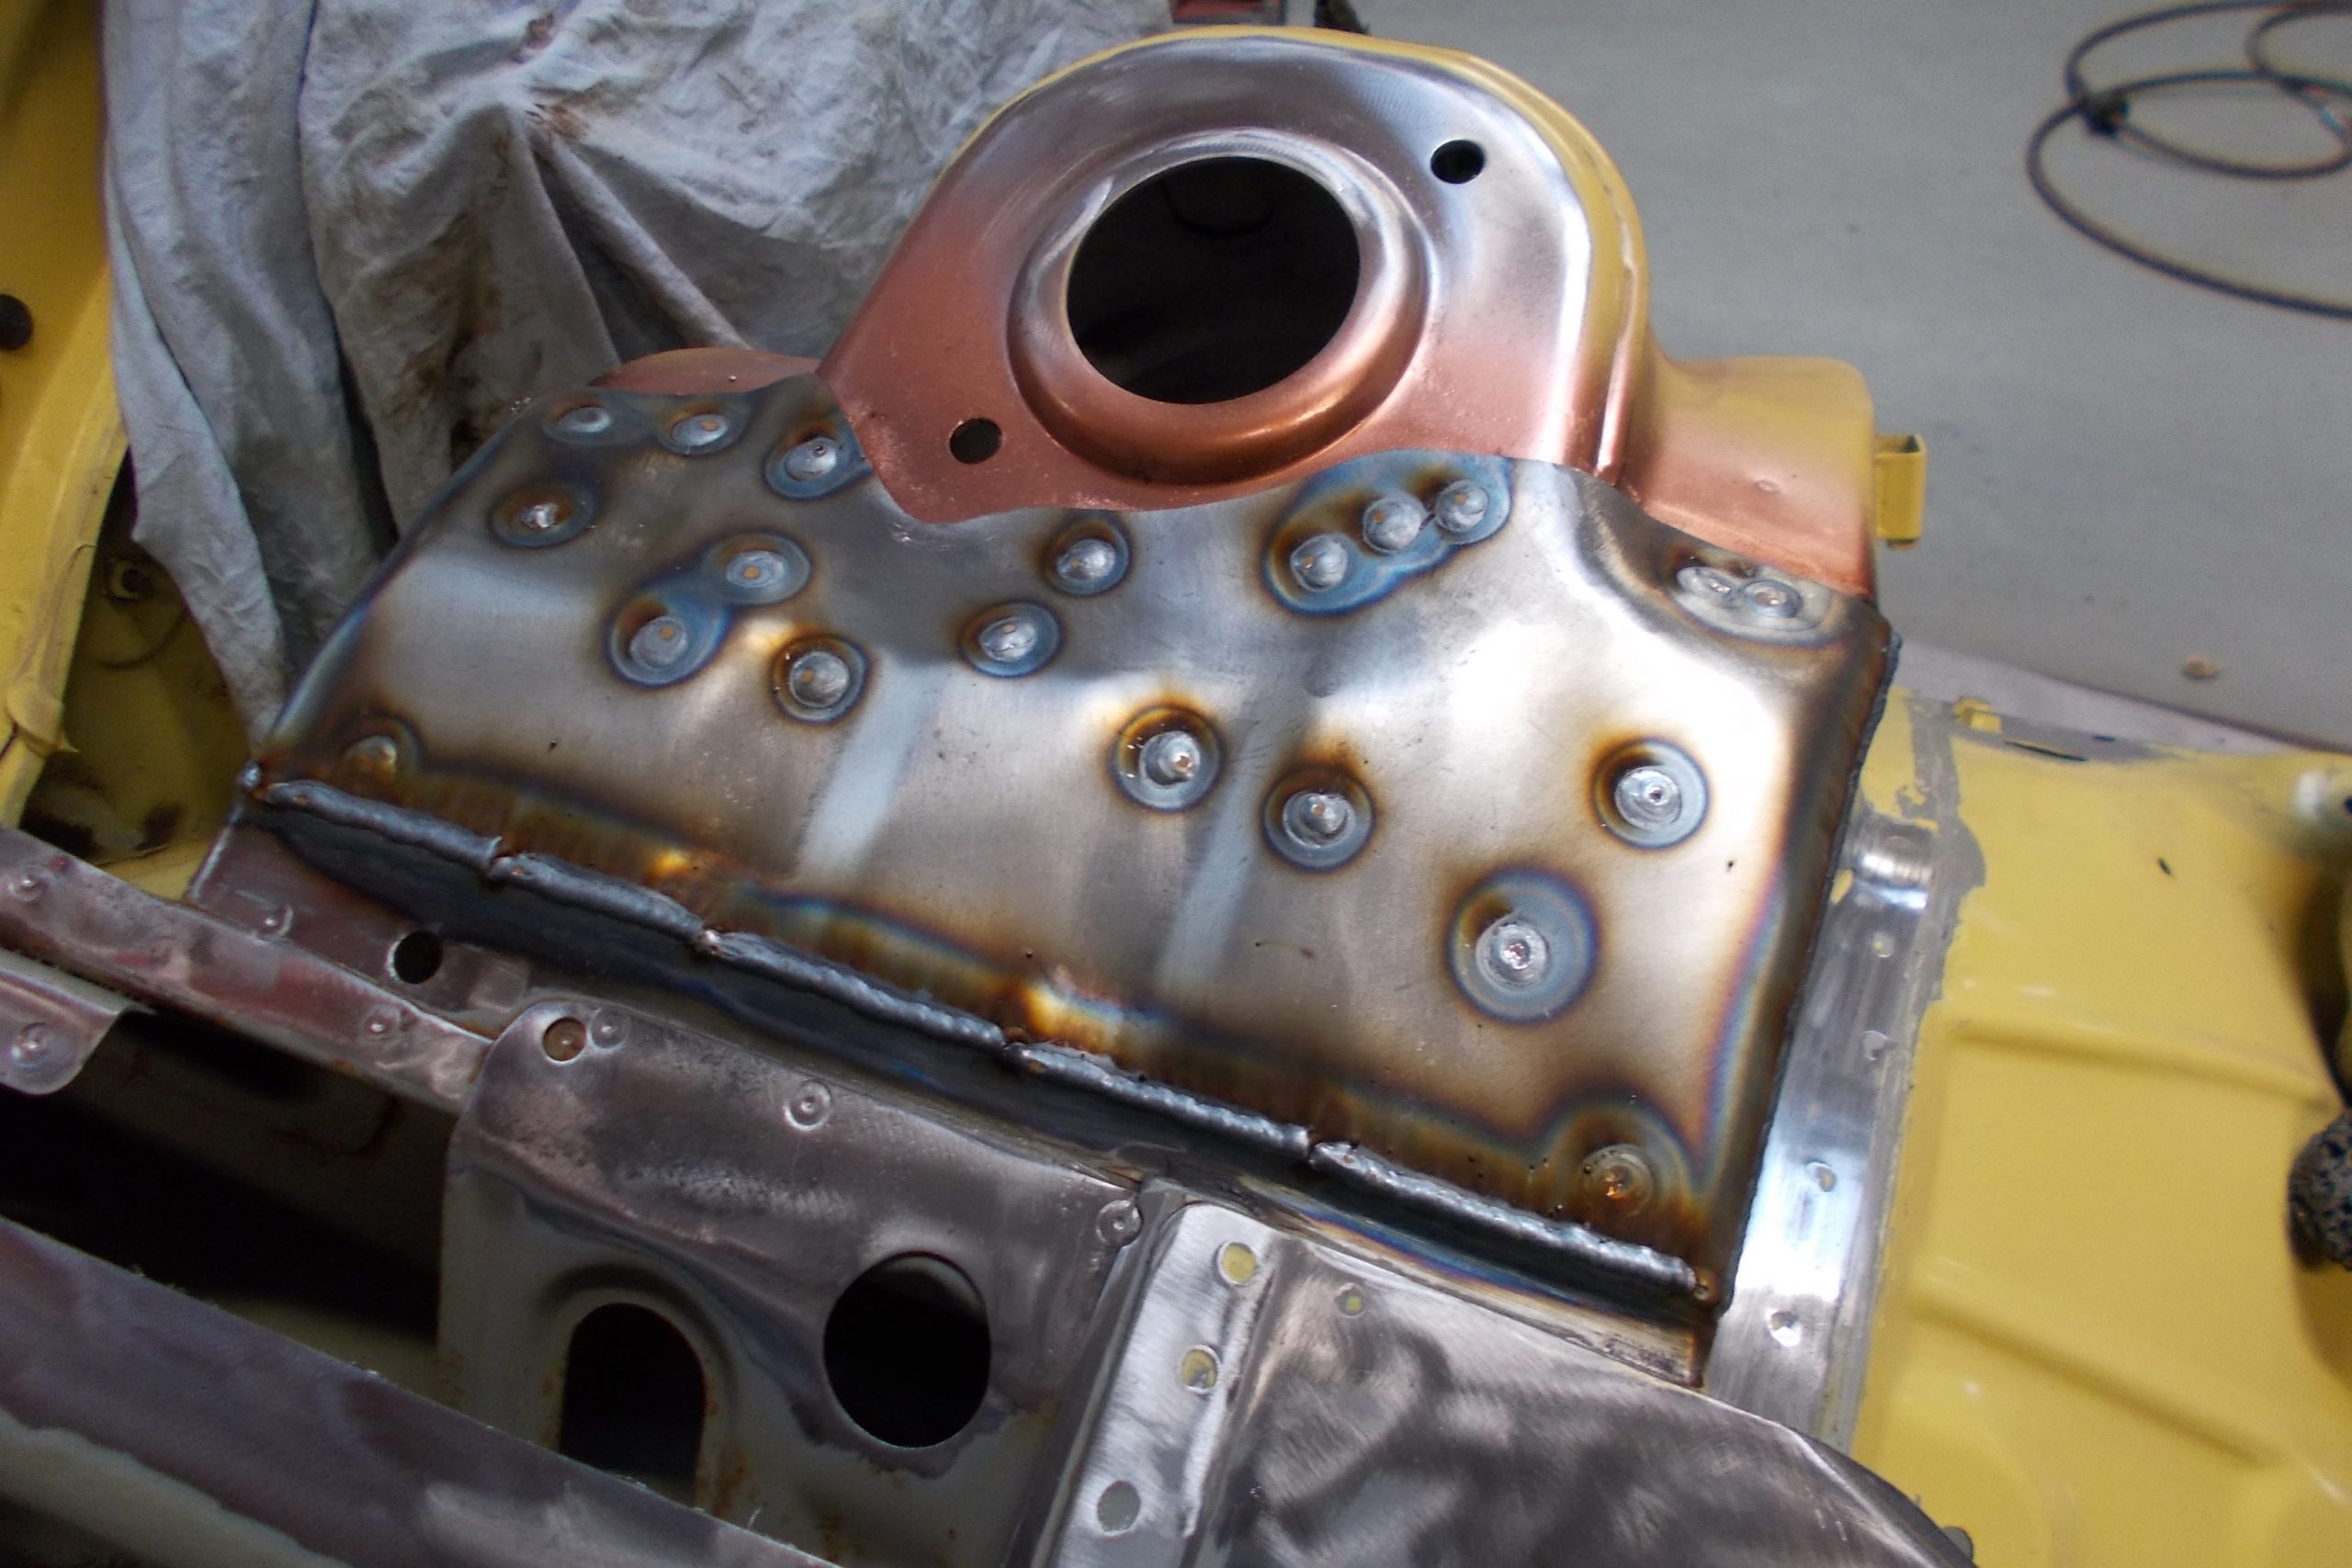
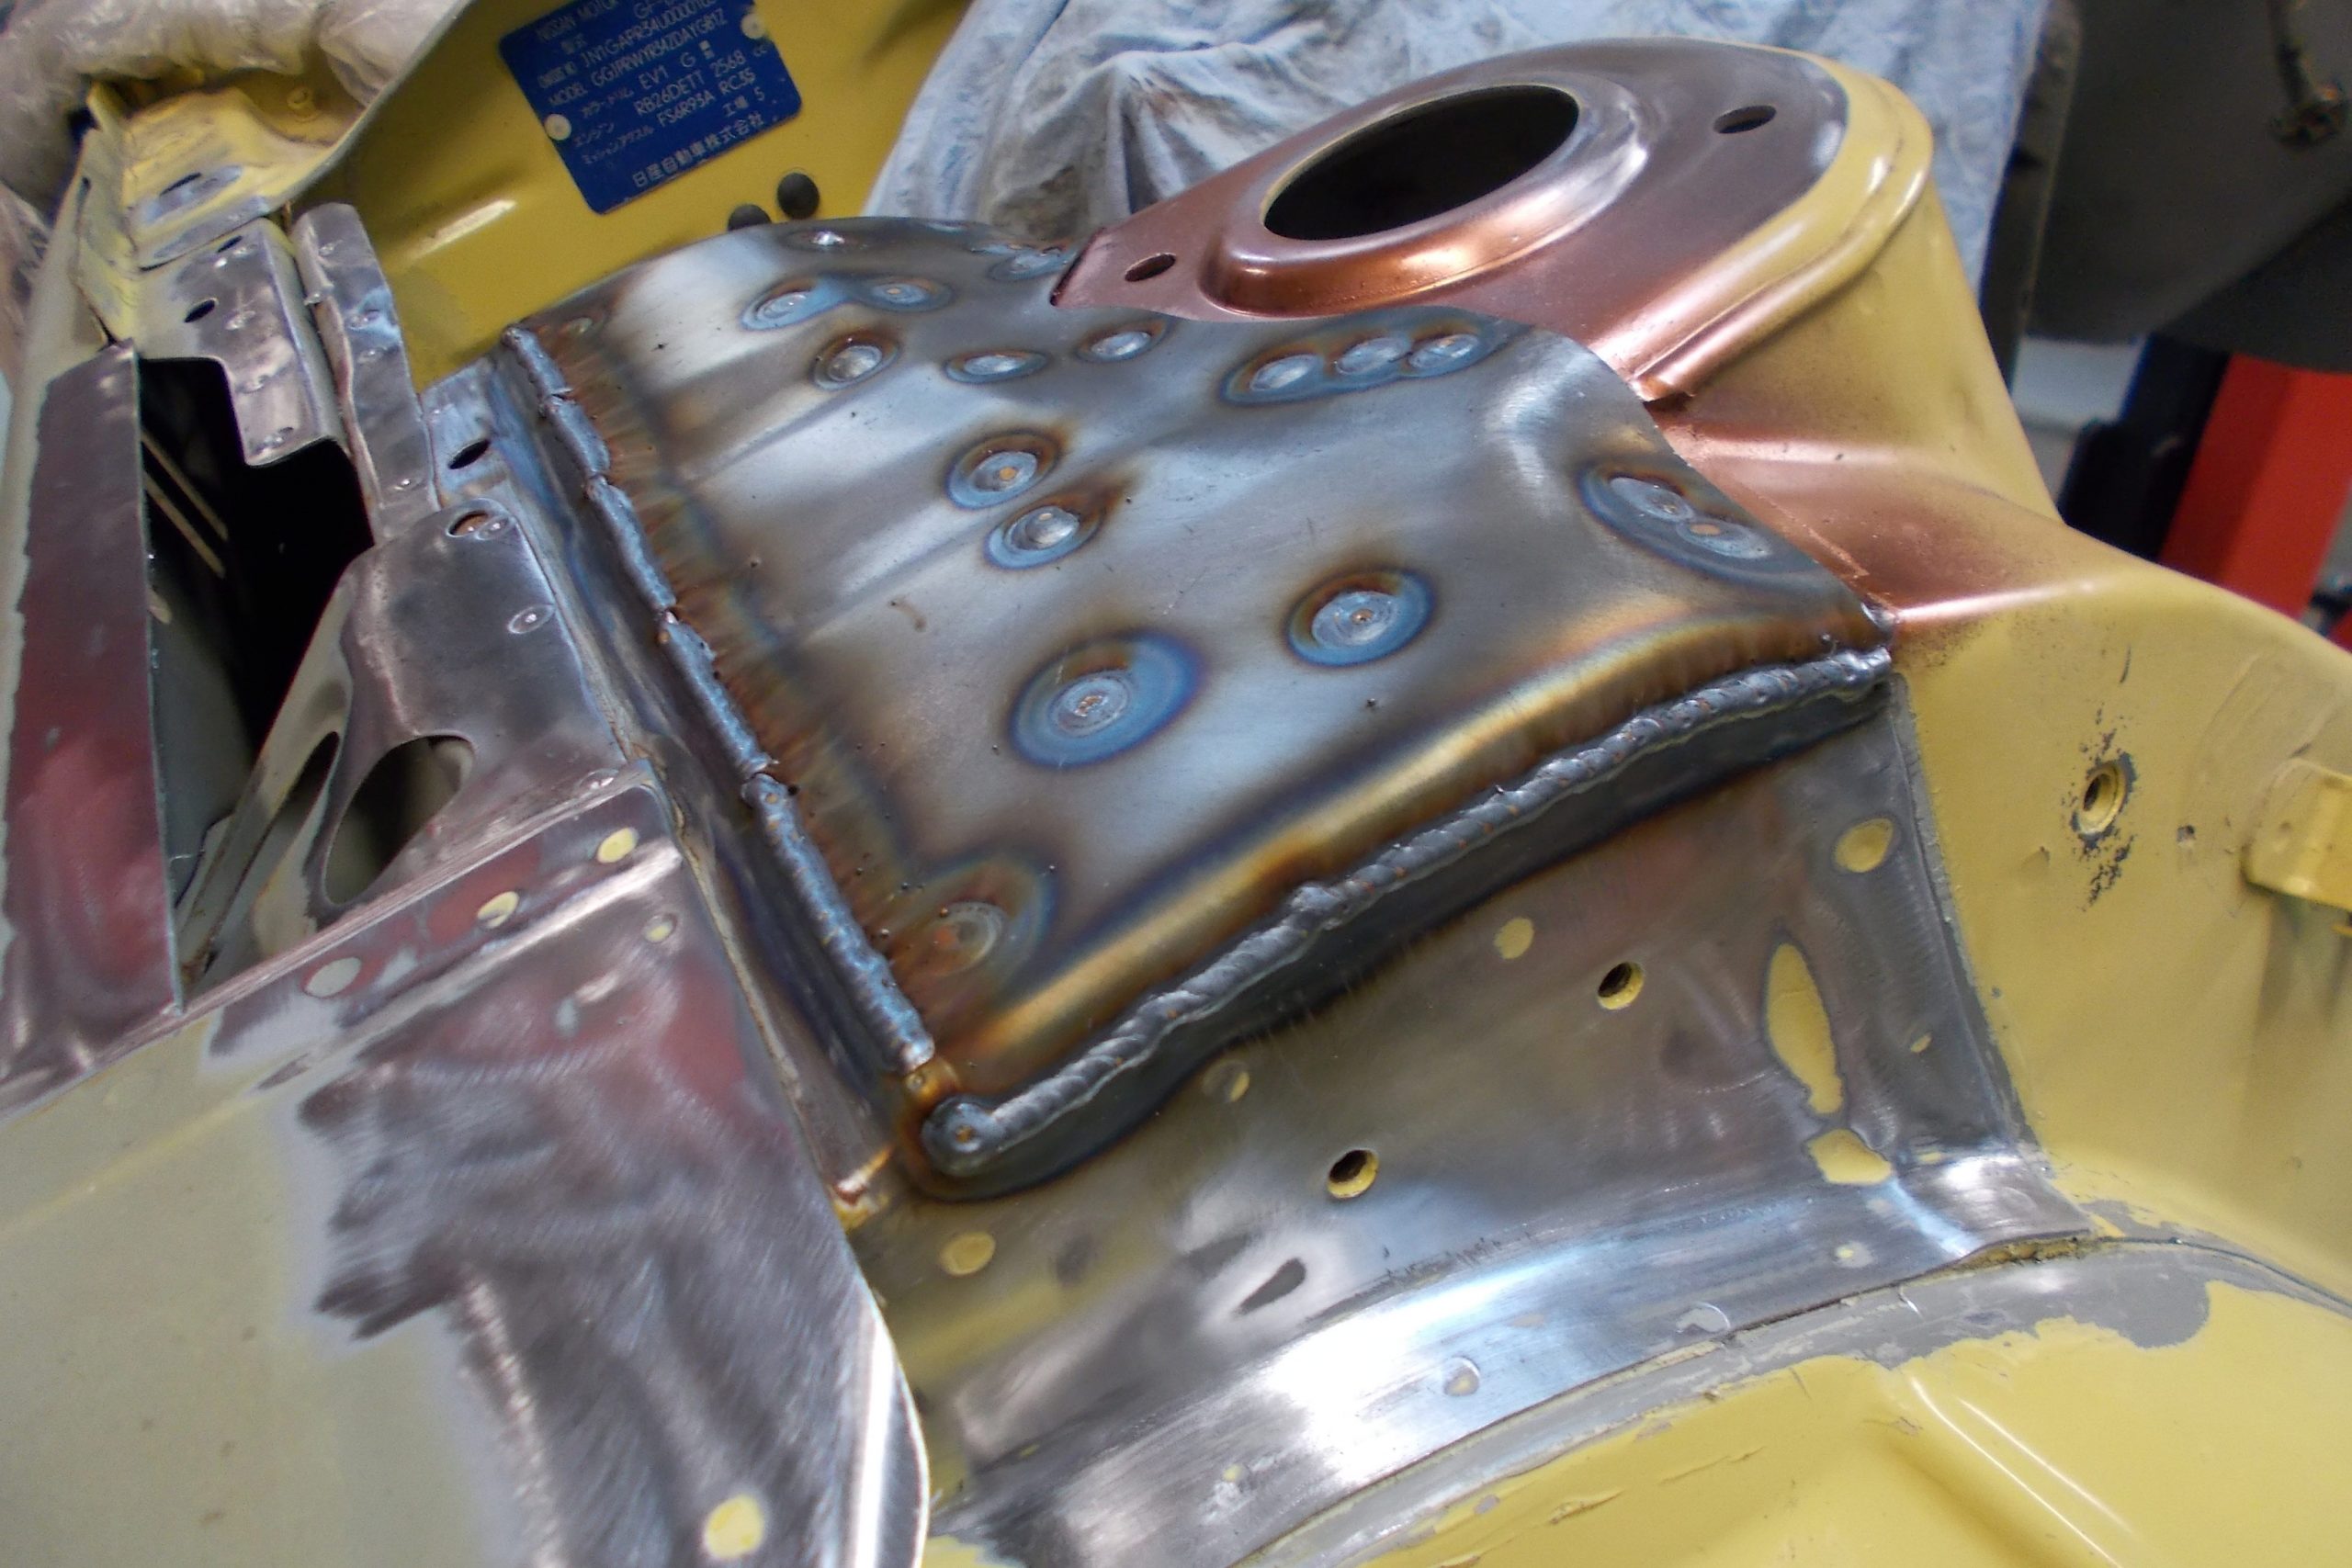
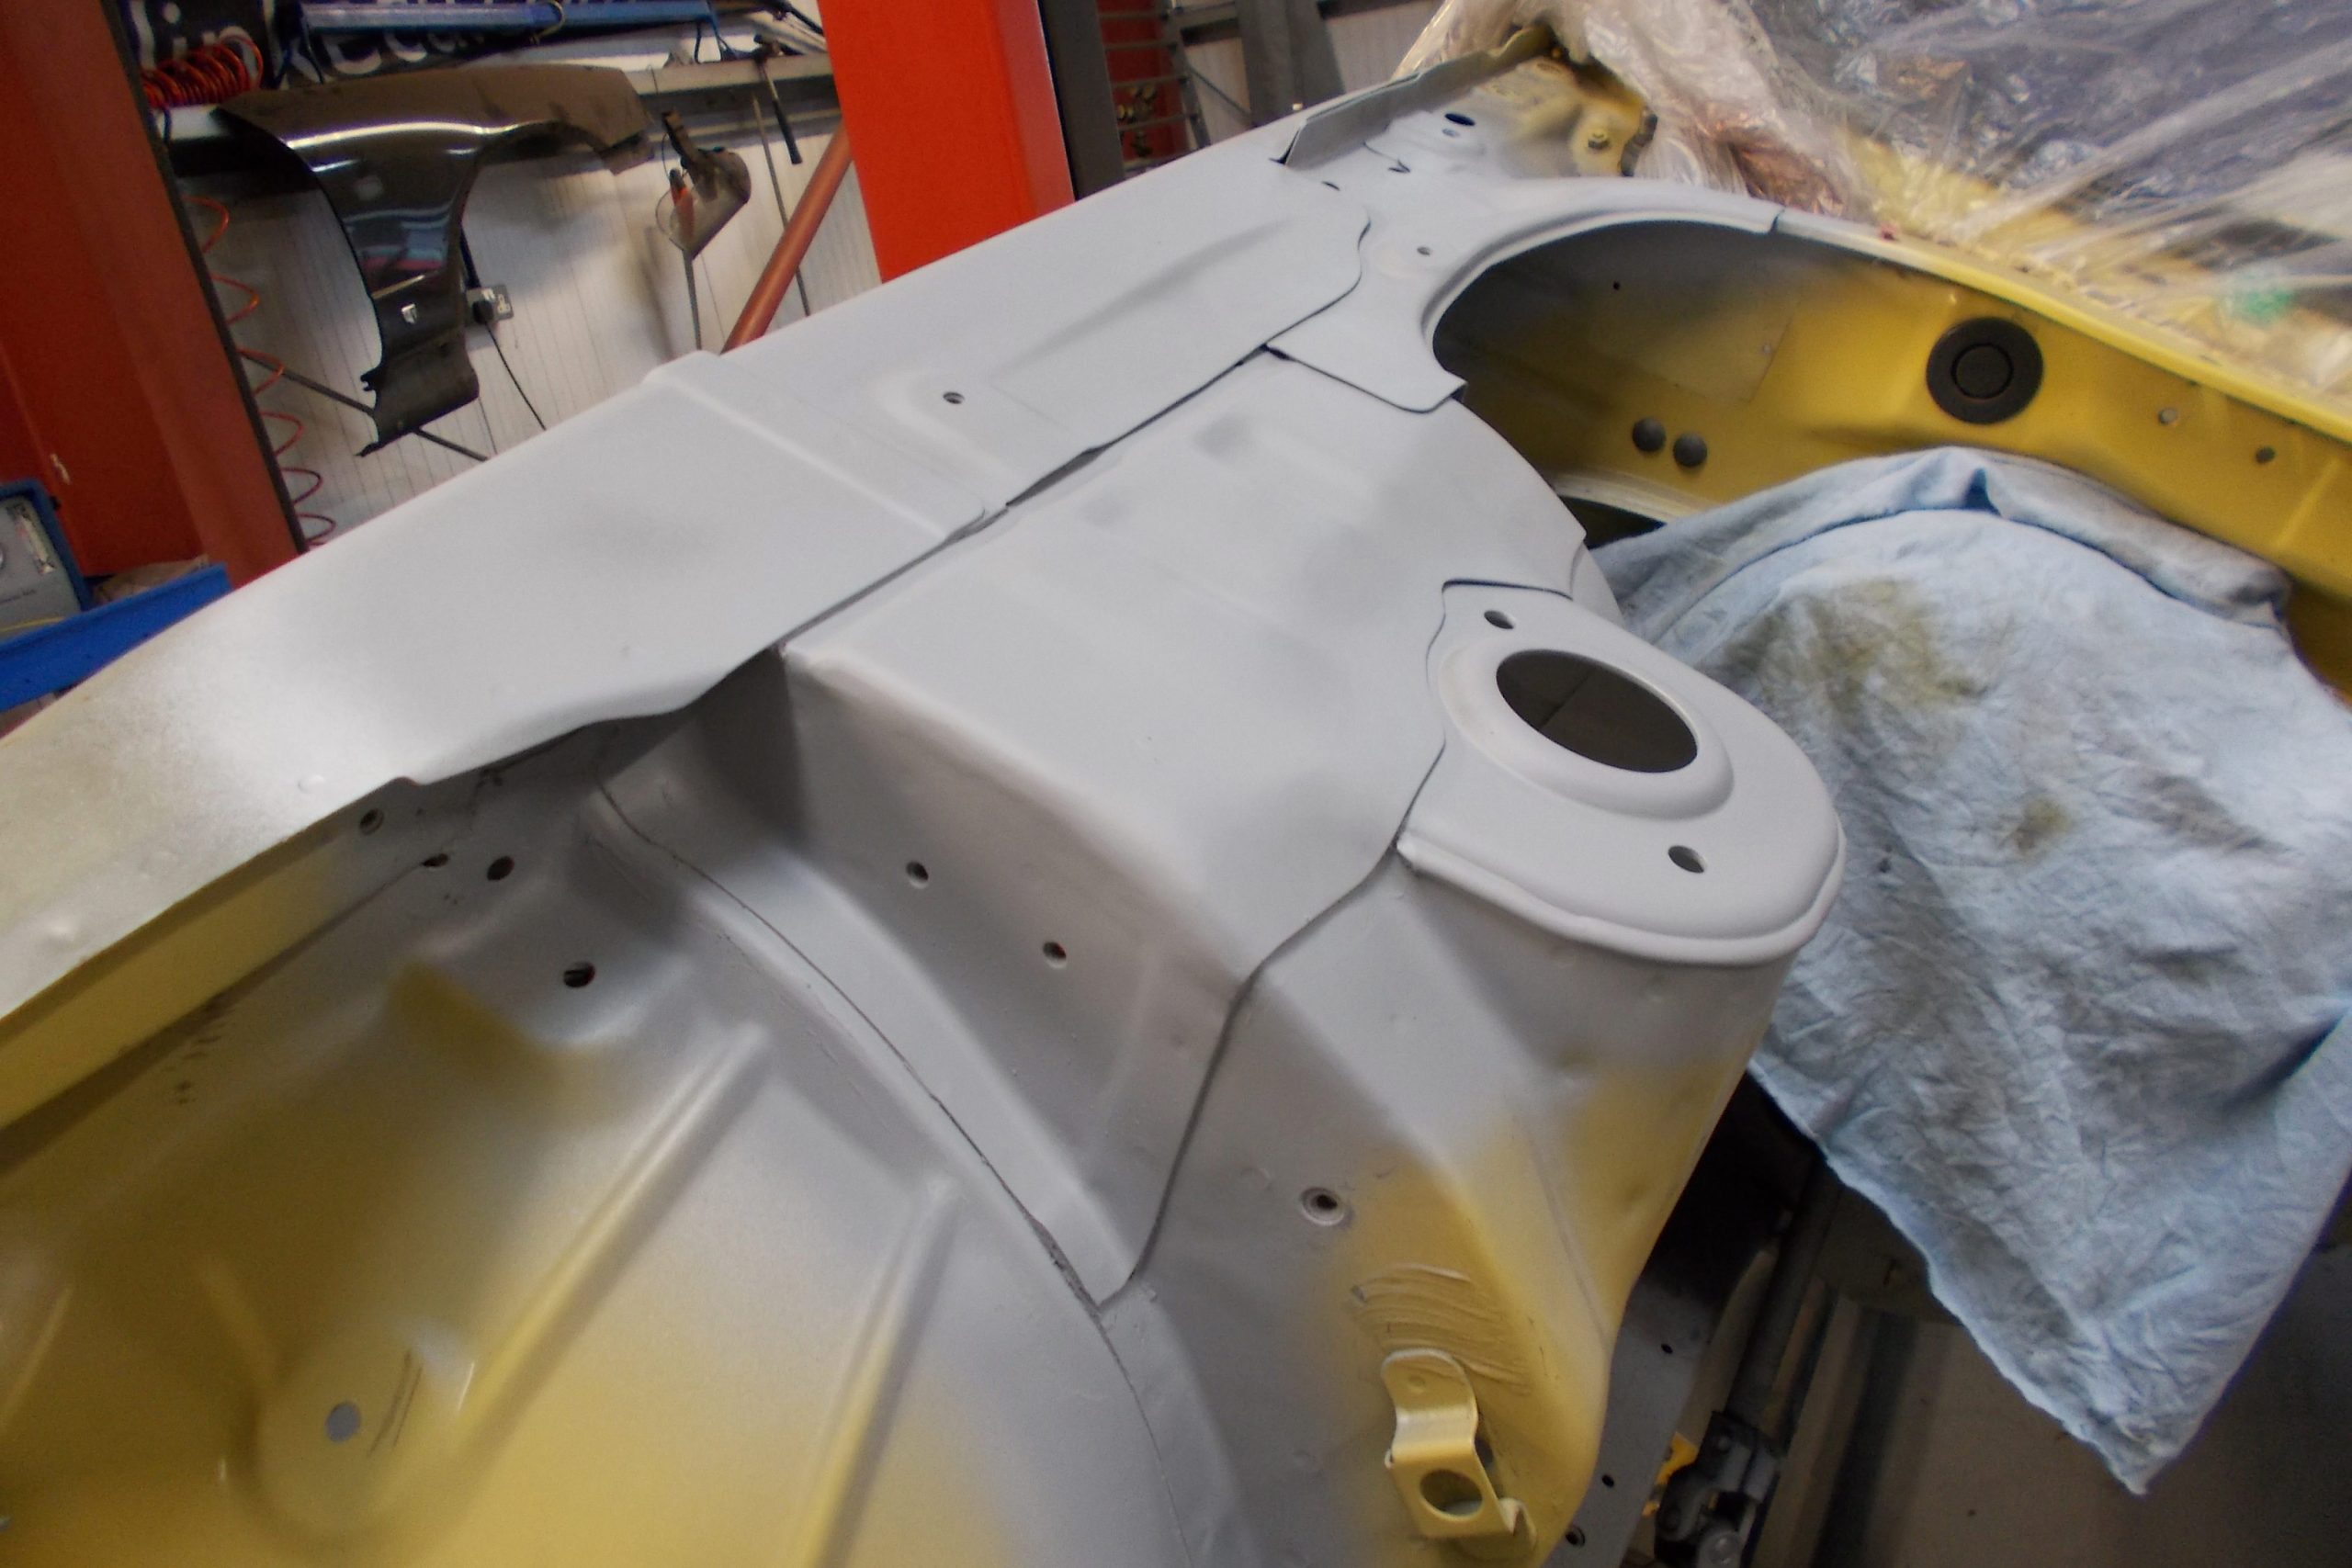
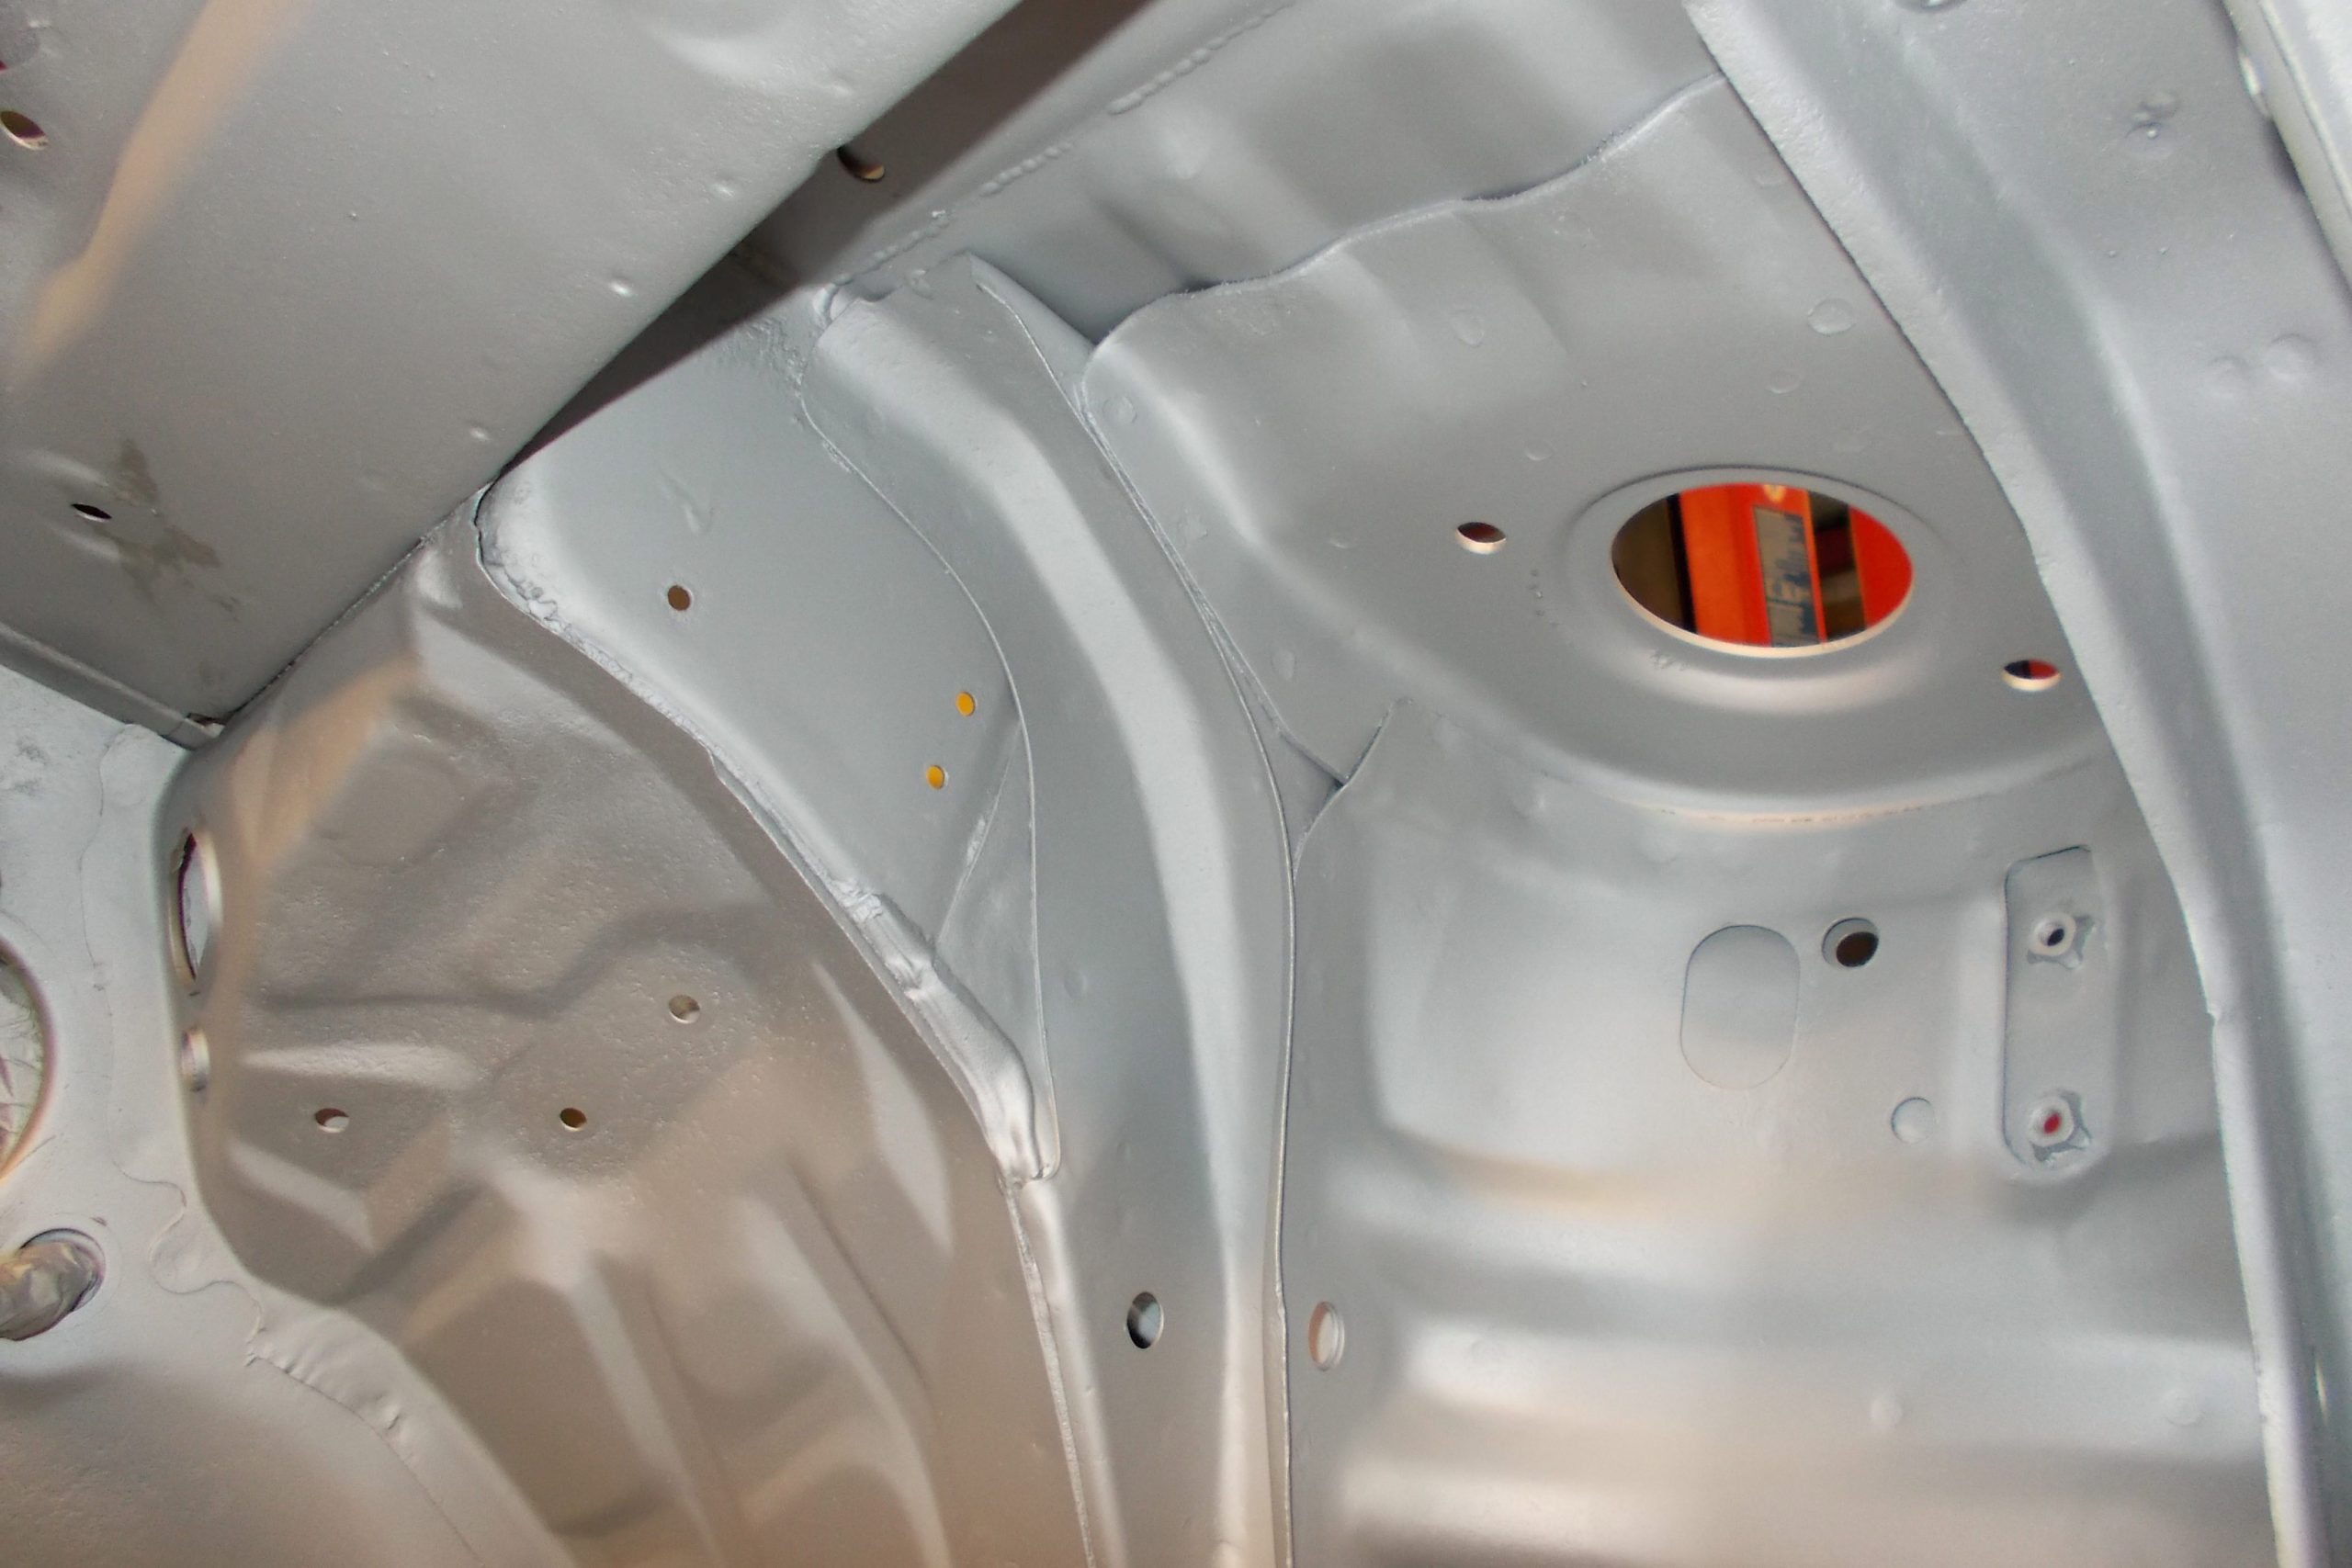
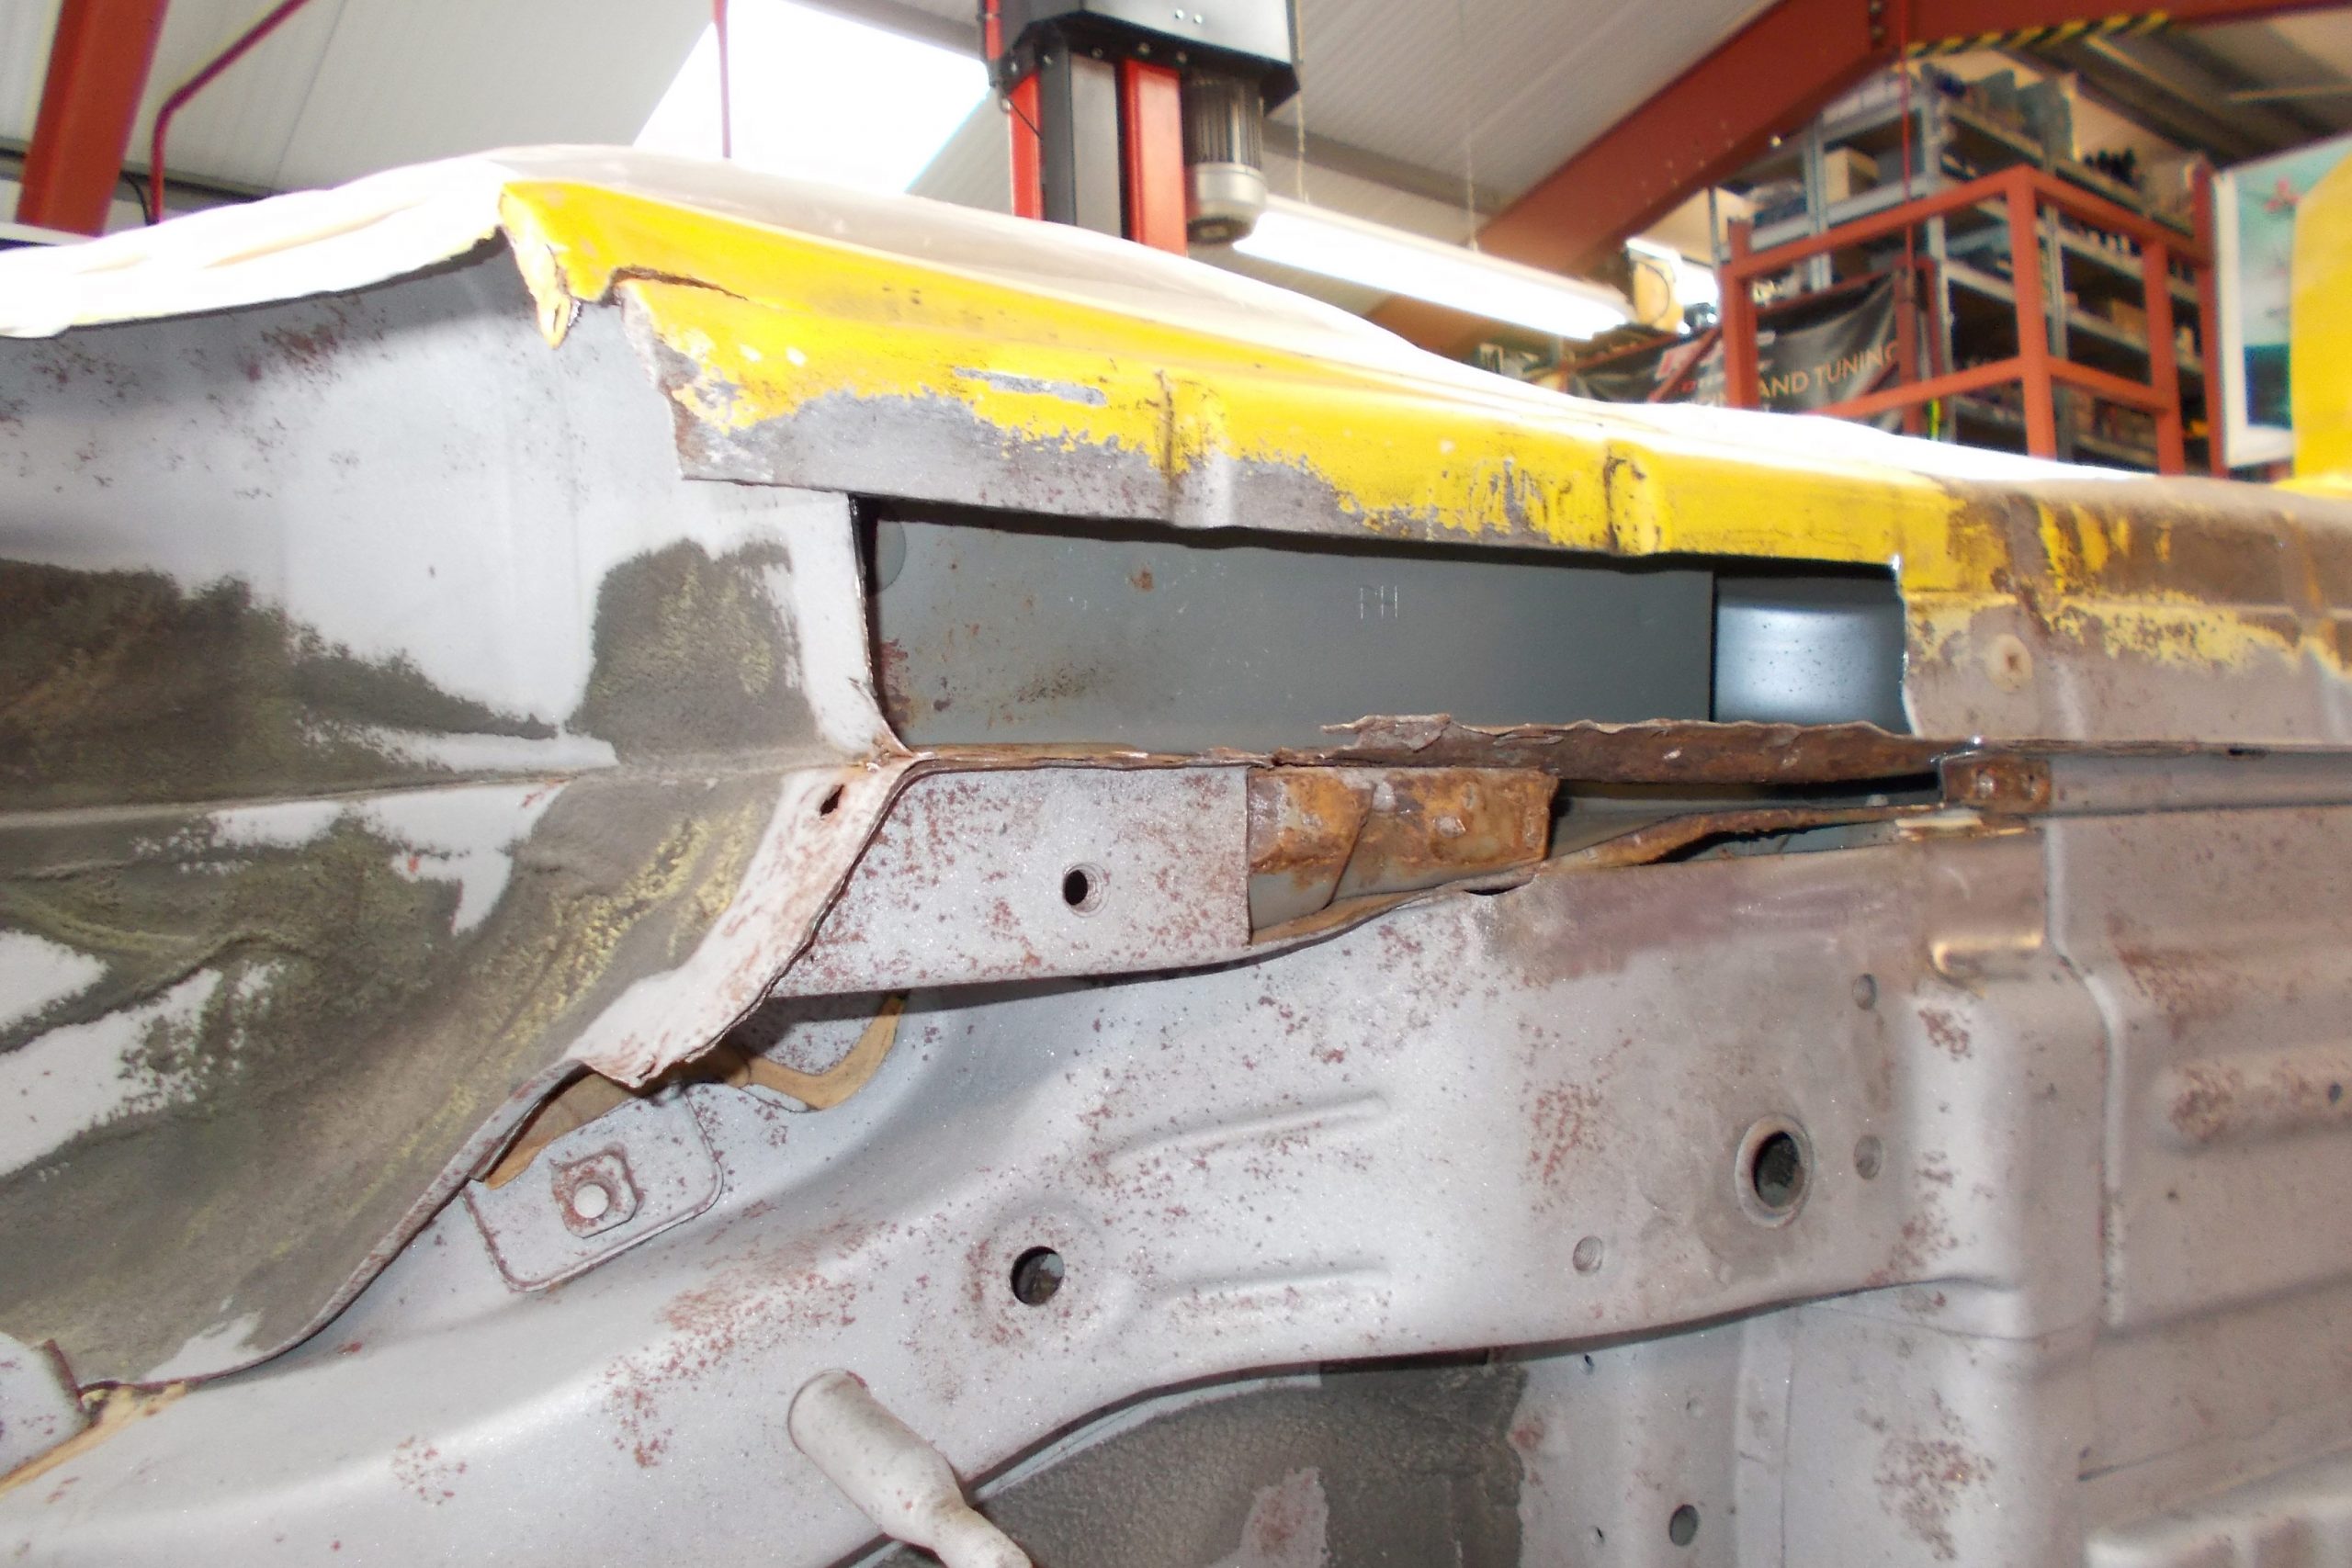
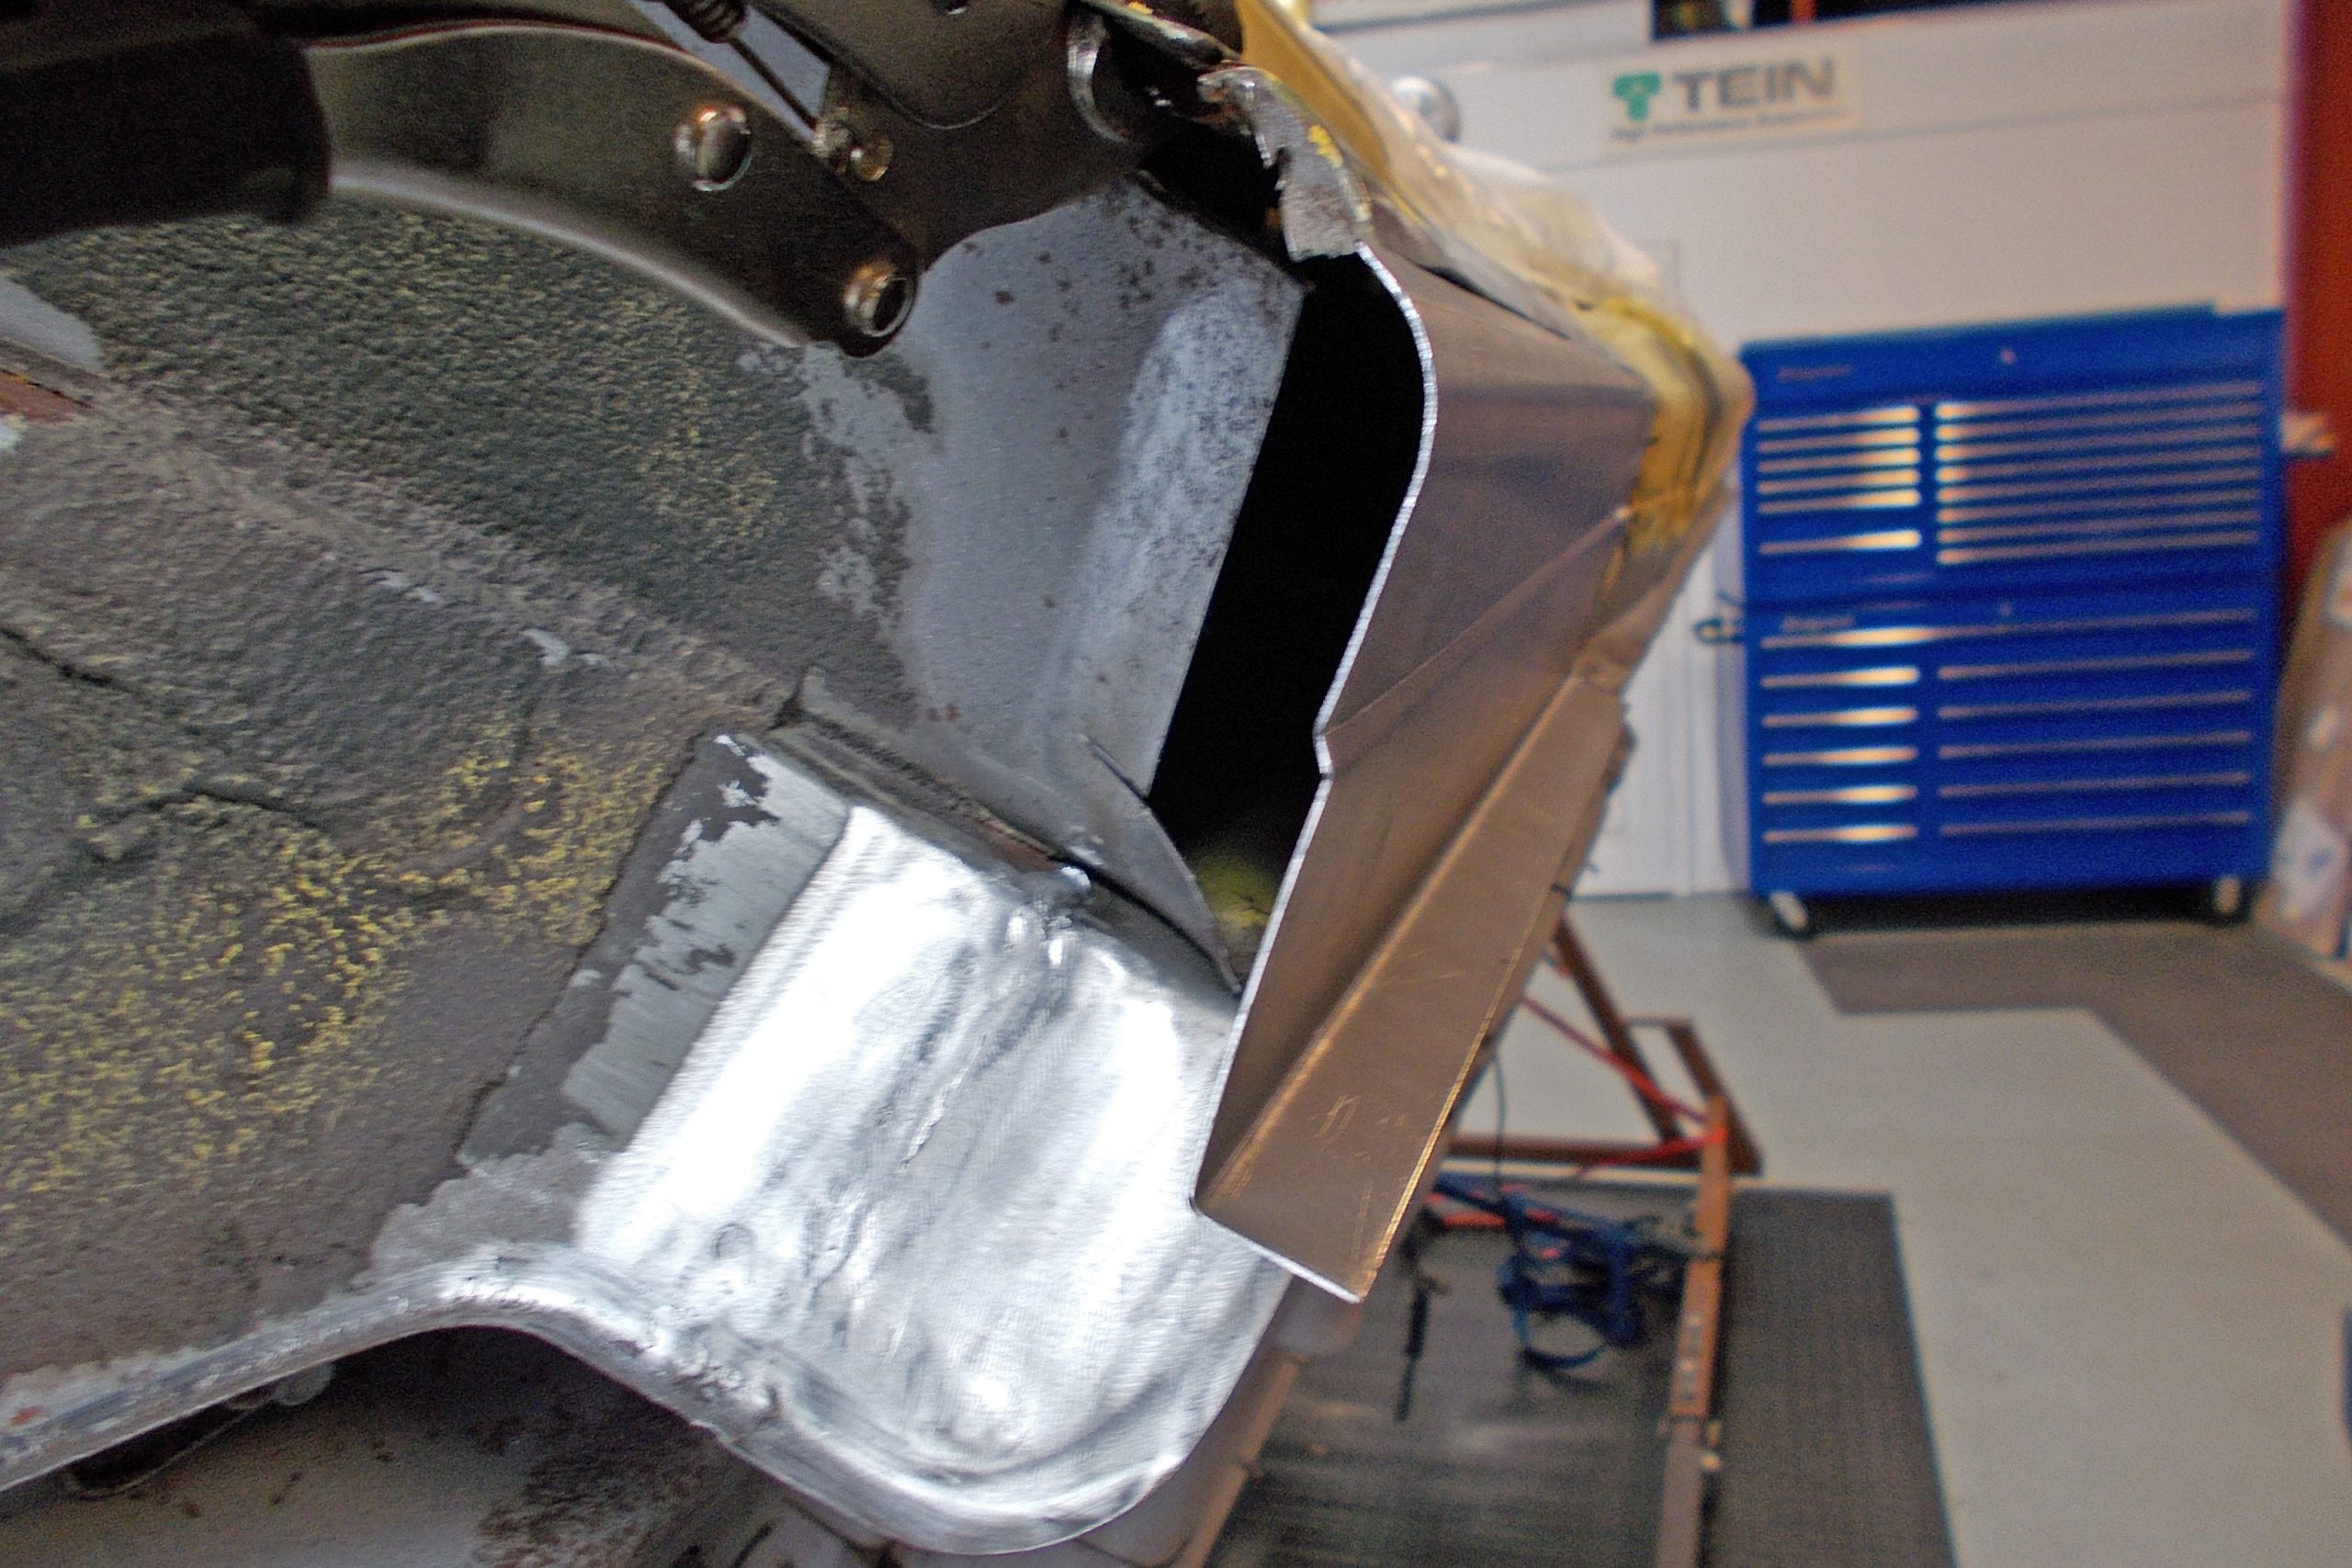
It was inevitable that we’d find a few more areas where the metal had got either pin holes or very thin. In the end, there were around 11-12 areas of concern that we’d cut out and replace. Both turret tops, both front inner wings high and low, both rear spat areas, both rear closing sill panels, one of the chassis rails and where the fuel filler neck passes through the chassis all needed attention.
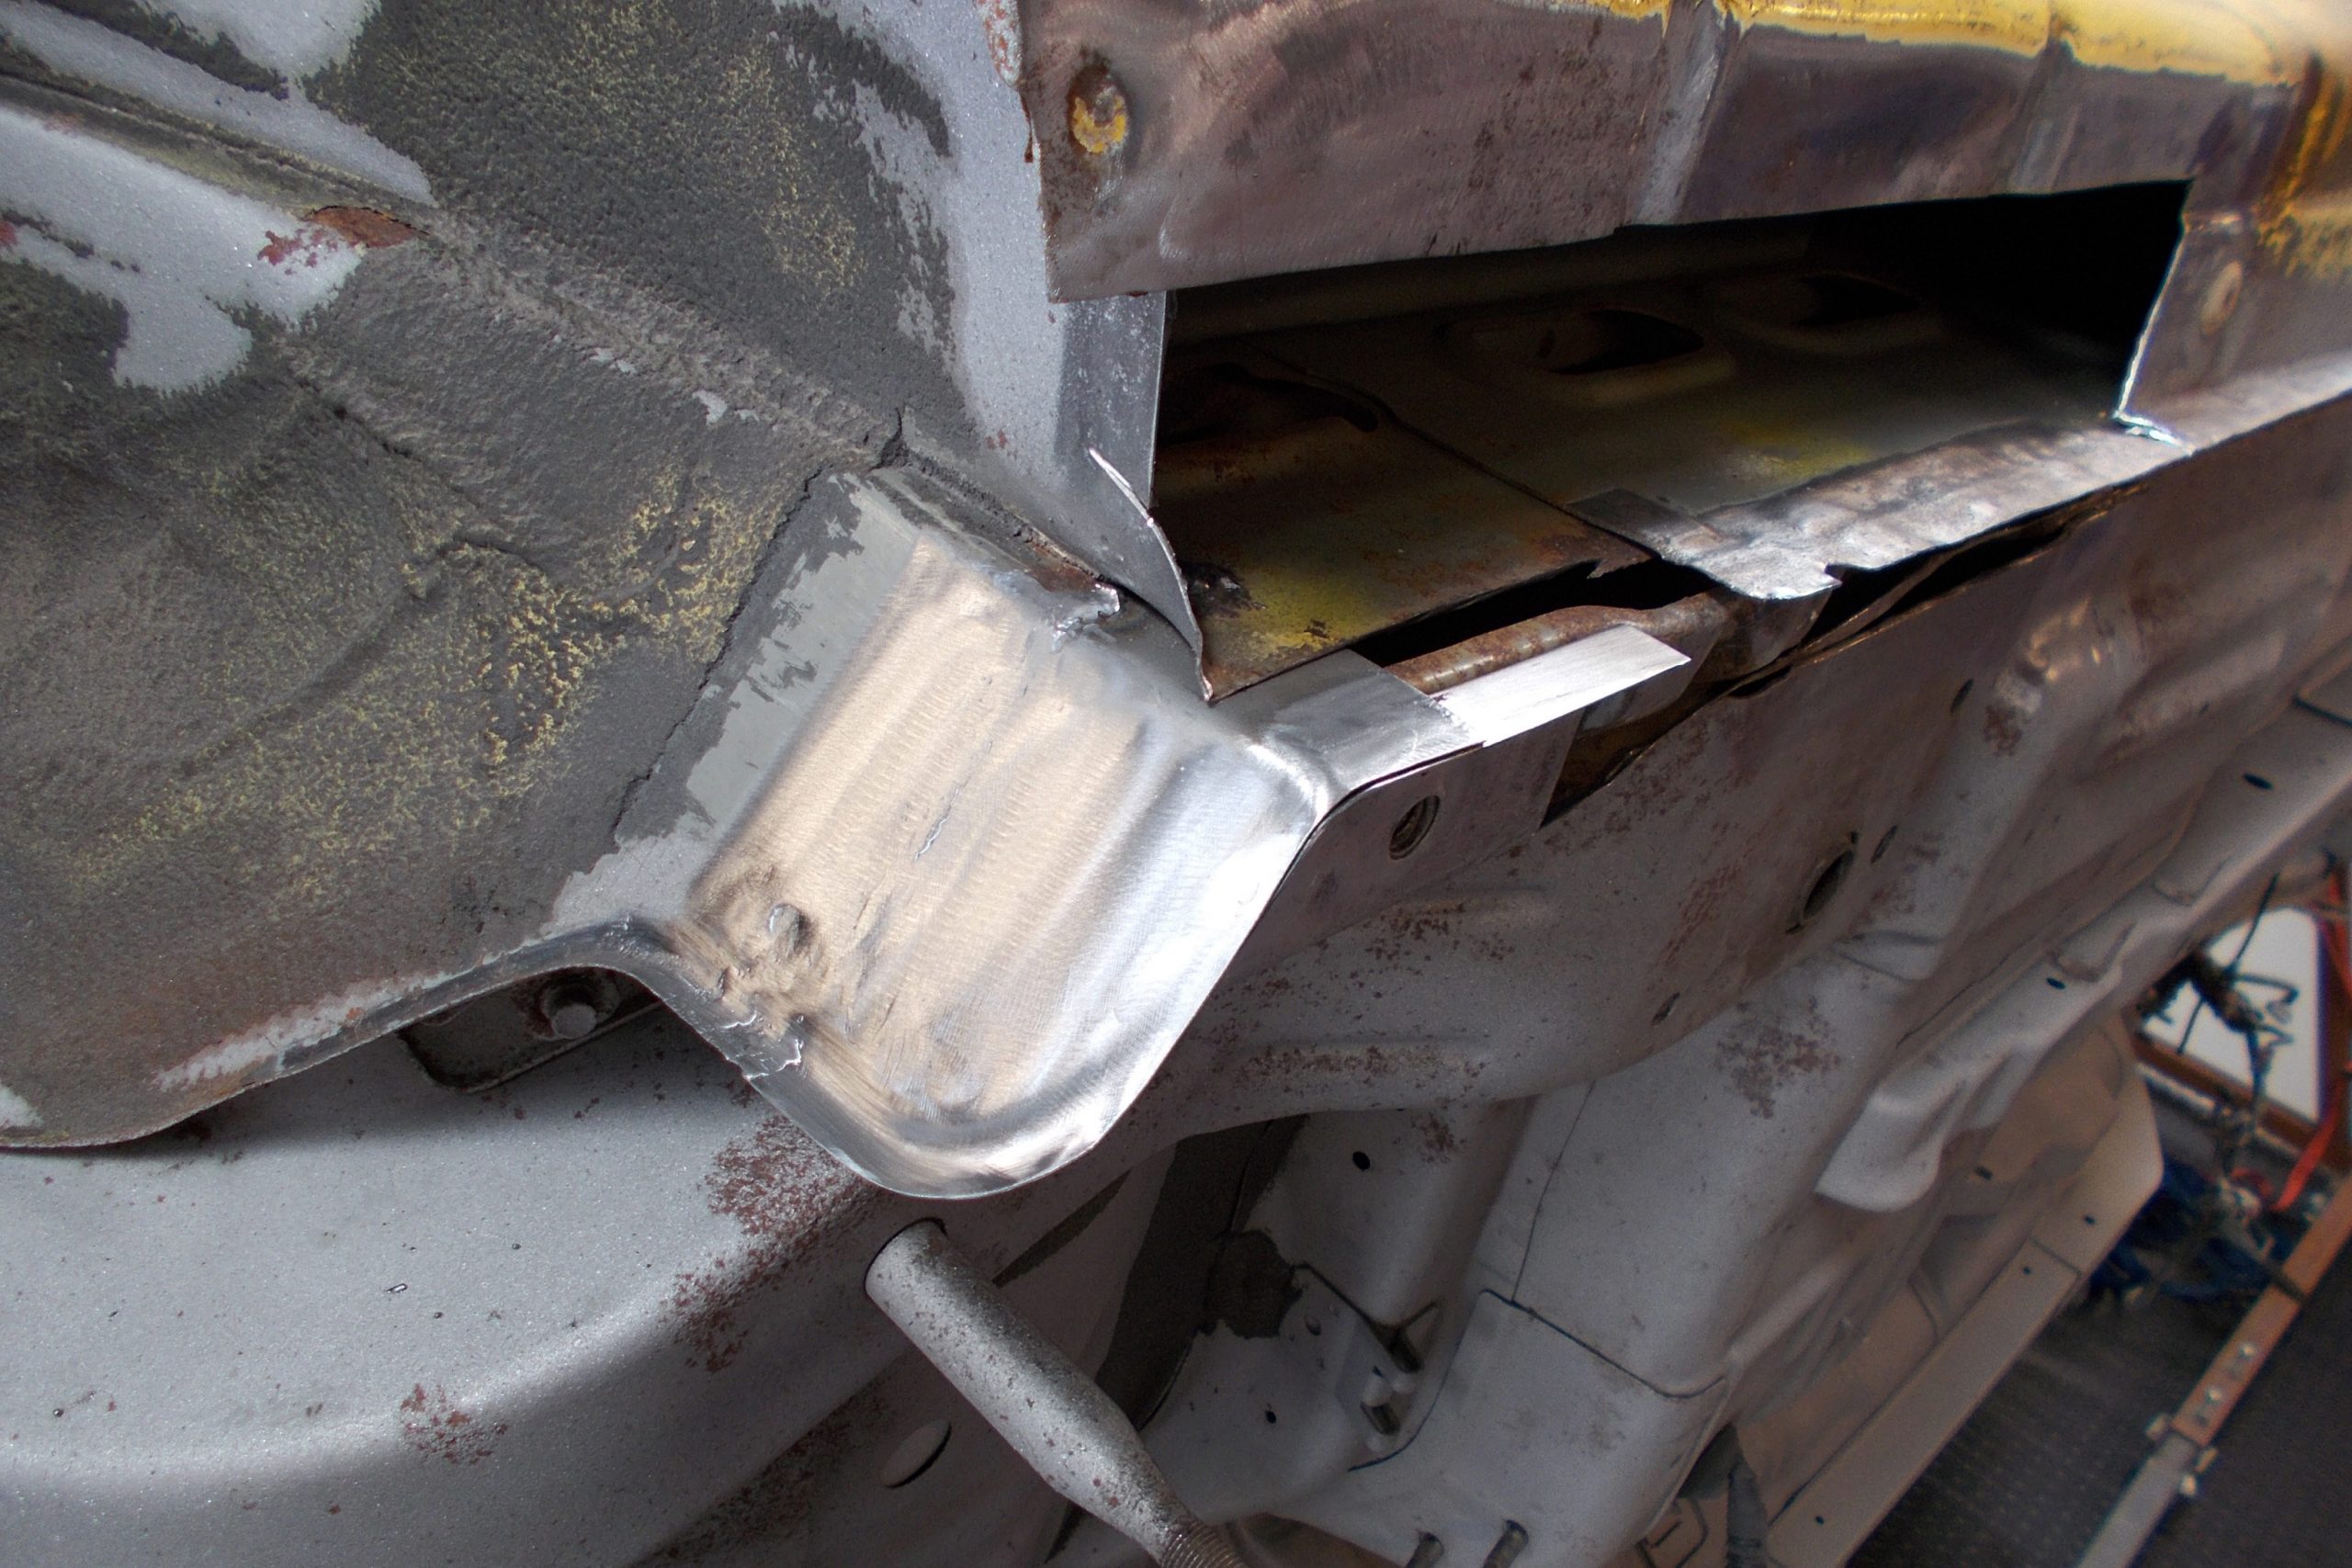
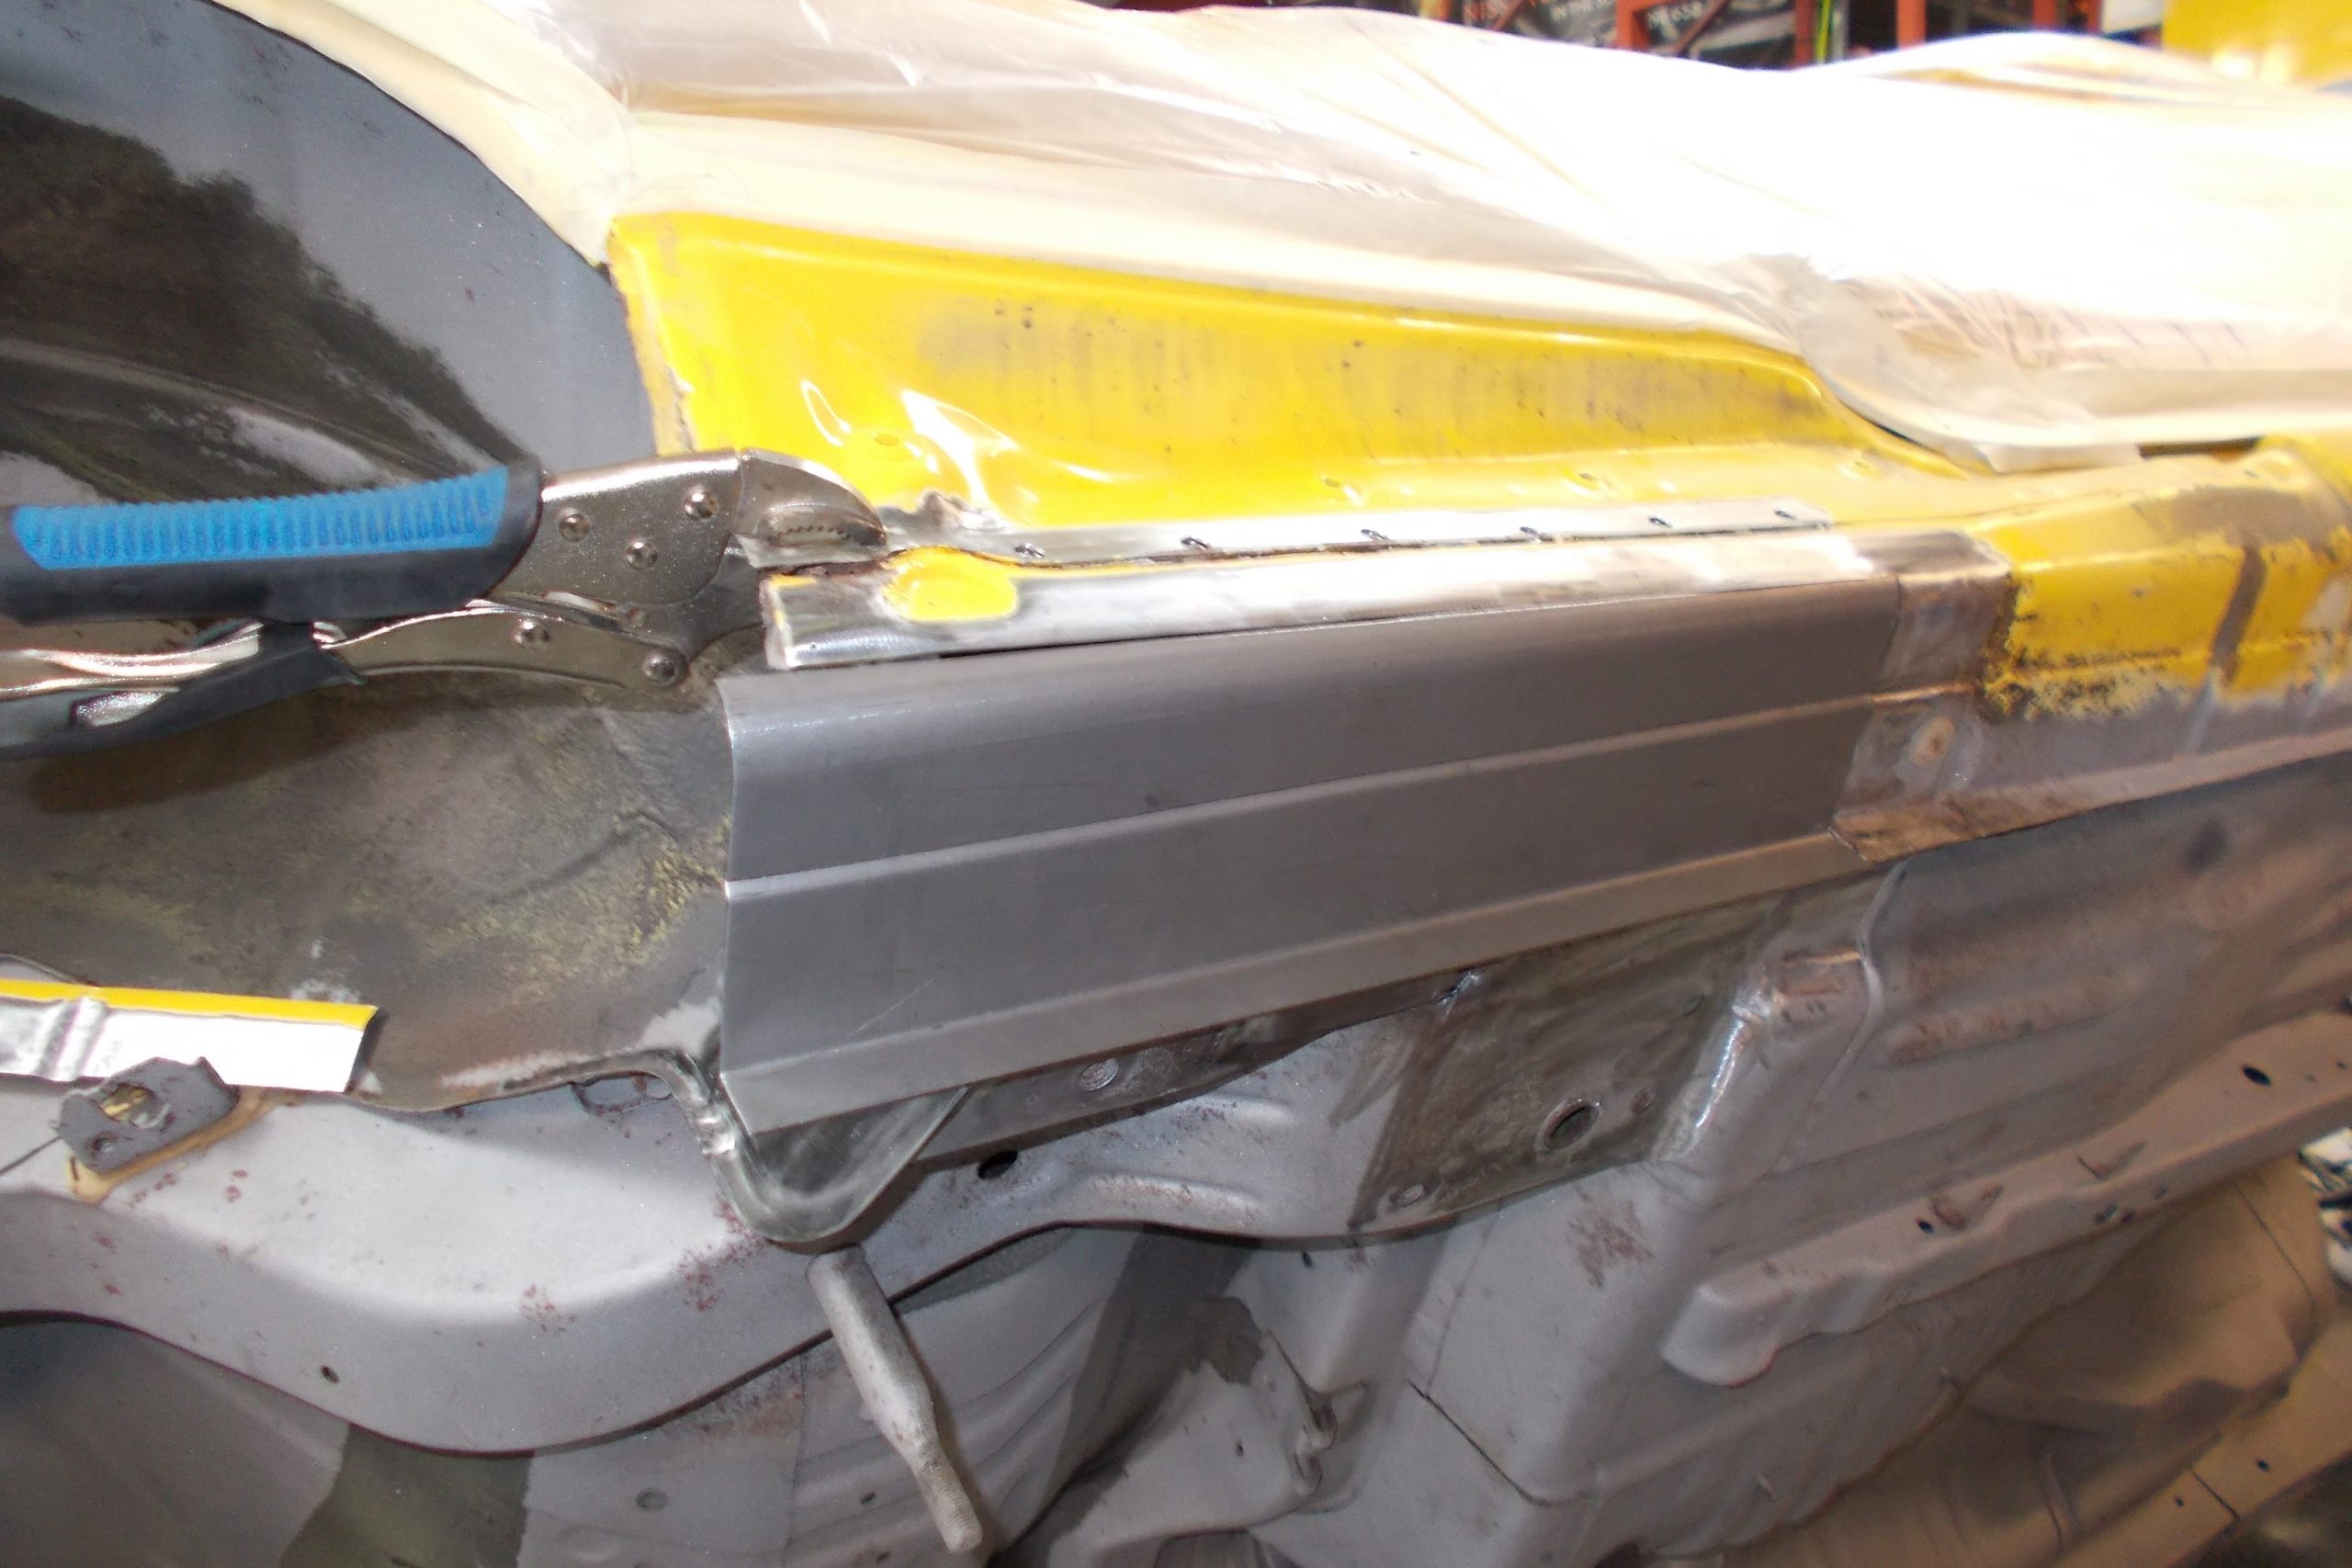
All welding repairs carried out to look like a factory finish and every bit of effected metal removed, not just a patch to cover the rust.
Preparing the Chassis
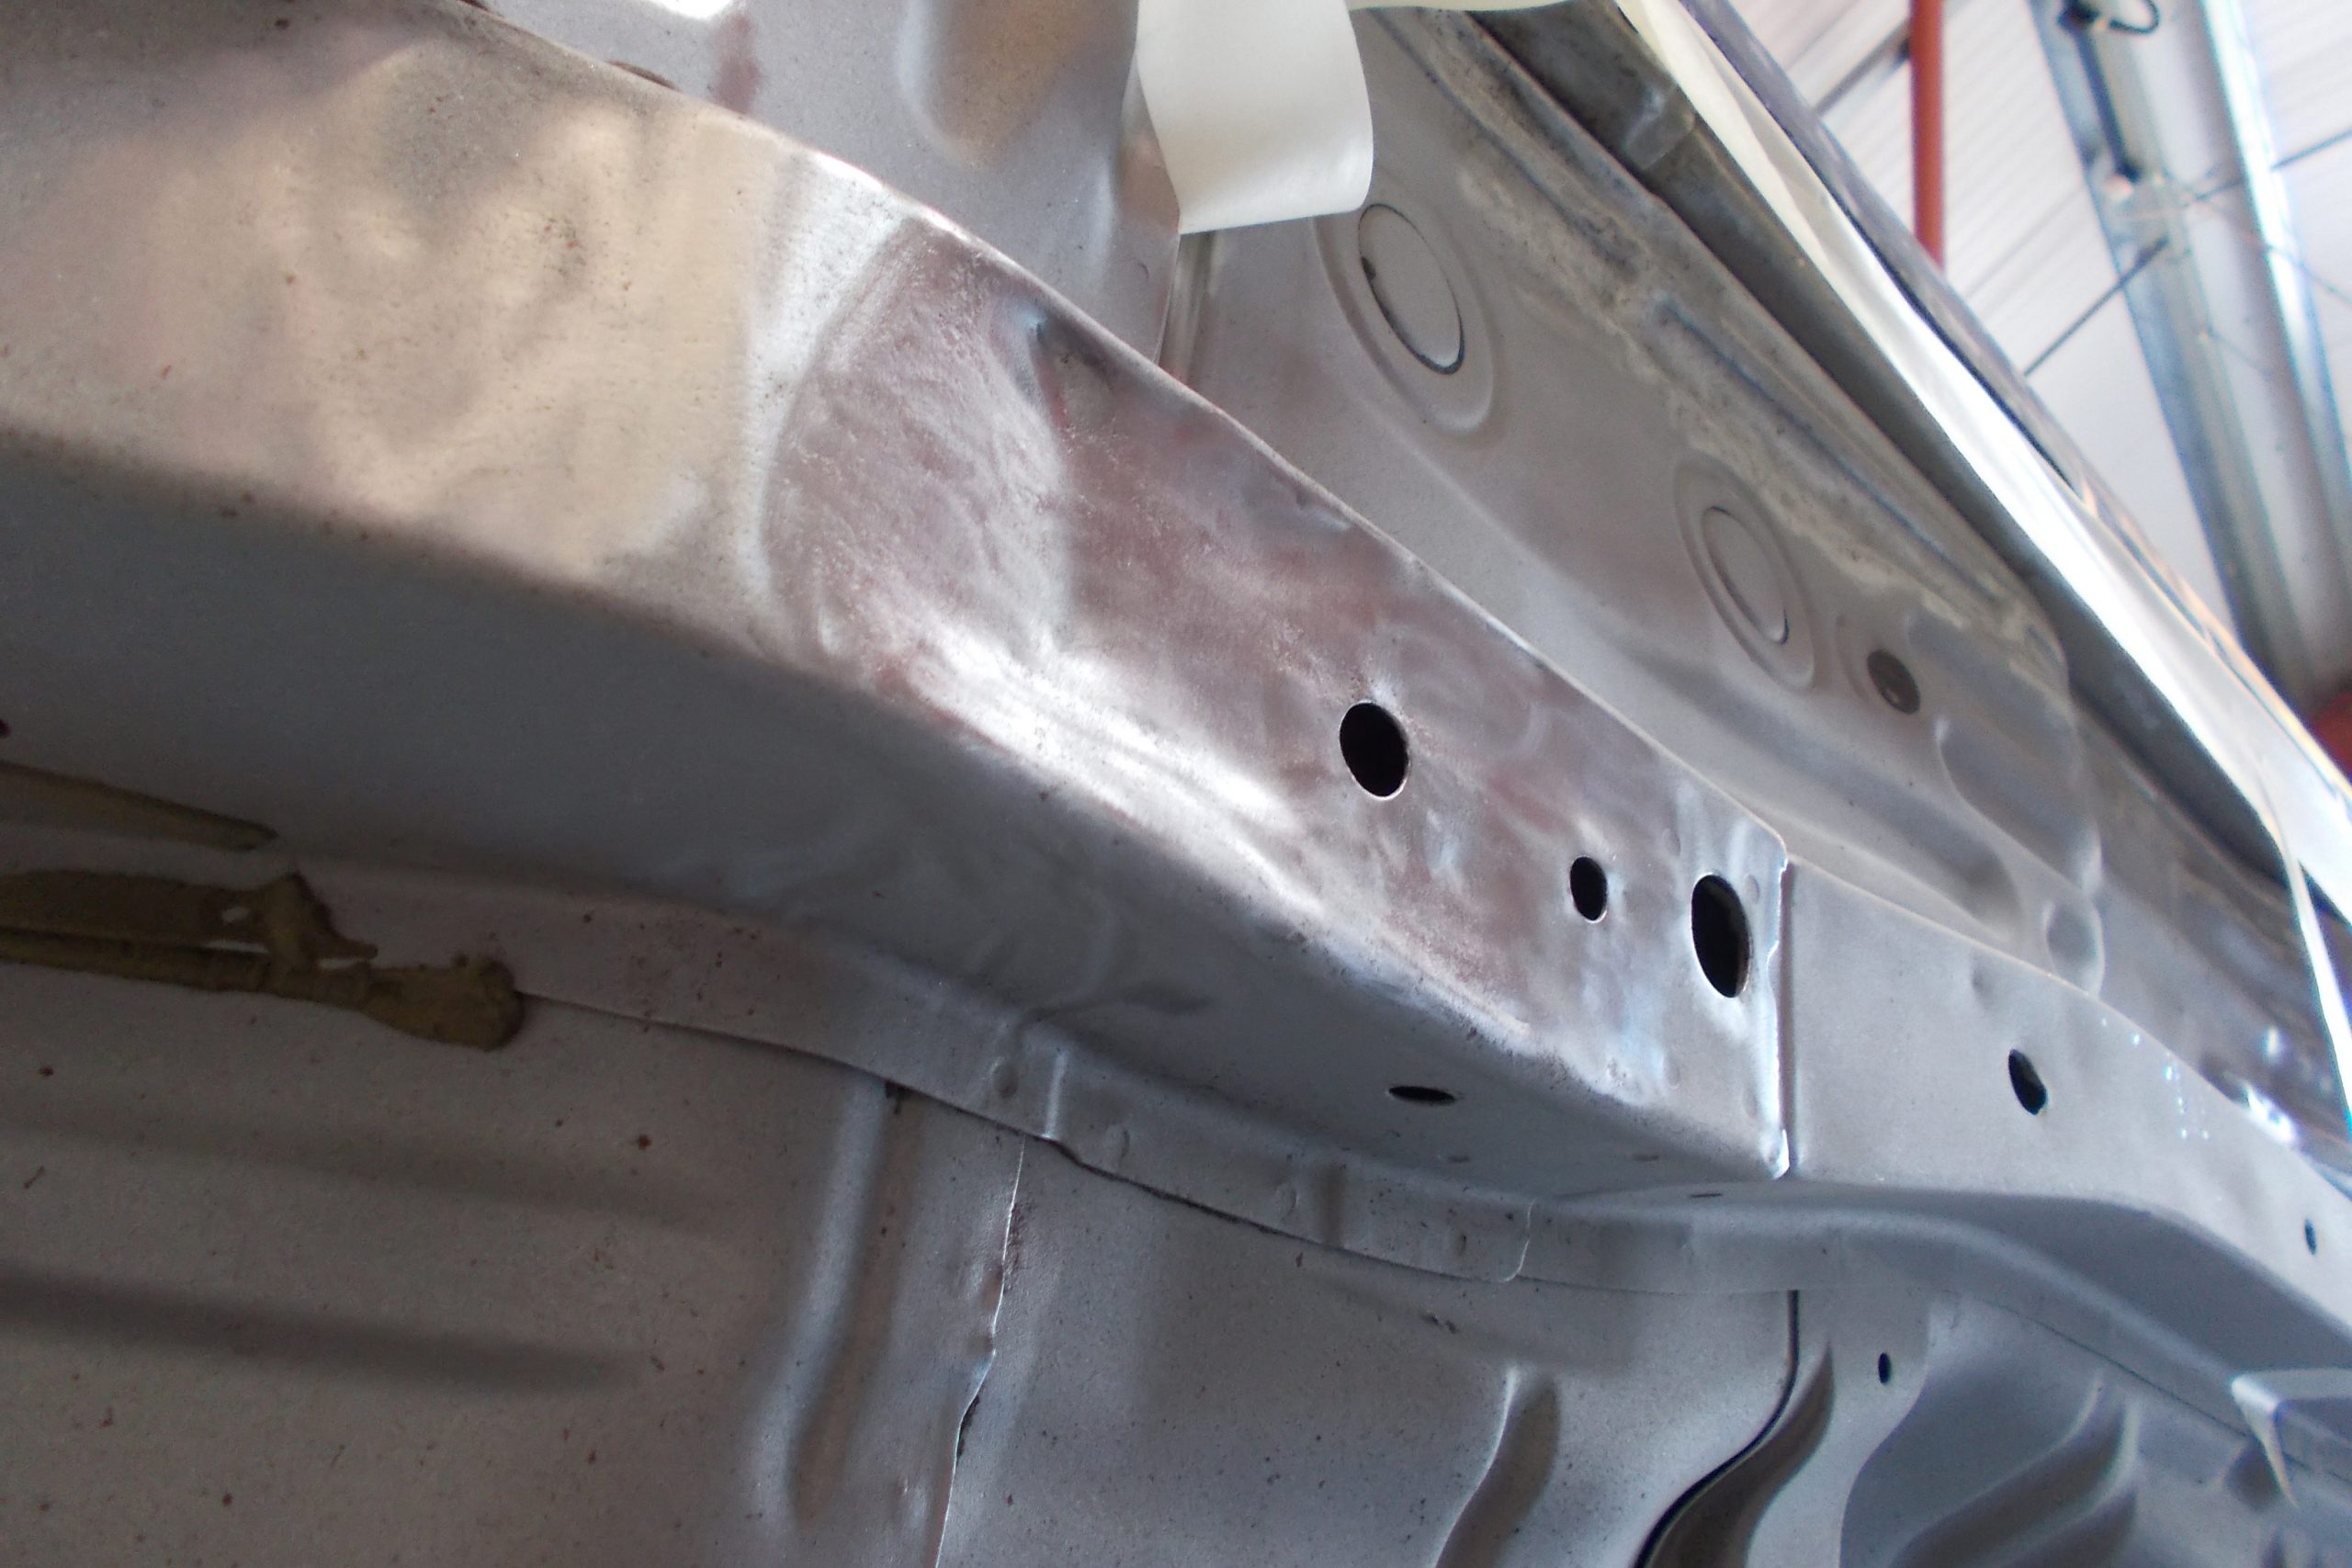
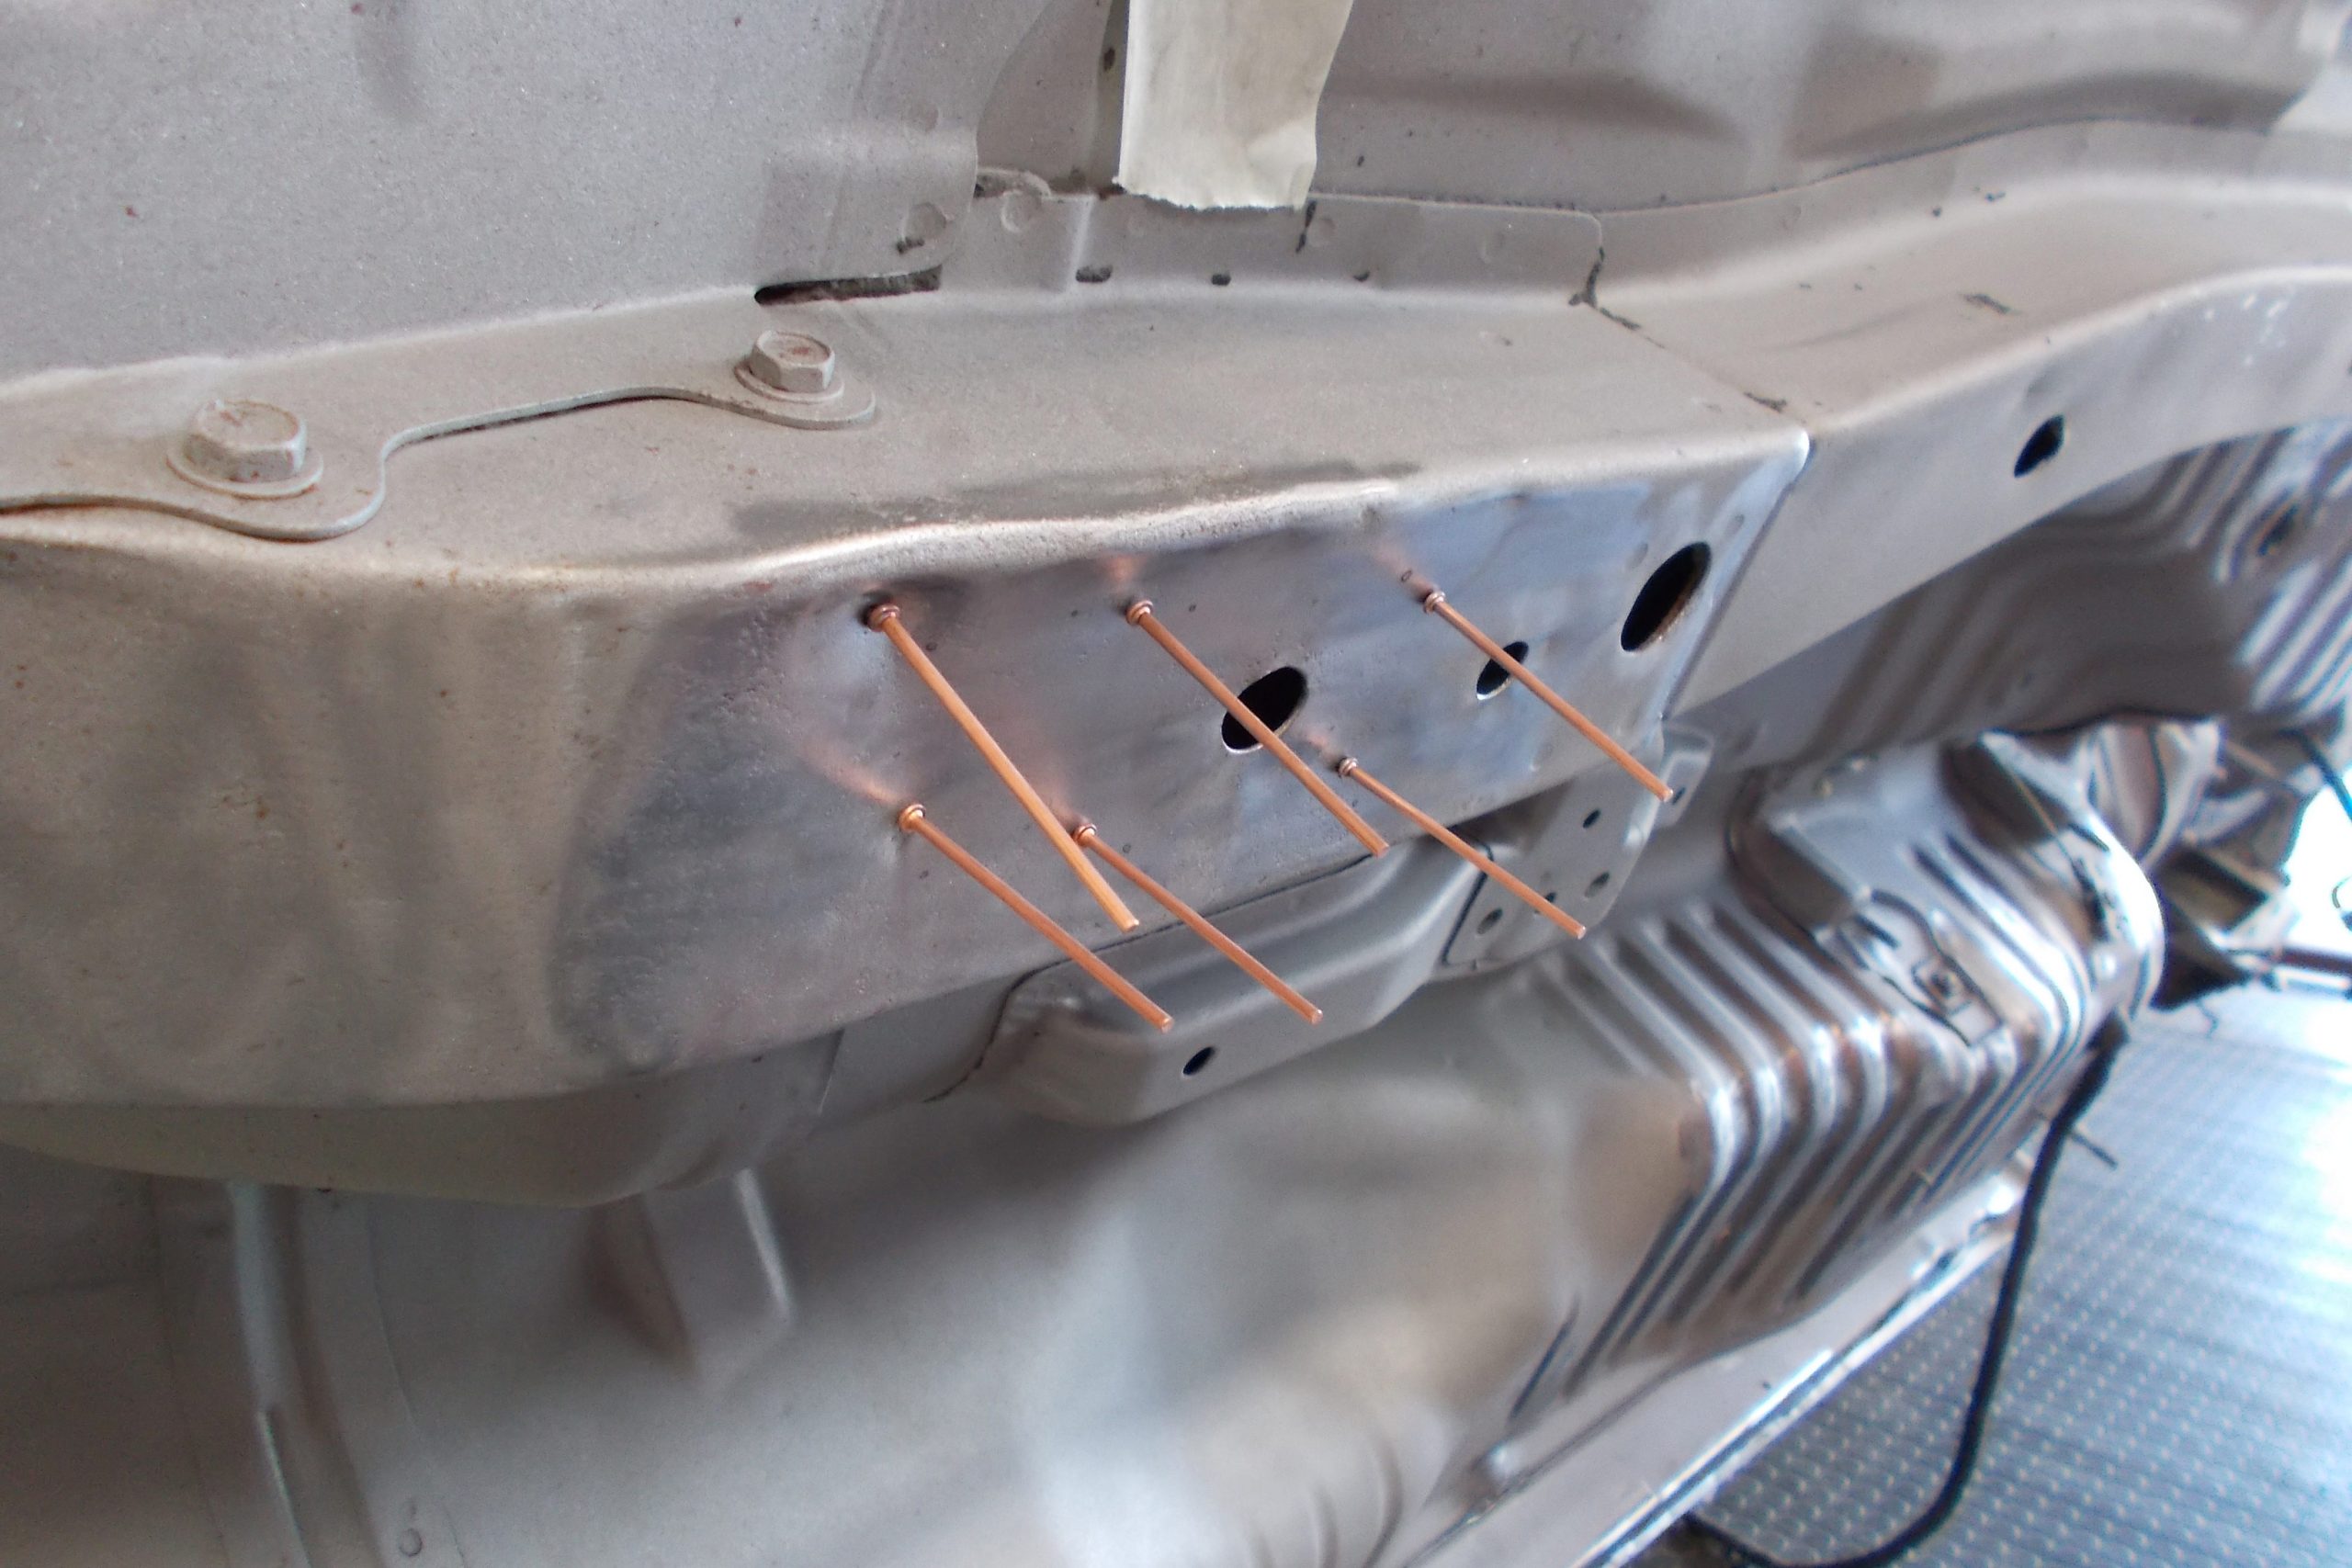
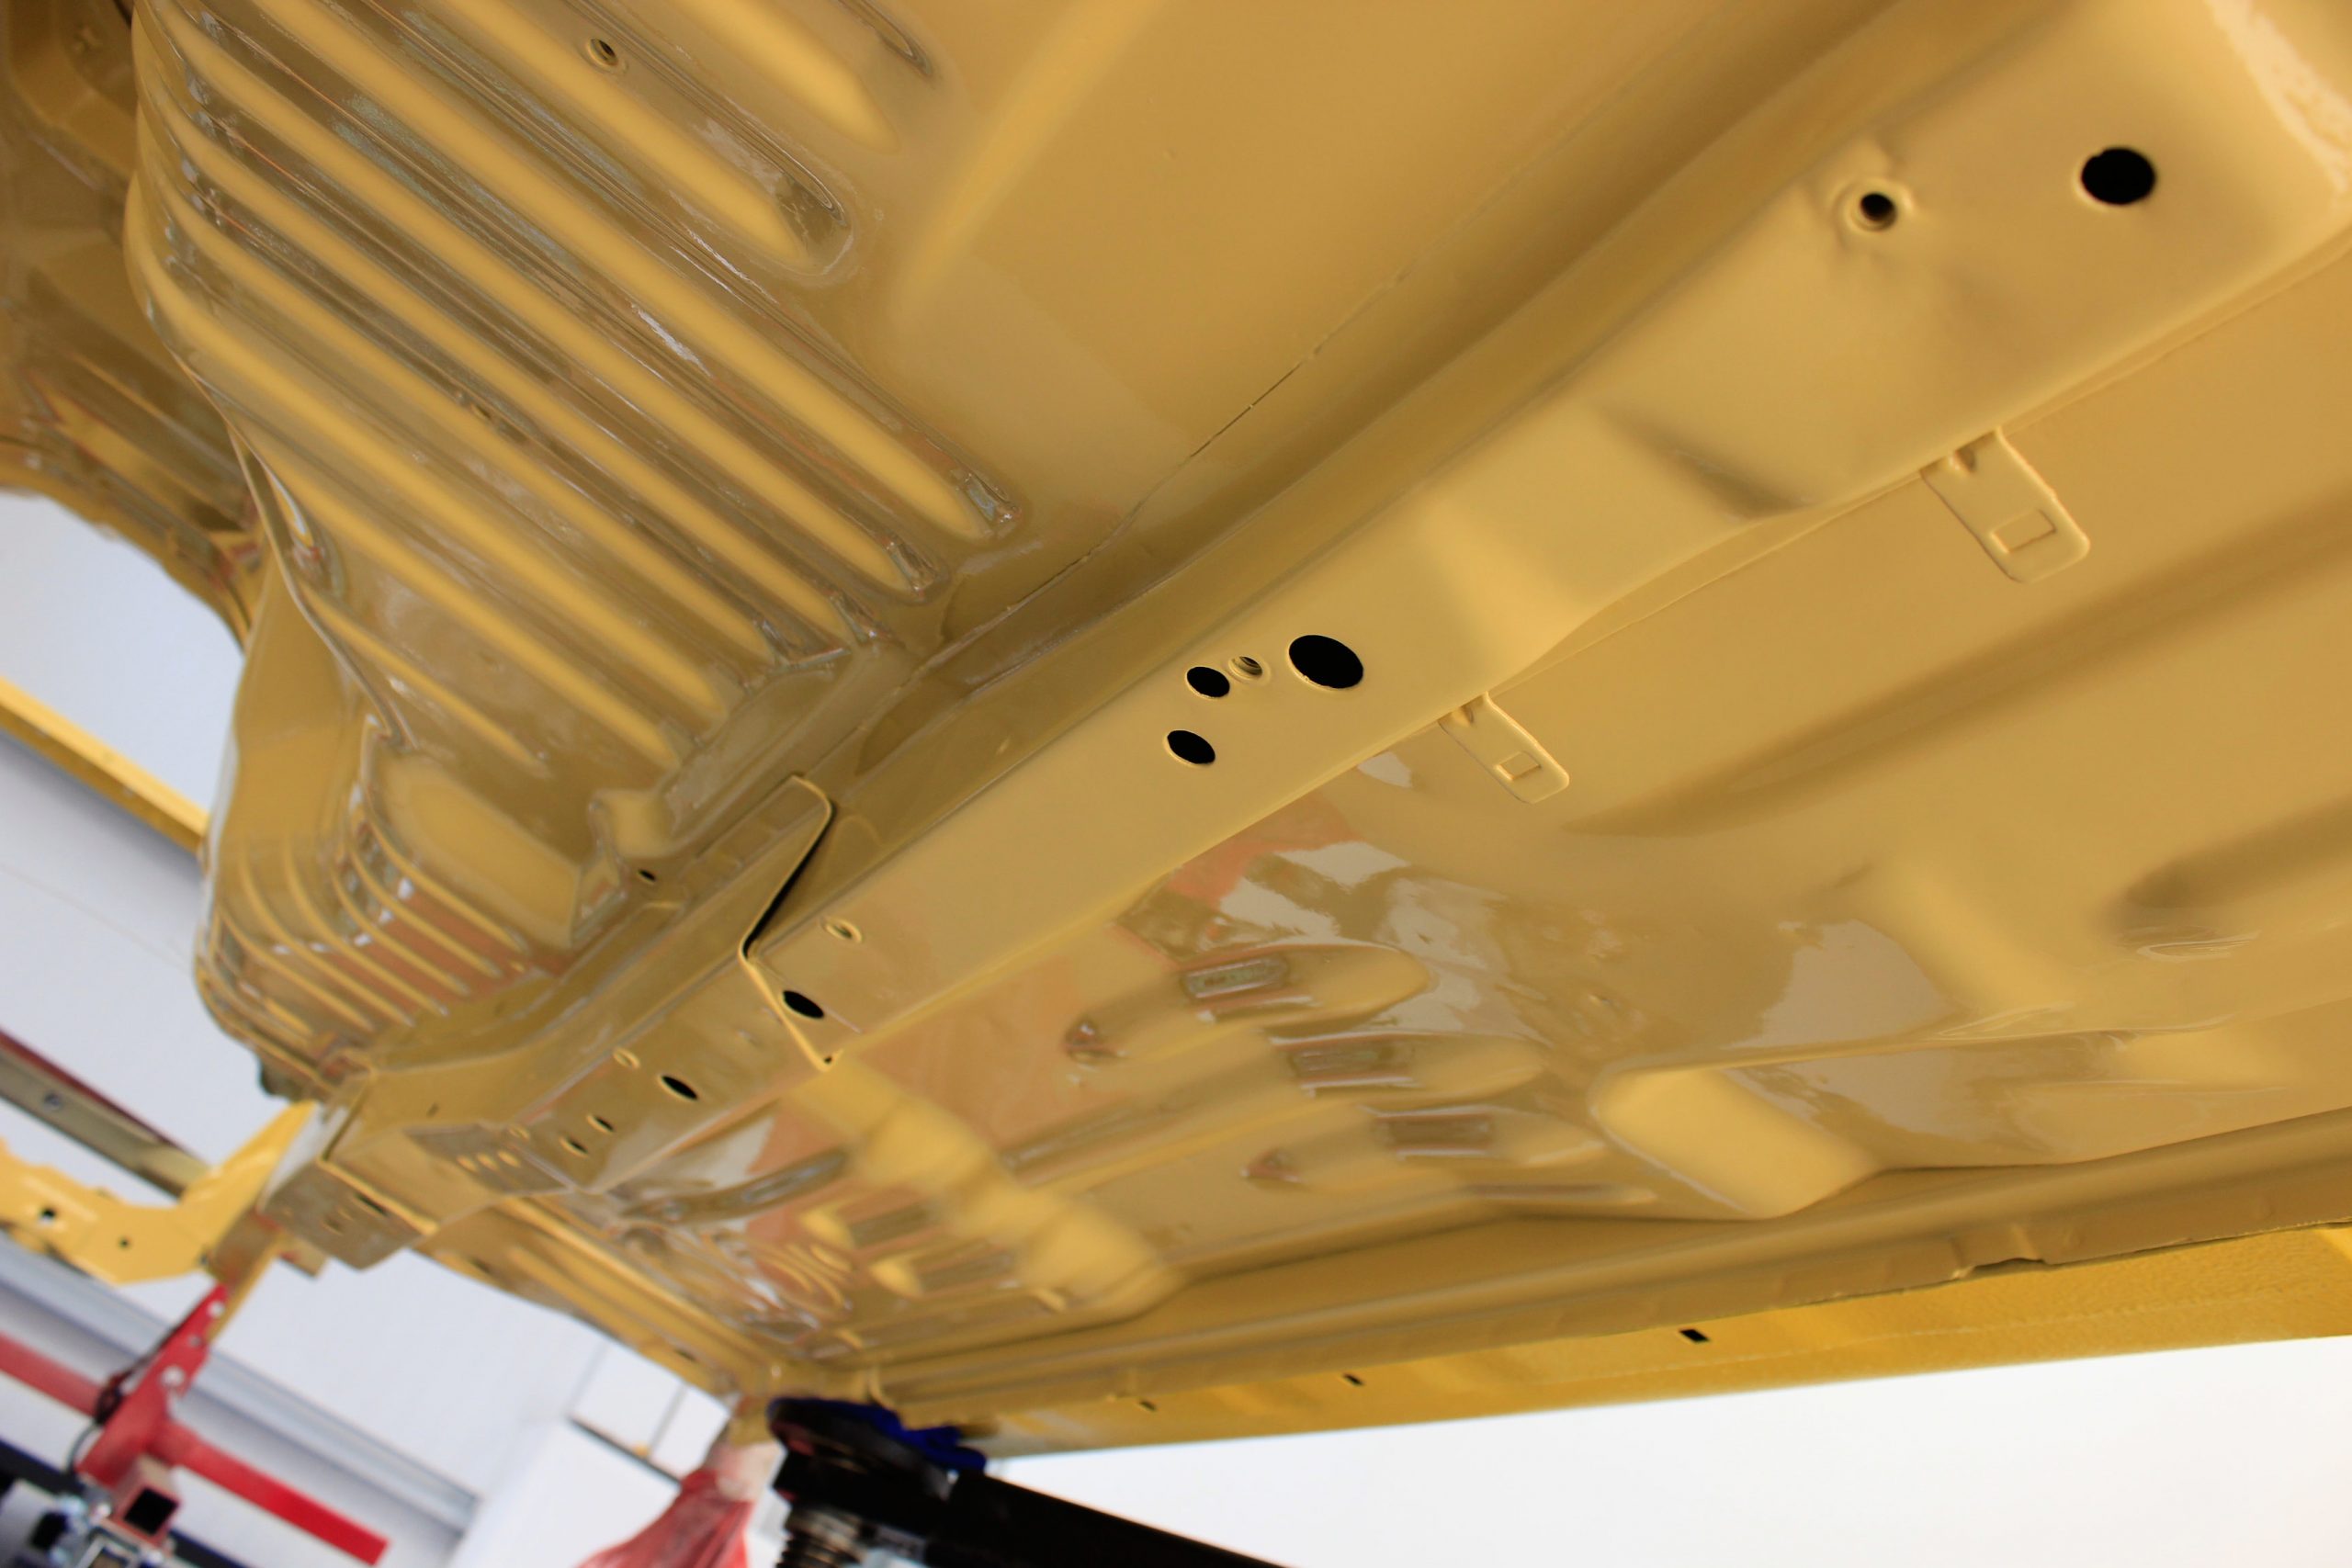
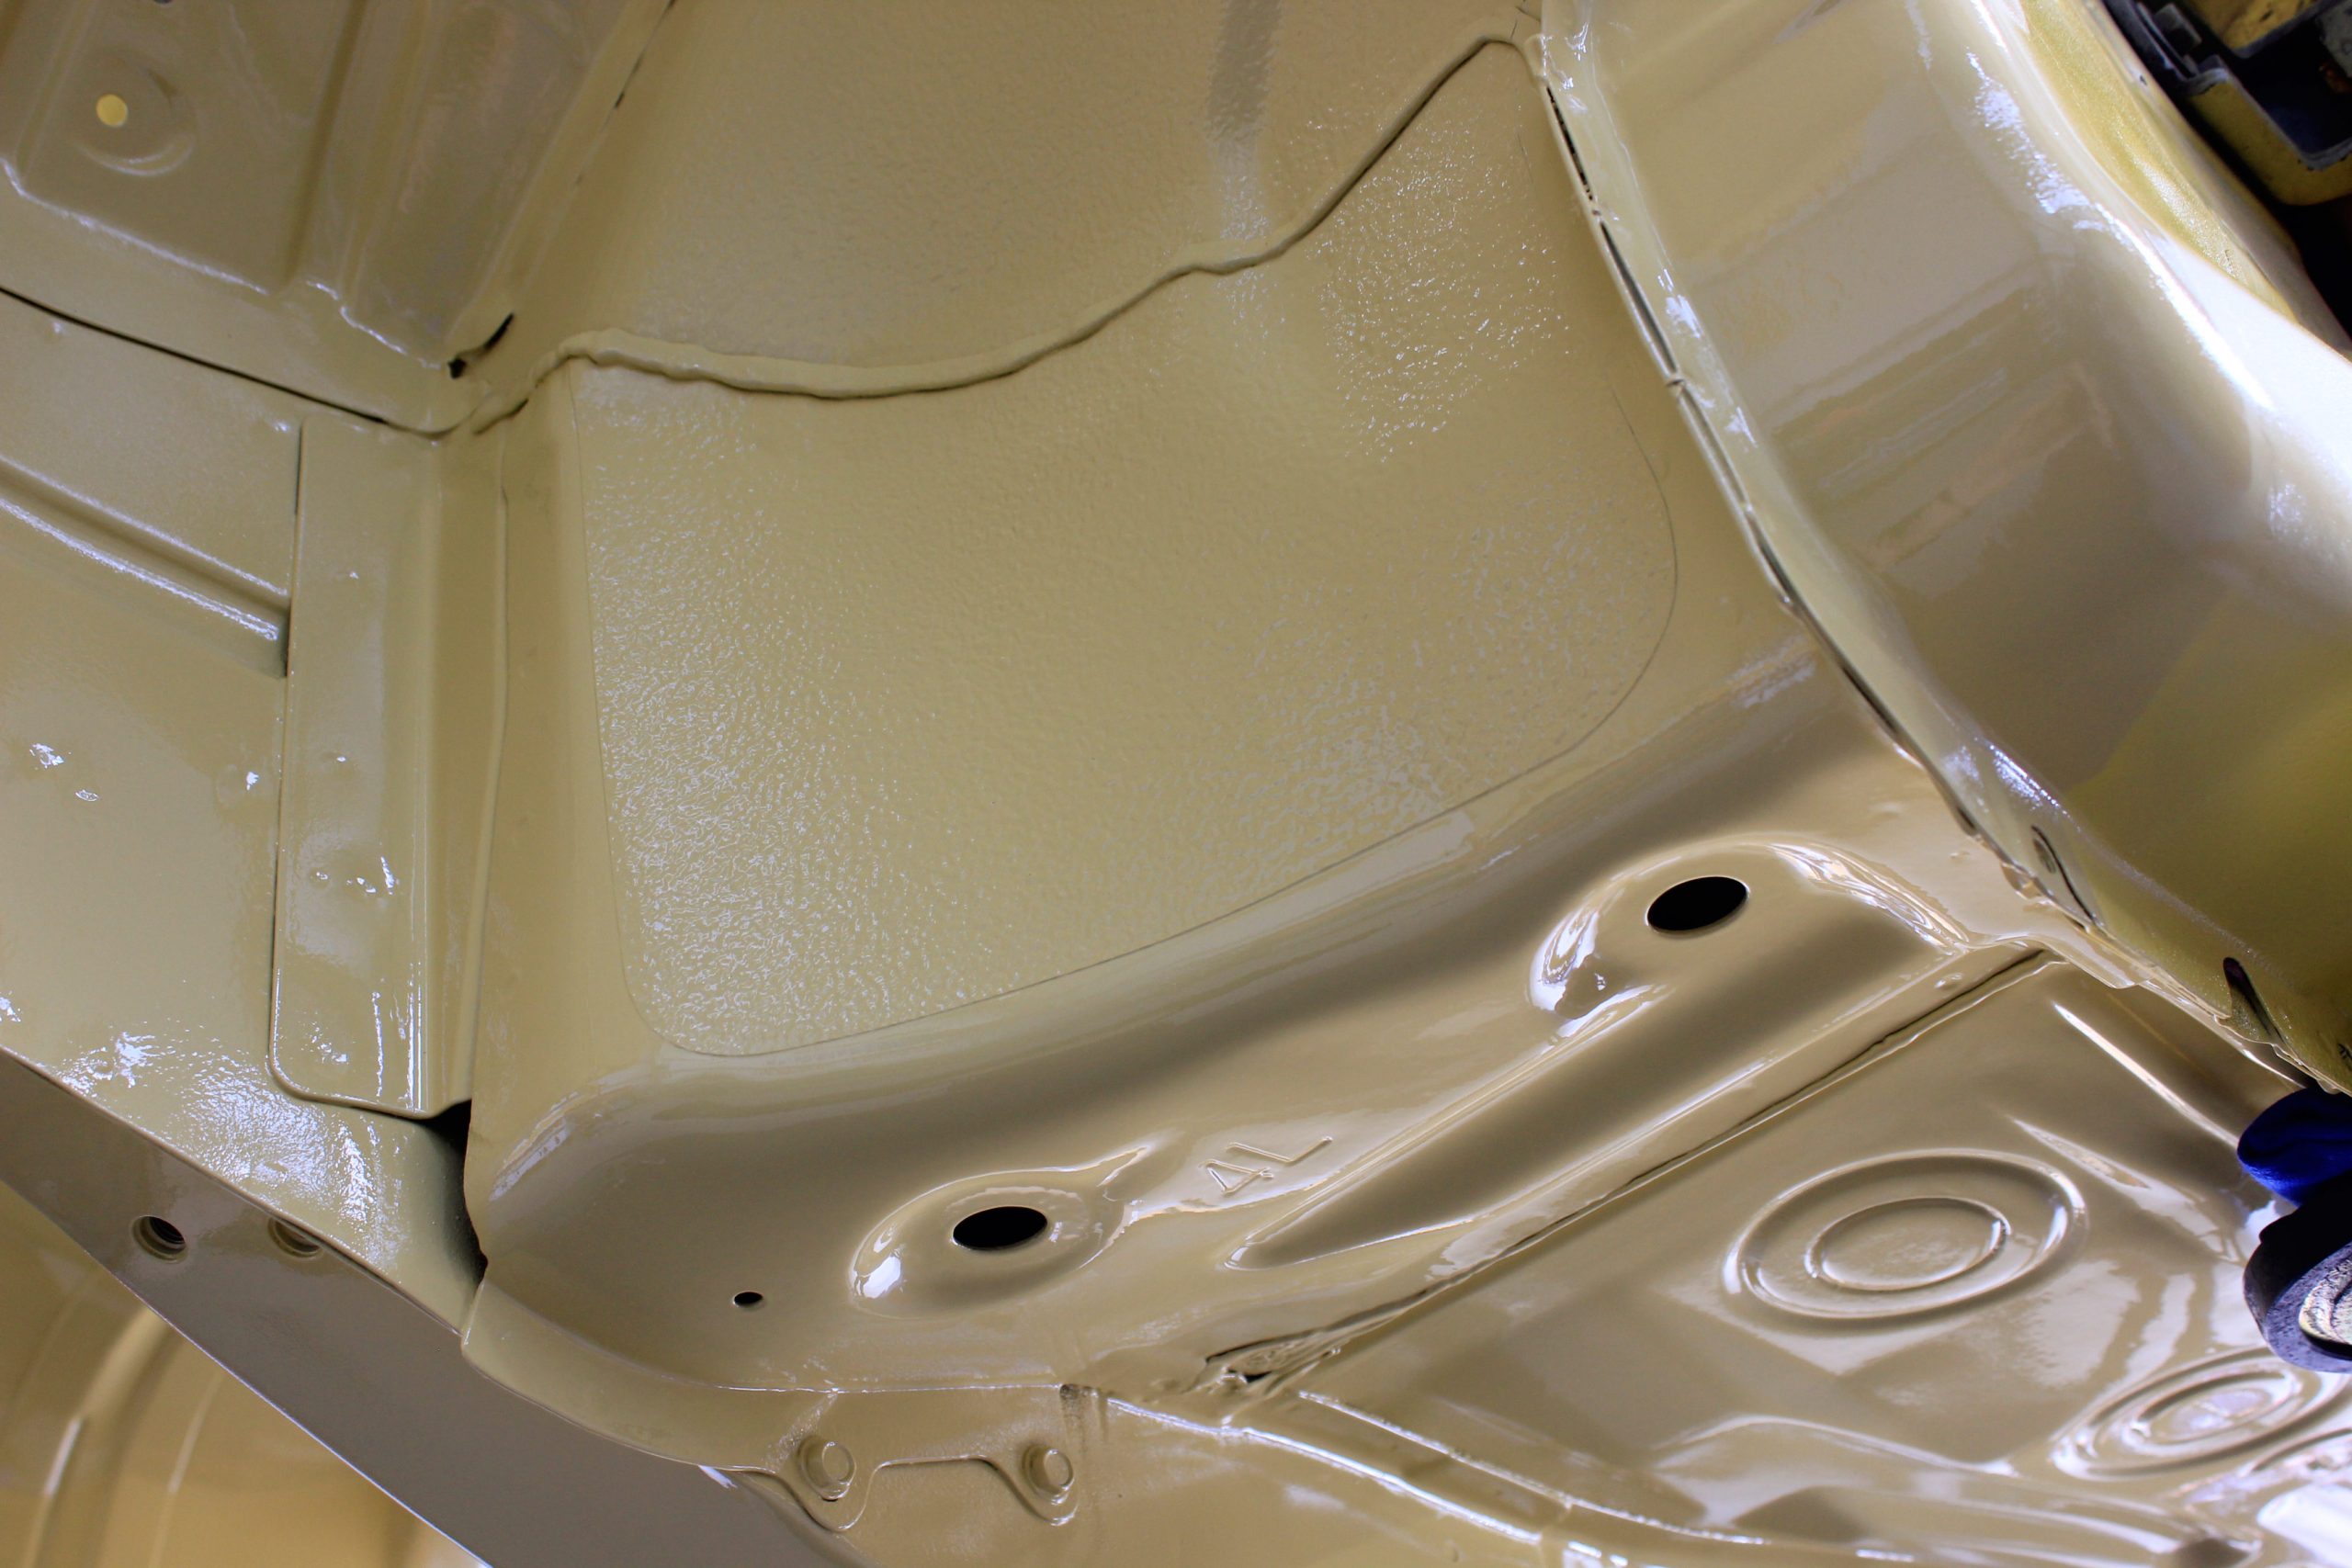
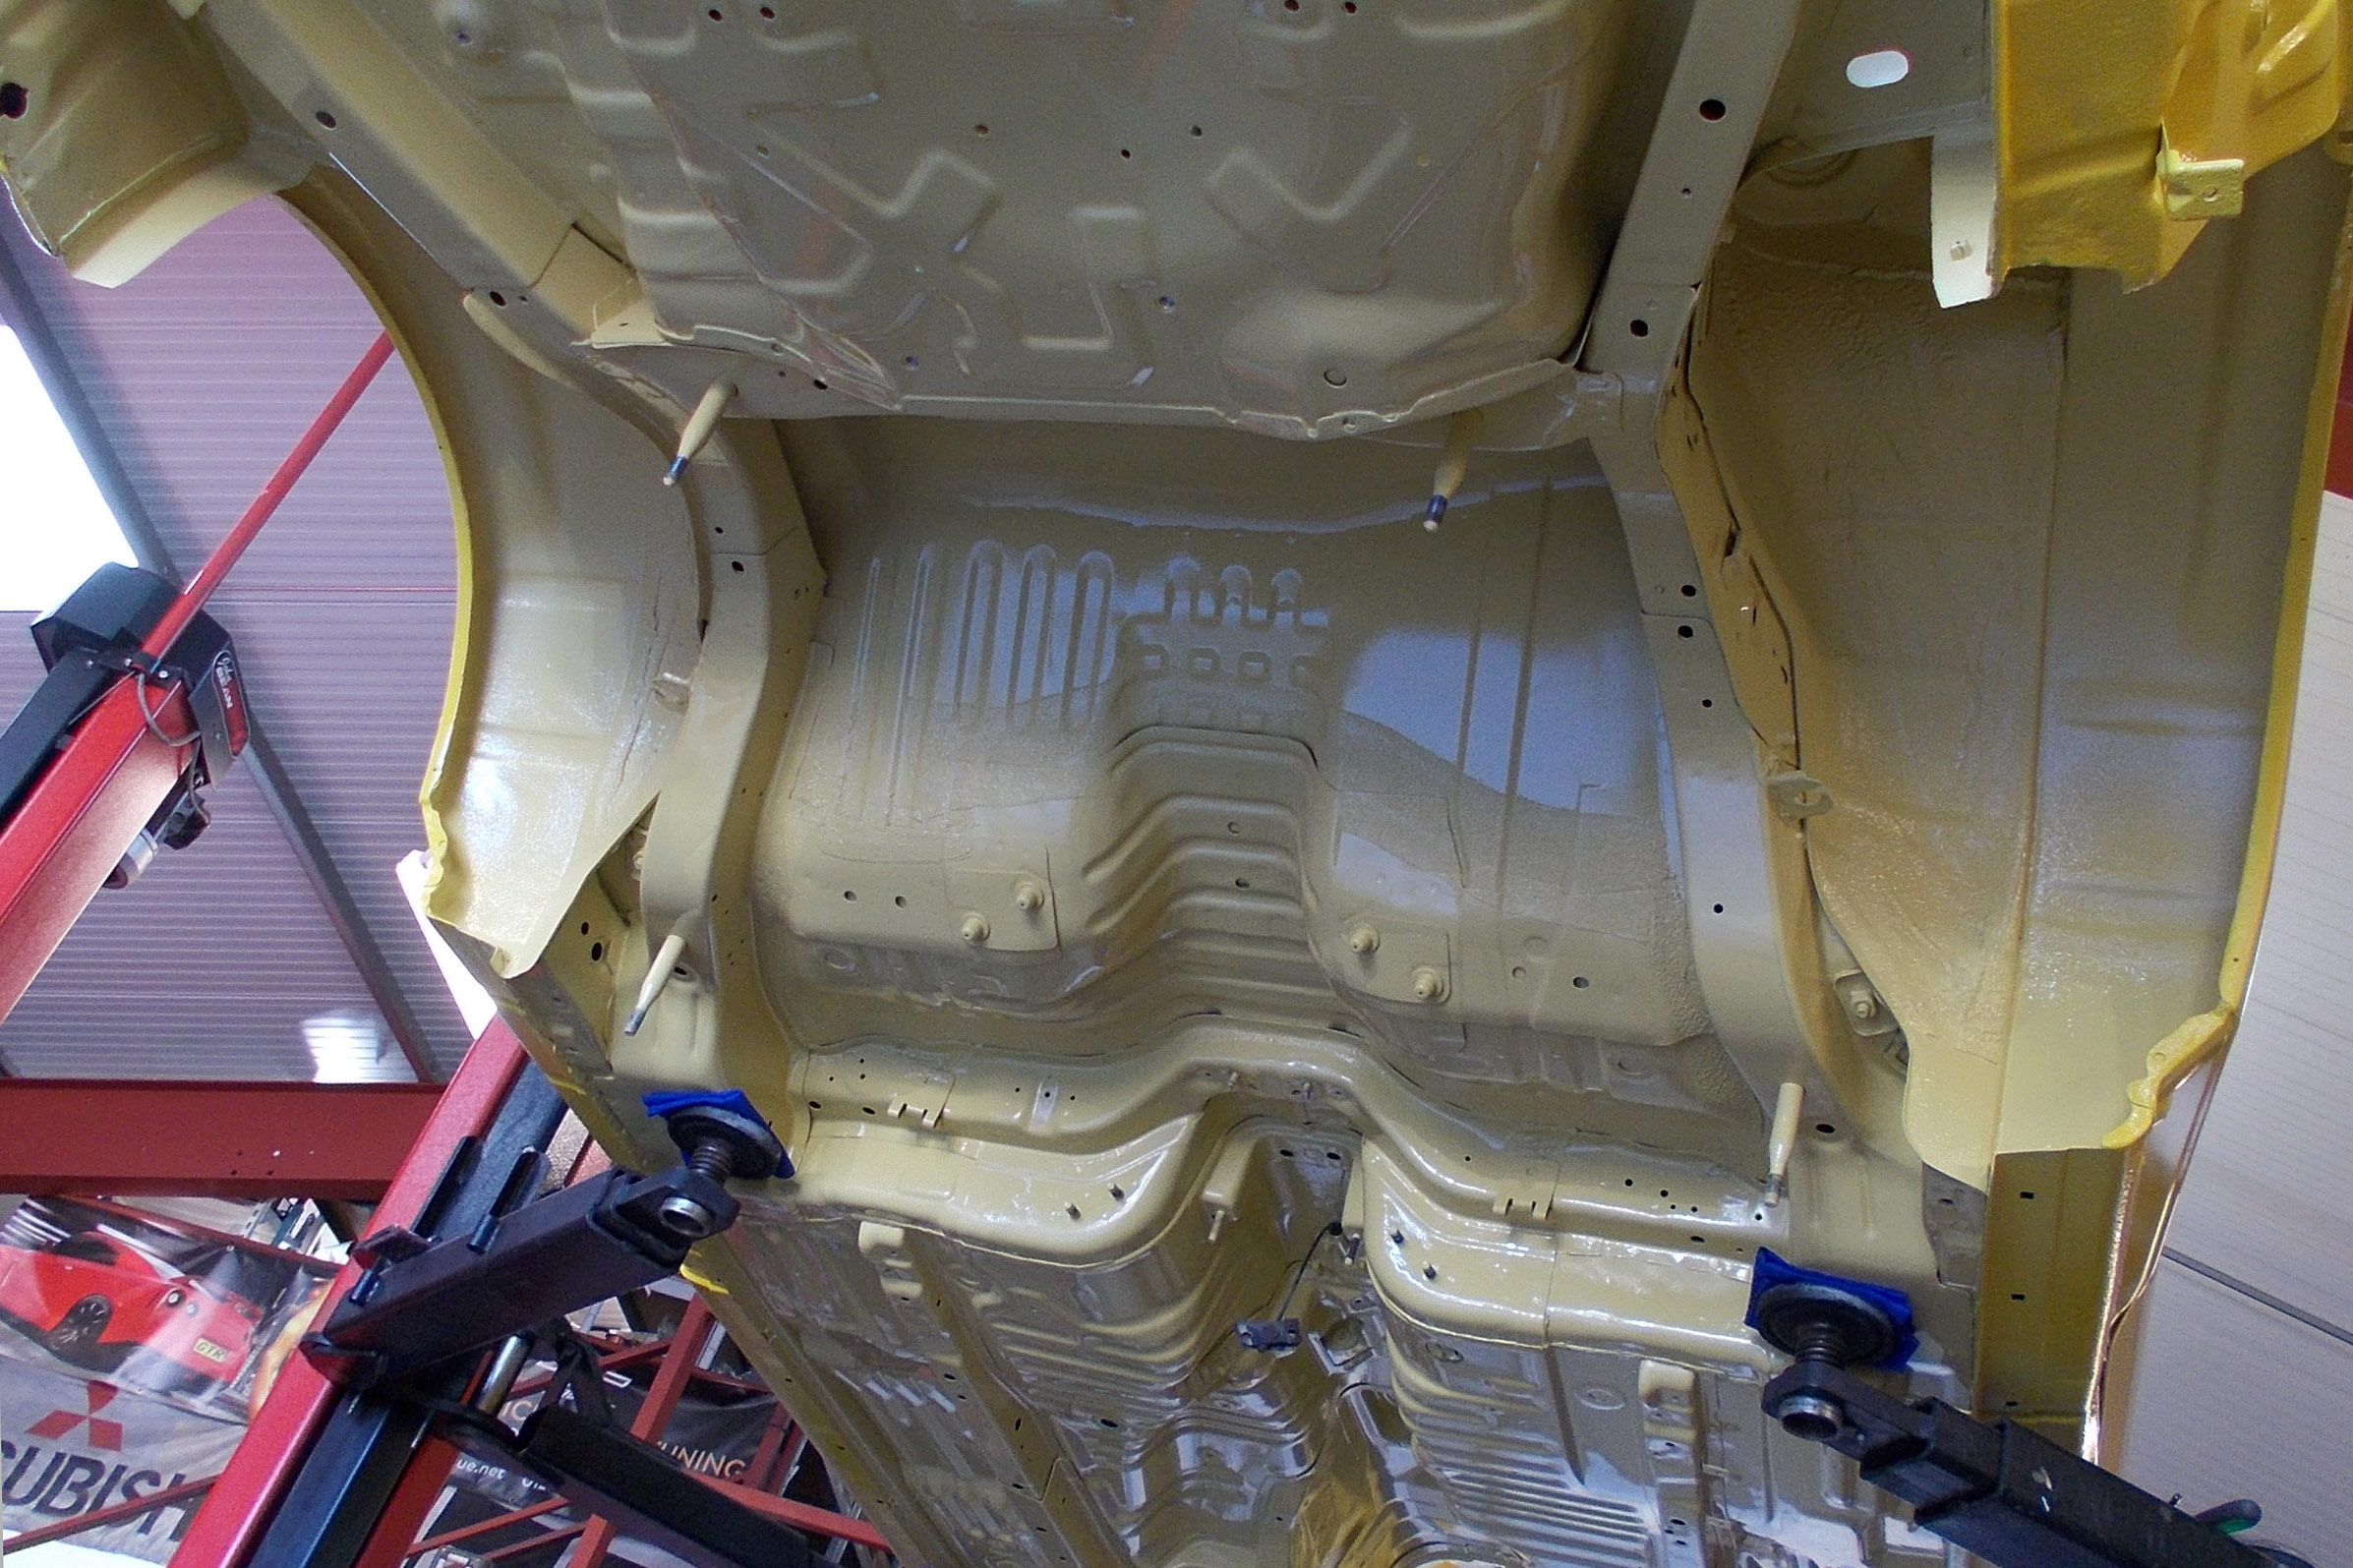
Below is a selection of photos demonstrating some of the preperation we had to do to the underside before we could protect and coat it. Pictures are in reverse order.
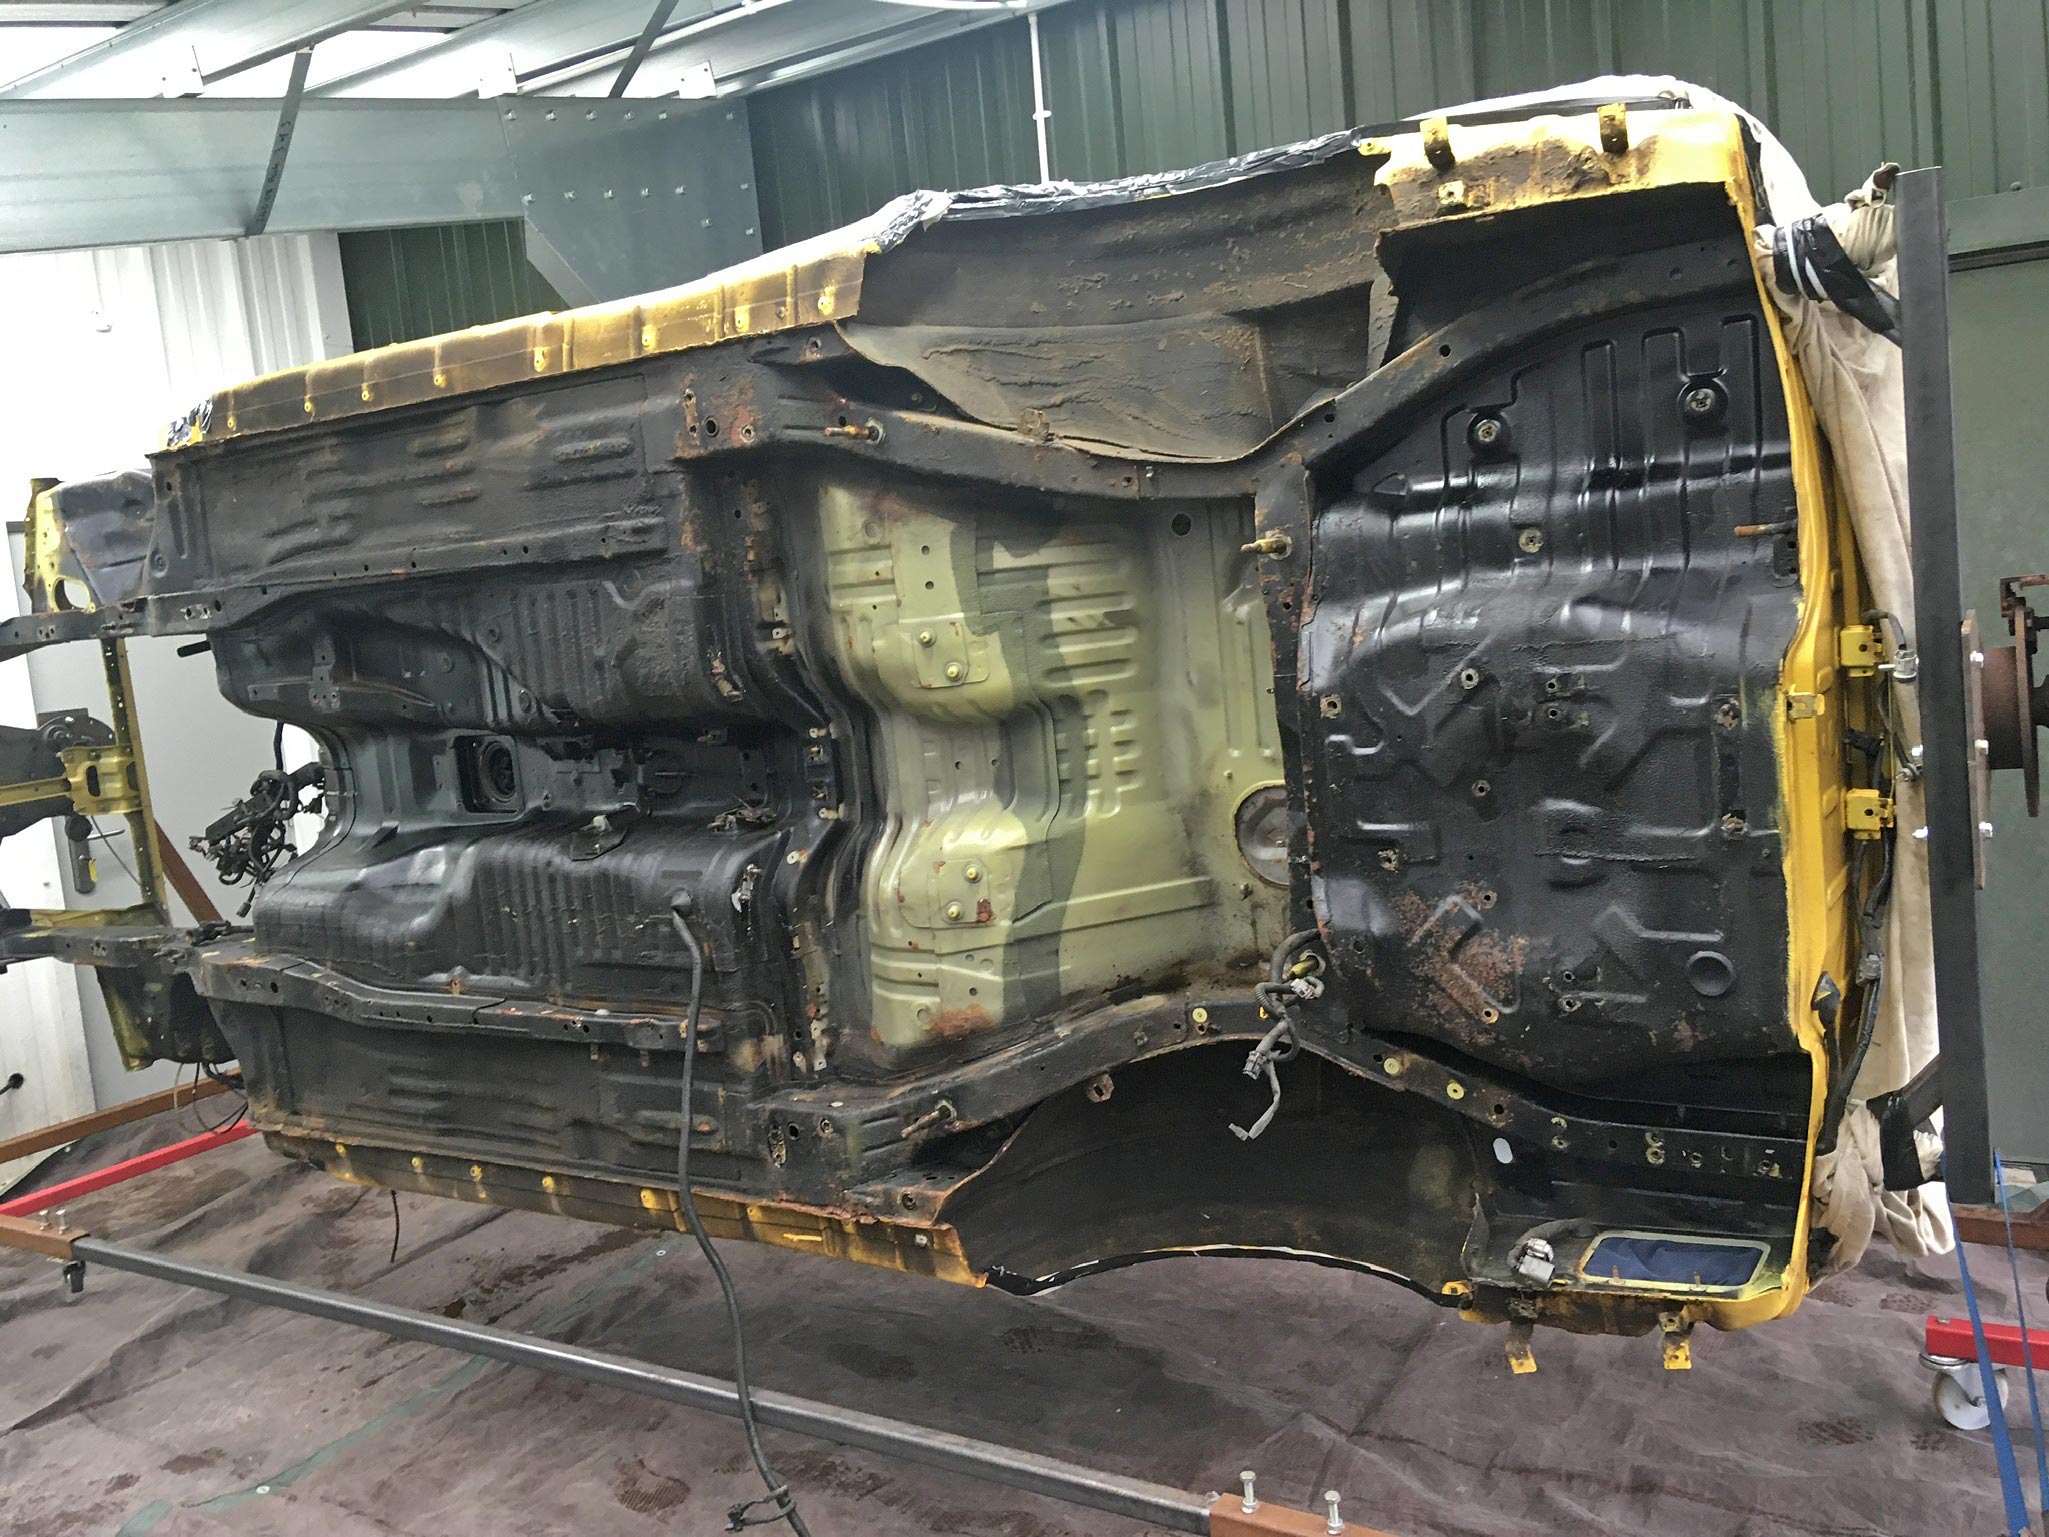


Corrosion removal and chassis repairs/reconstruction
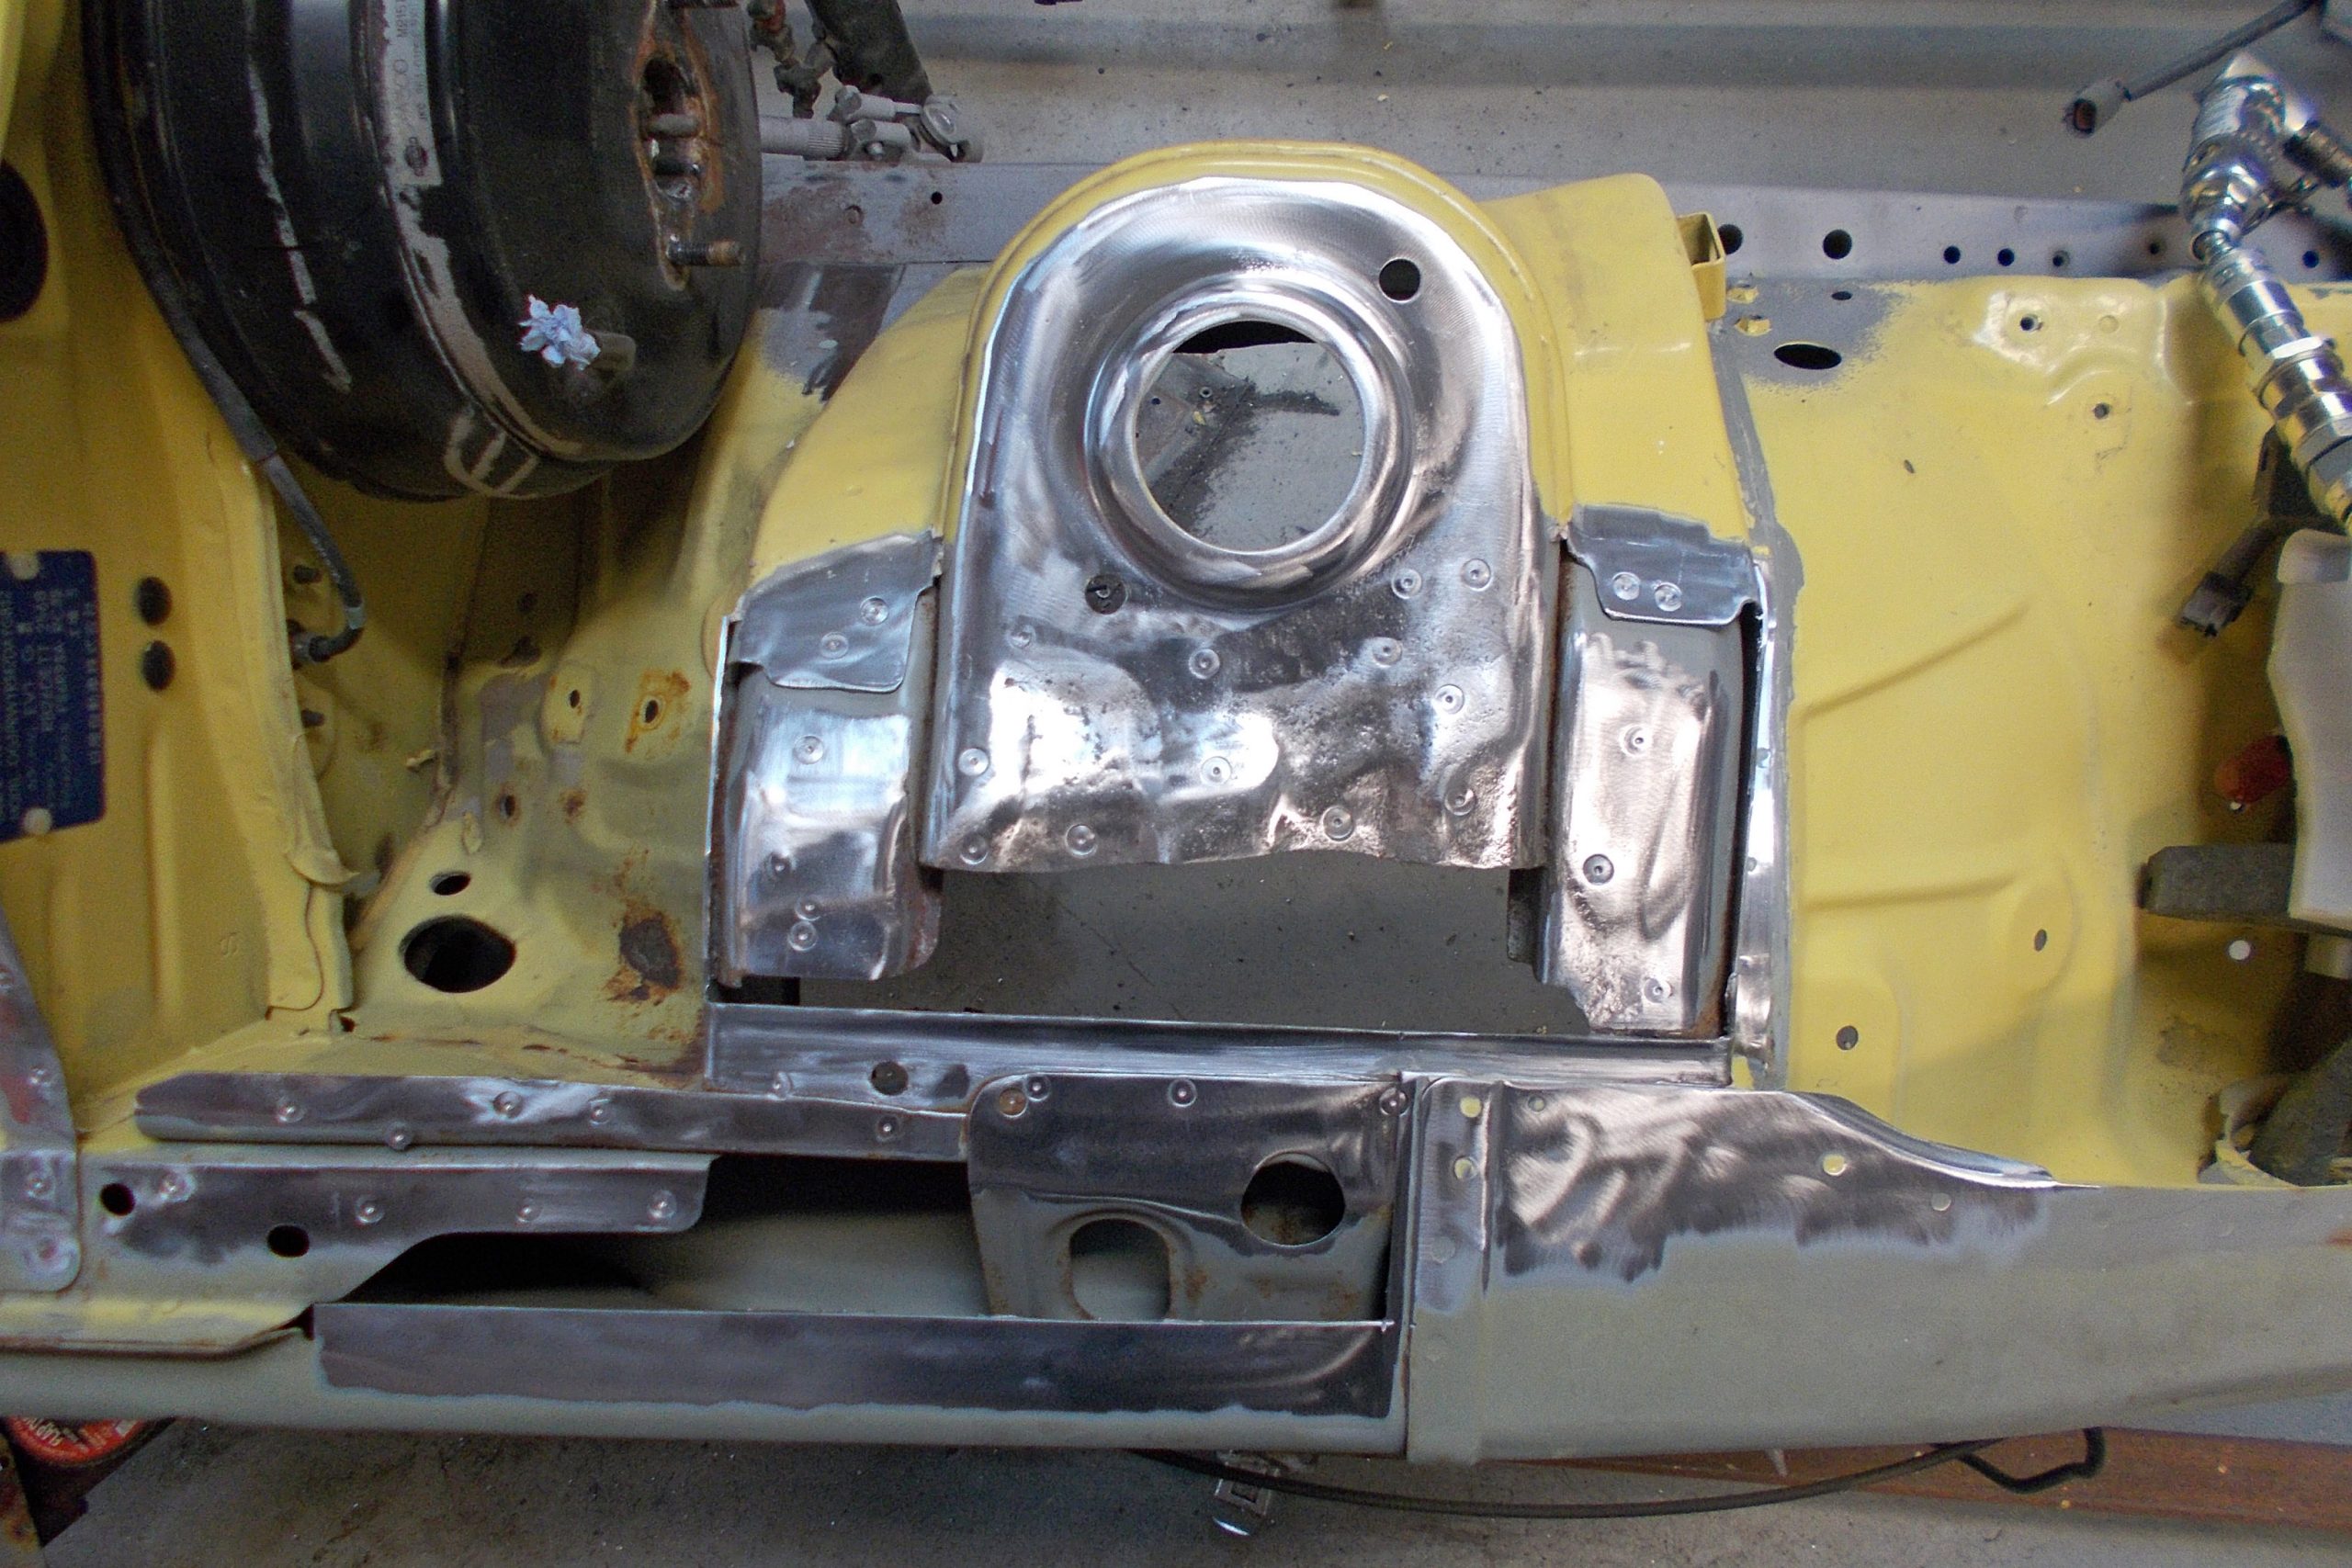
There were over 200 man-hours spent repairing and reconstructing this chassis in a way that you couldn’t even tell it had been done, keeping the OEM panel design, strength and integrity was at the forefront of our priorities along with obviously removing and deep-set corrosion.
Below are just two sections of the chassis we rebuilt, the OSR inner arch above the rear chassis leg and the front strut tops, which is a very common issue on these GTRs.


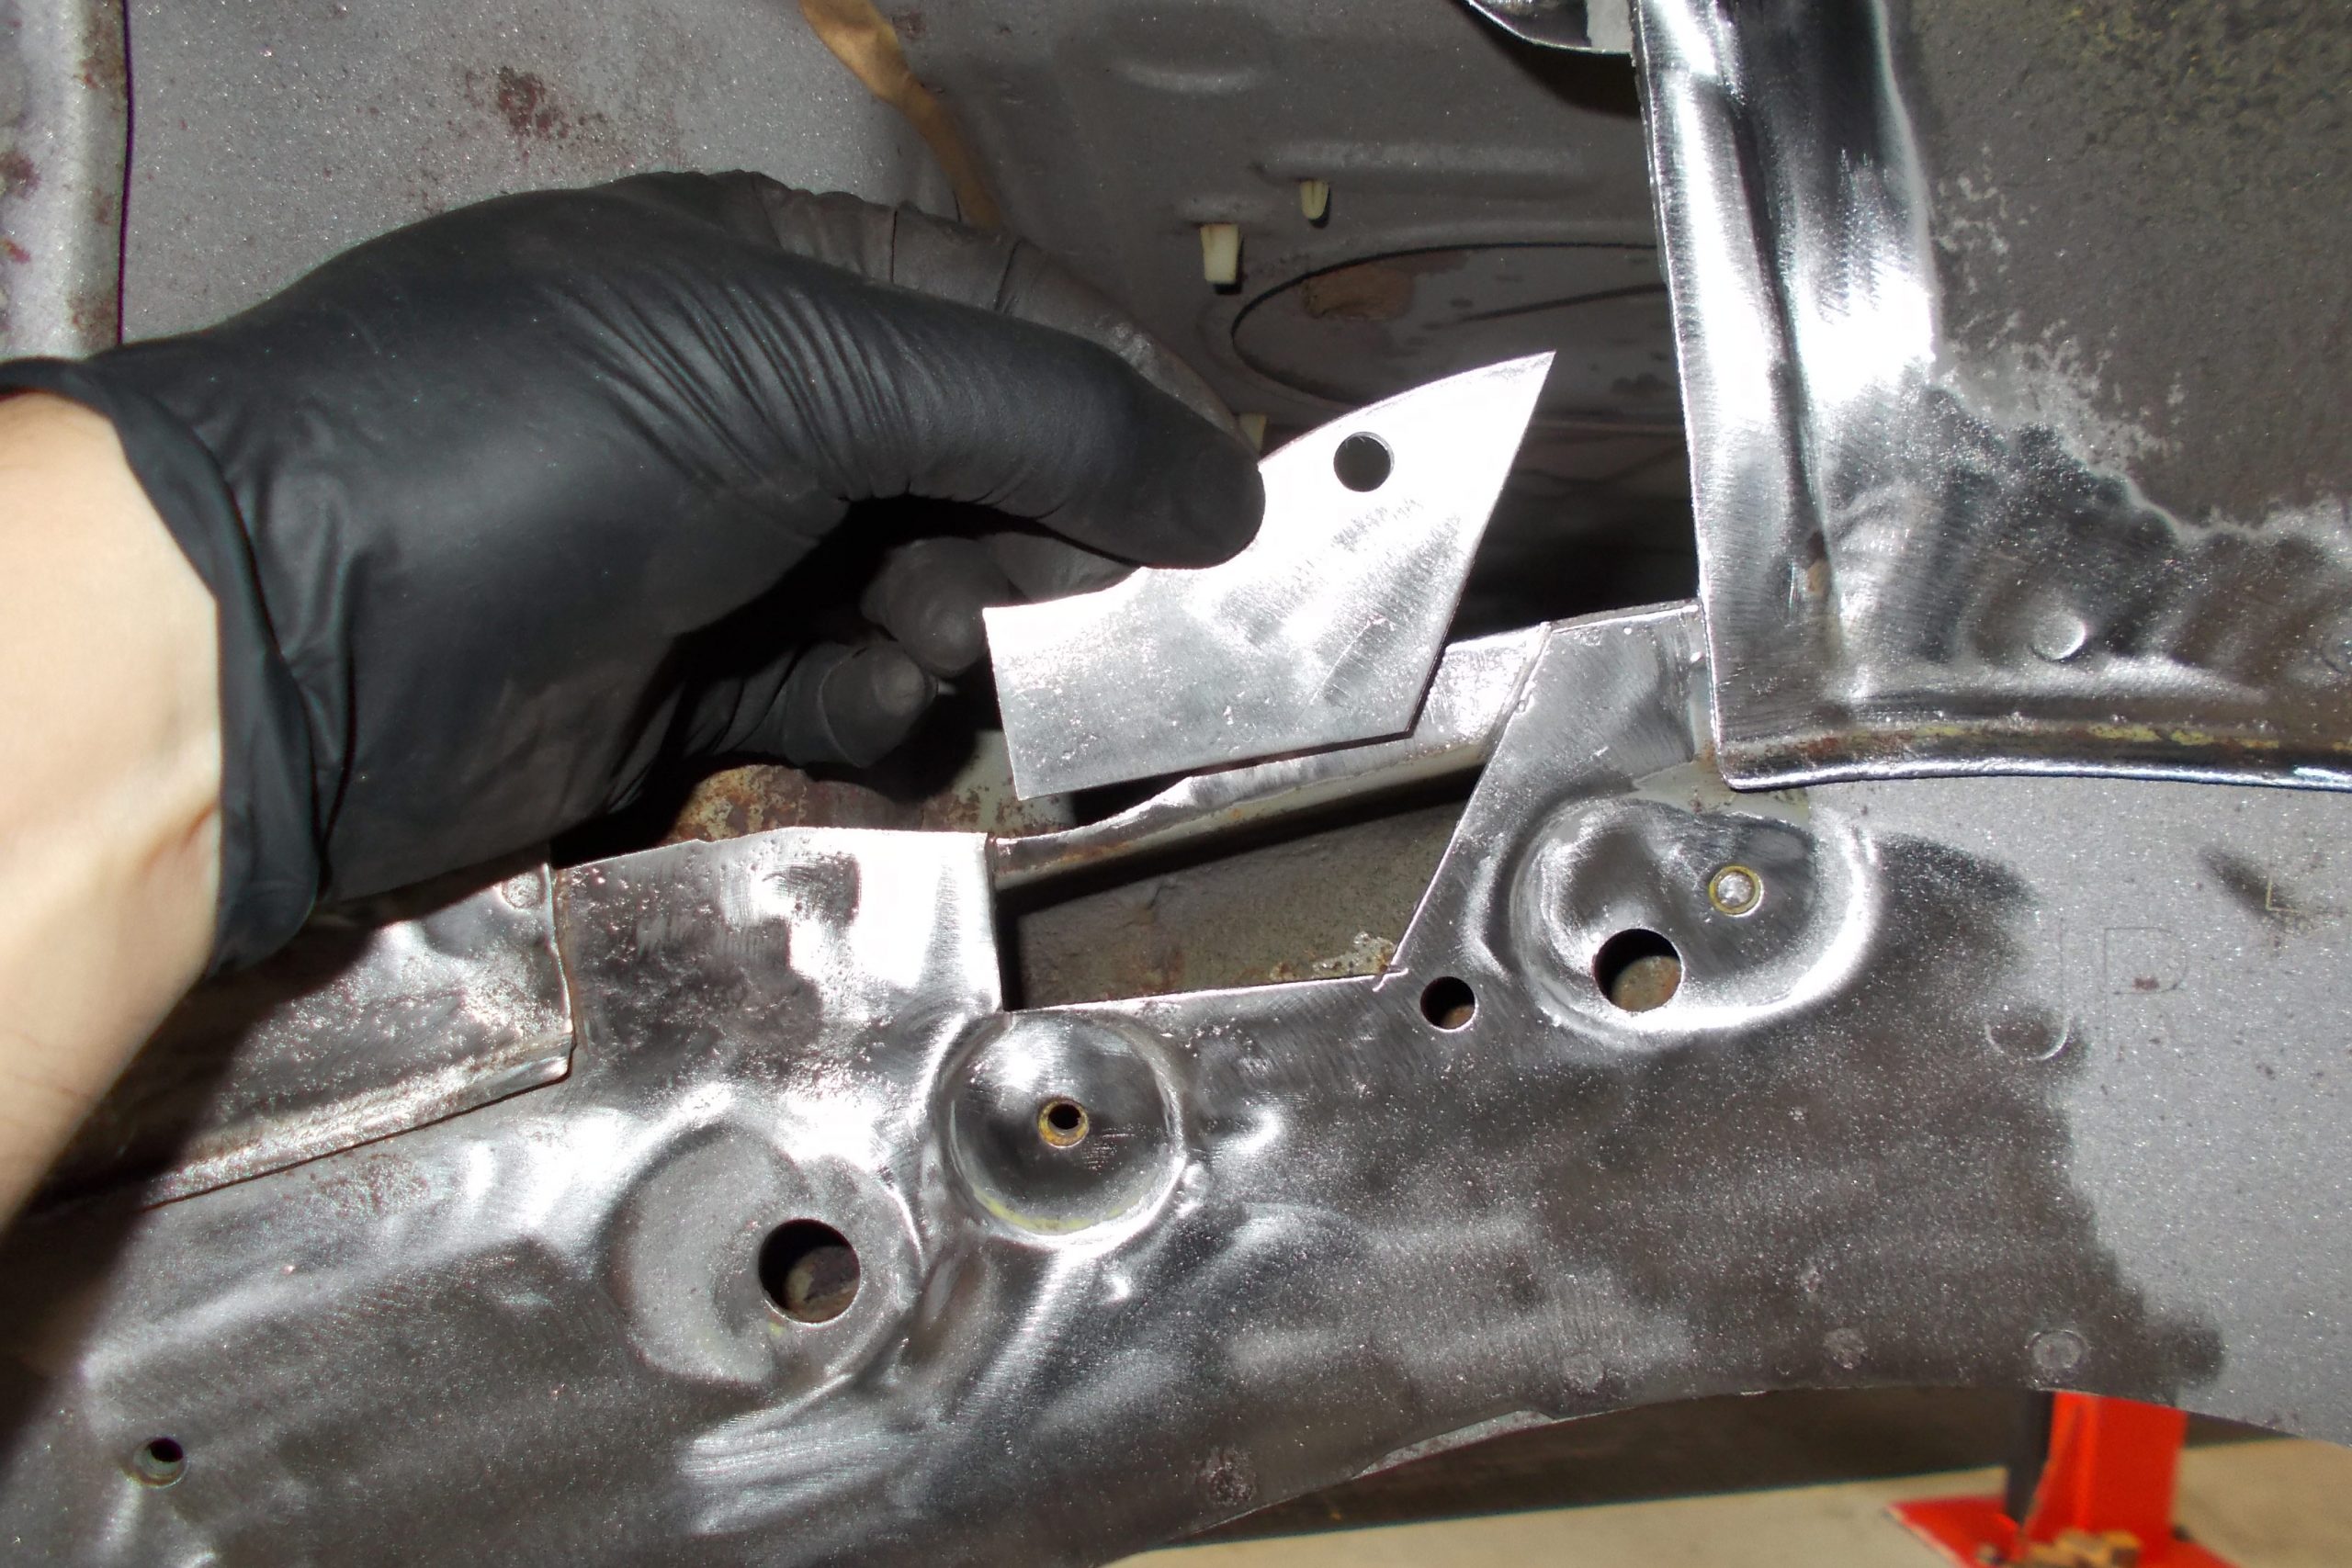
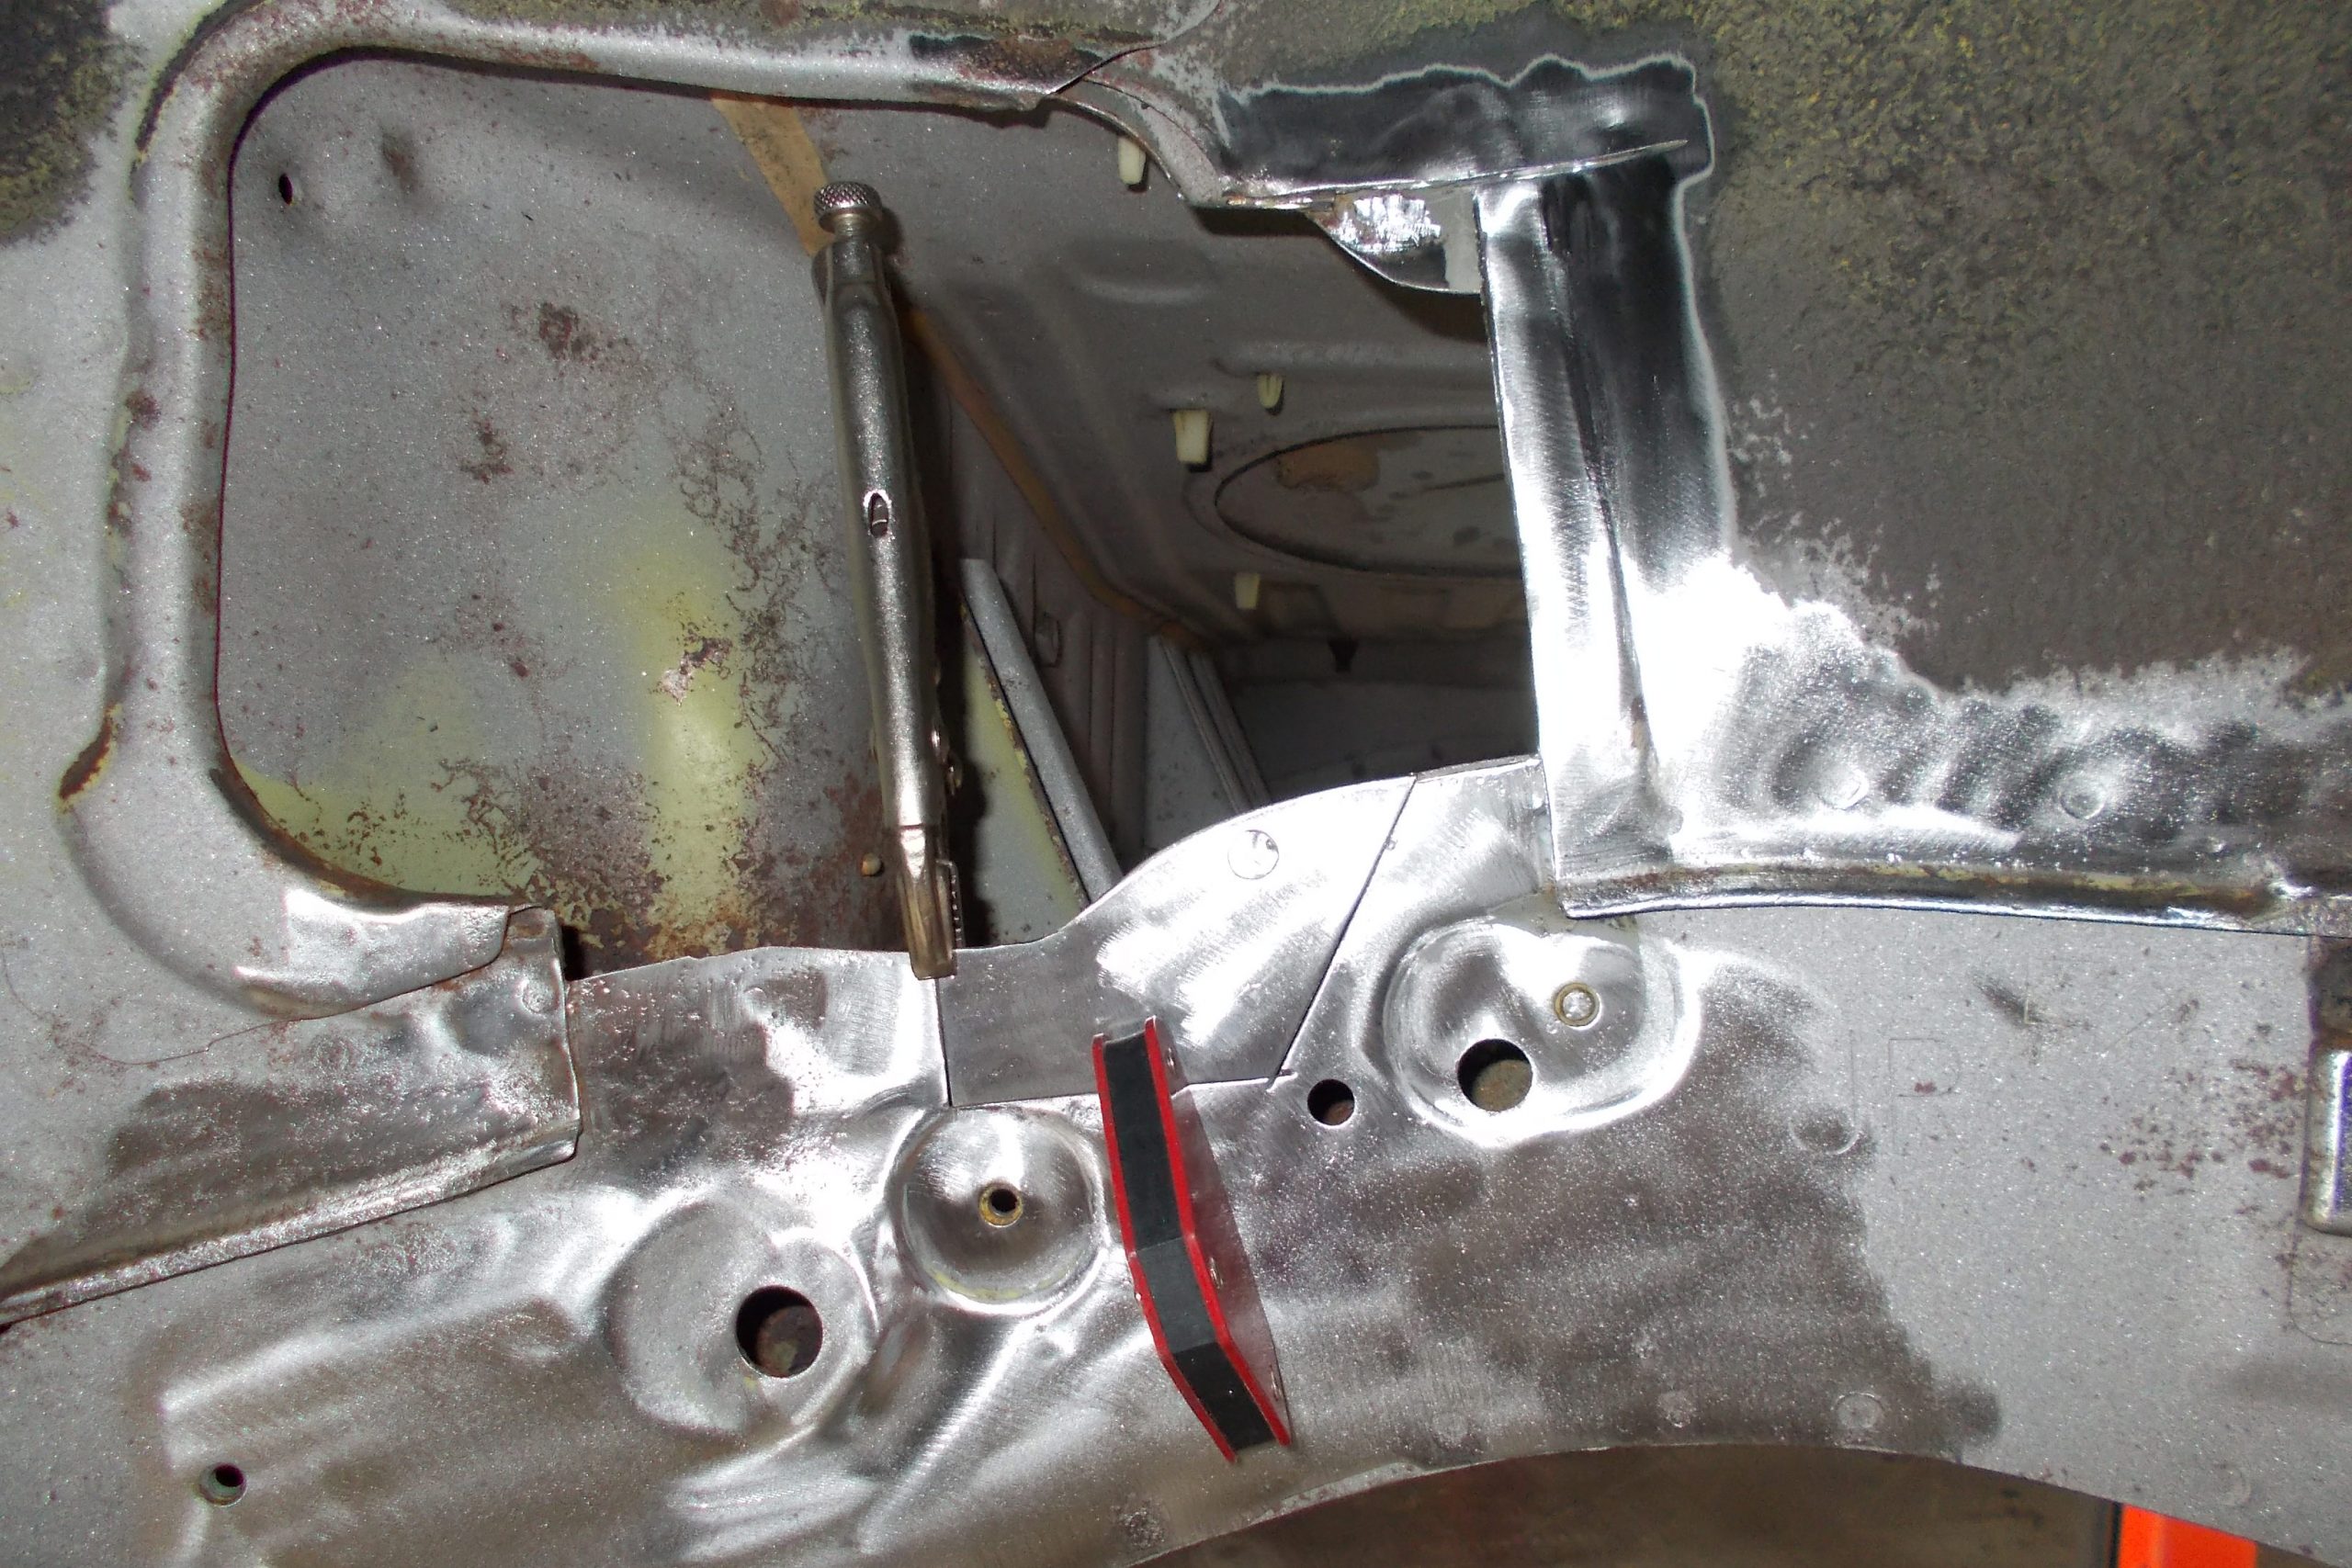


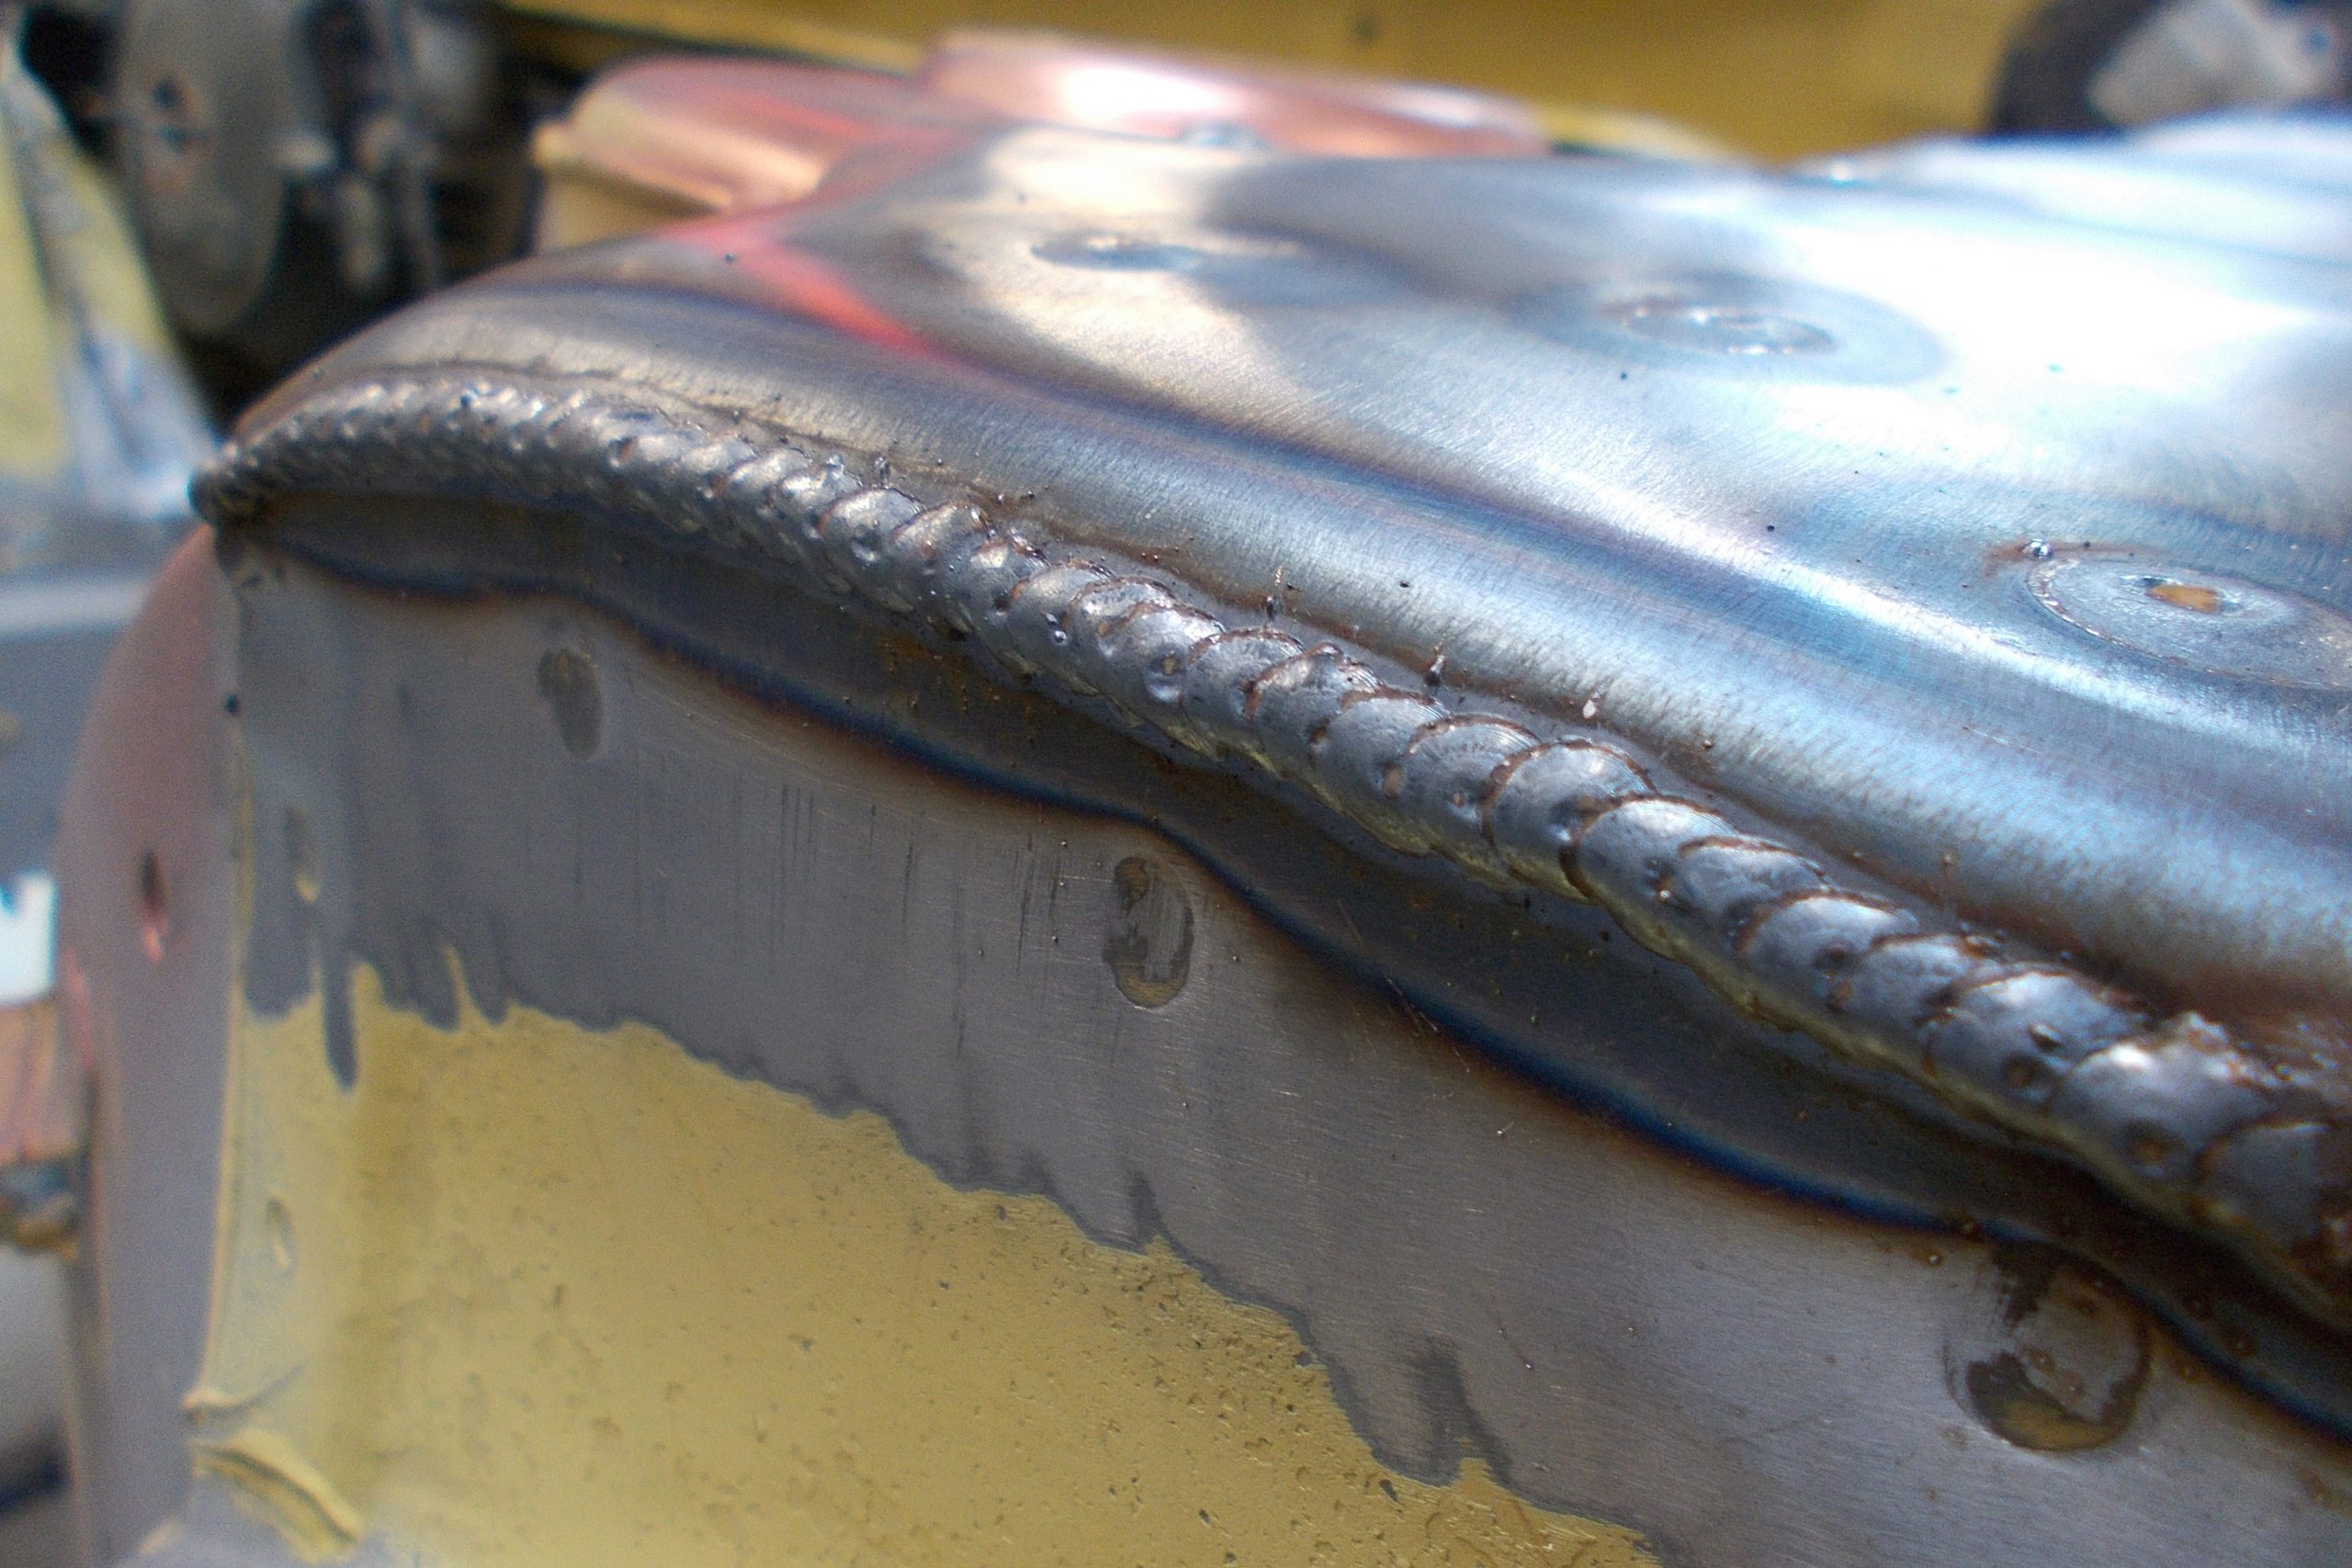


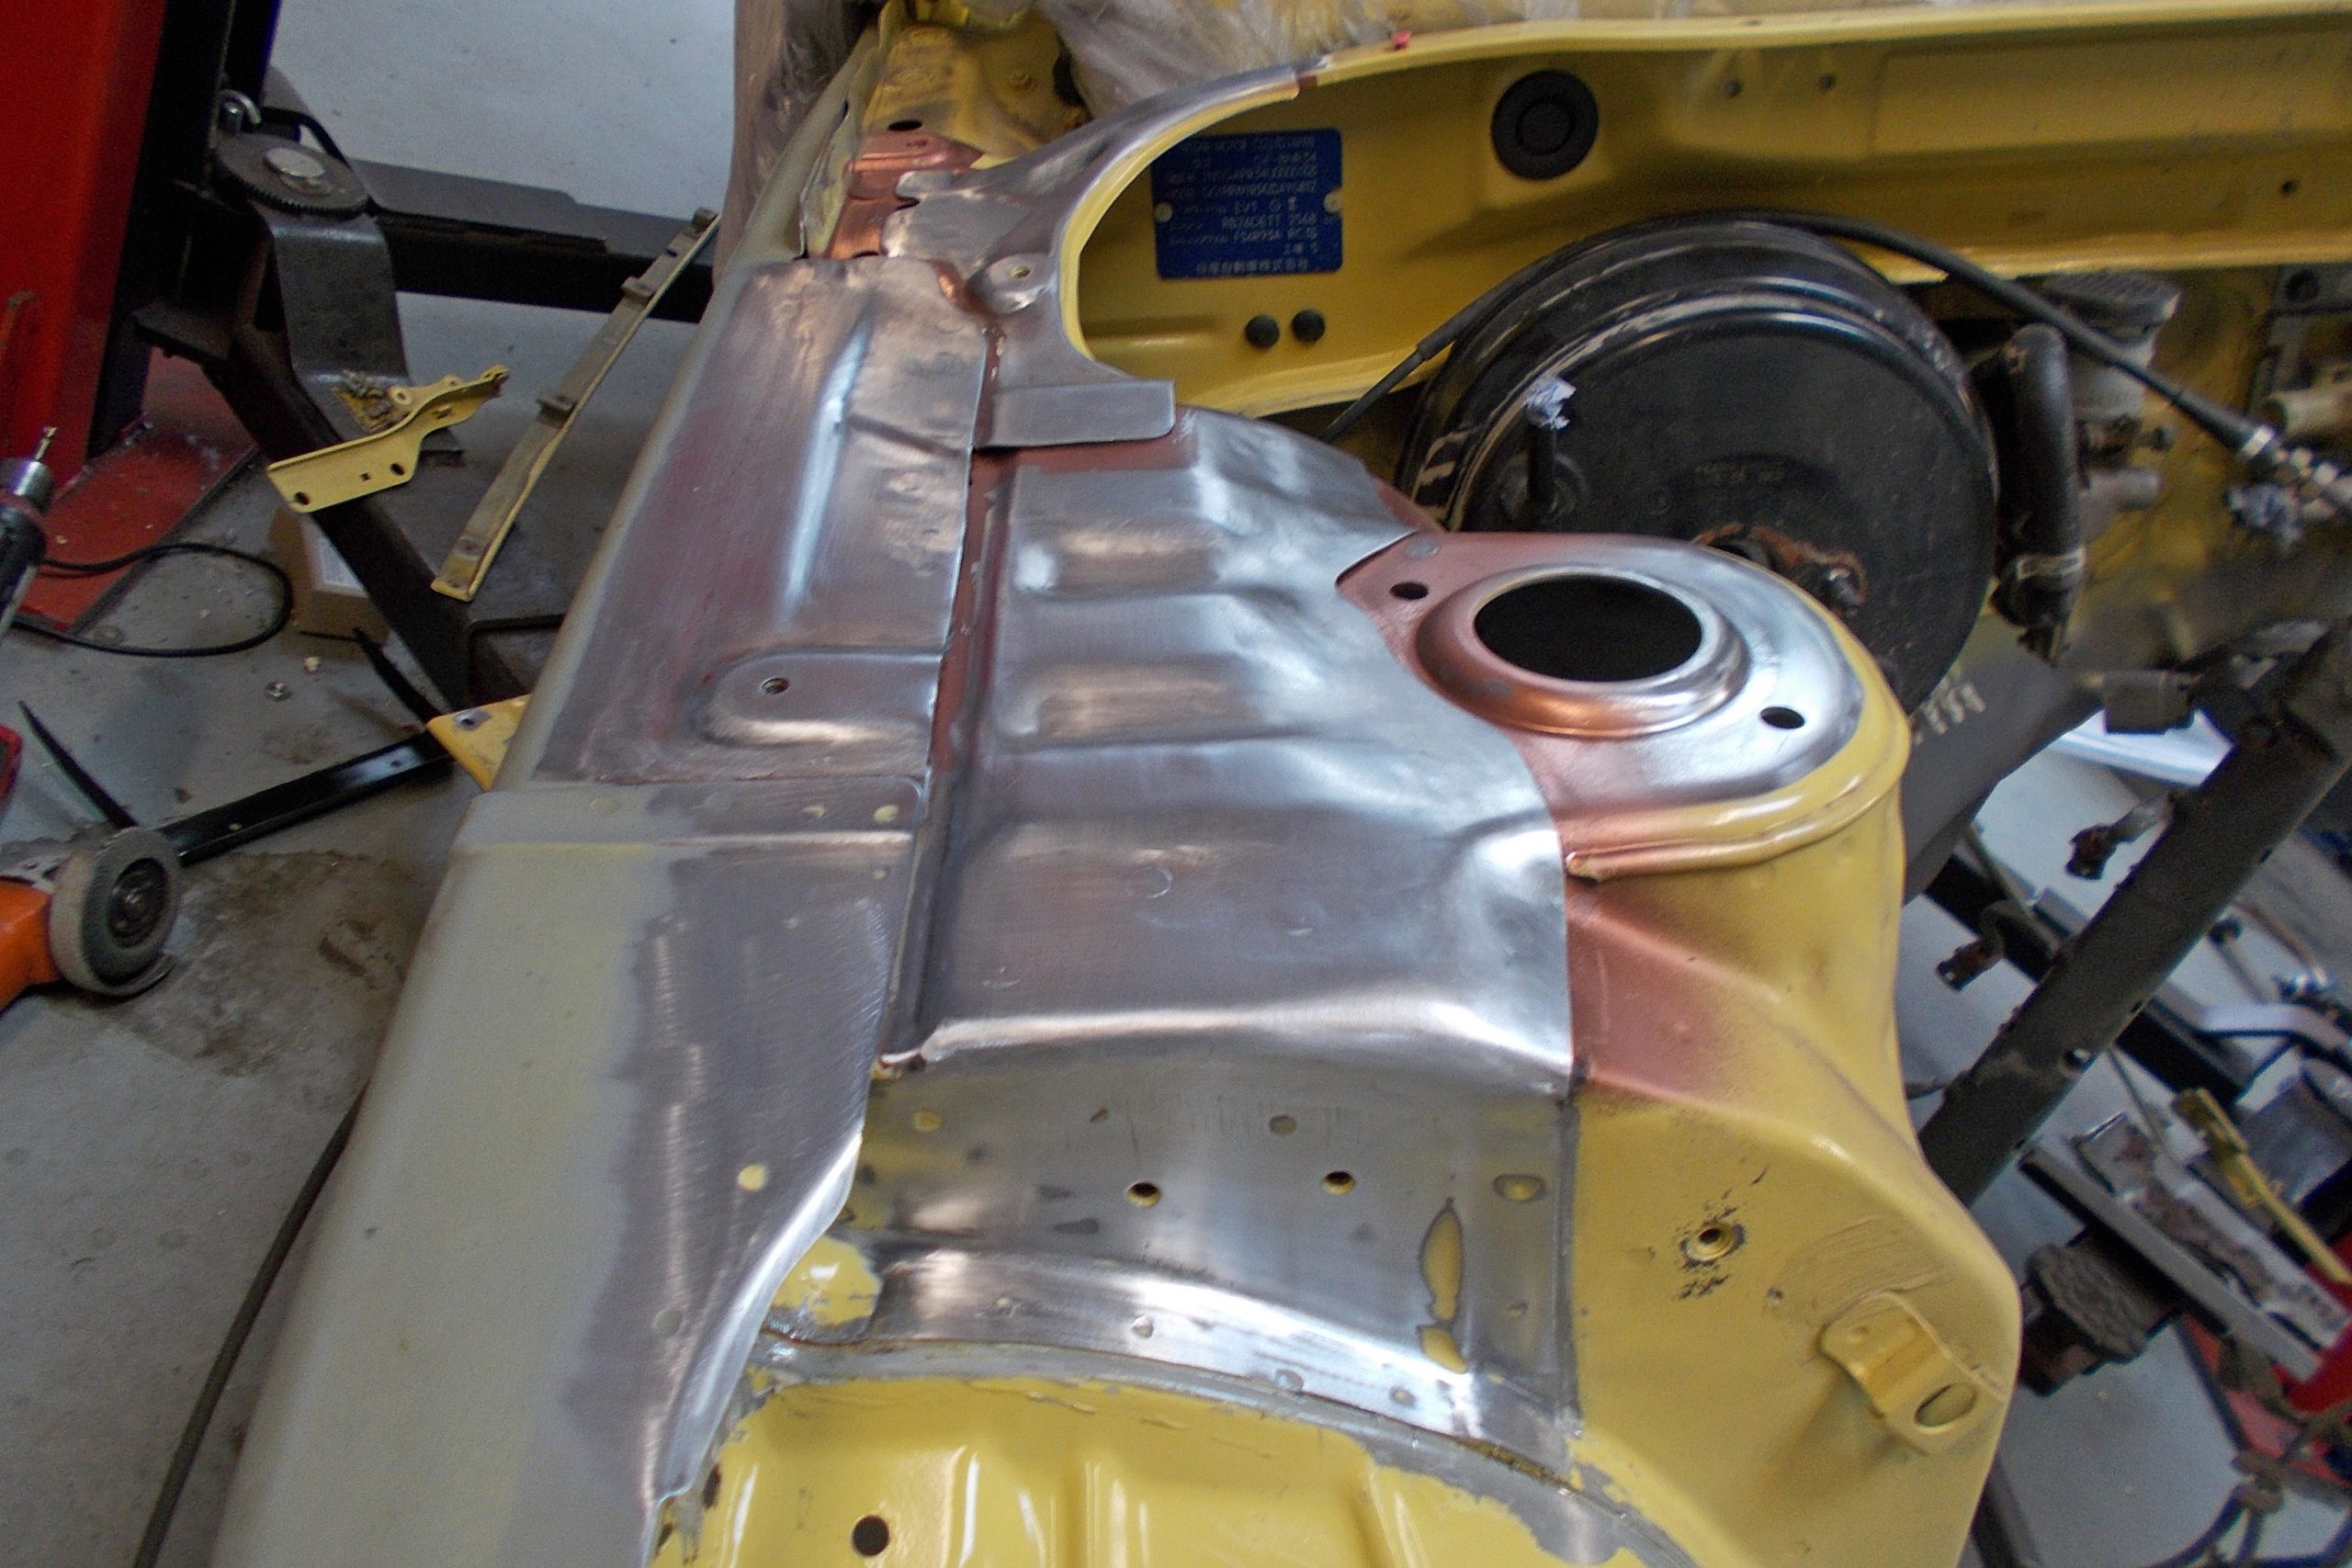
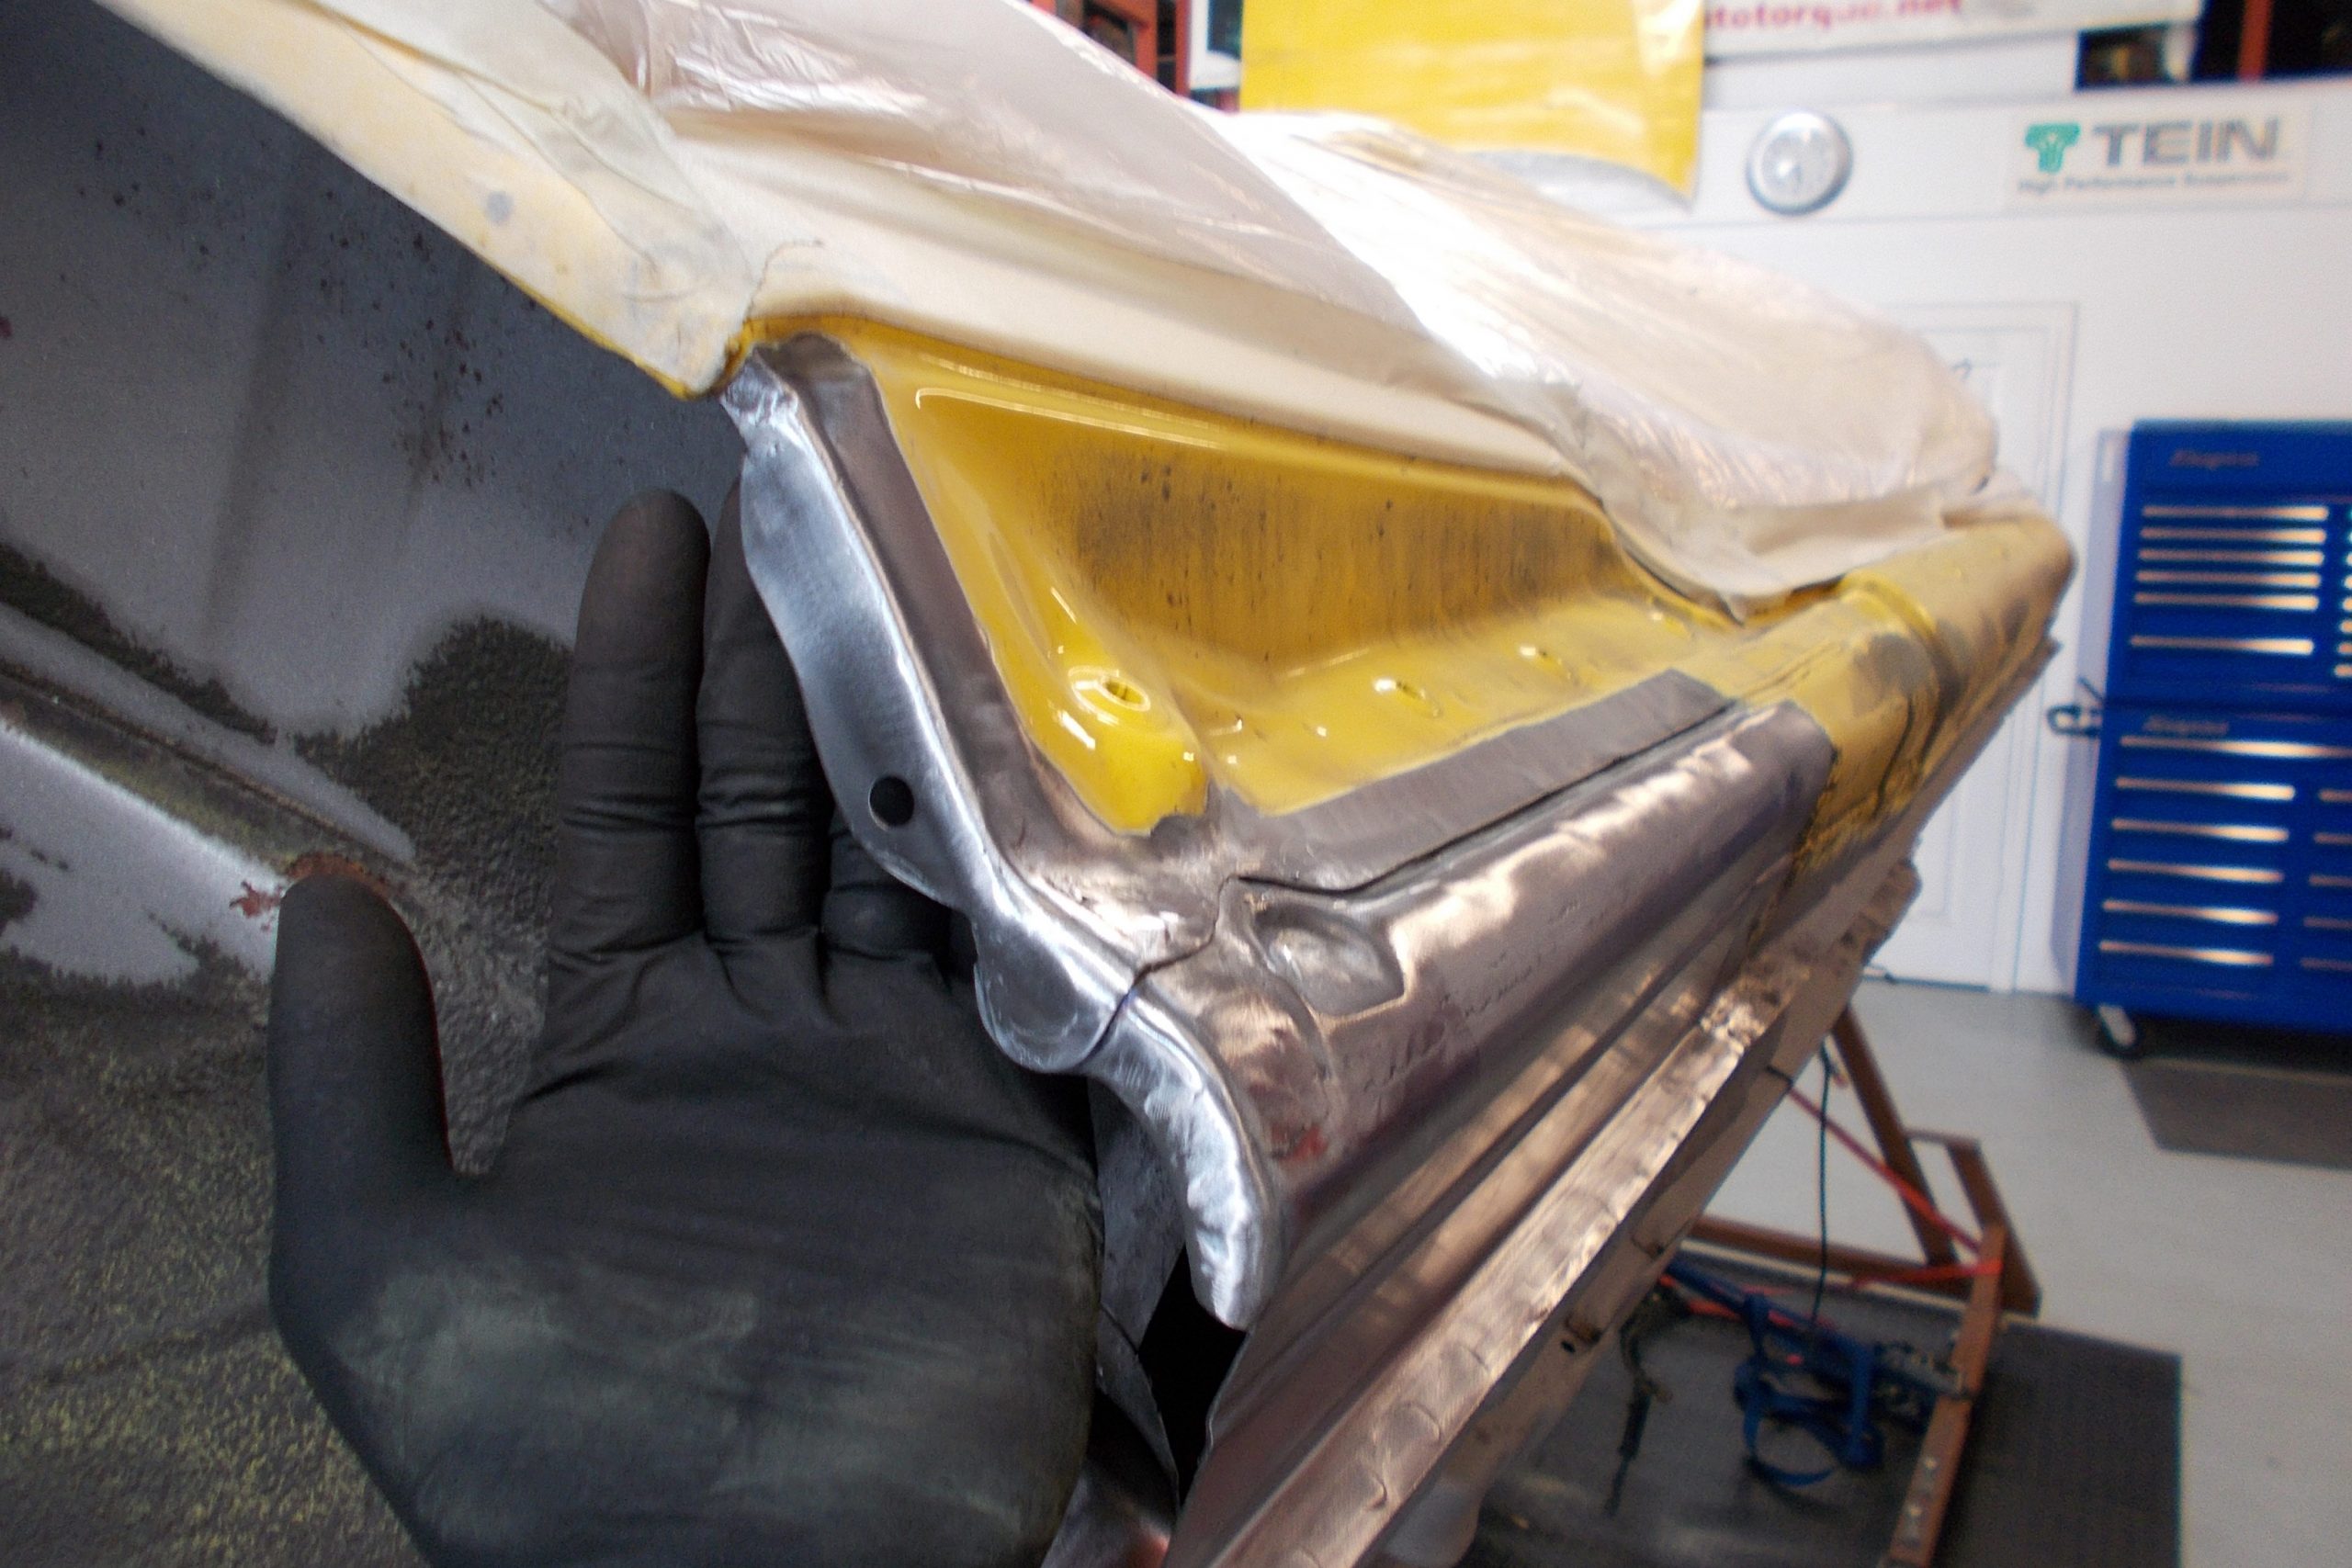
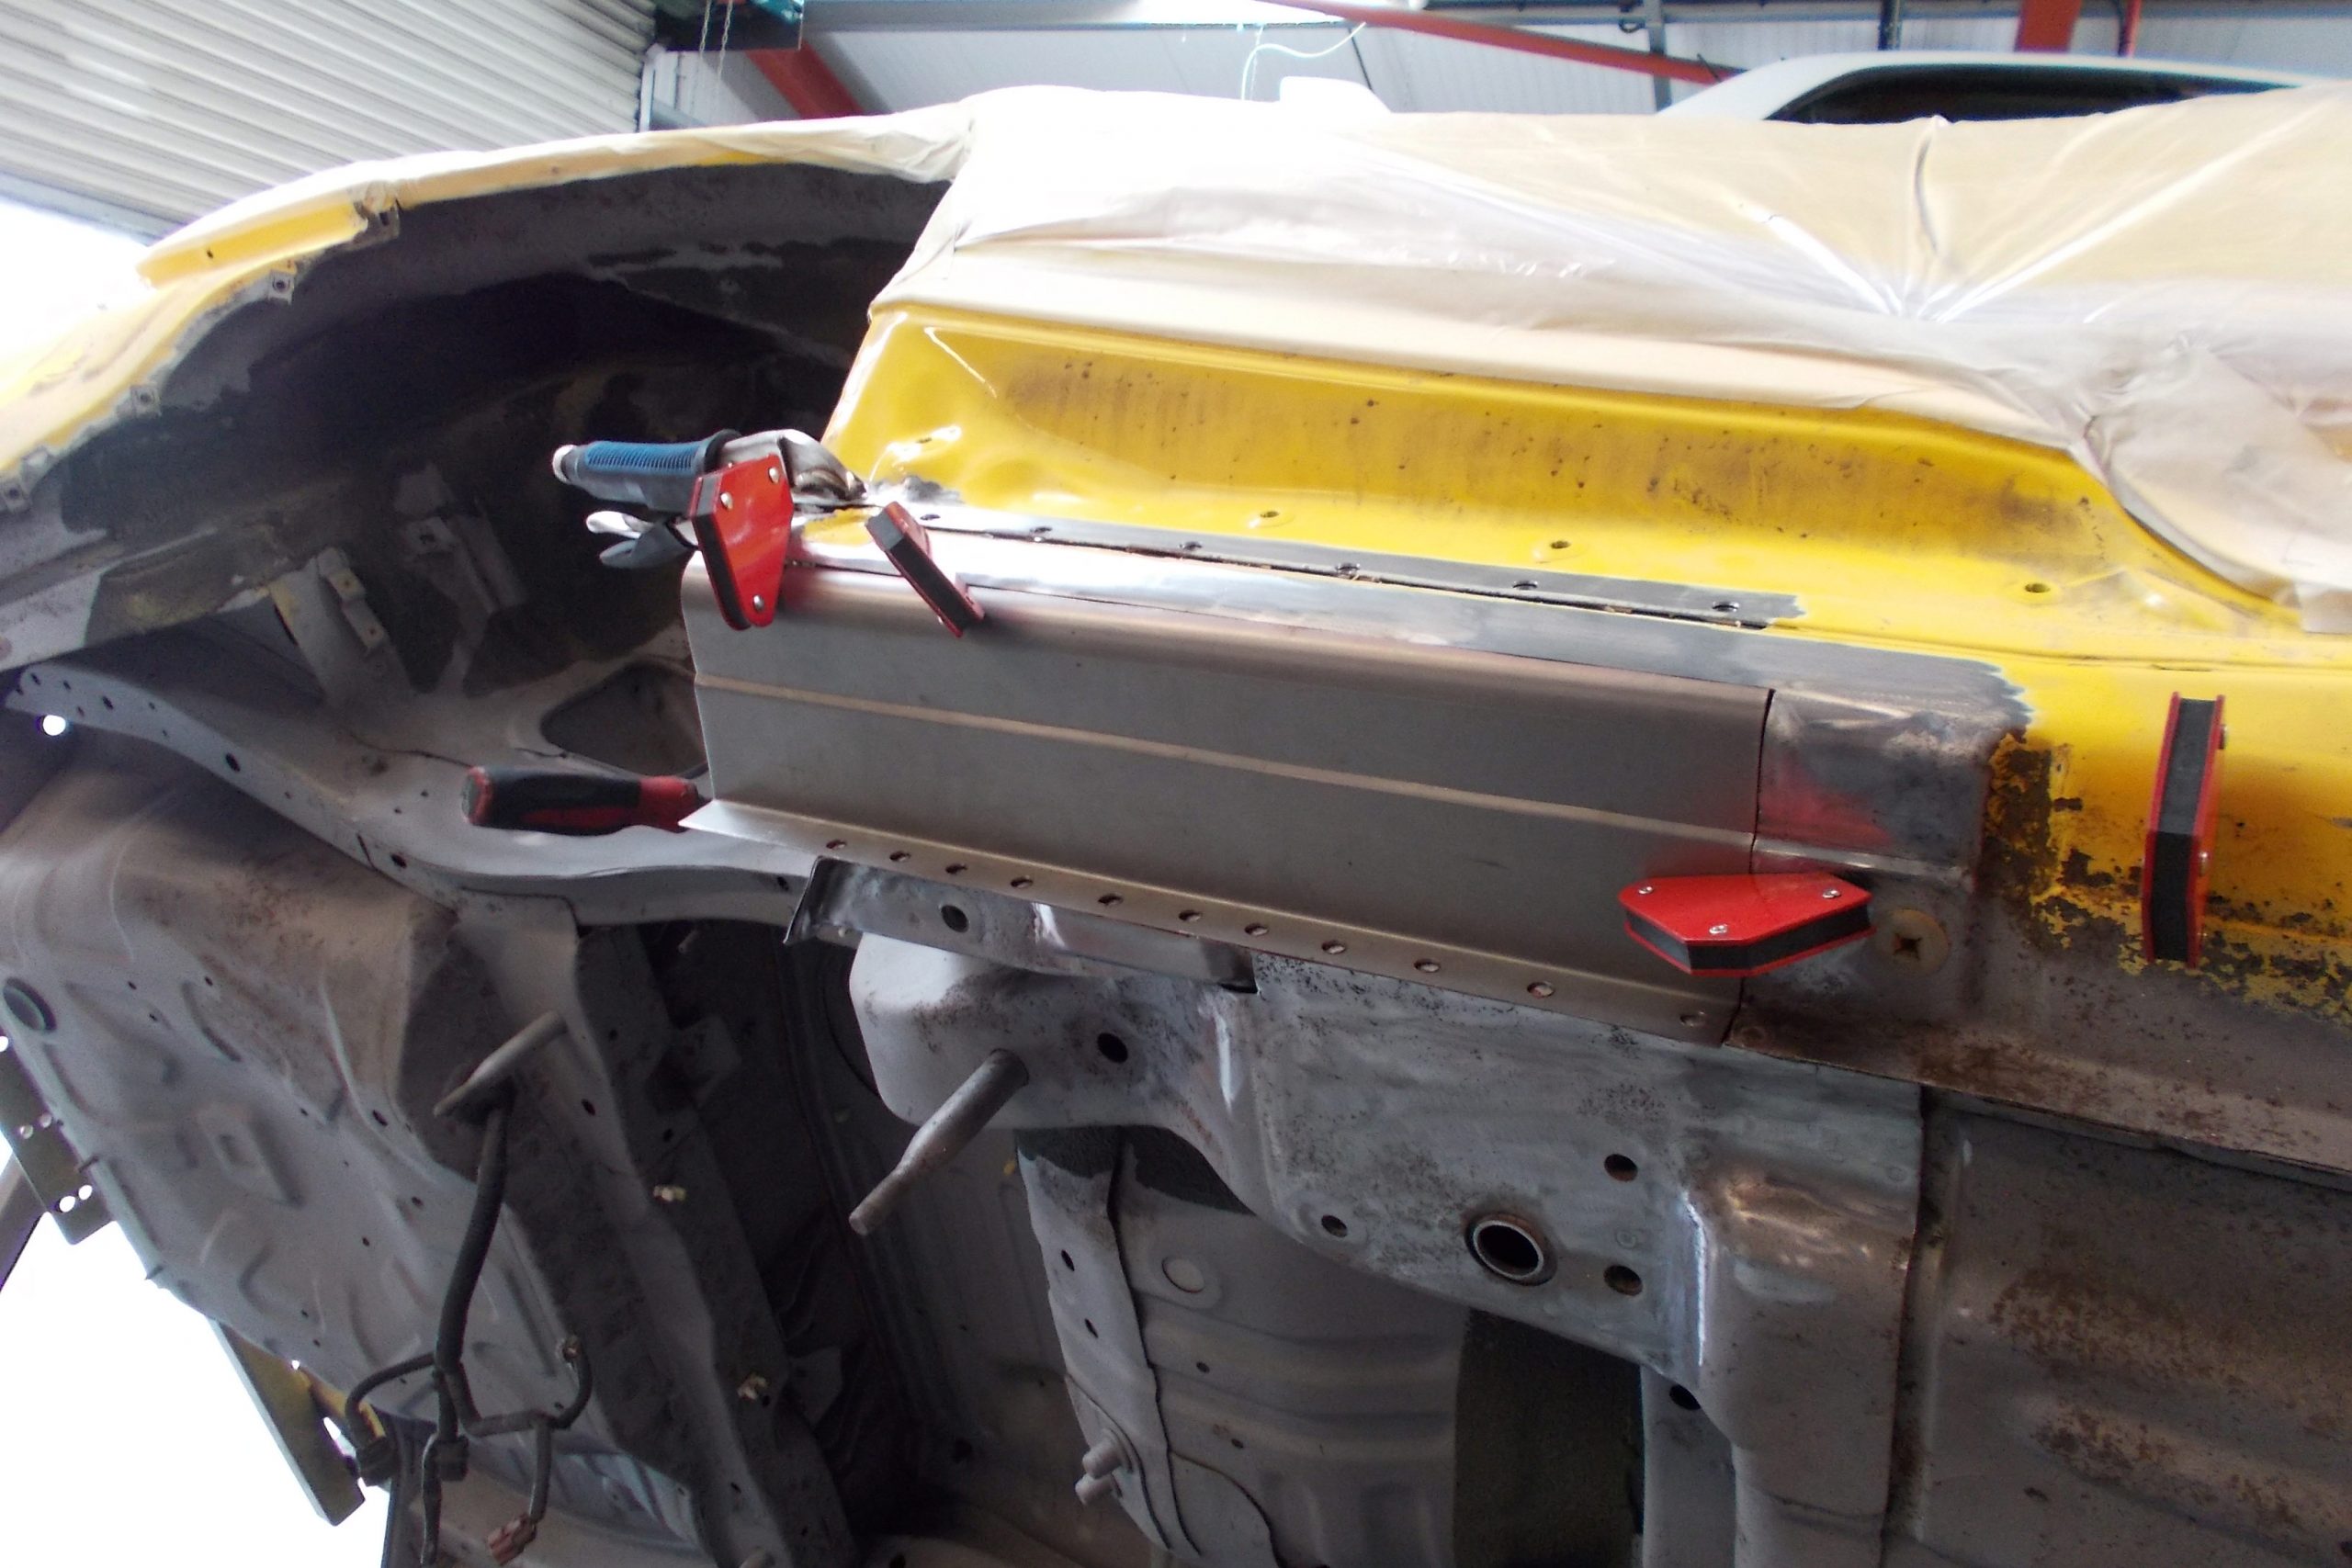
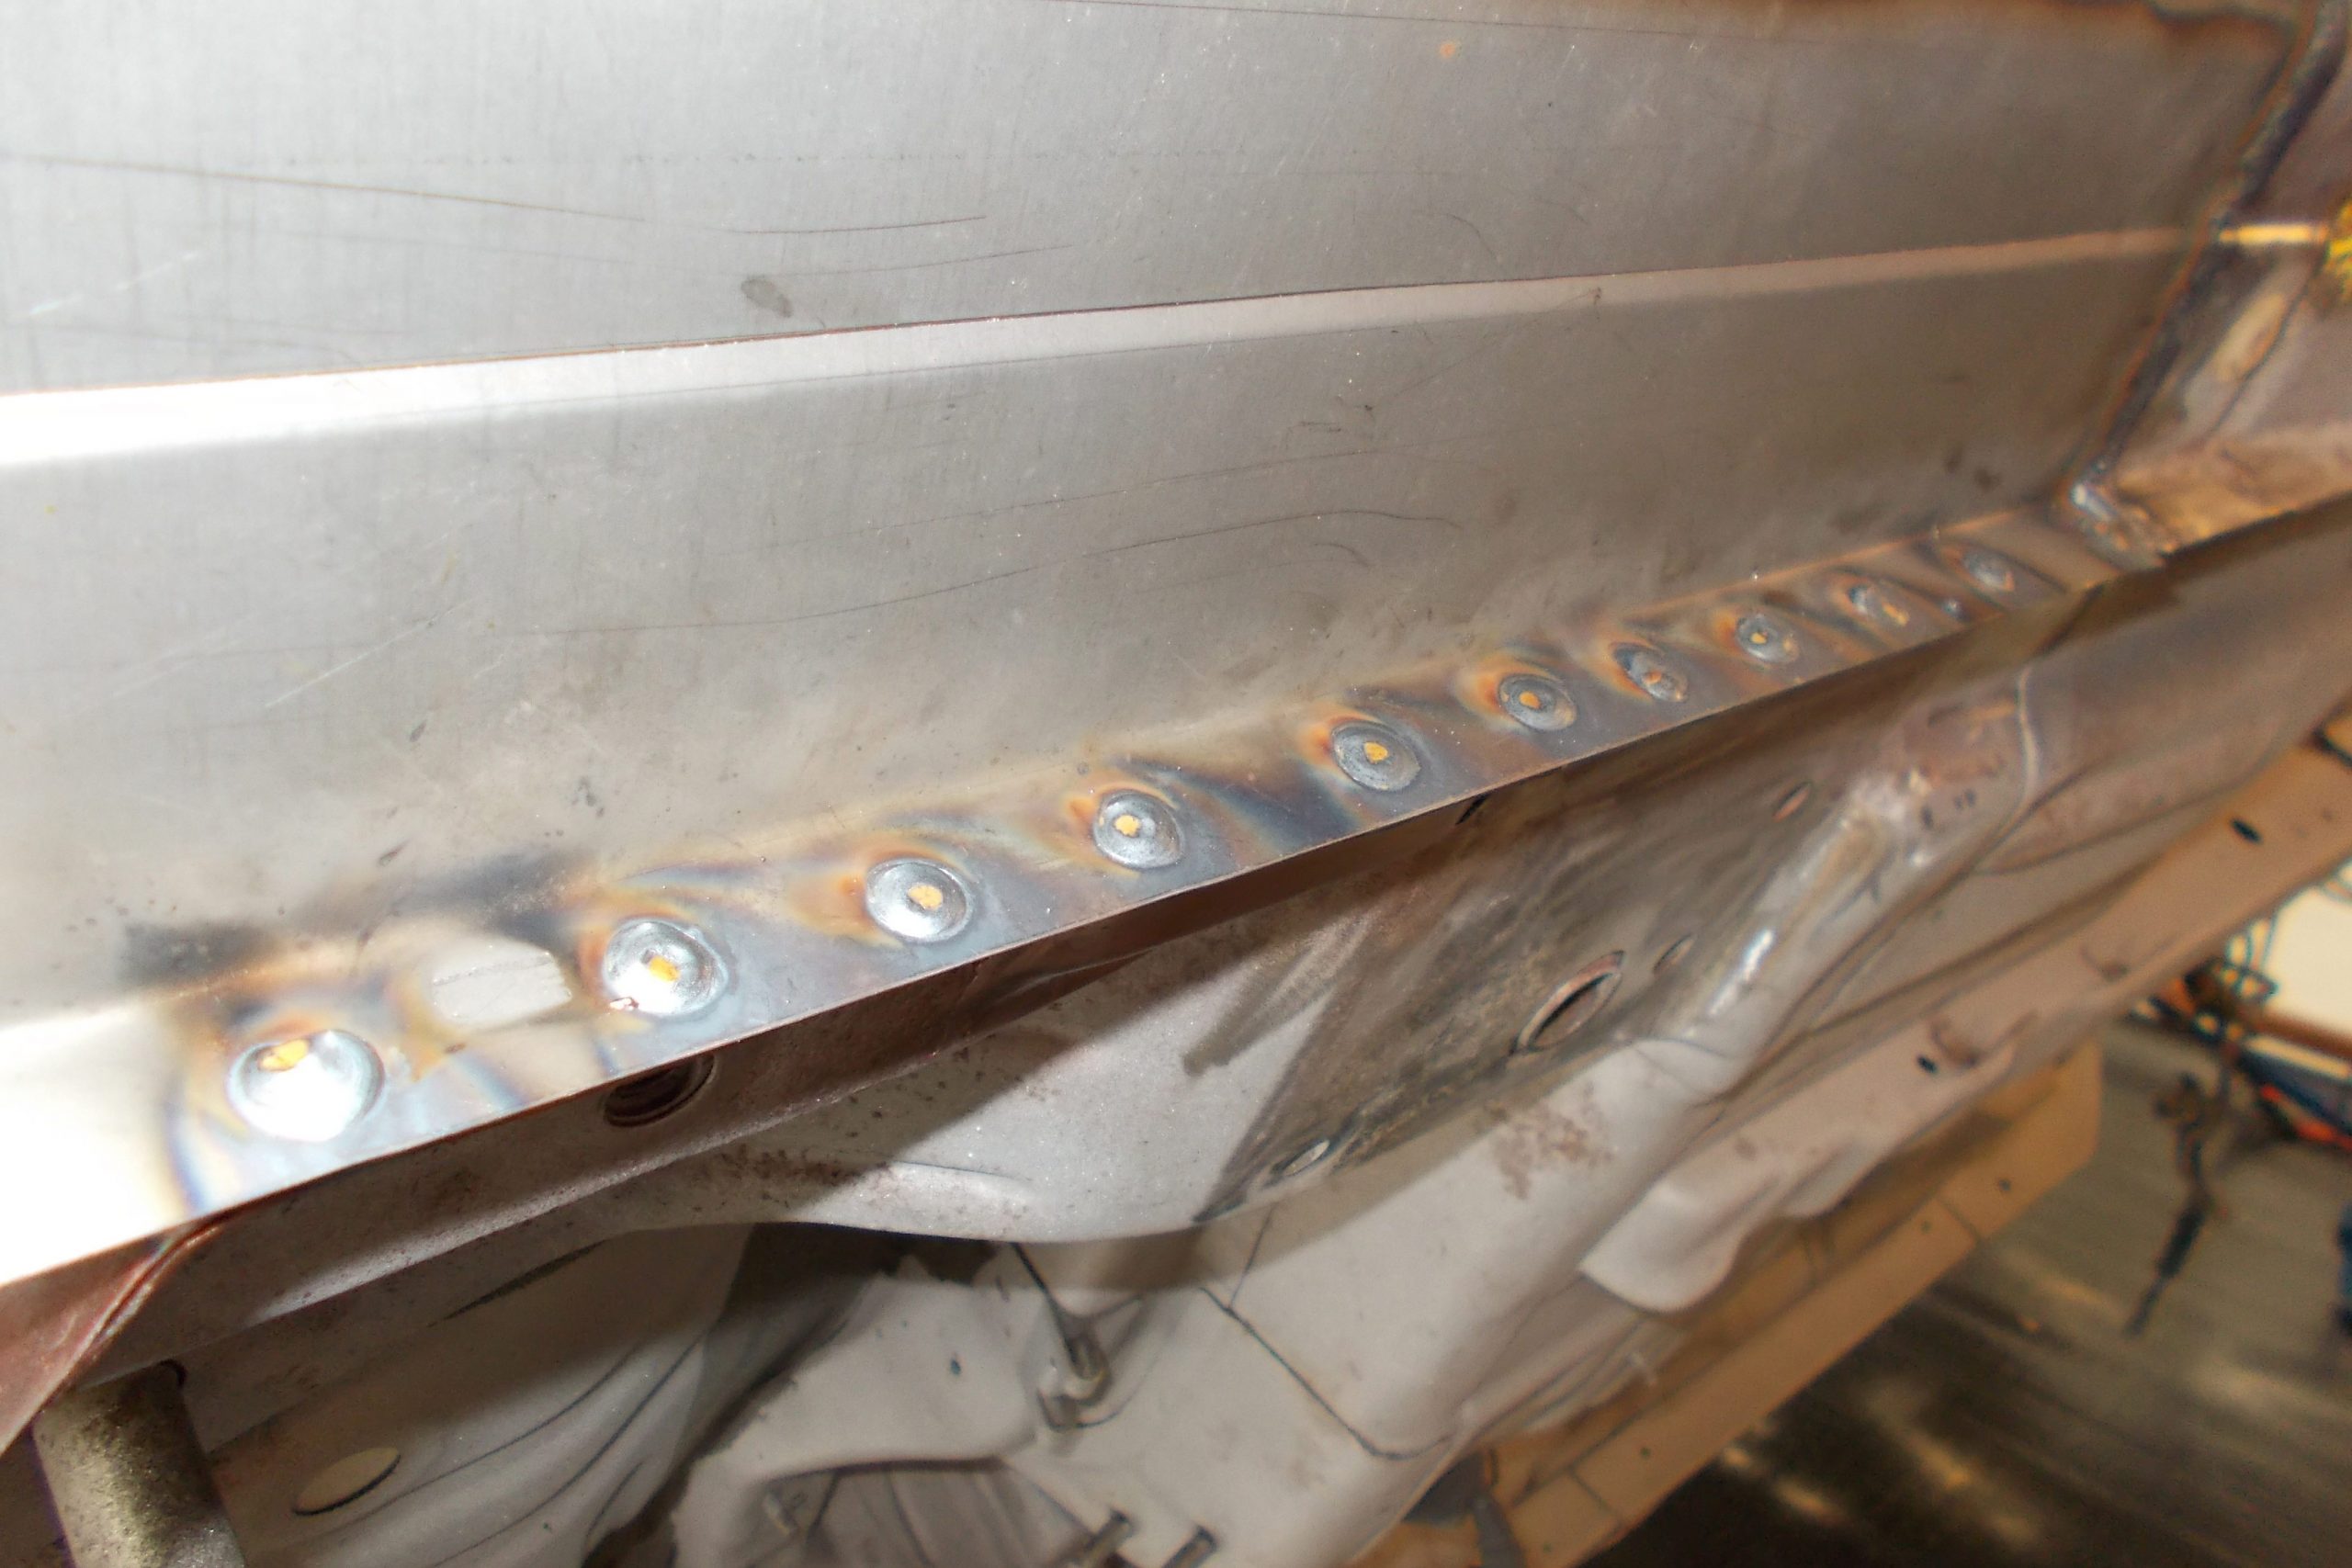
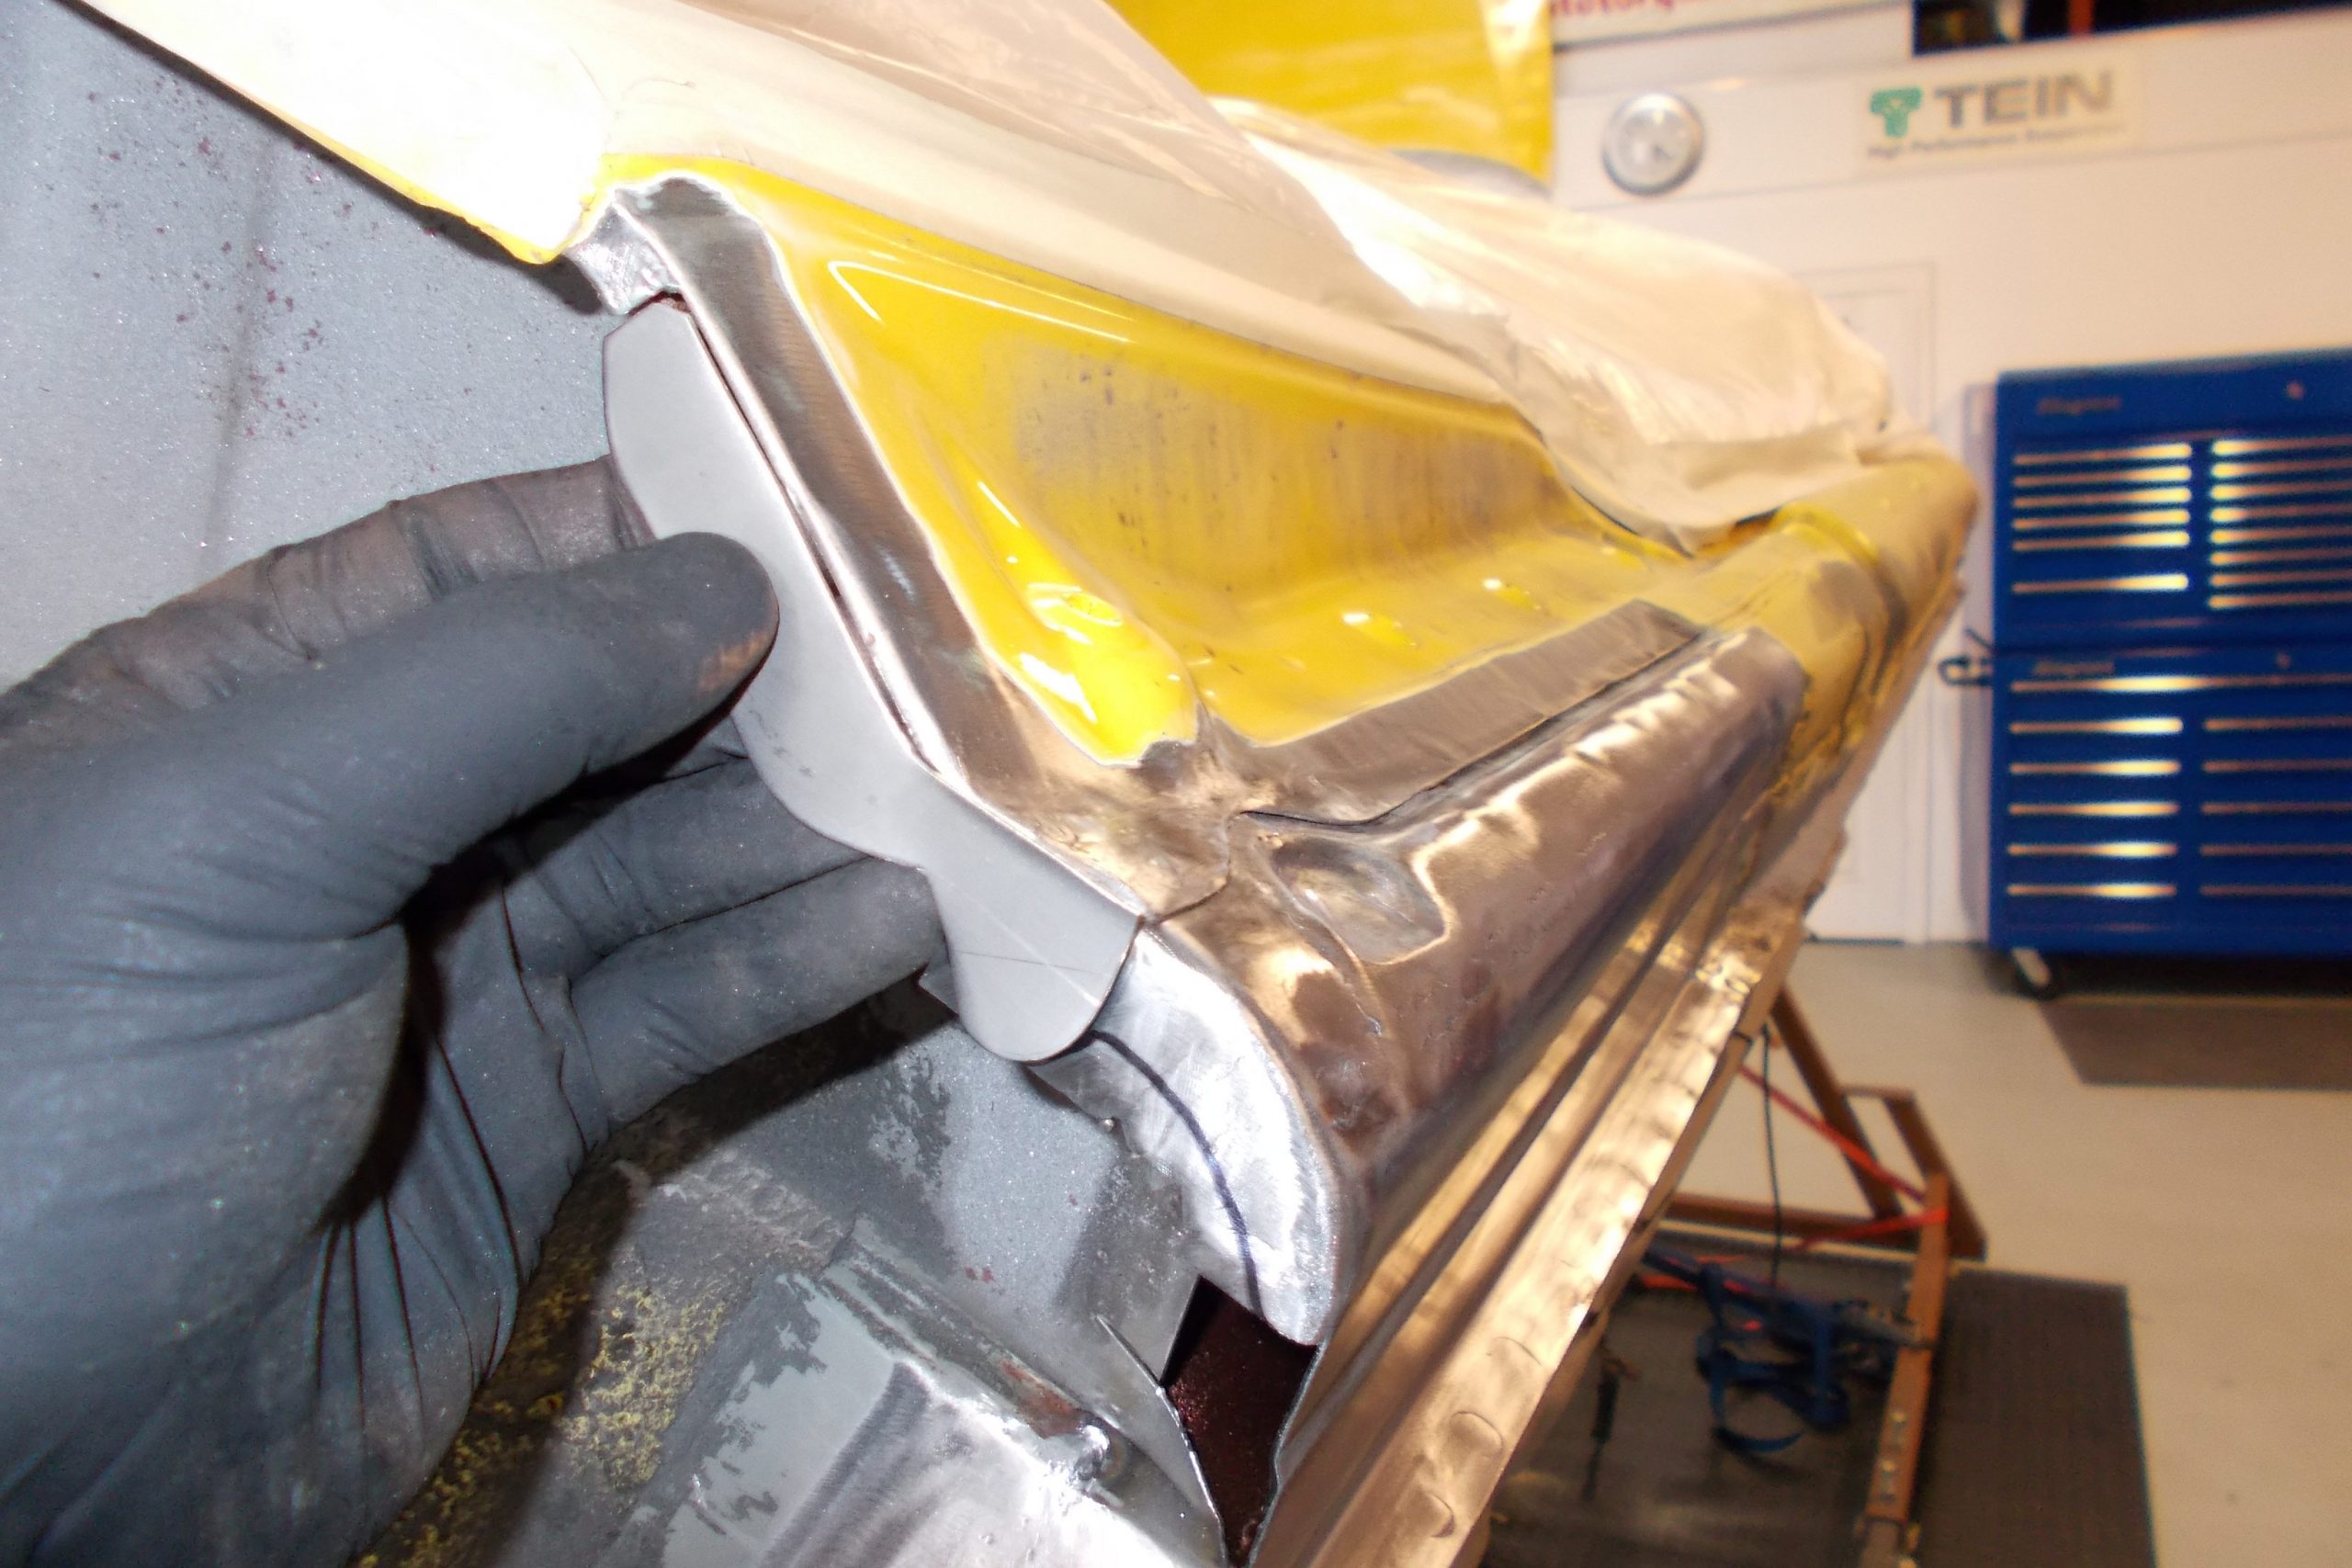
Sill reconstruction
Below are a series of pictures of one of the sill repairs we carried out


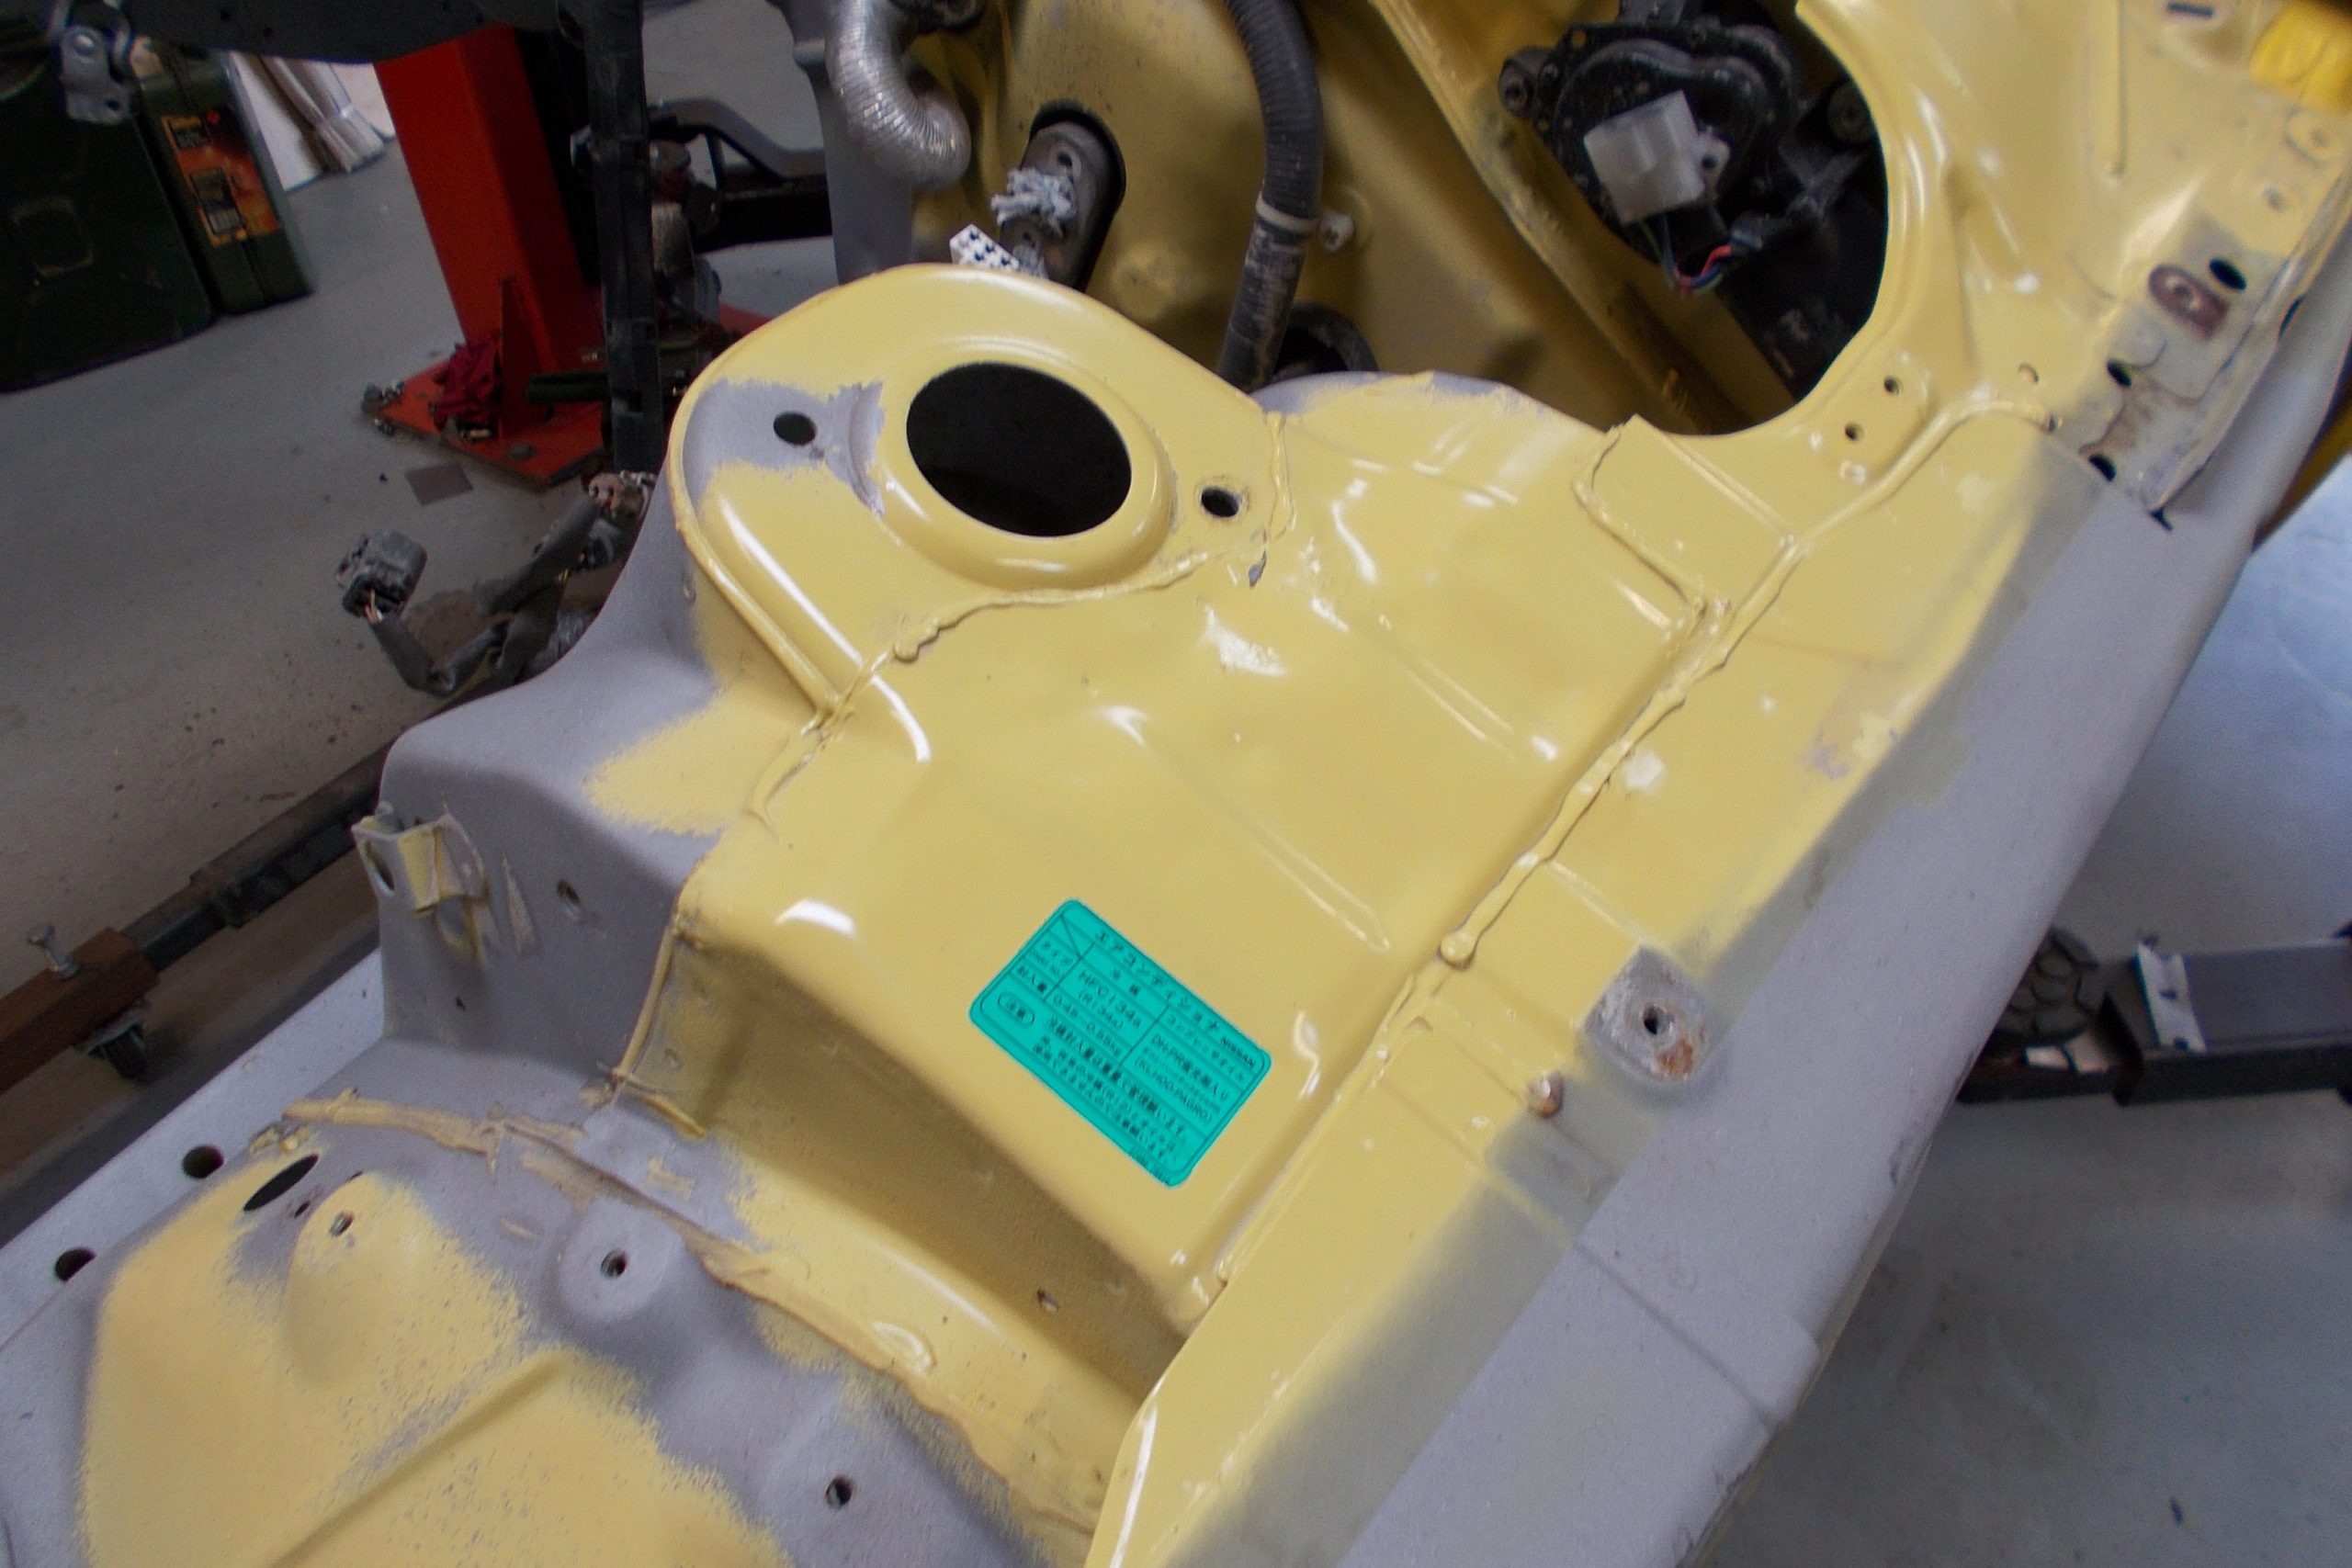
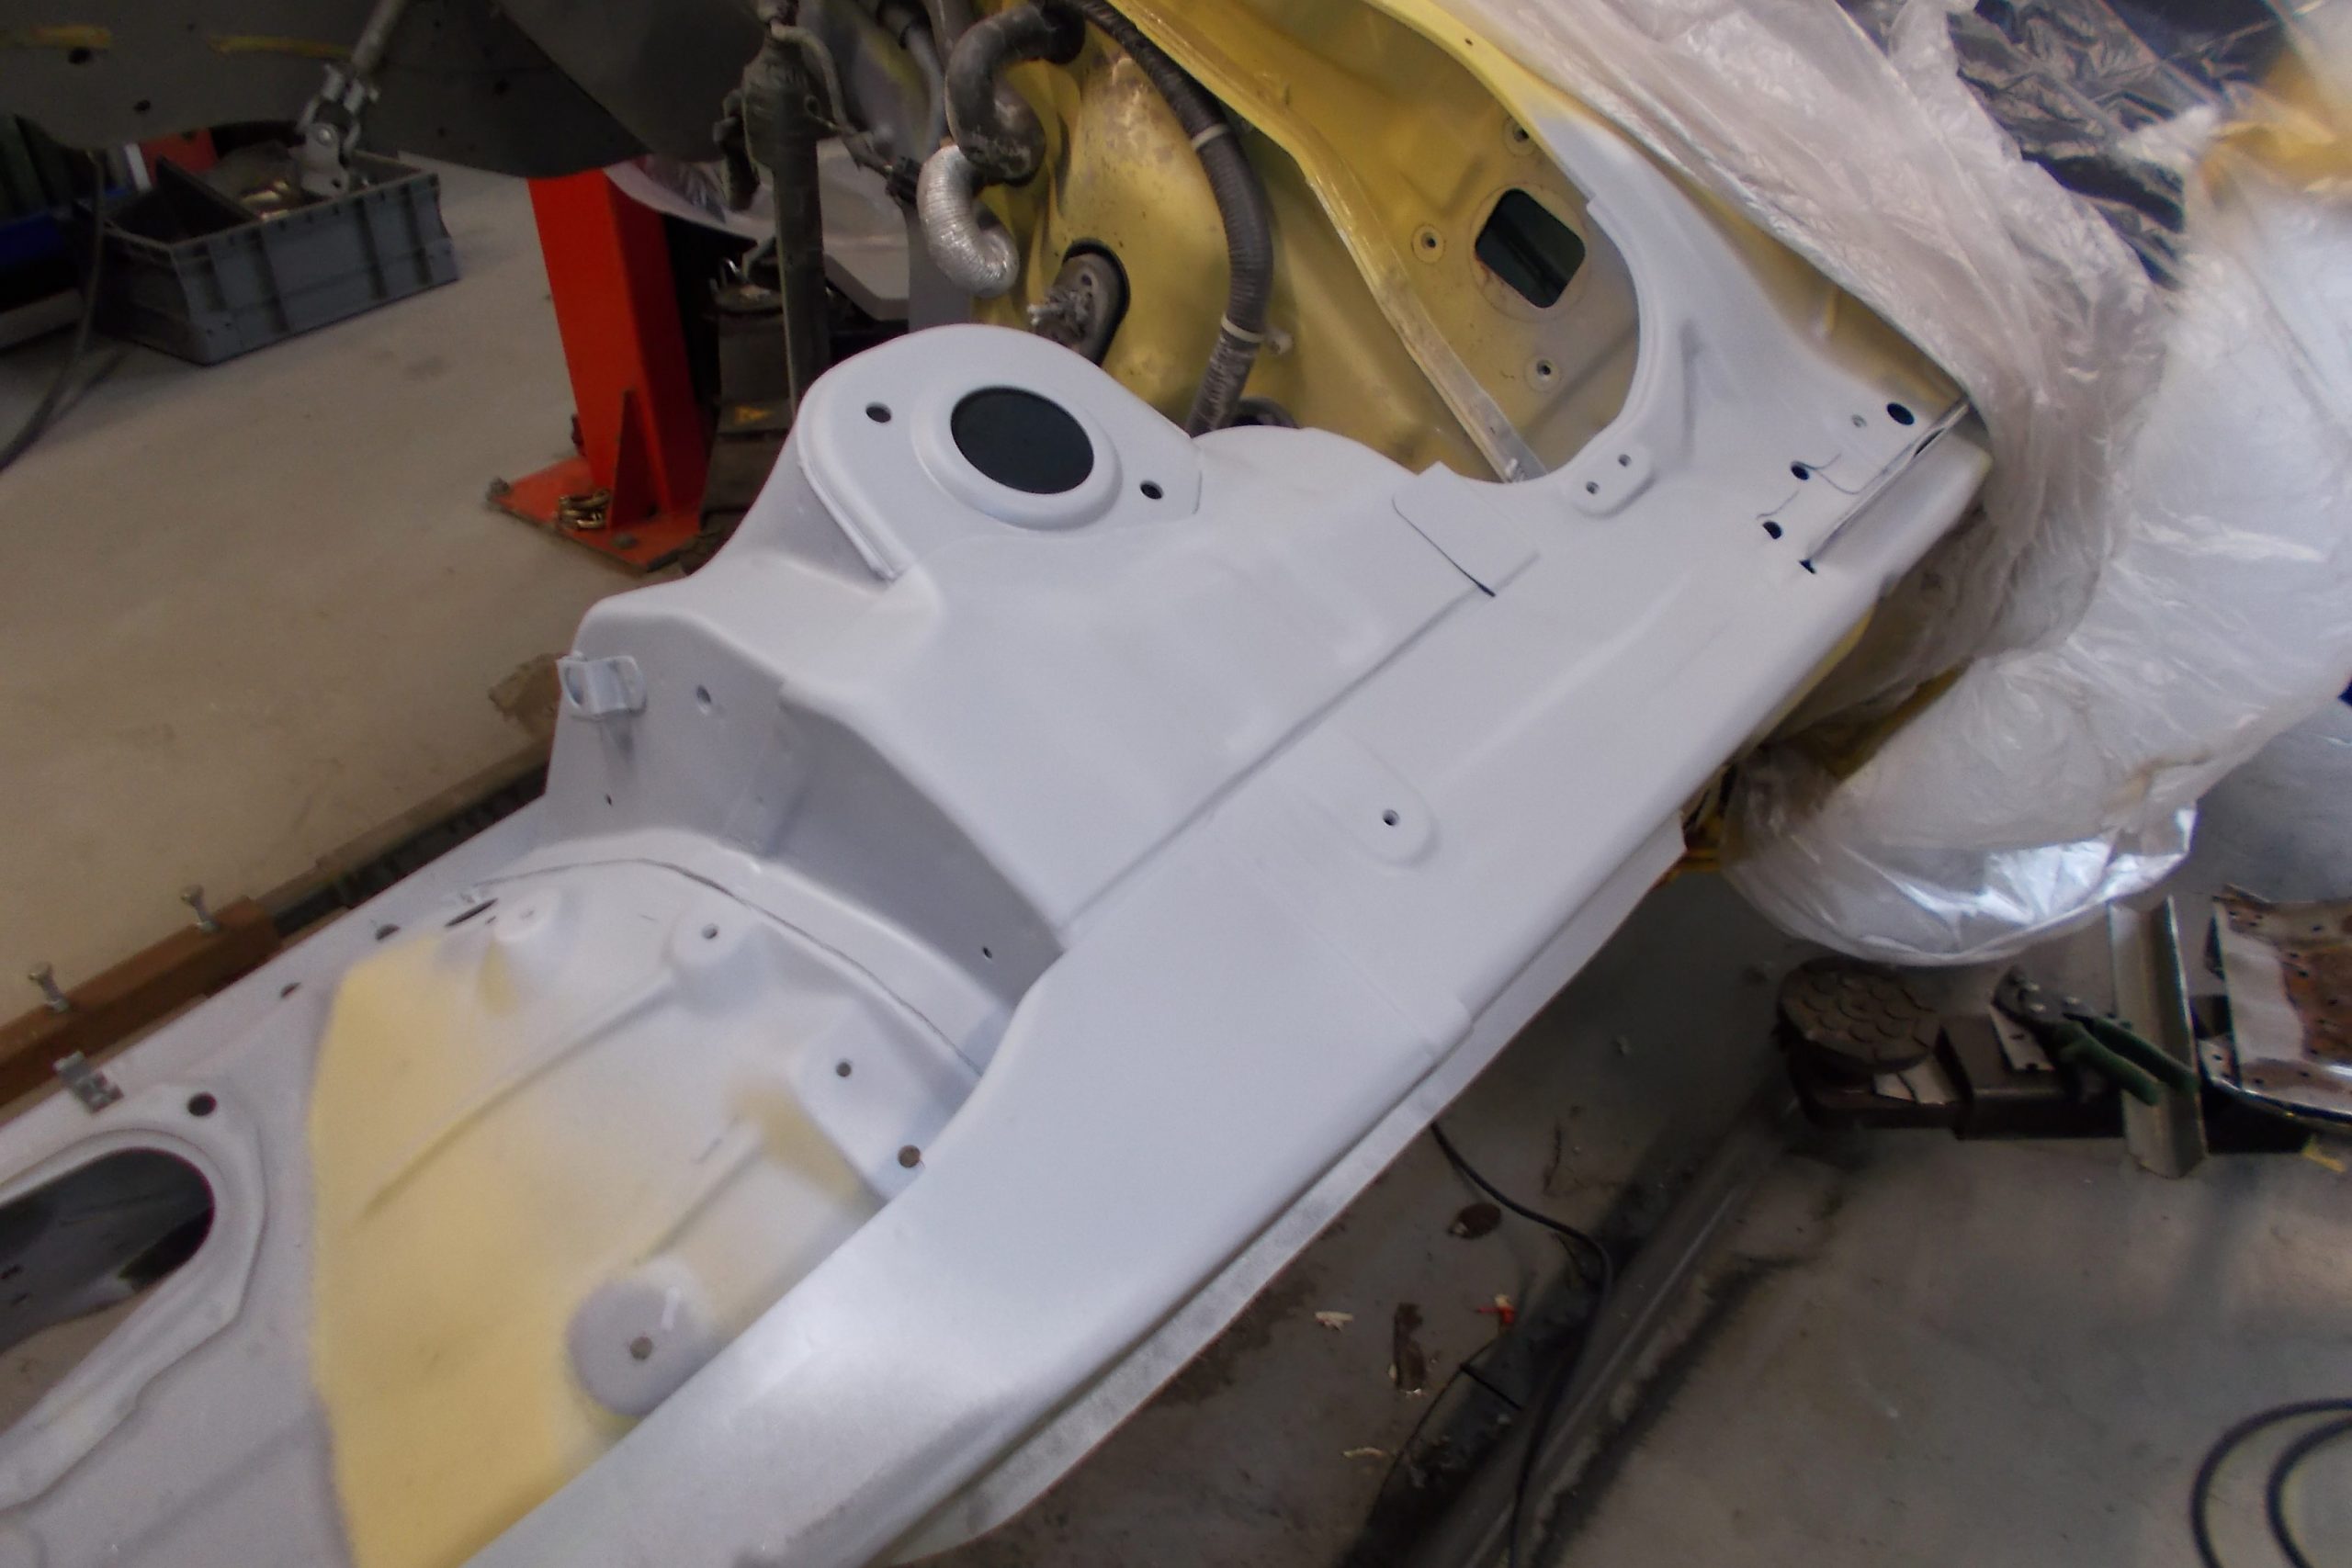
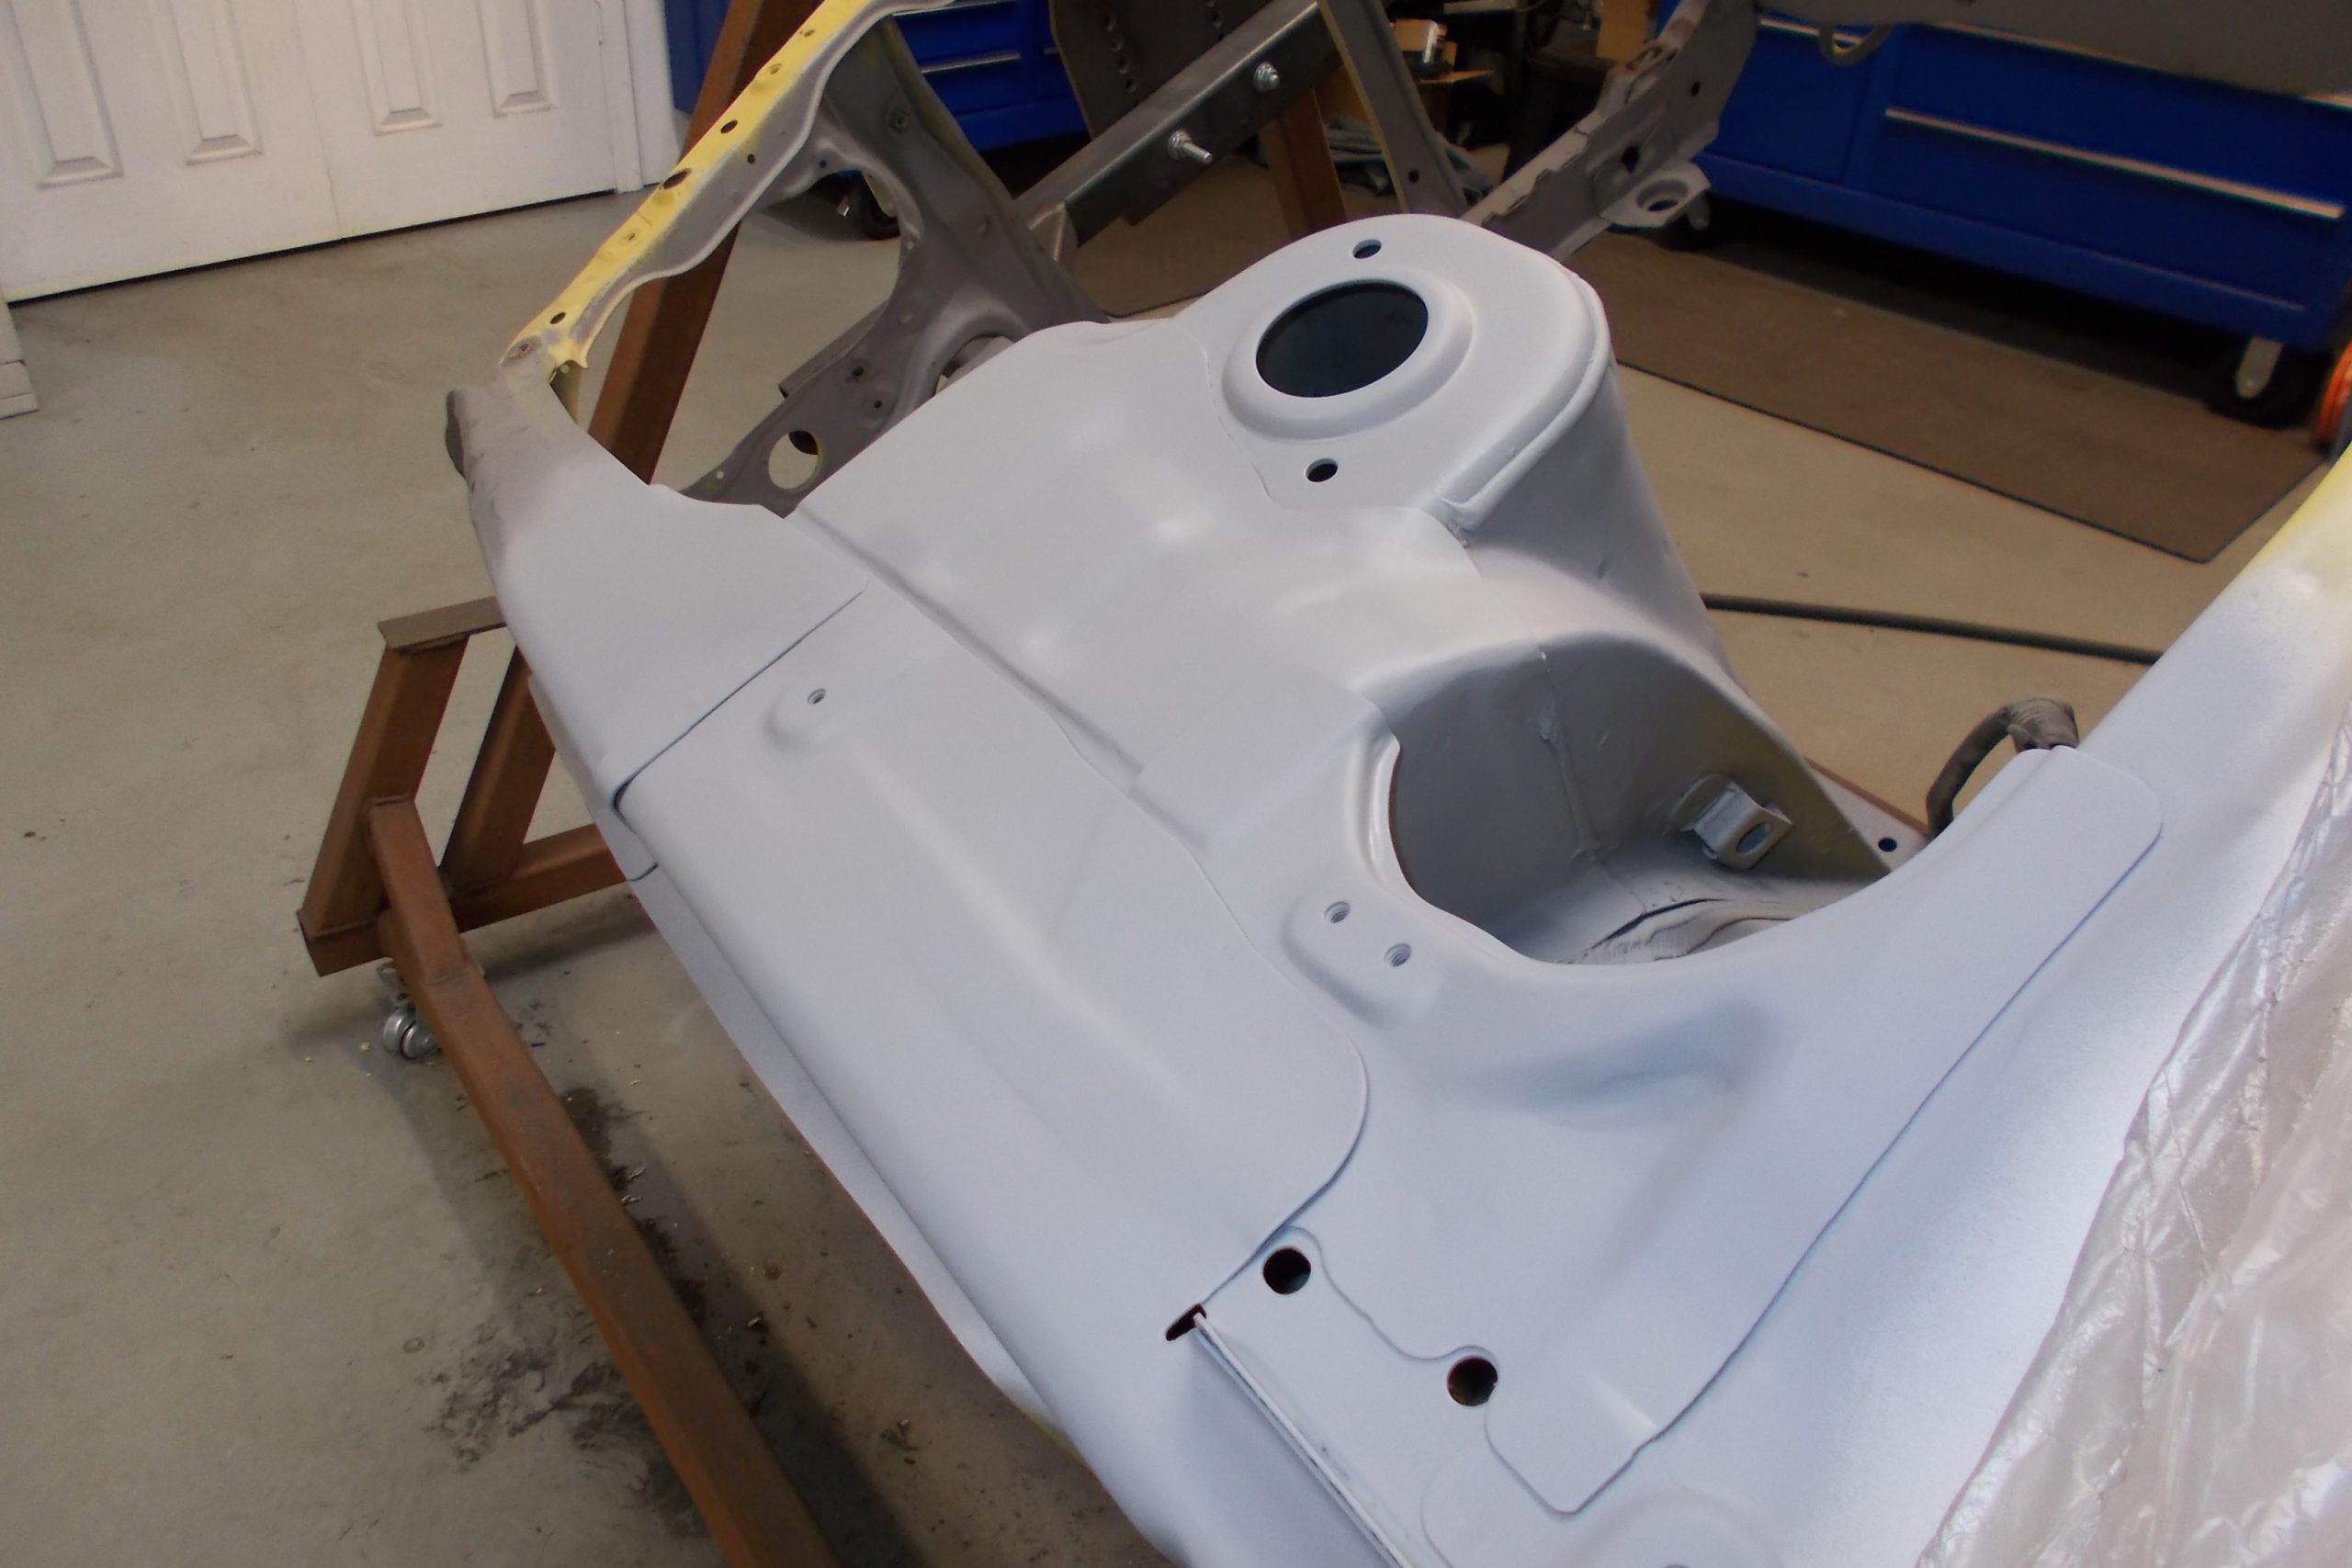
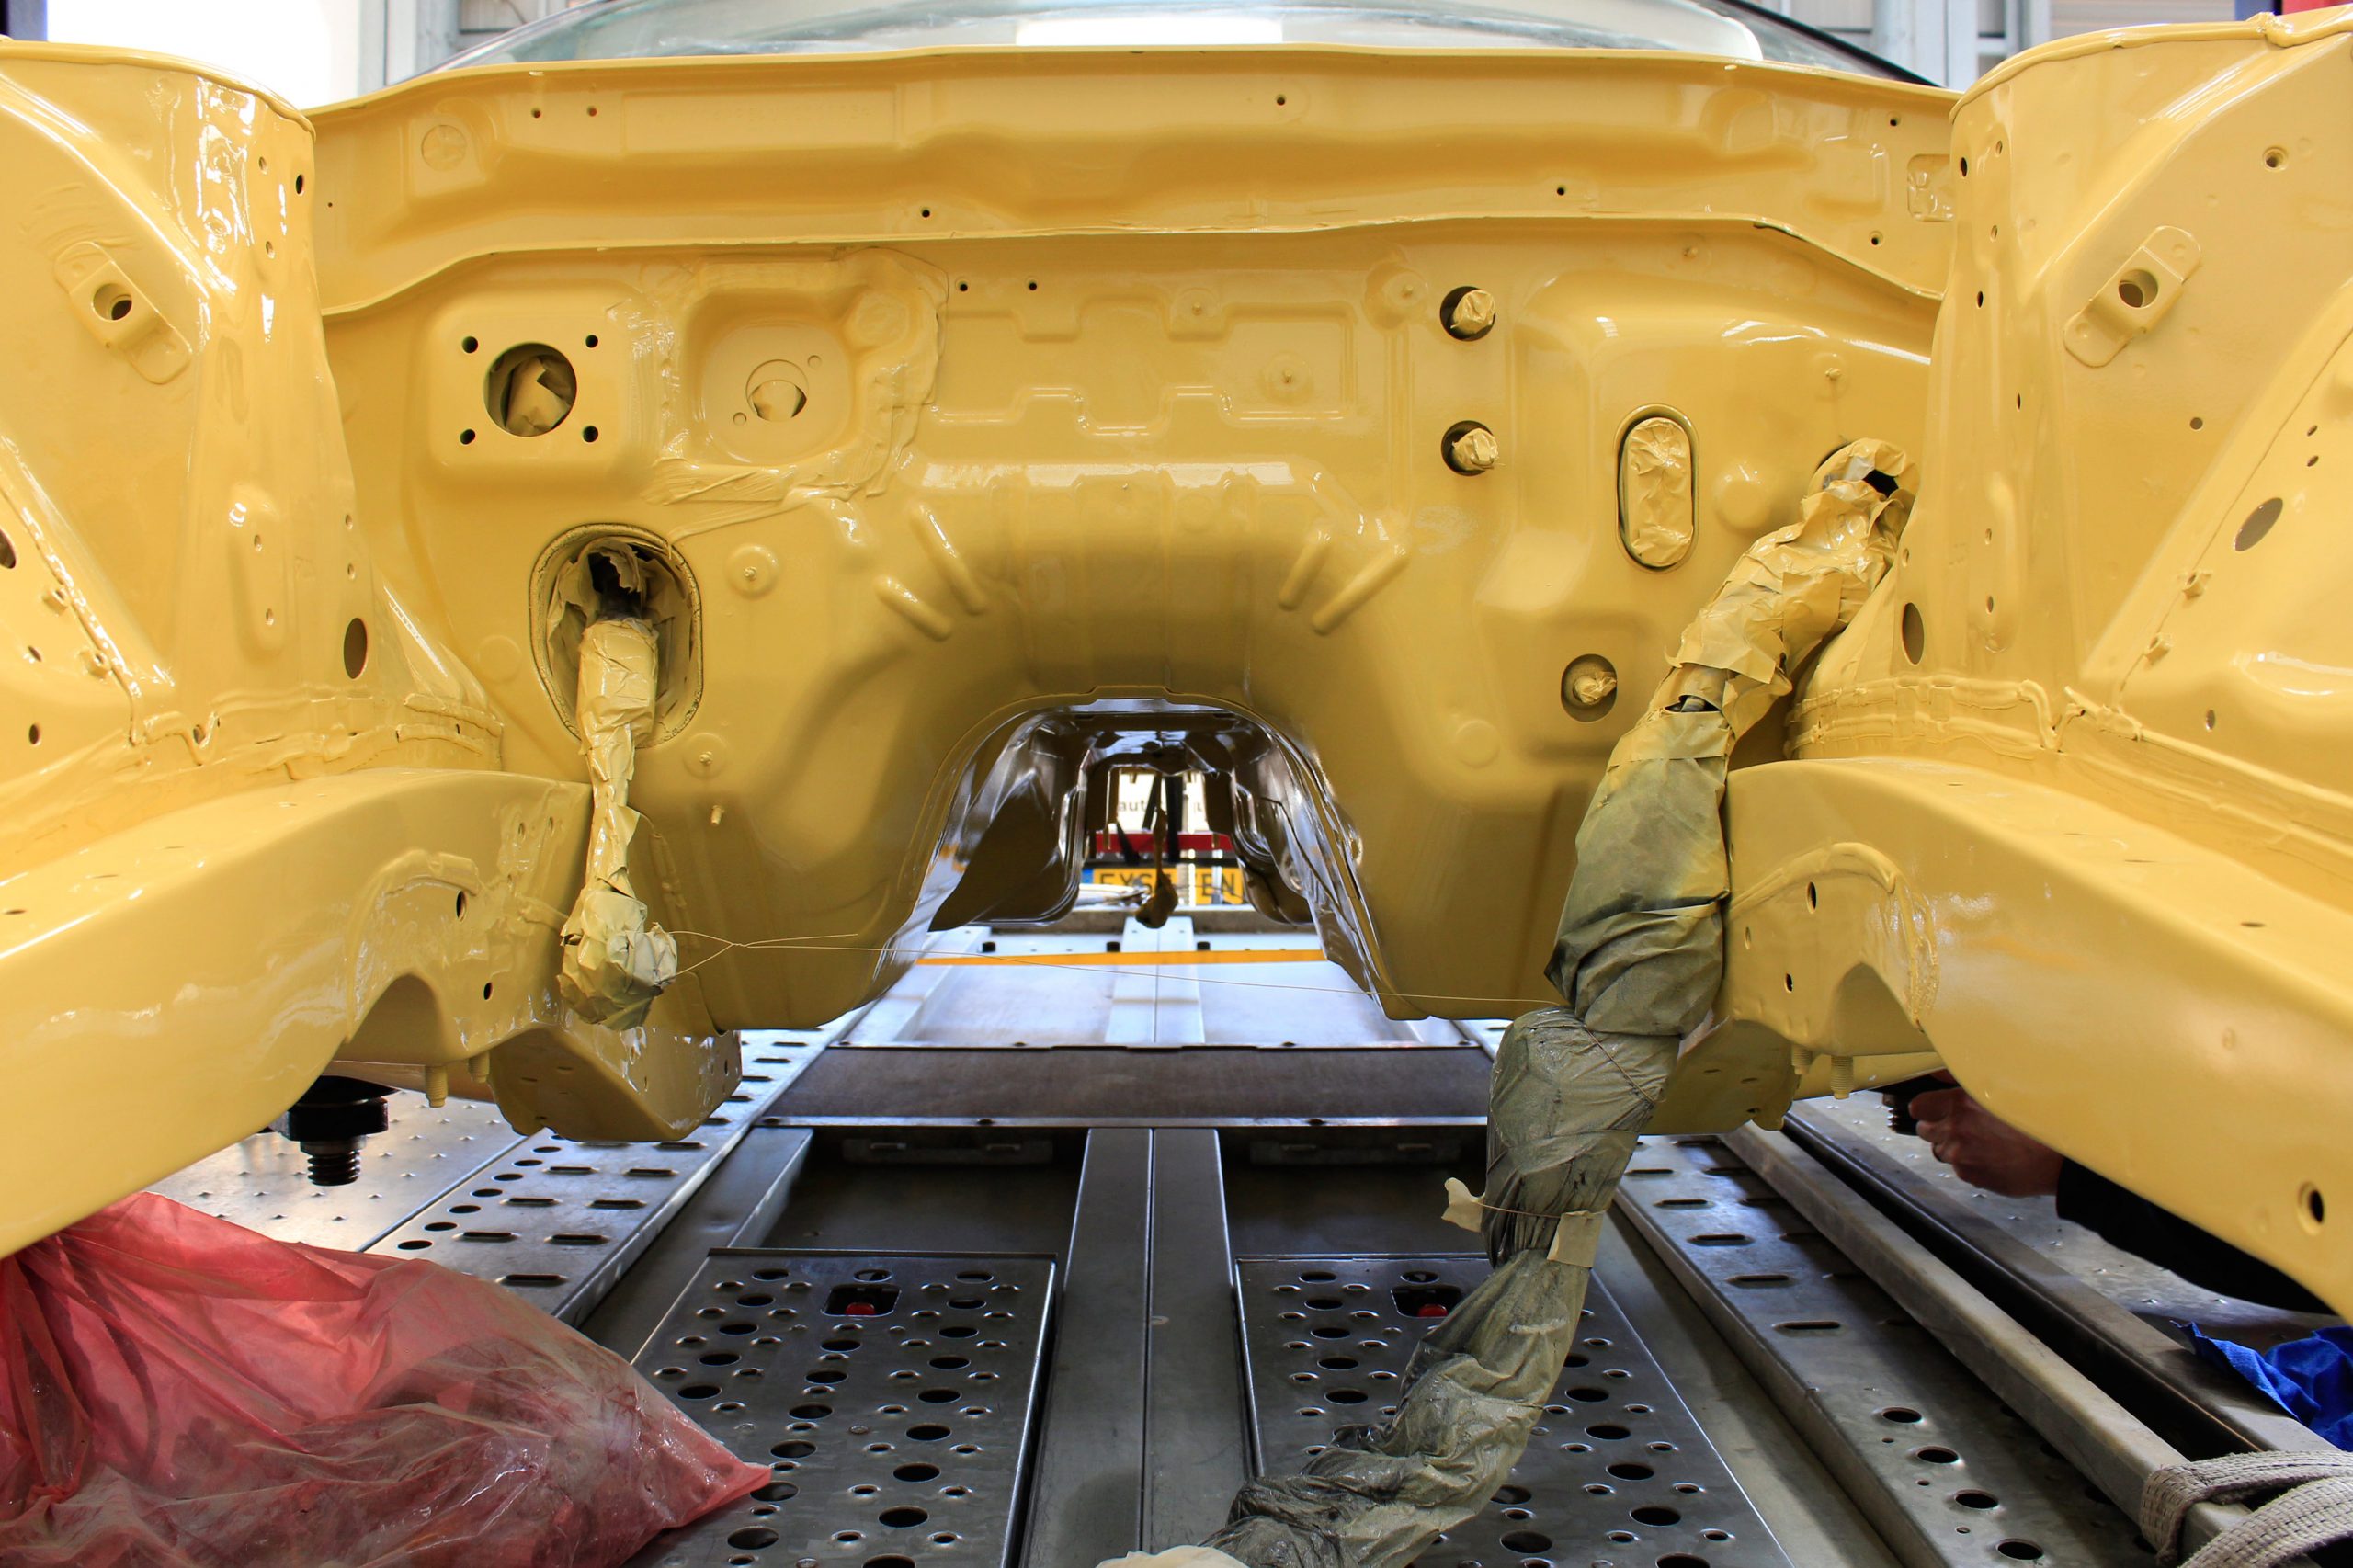
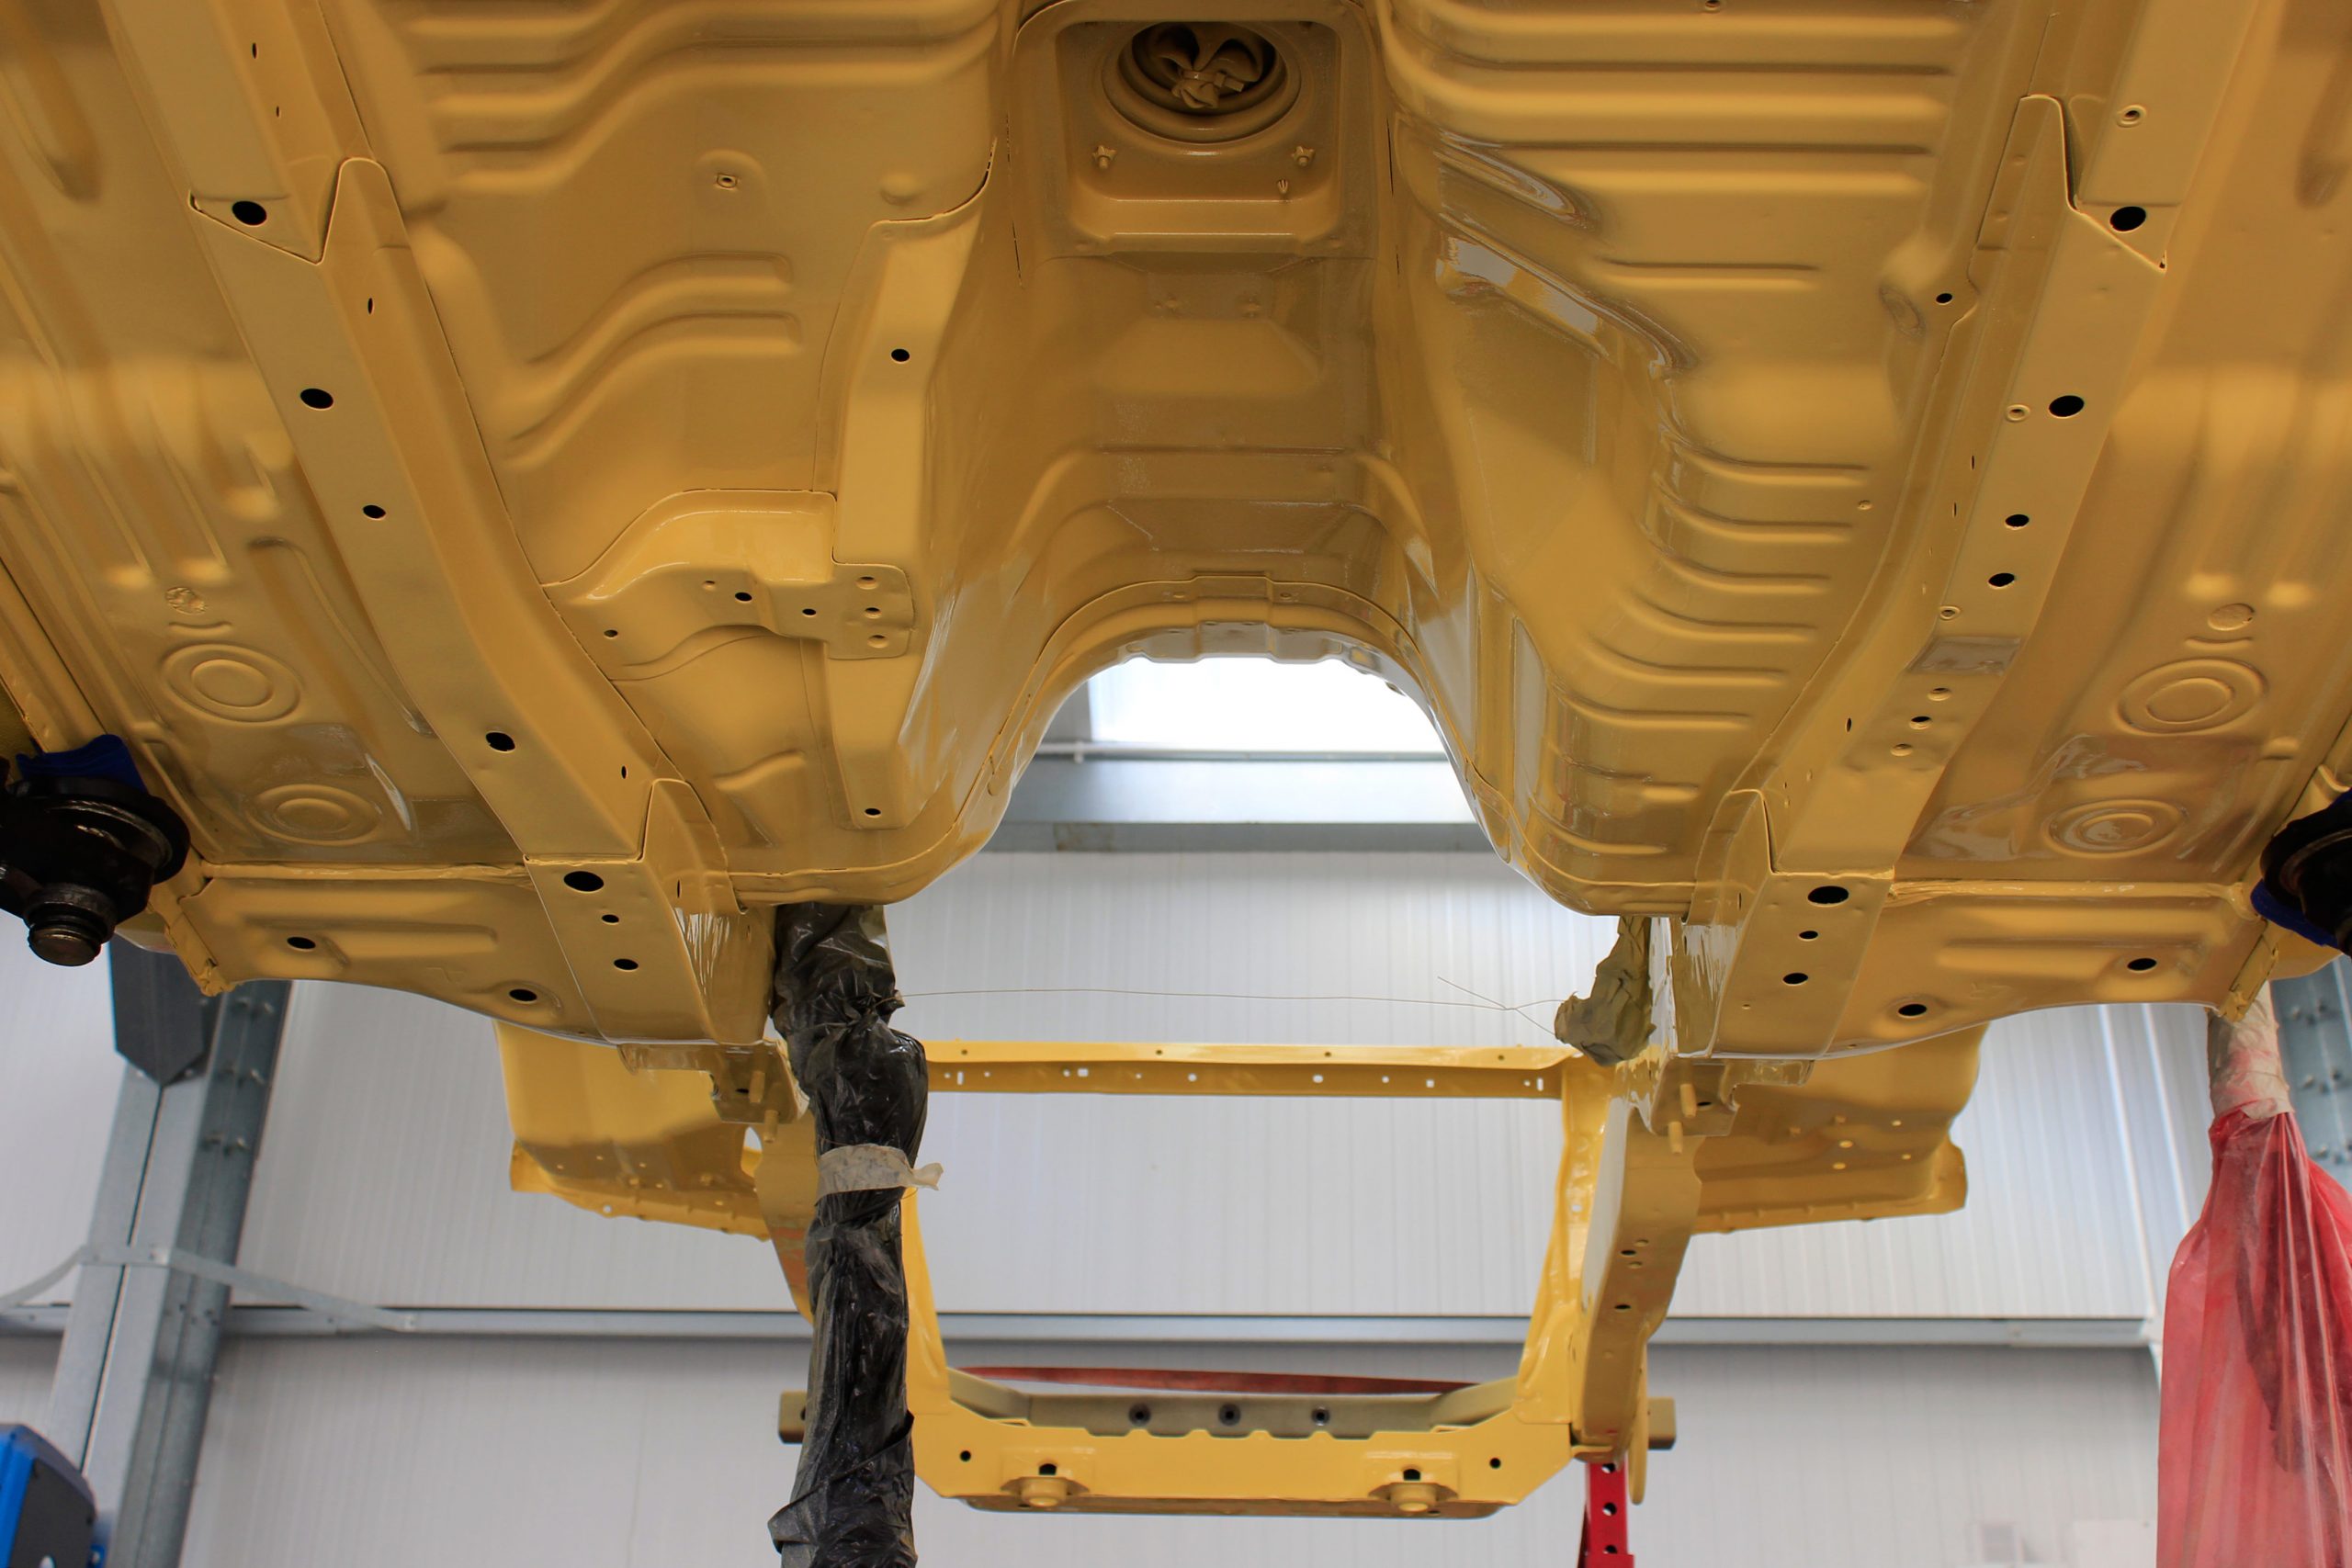
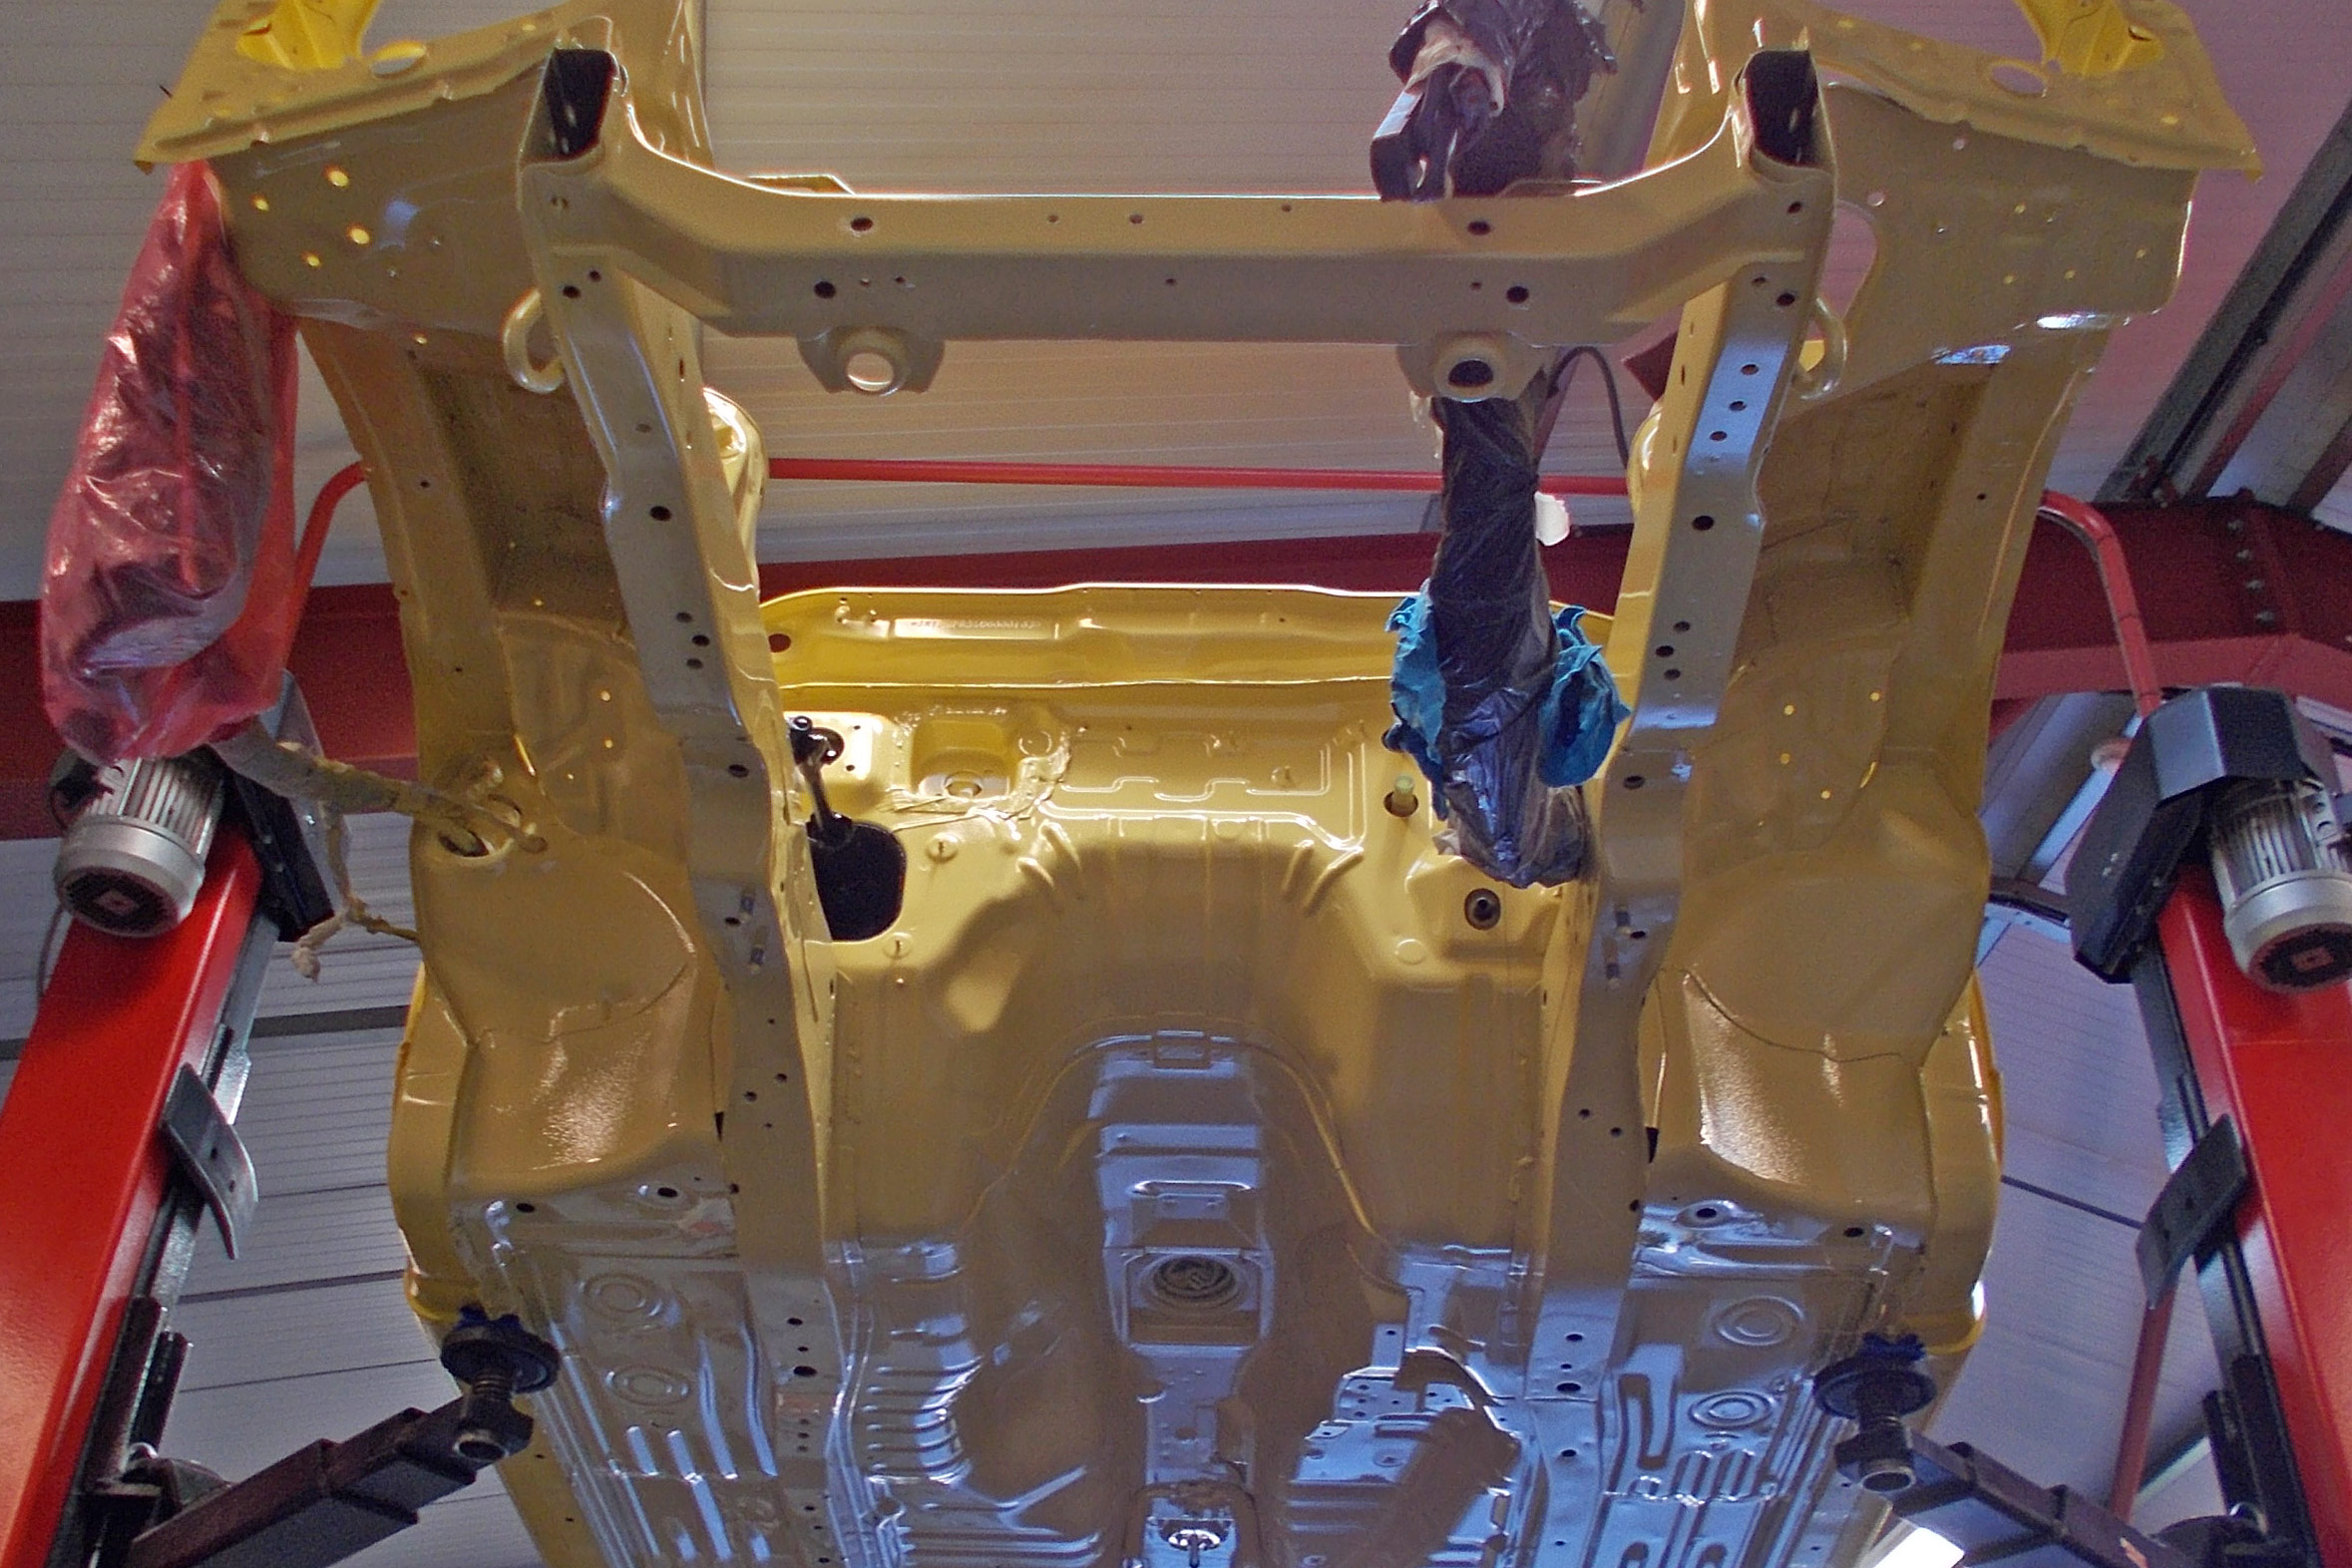
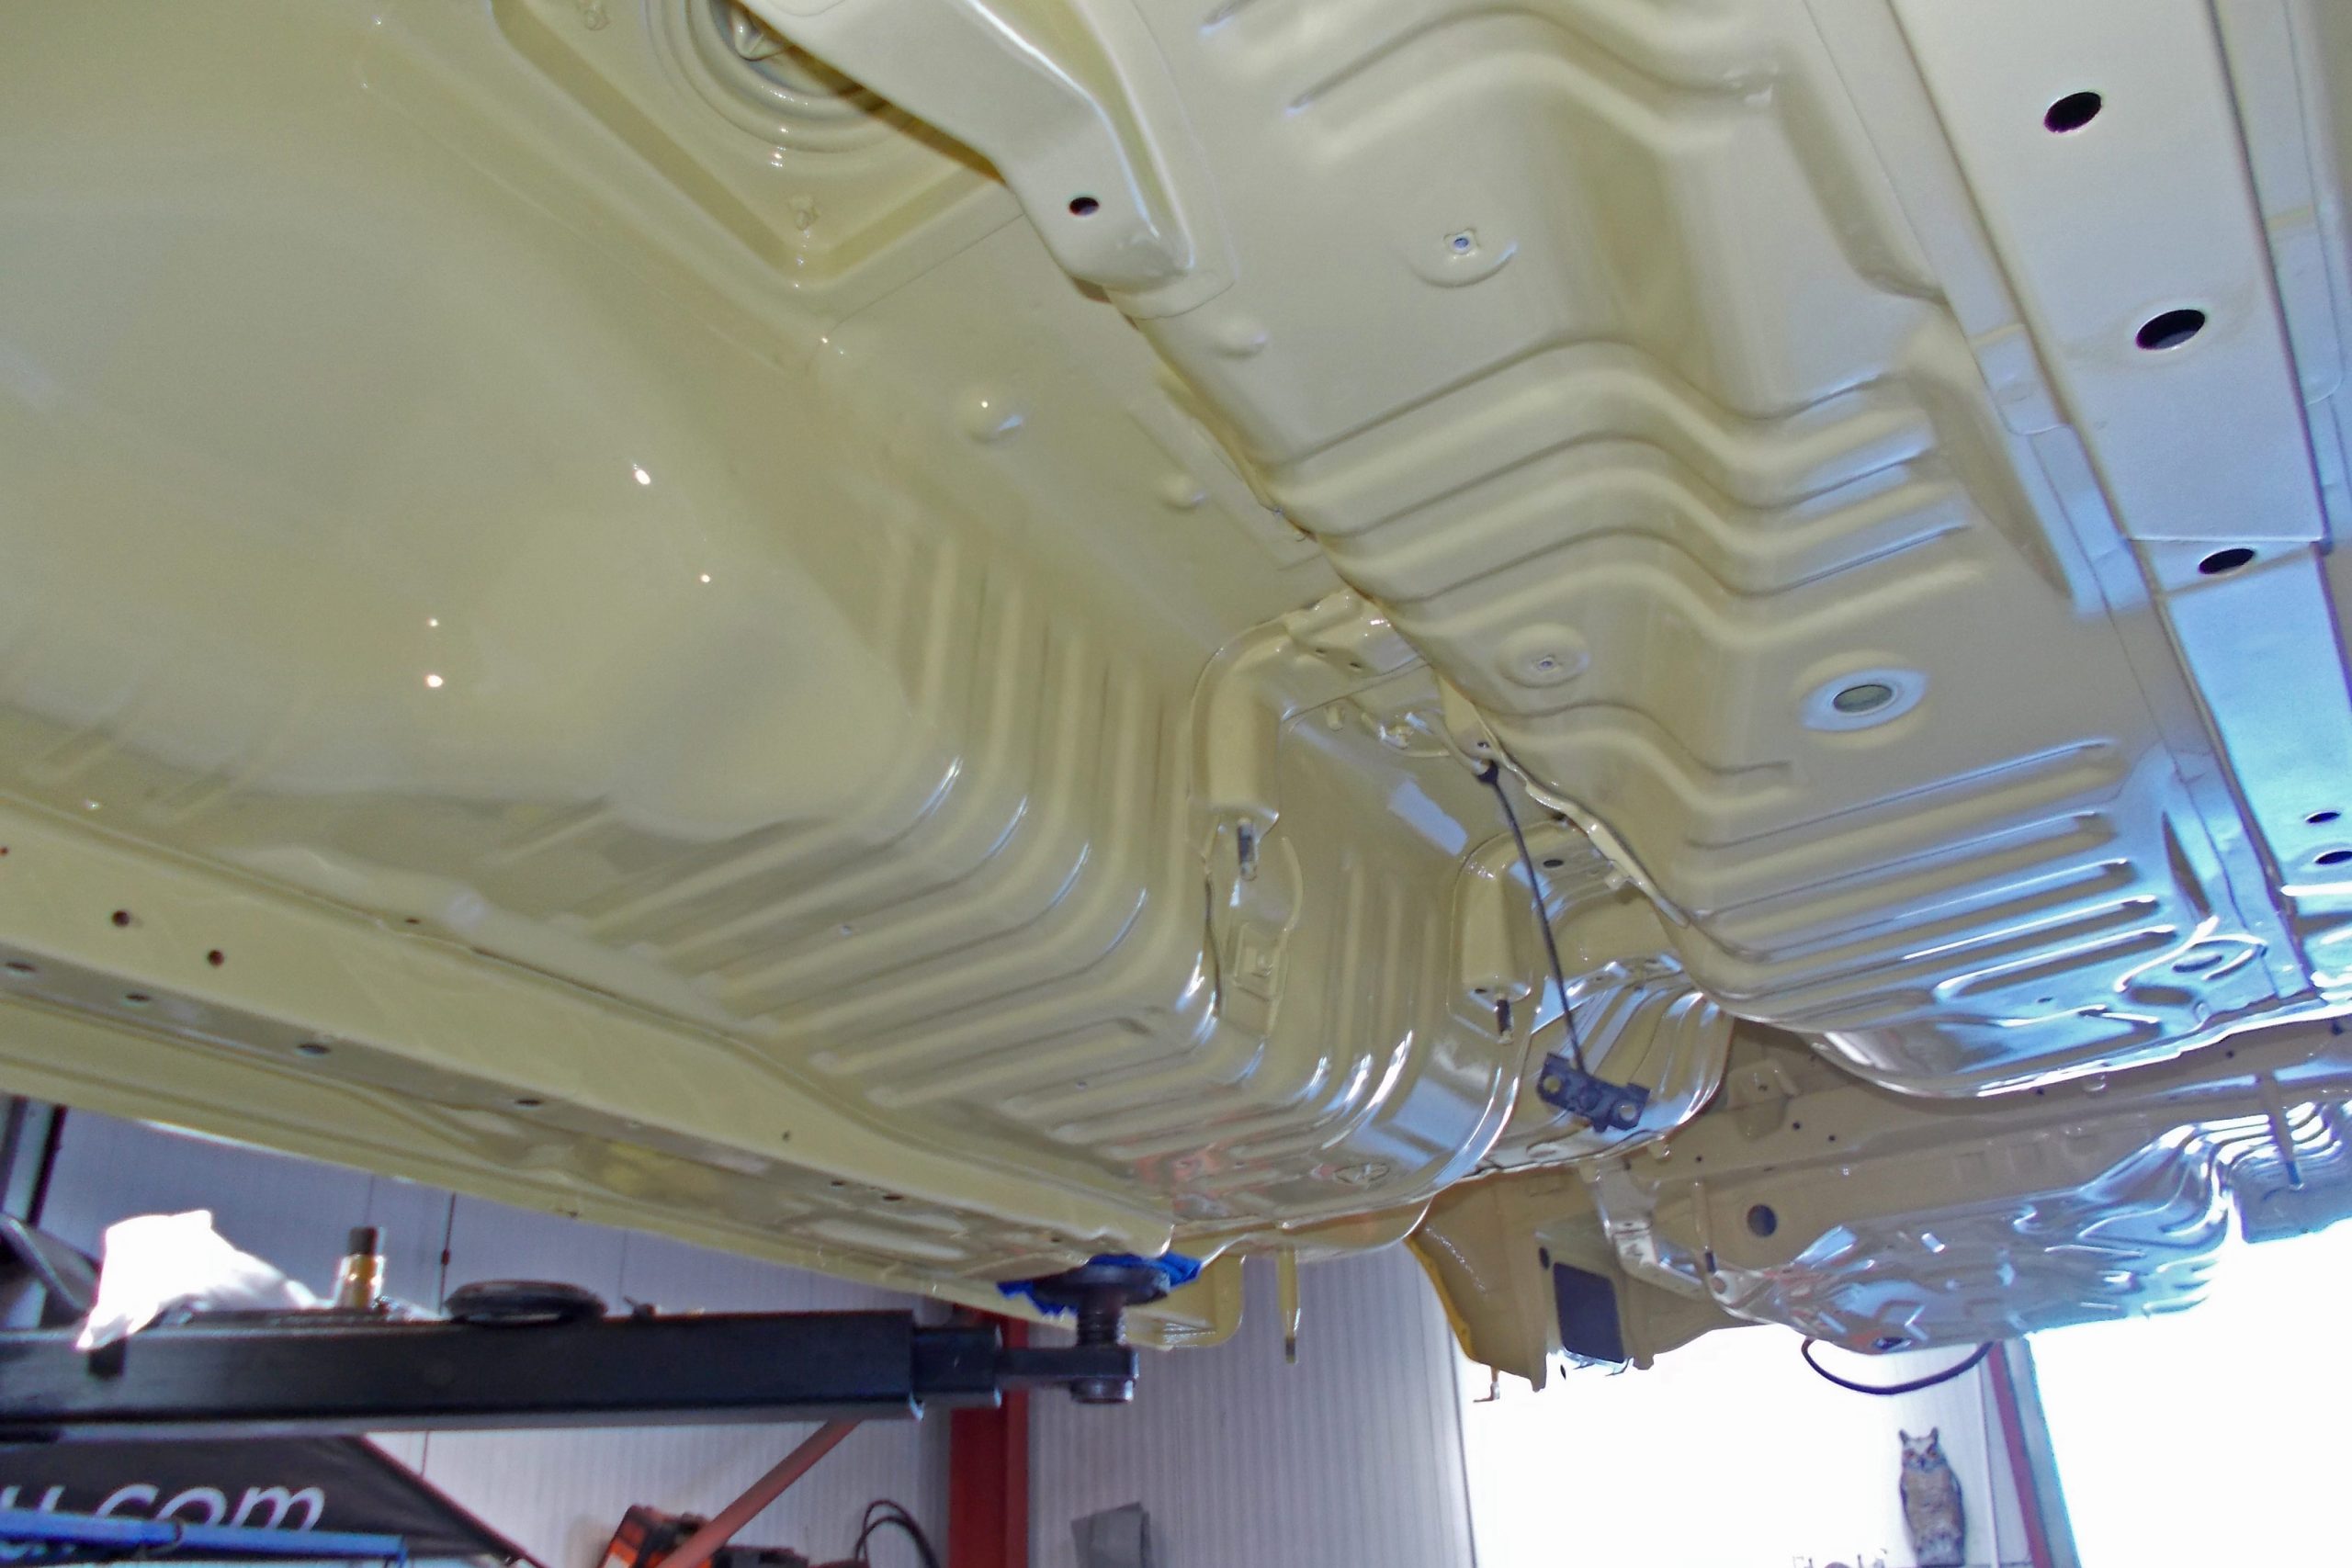
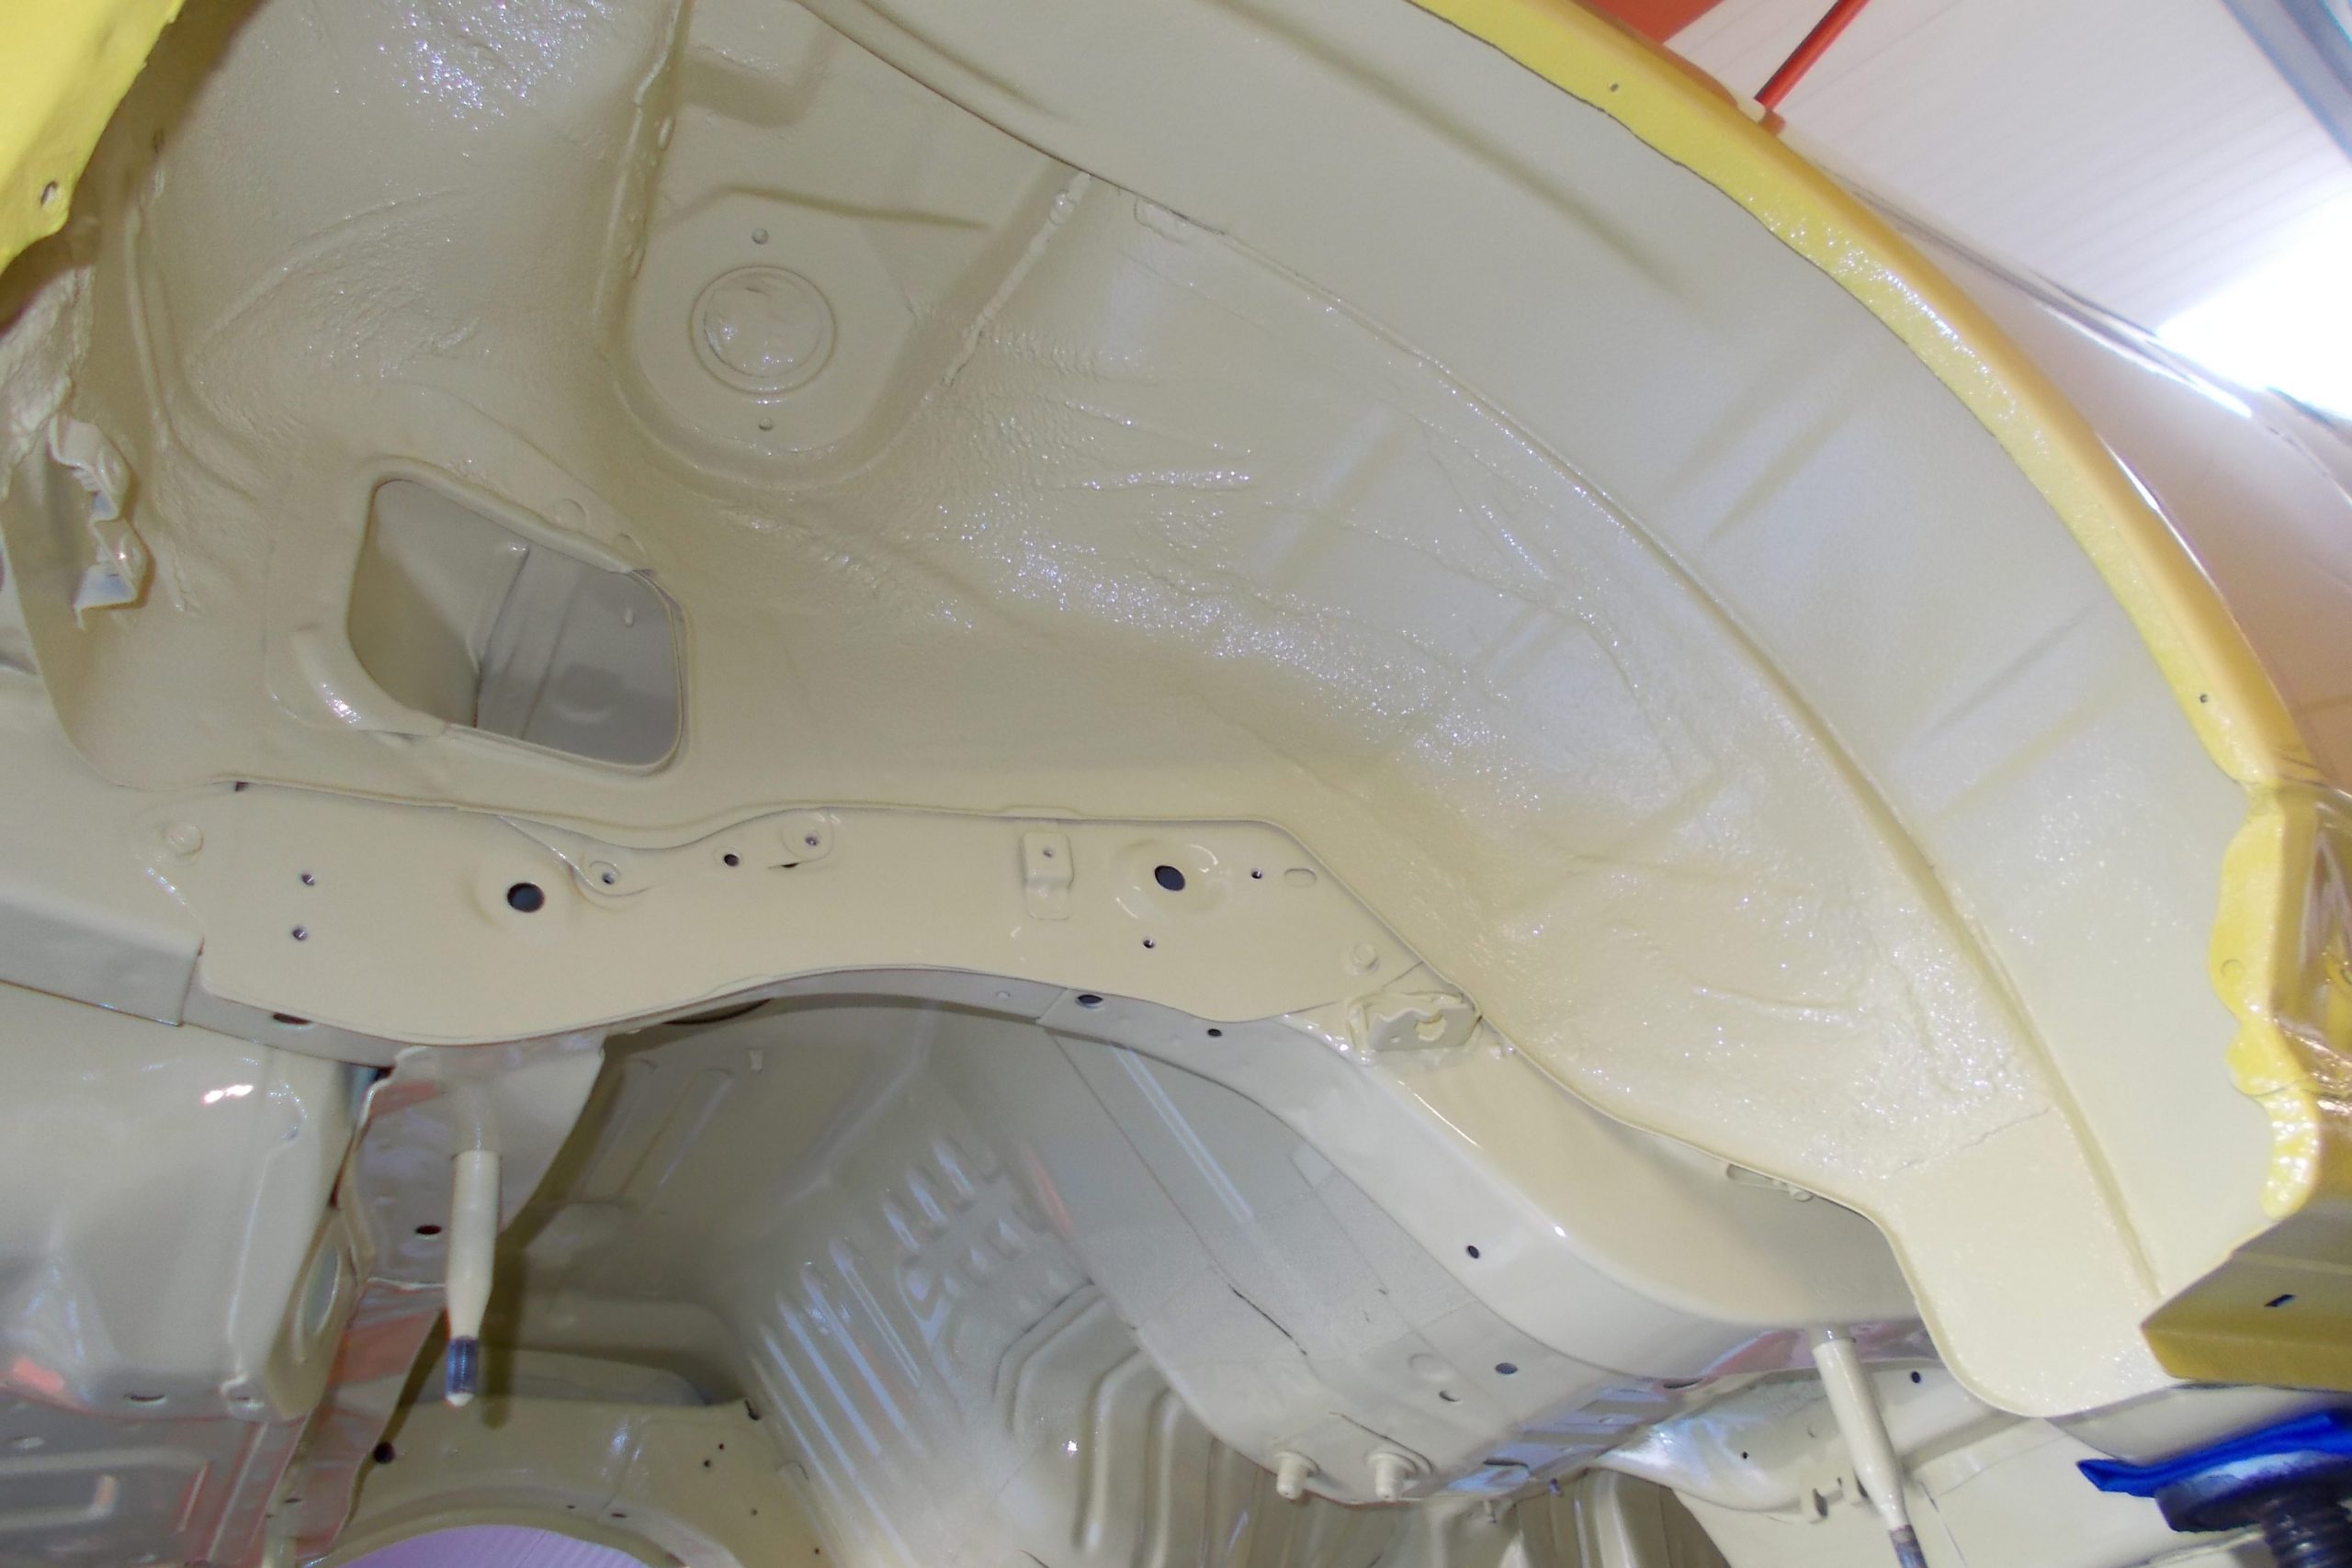
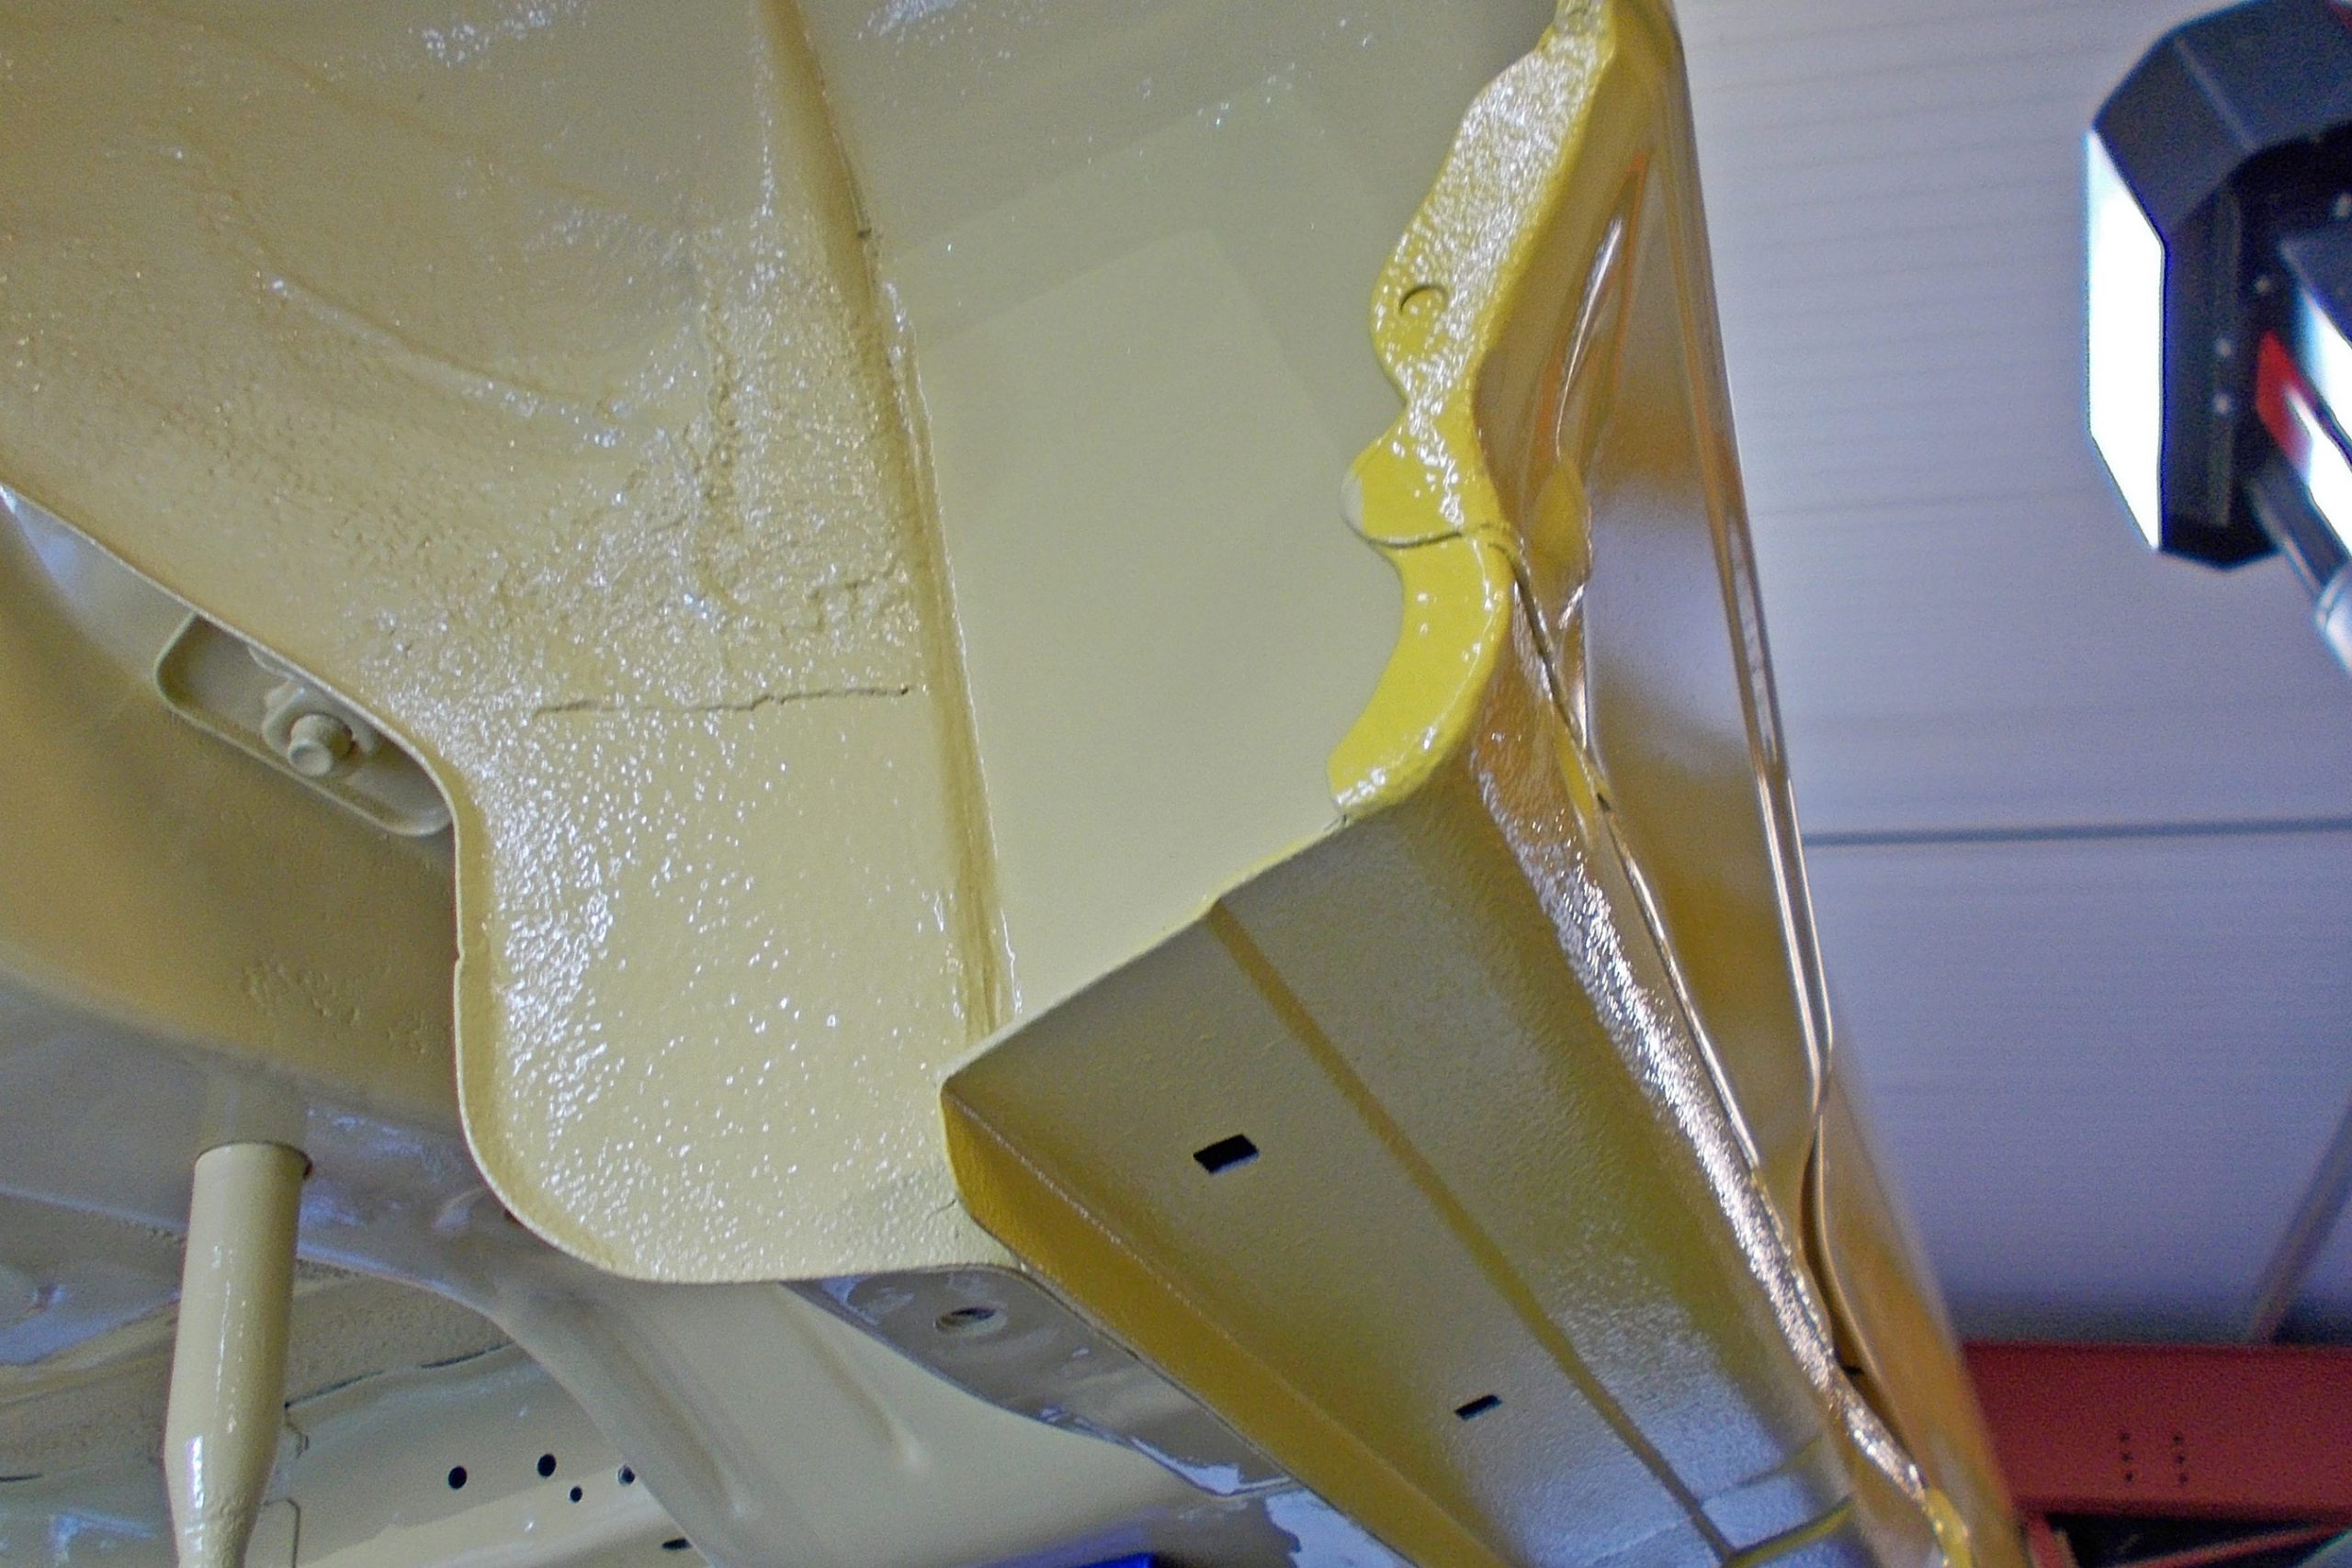
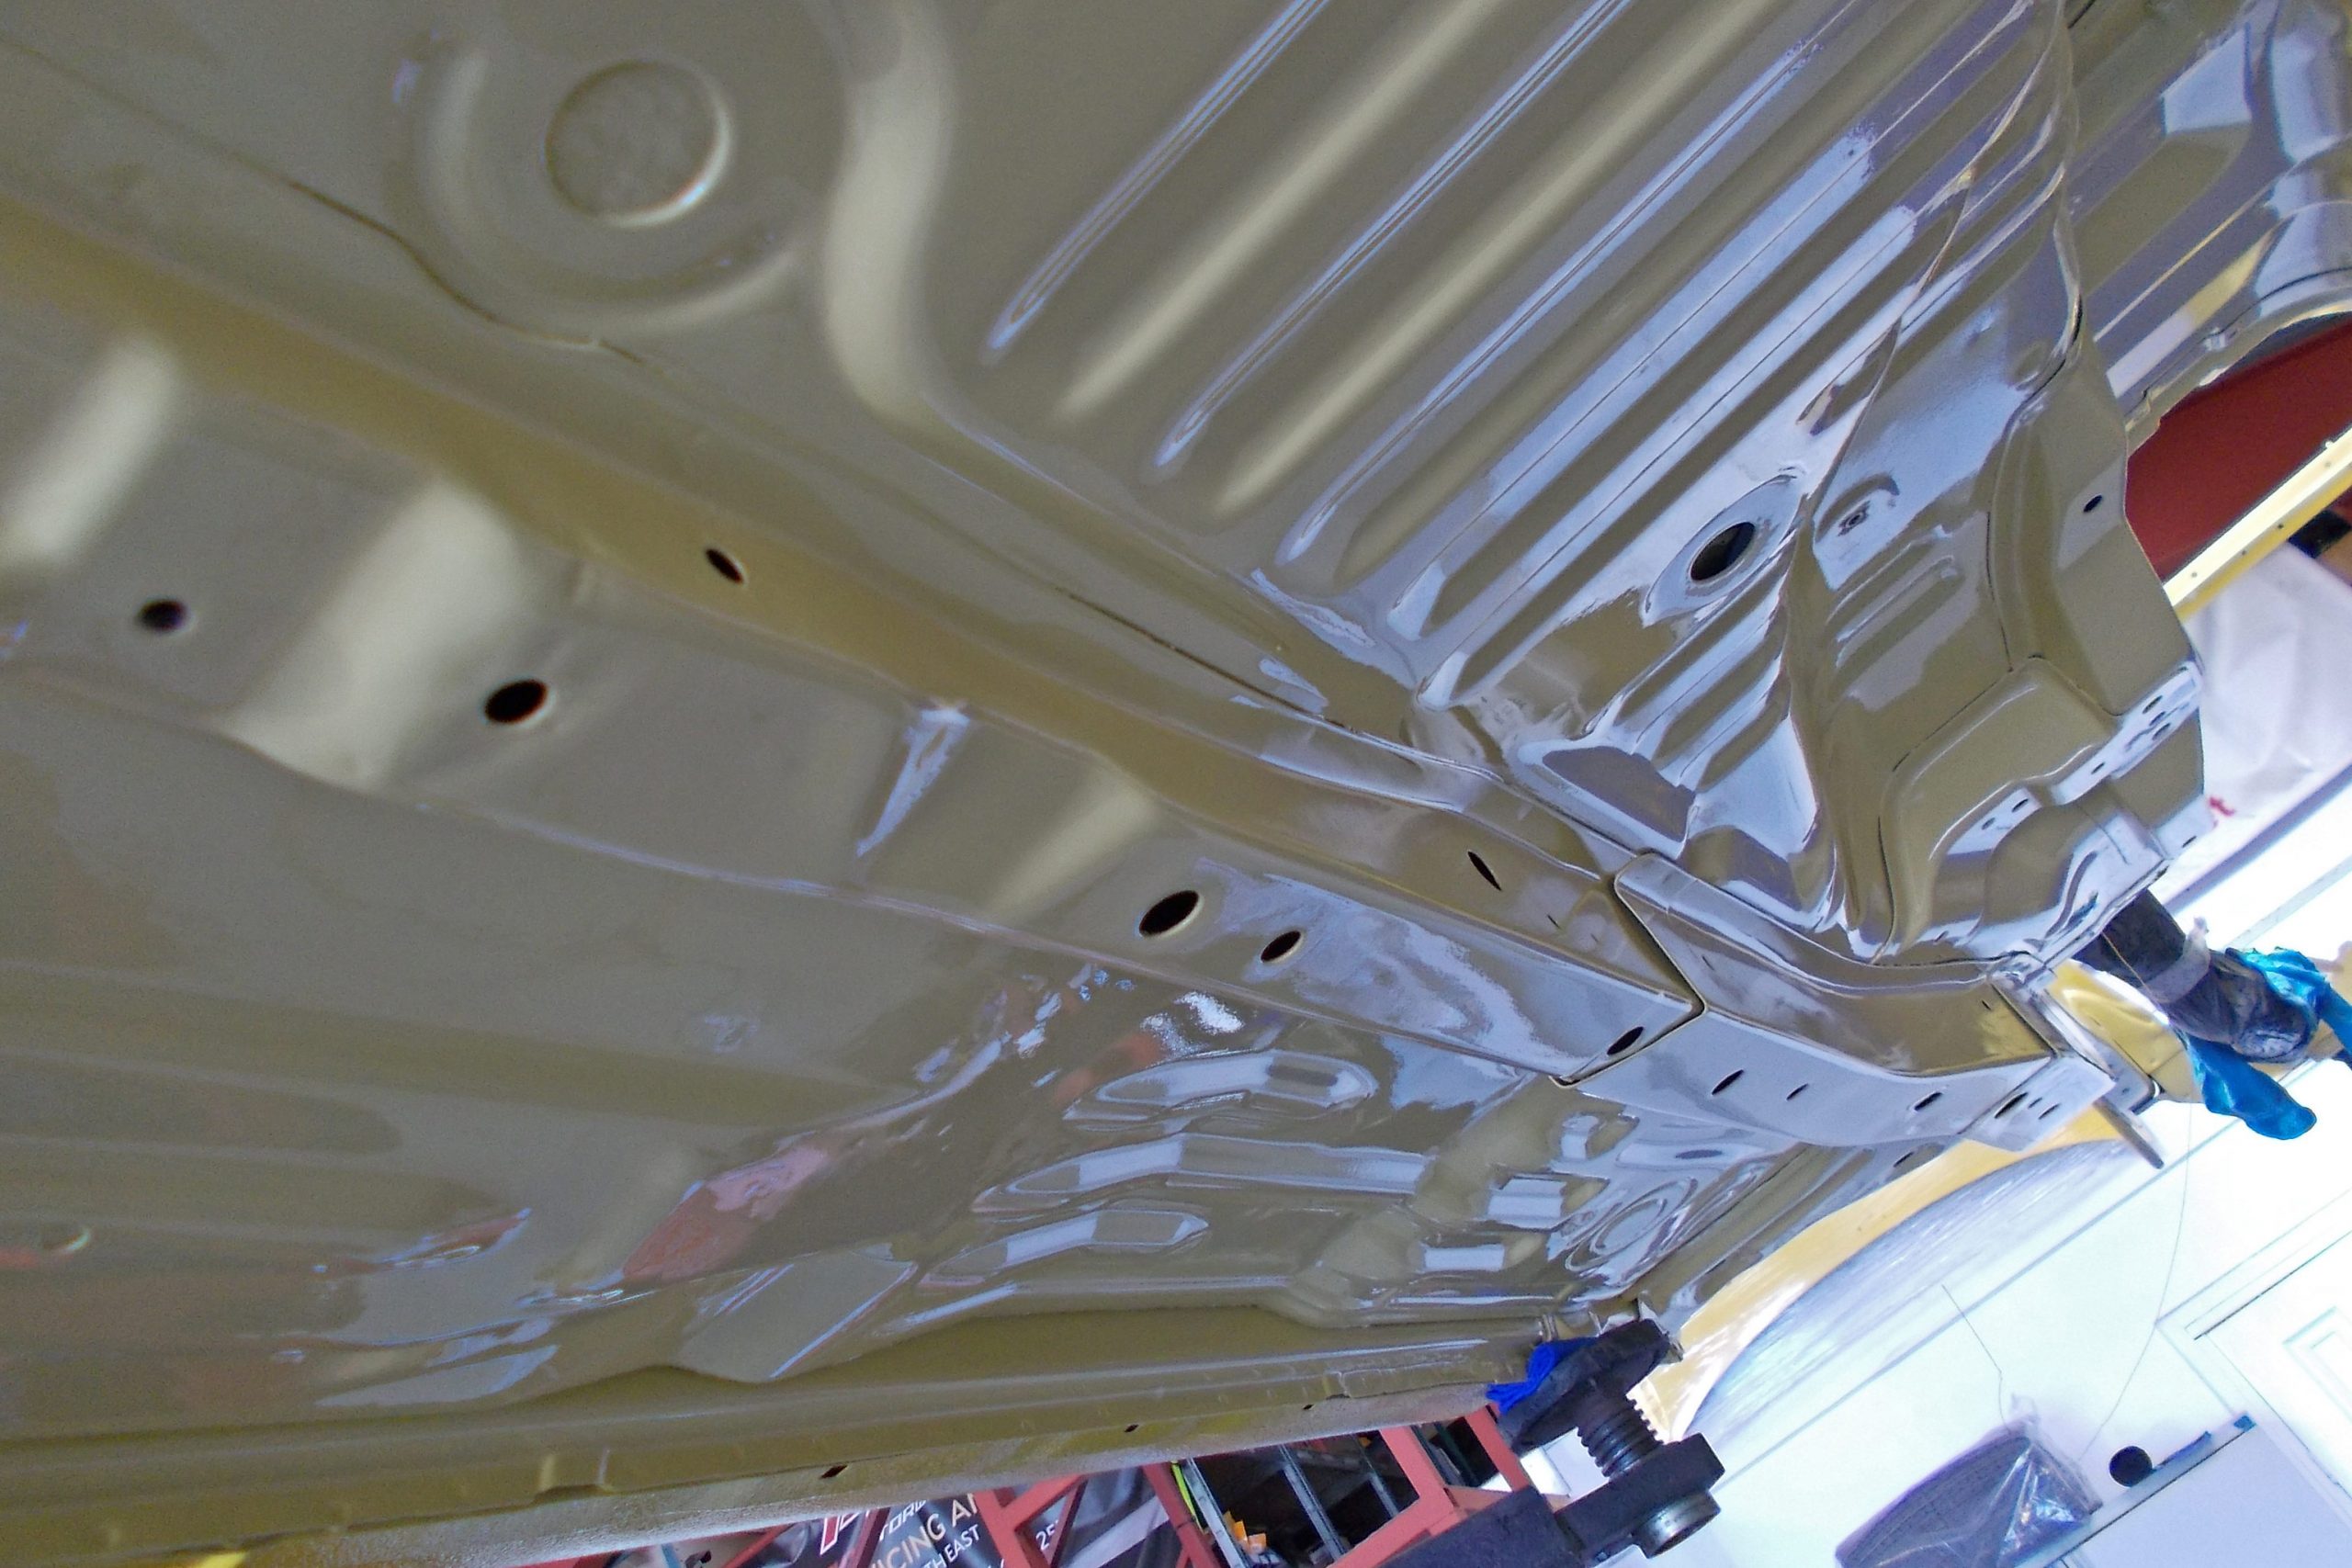
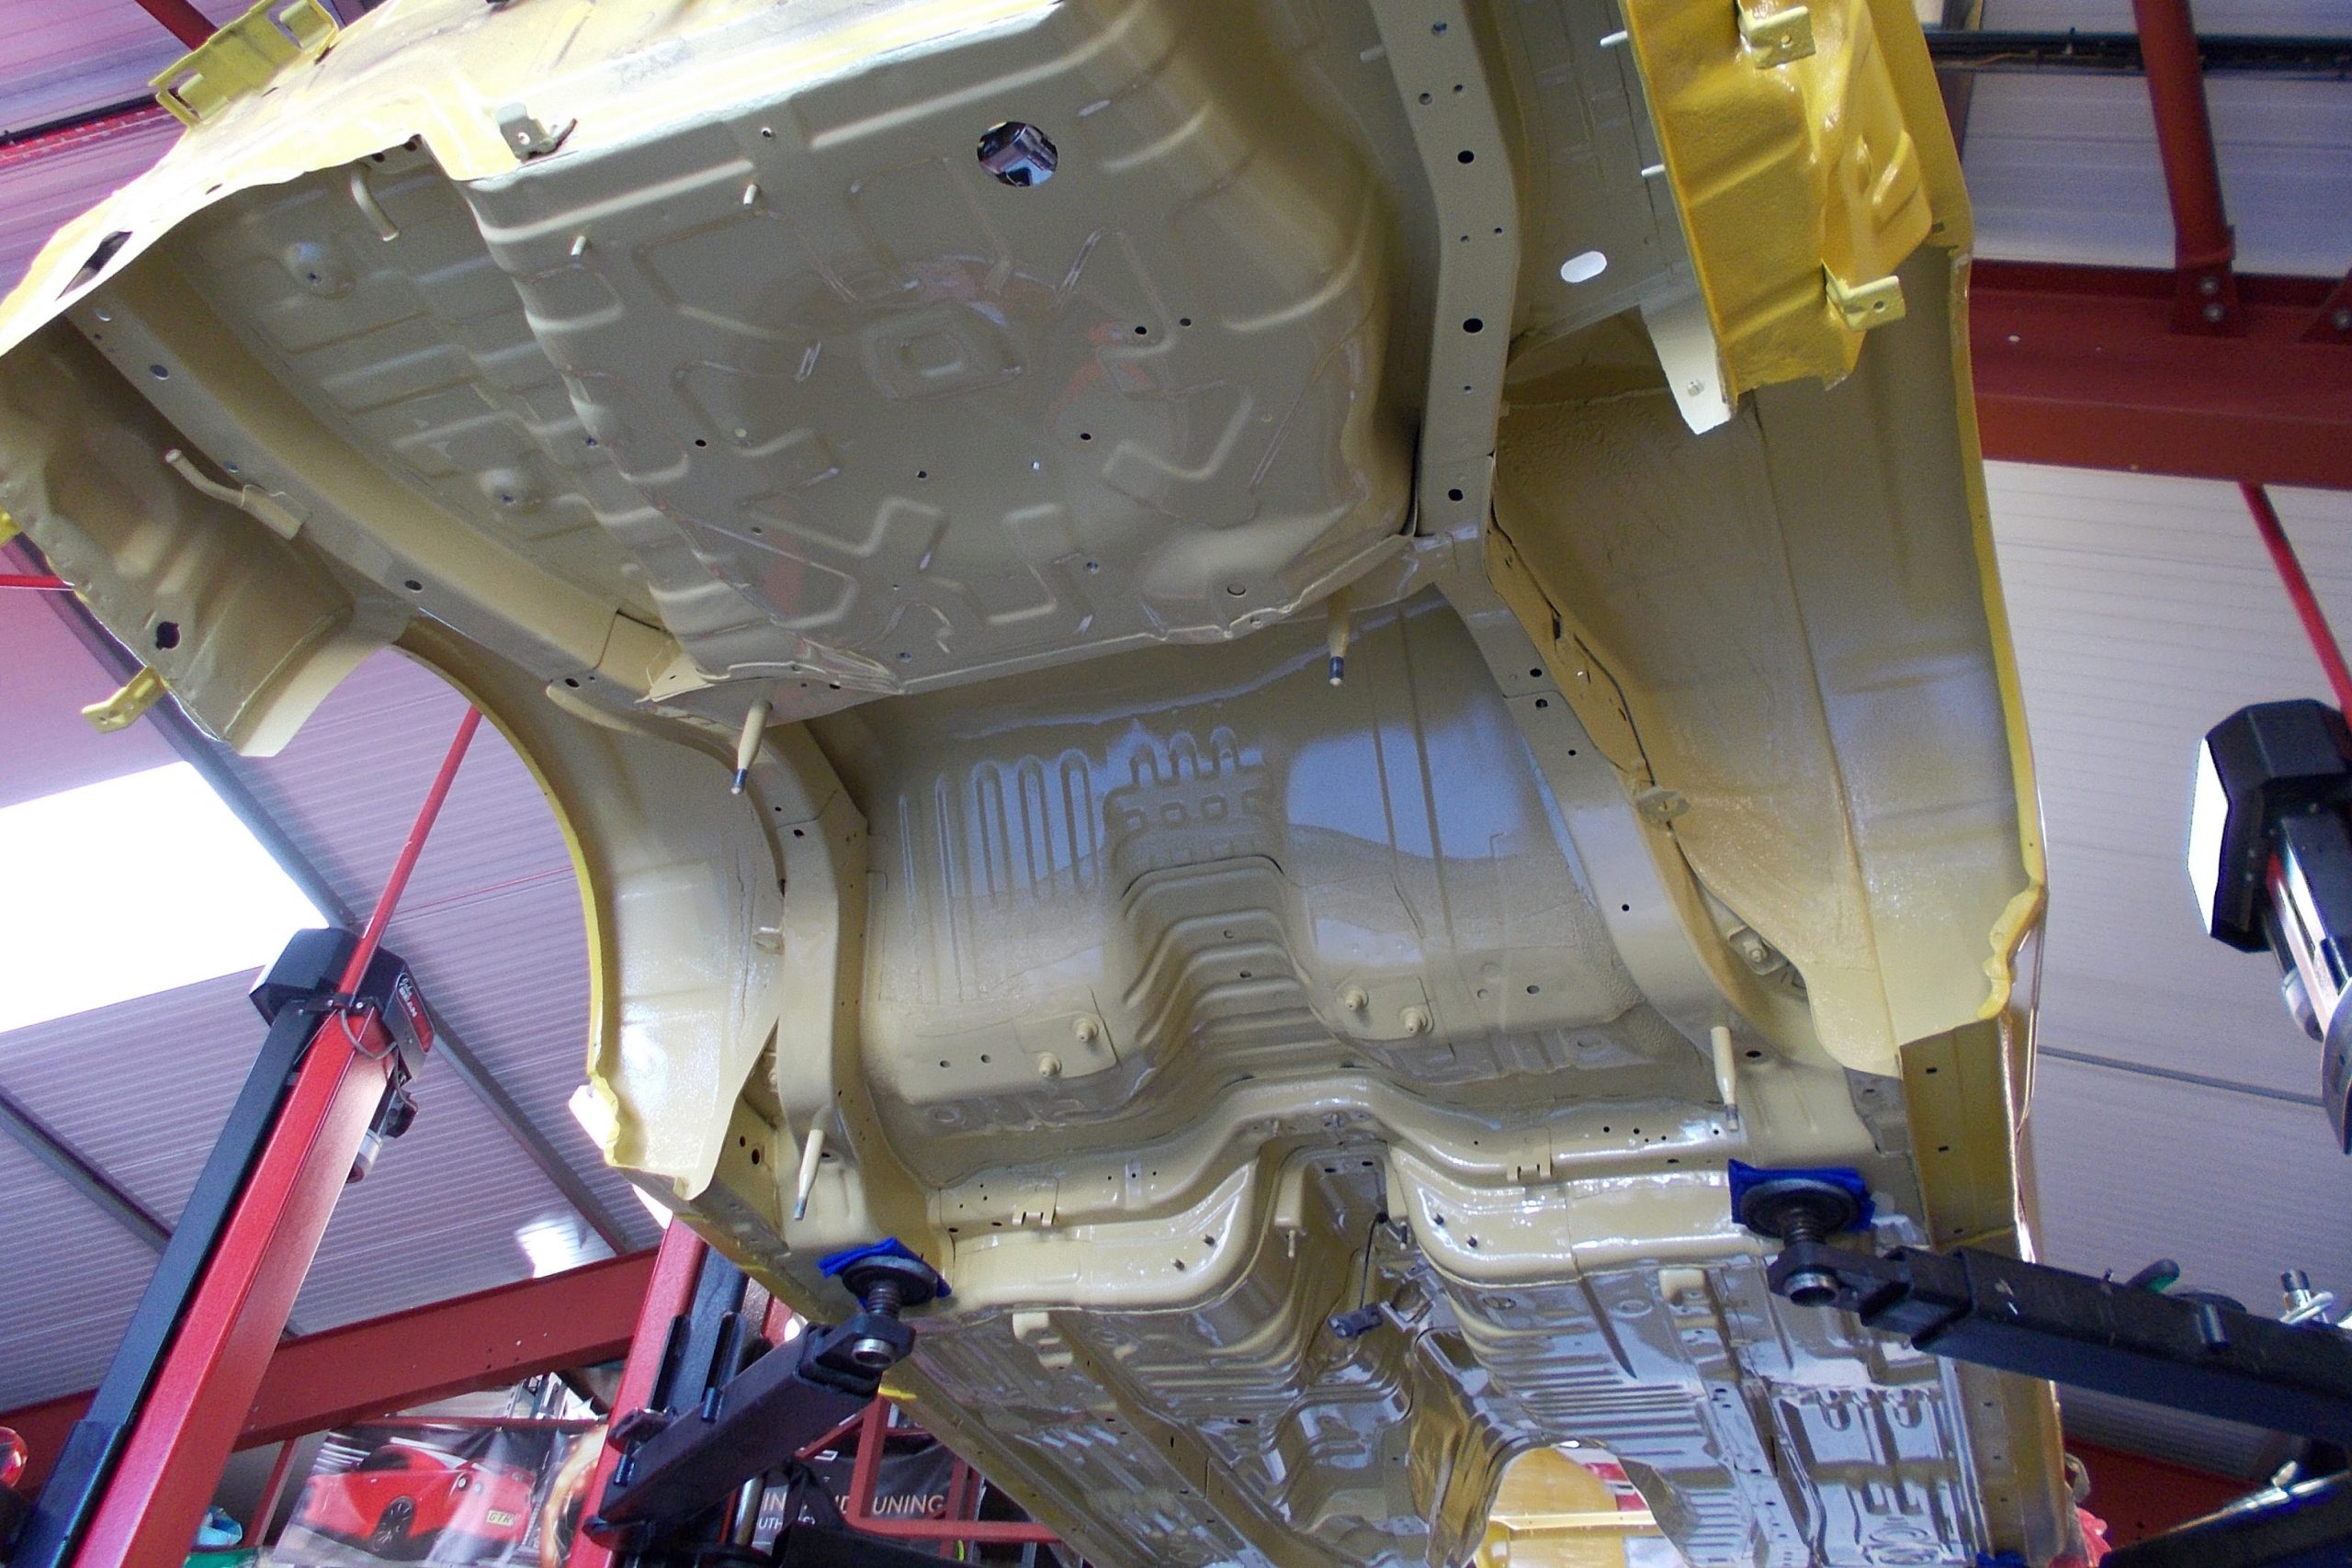
Time for paint….
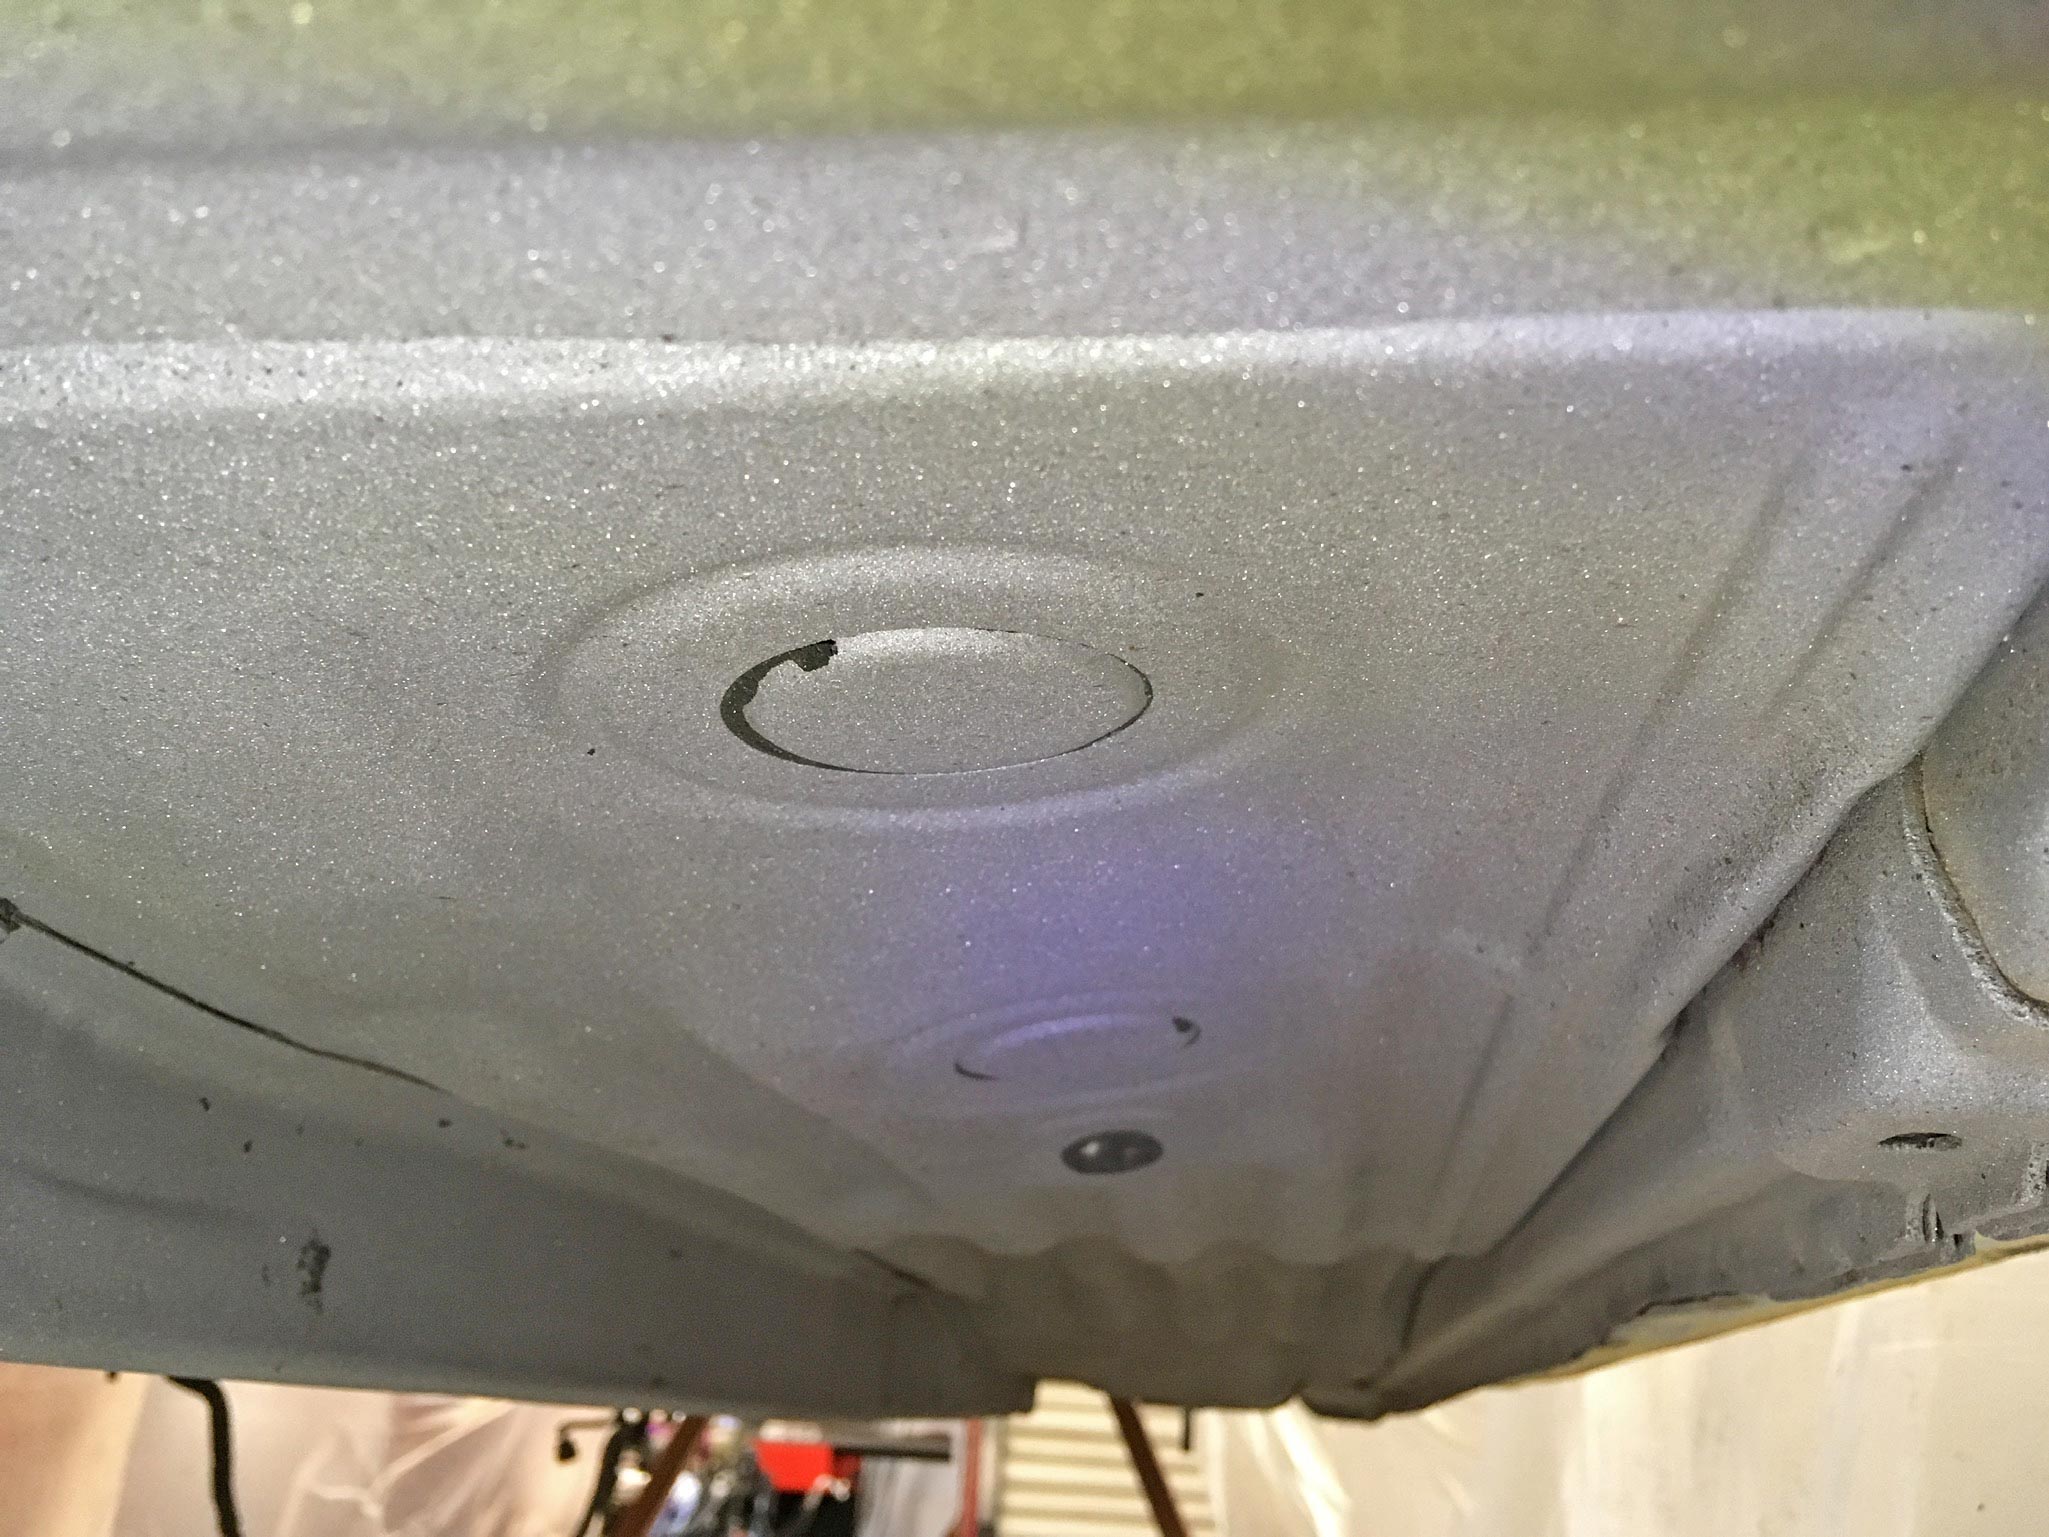
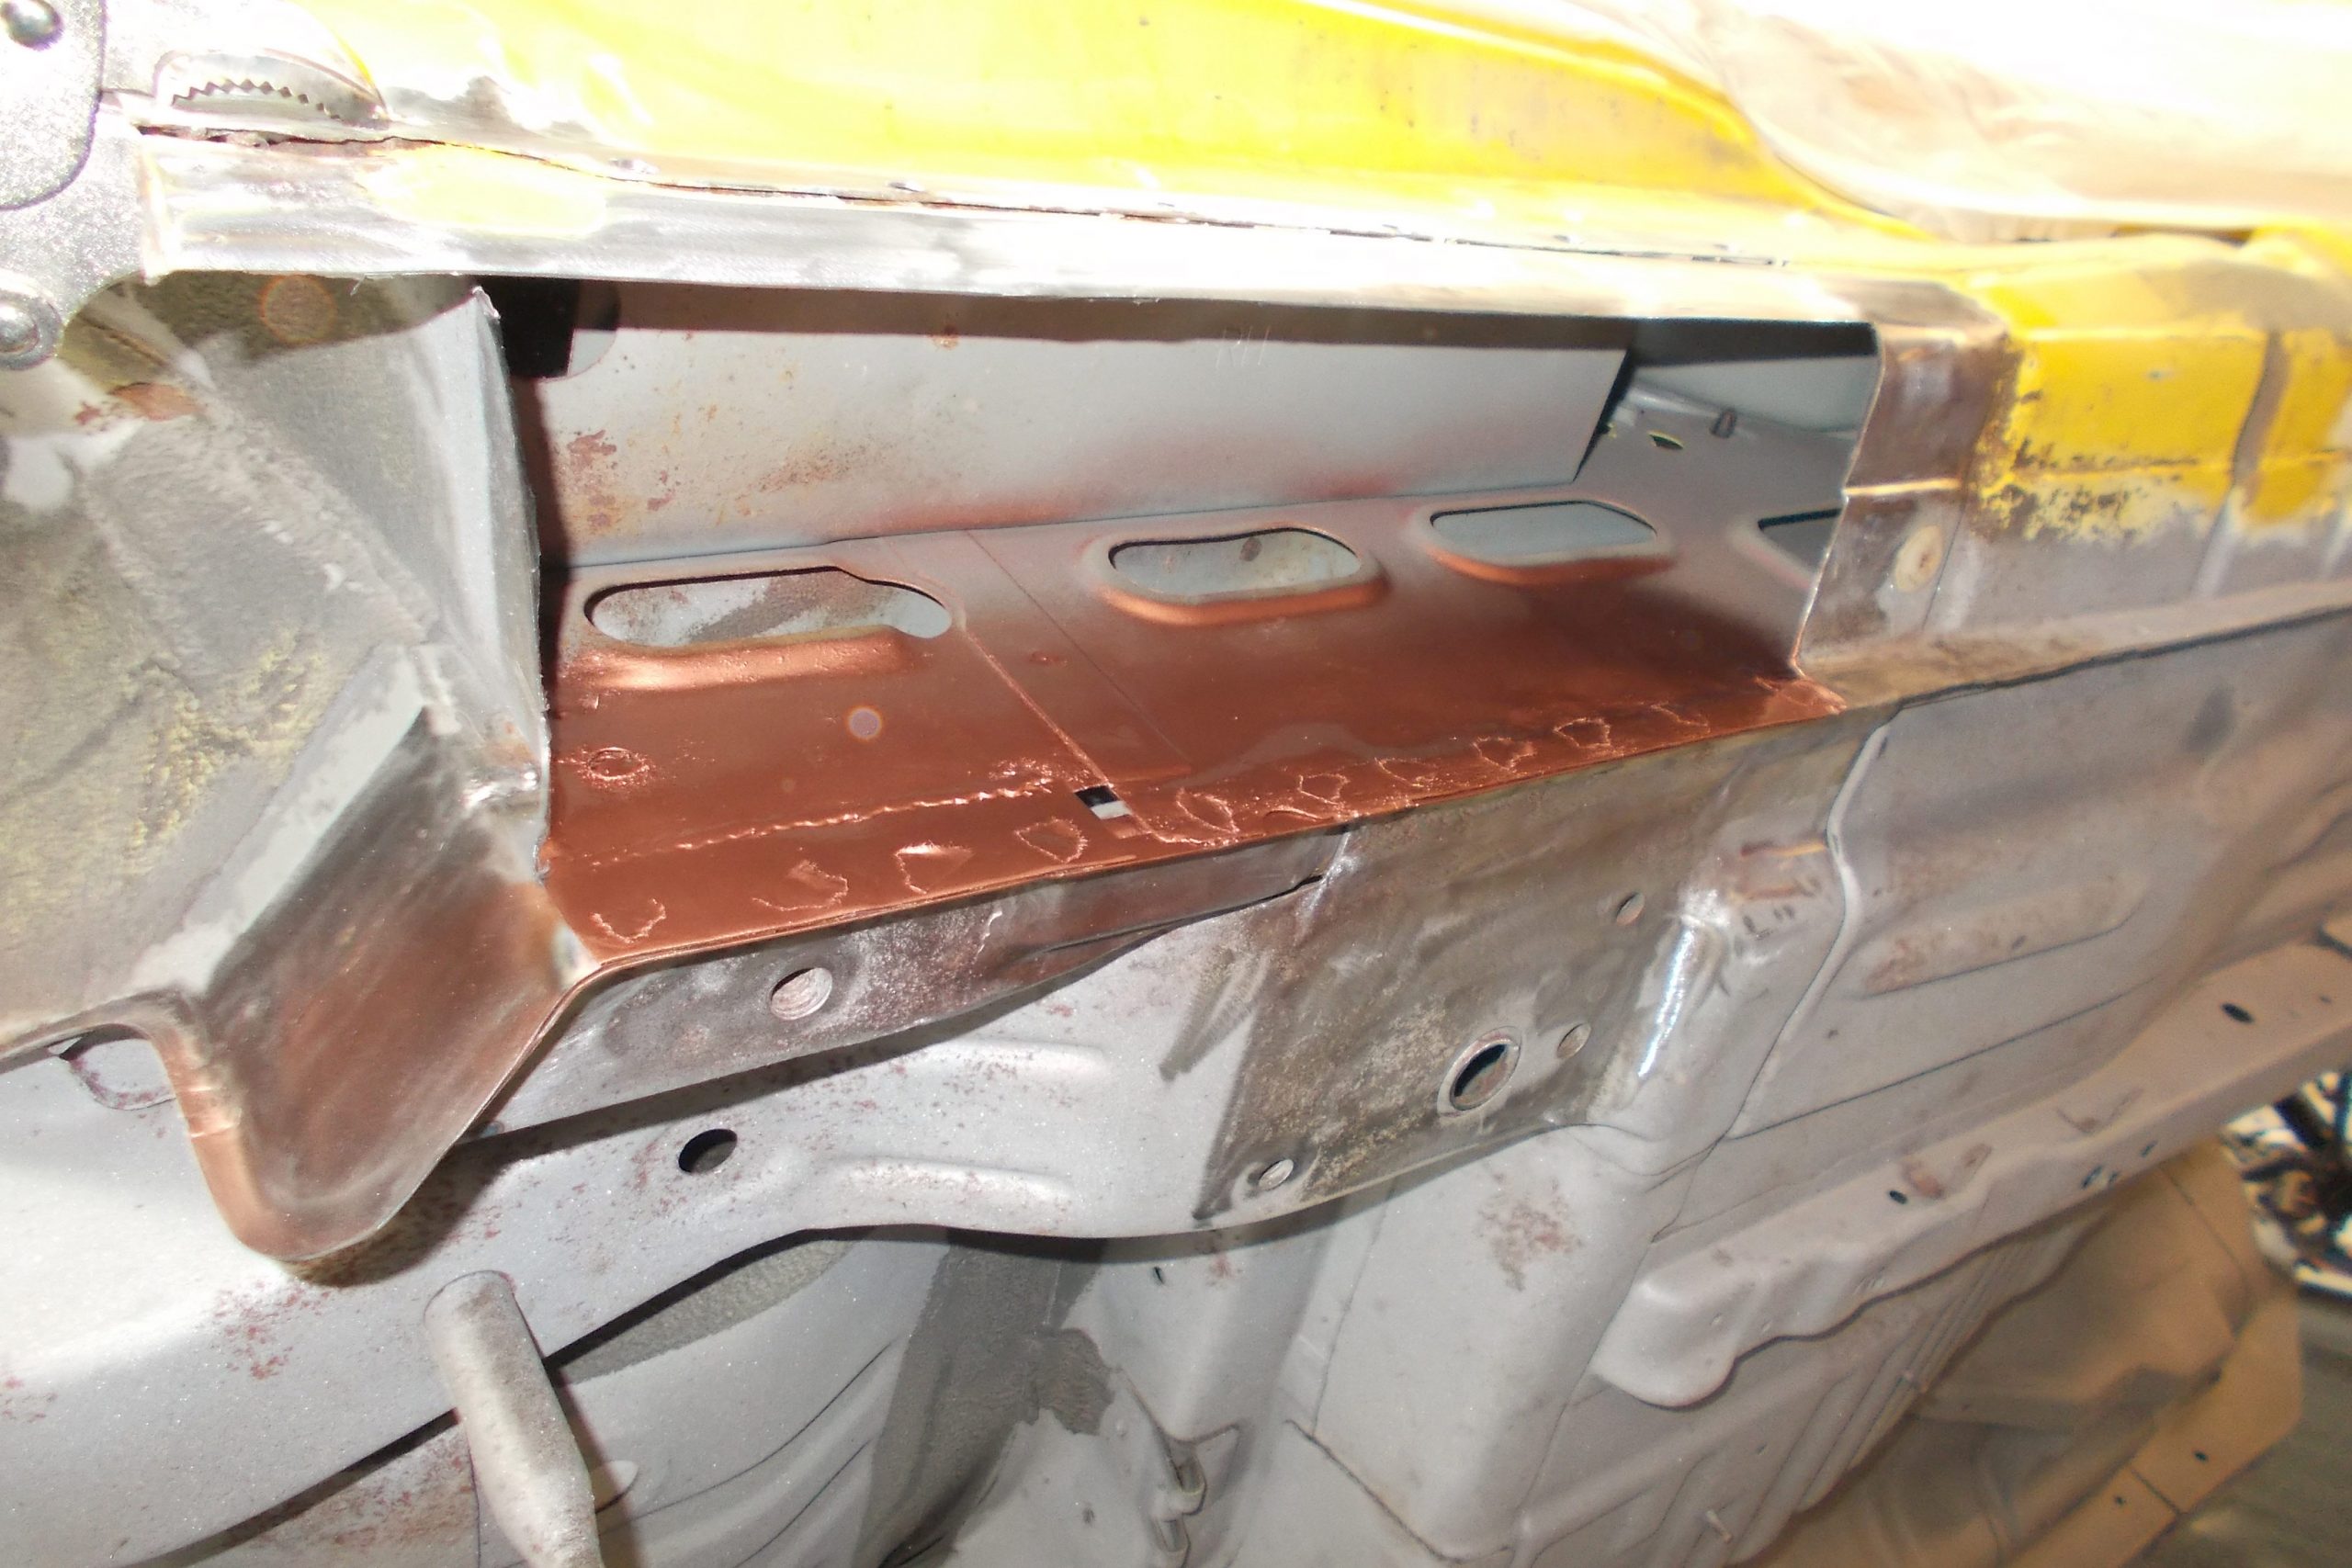
OEM paint colour code EV1 was applied to the underbody with stone chip under sealer in the areas that needed it for example under the wheel arches, see pictures below:
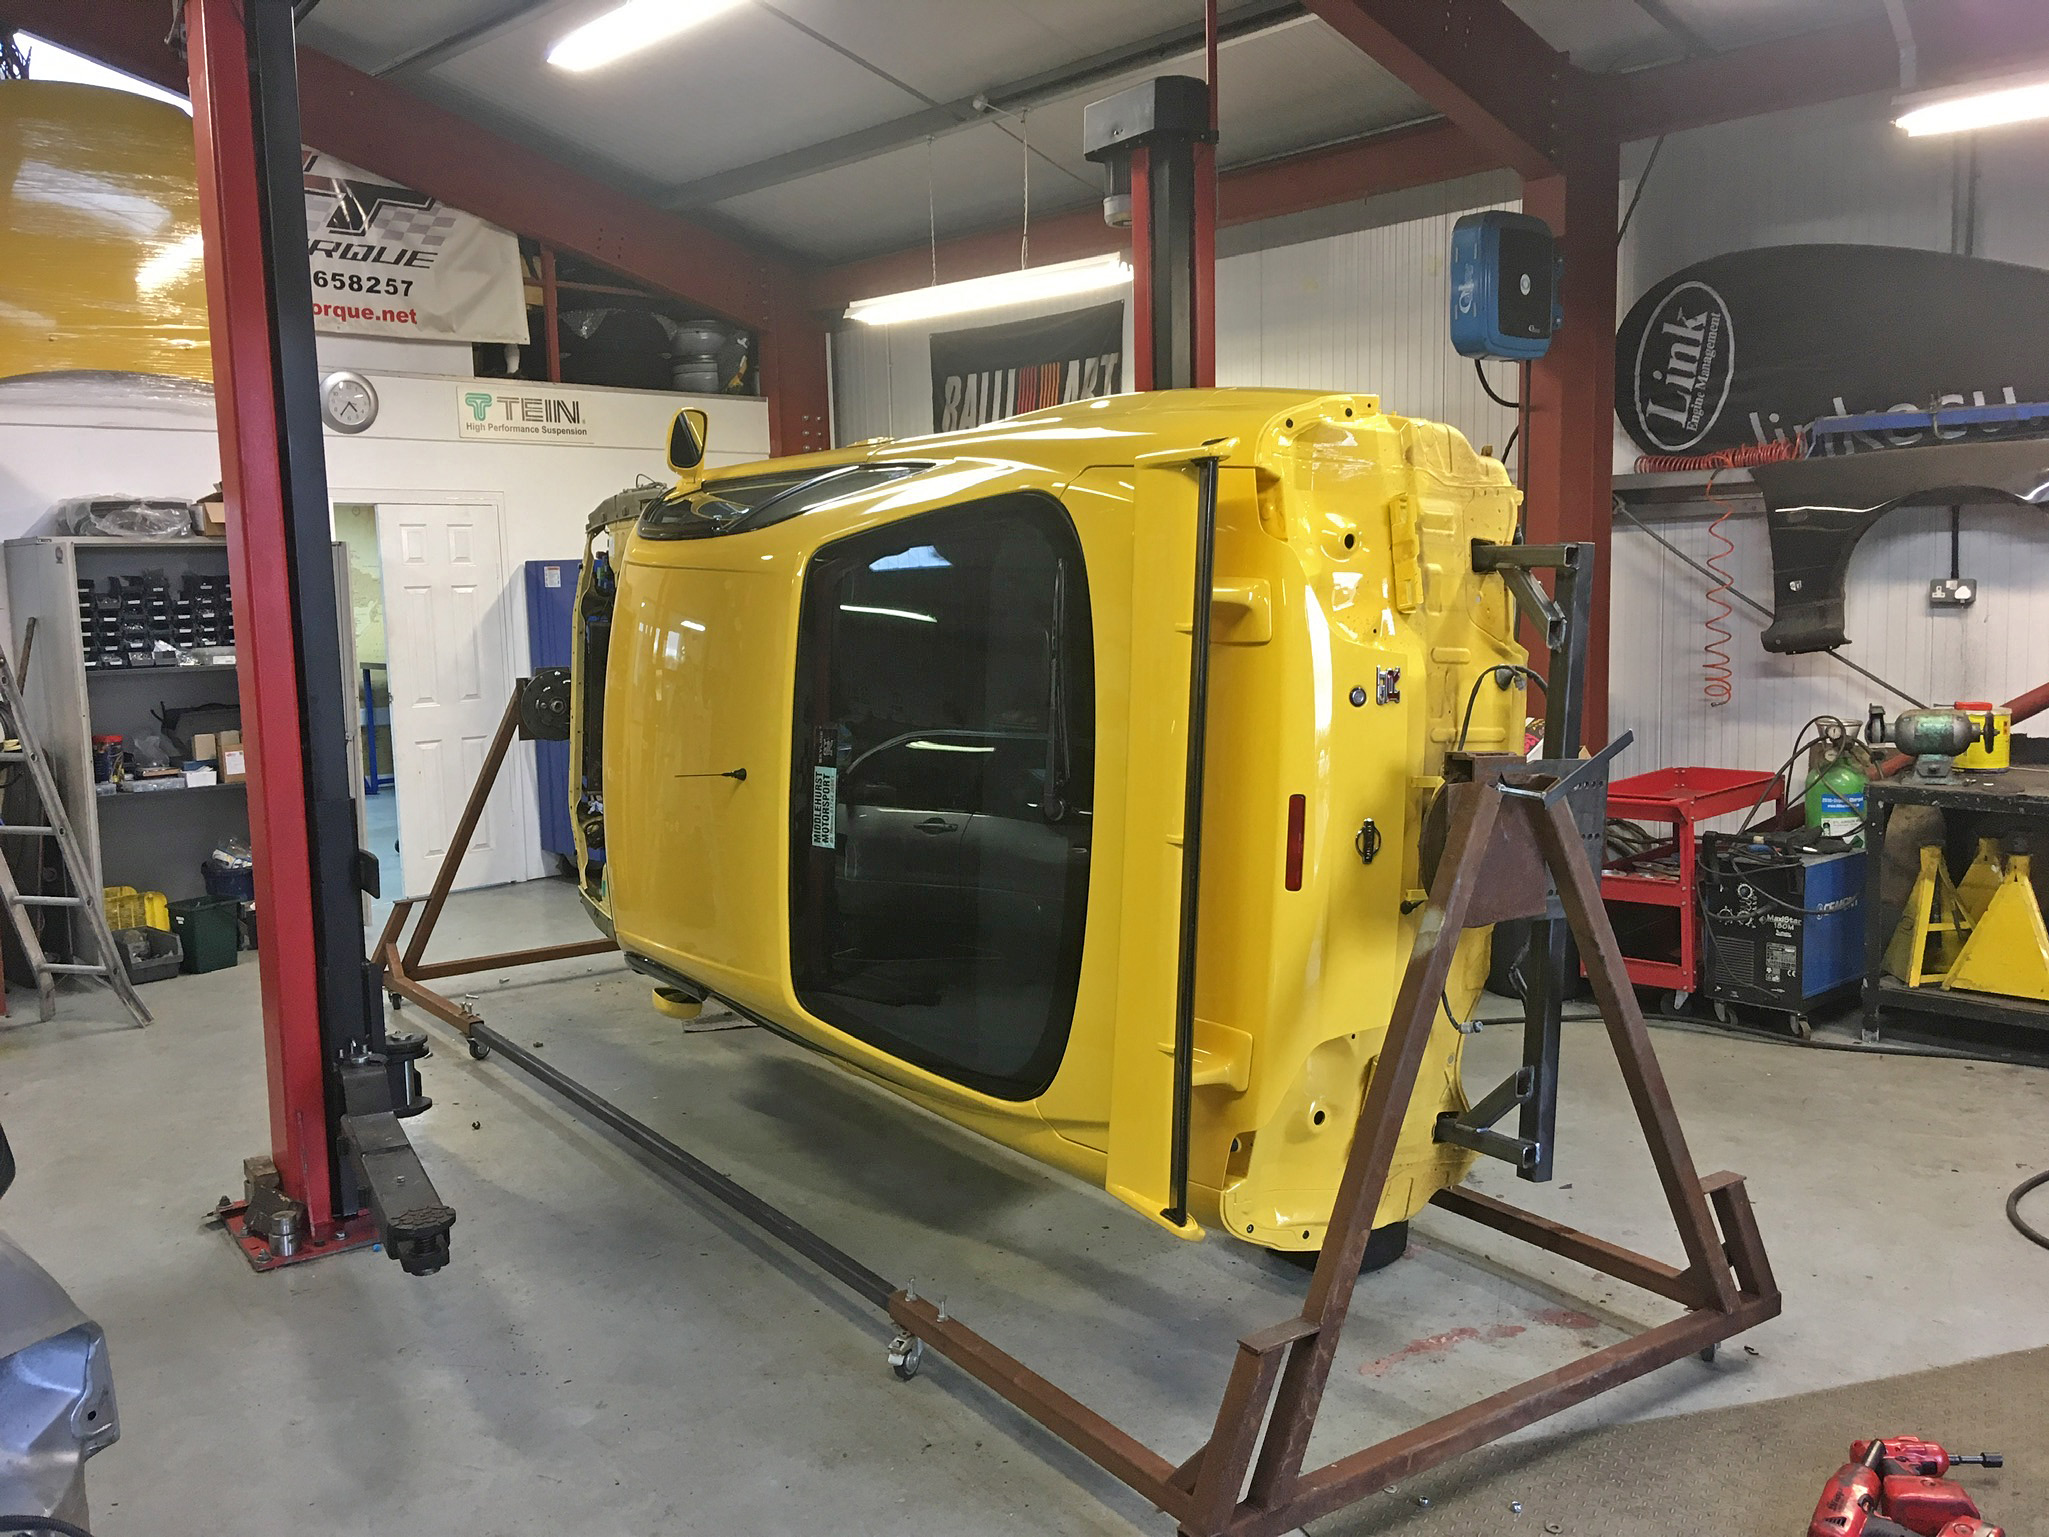
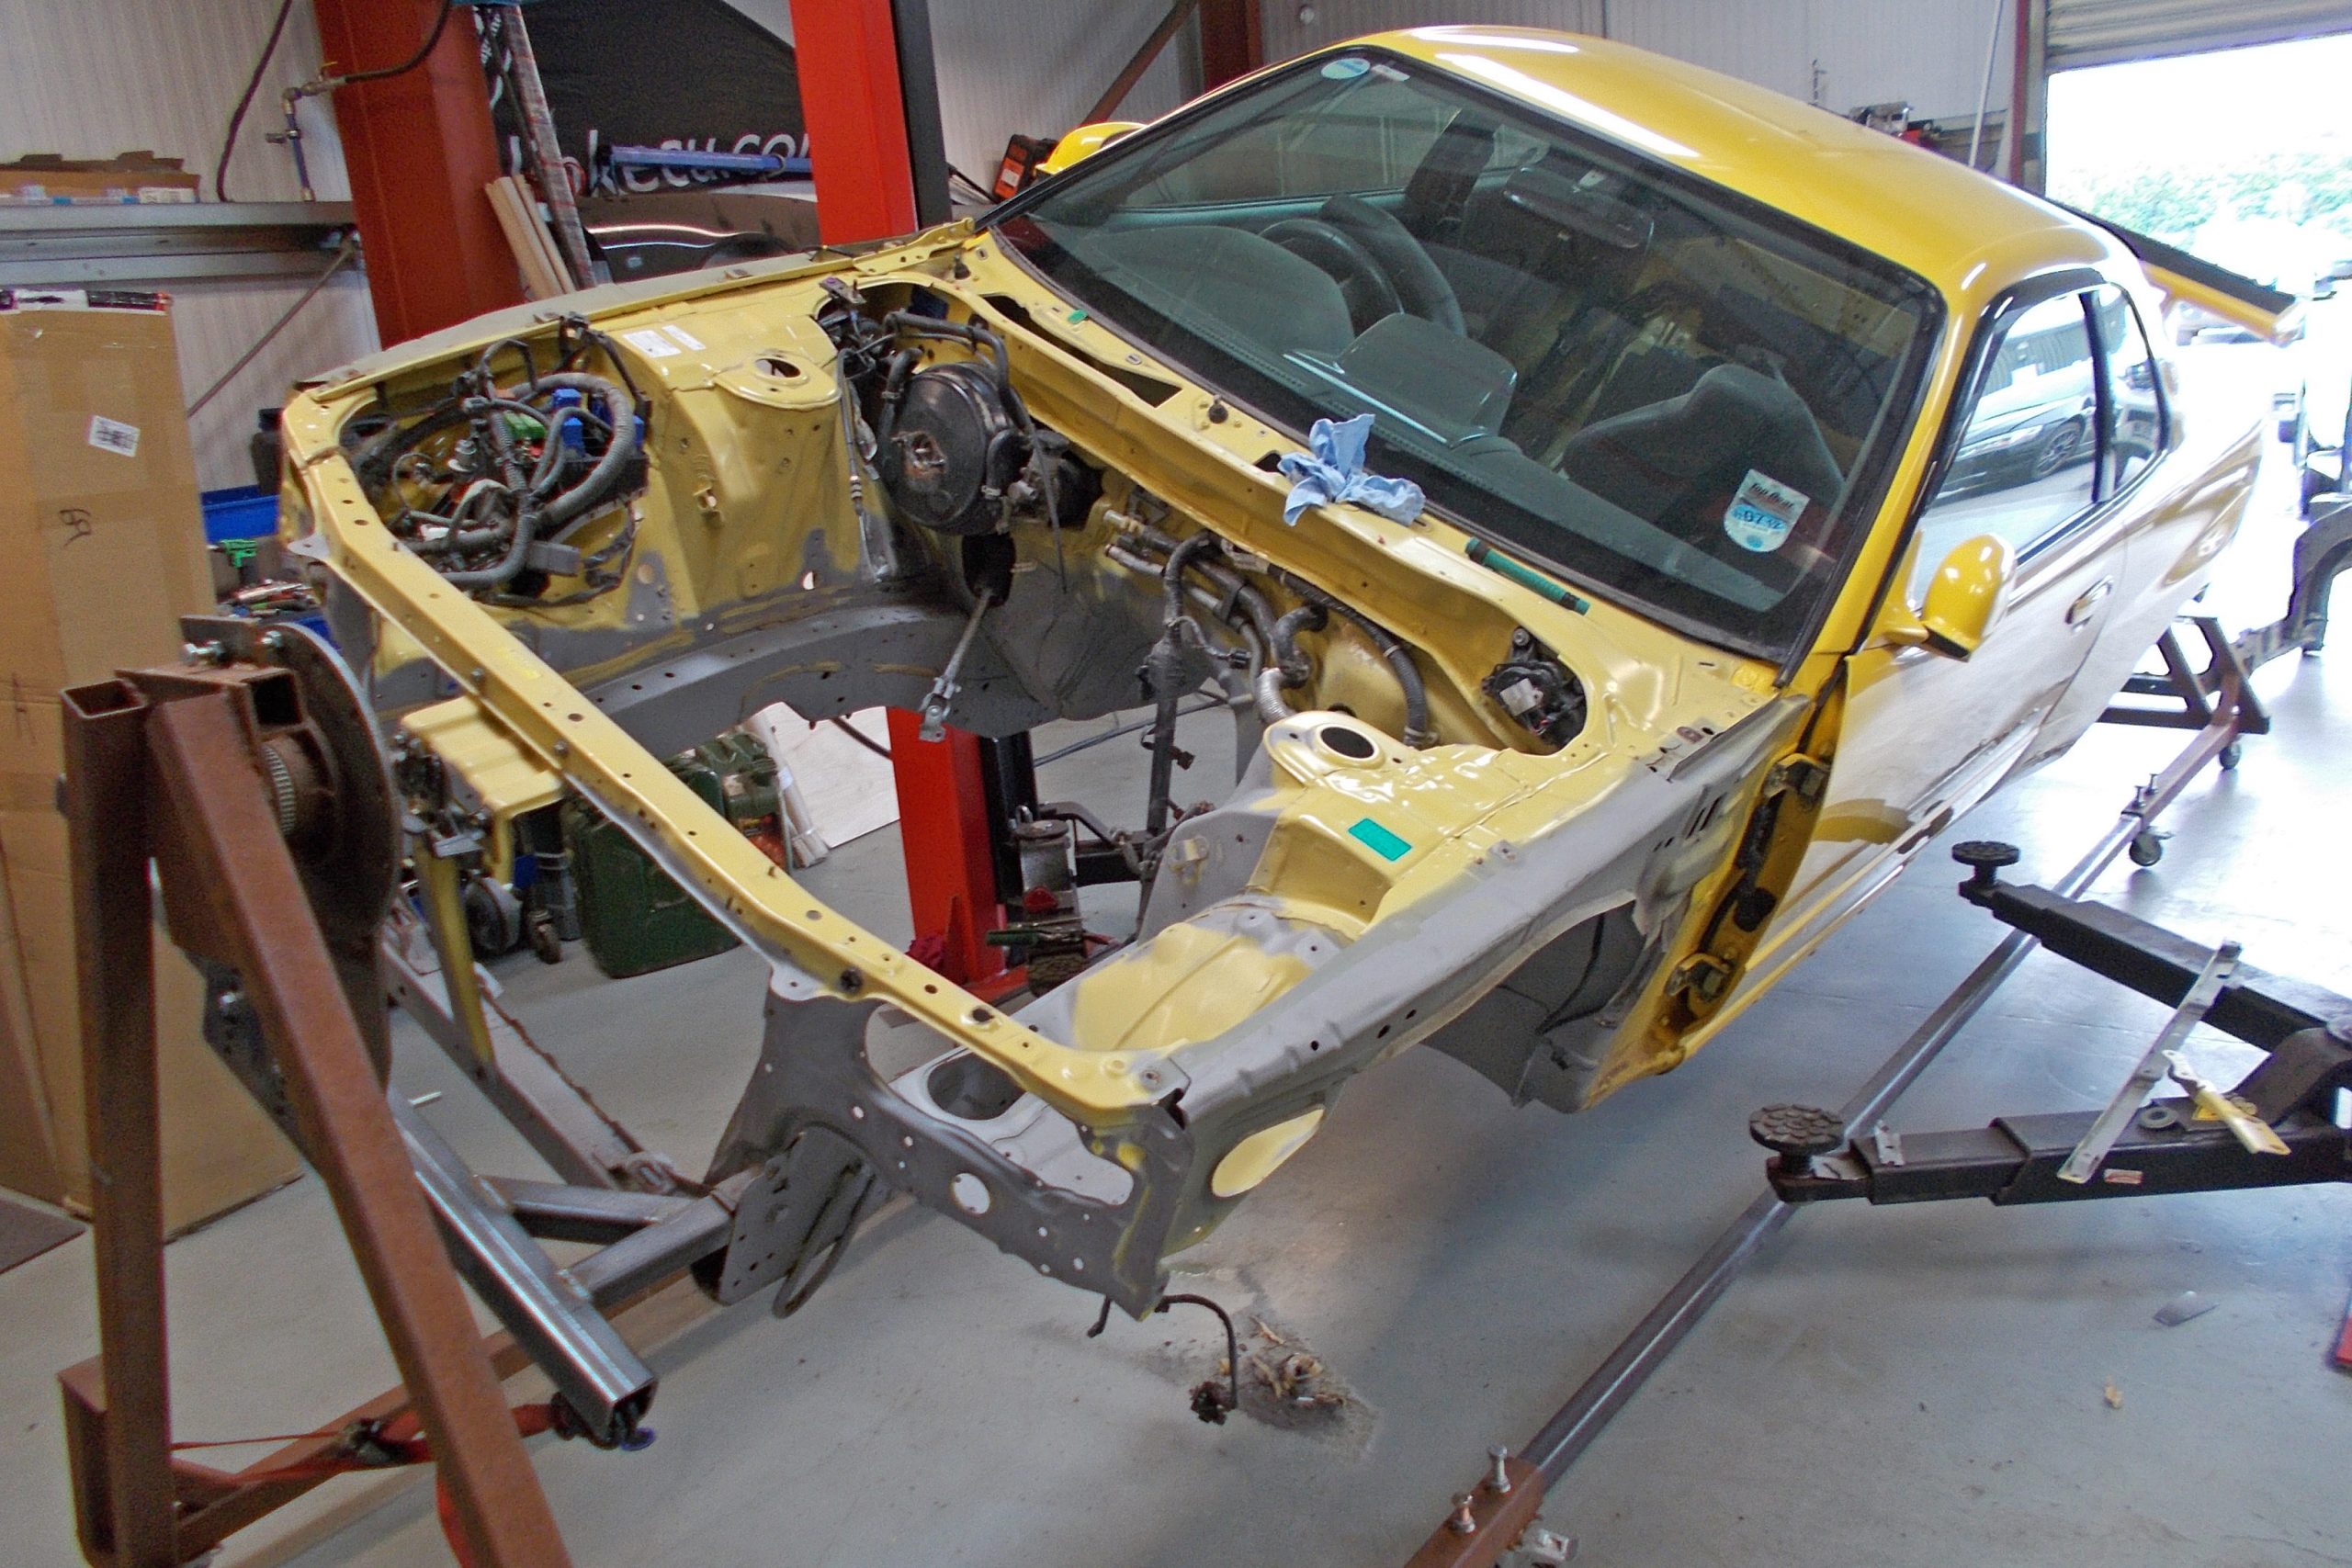
The restoration just went to a whole new level....
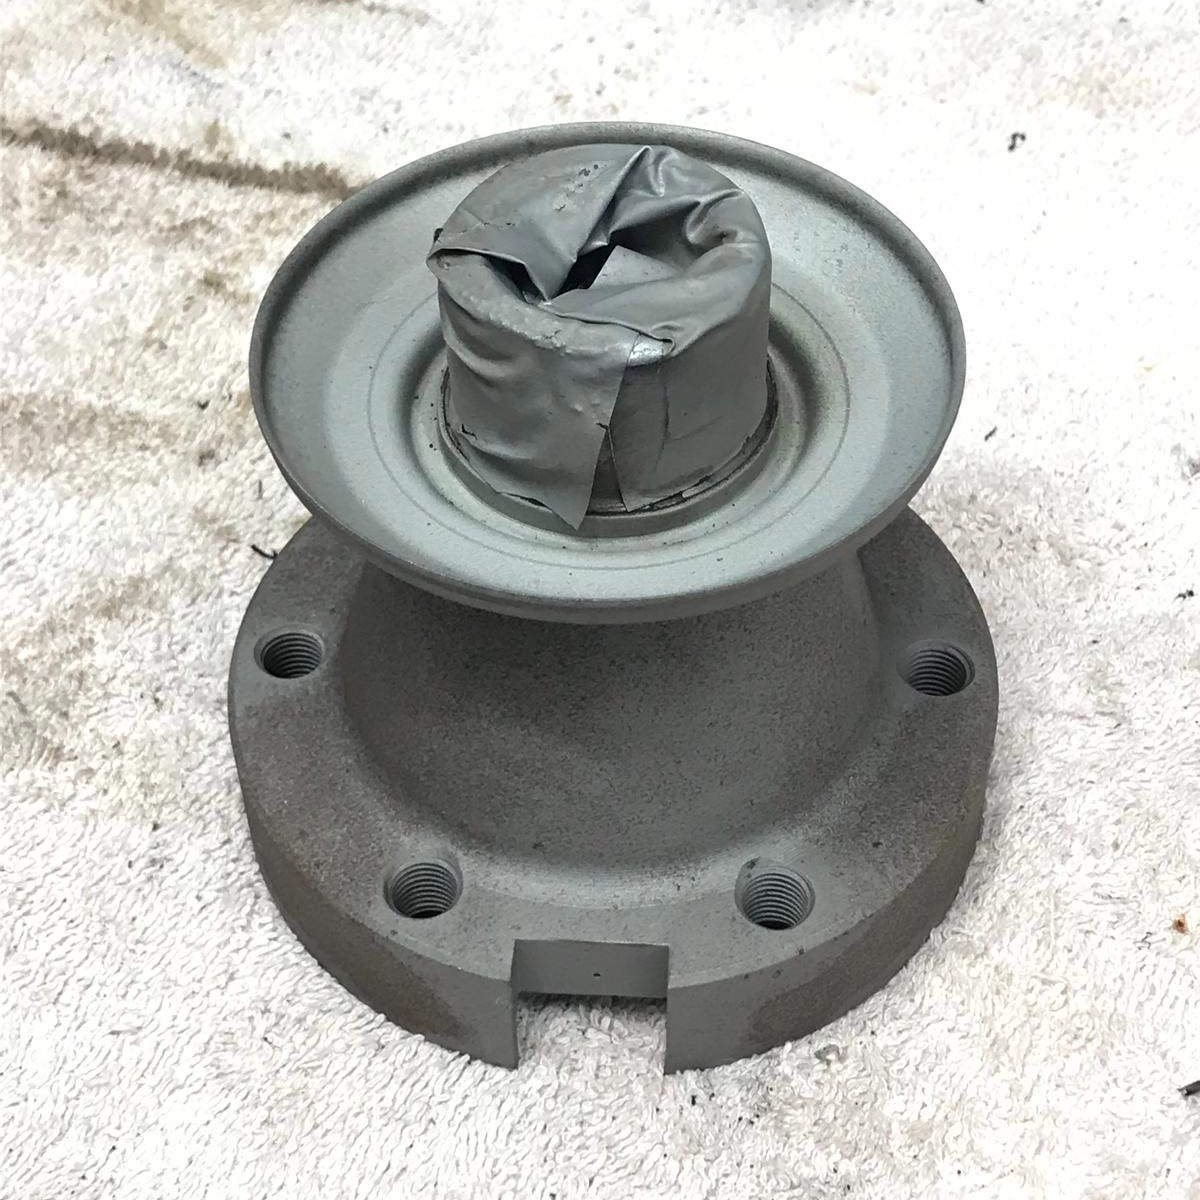
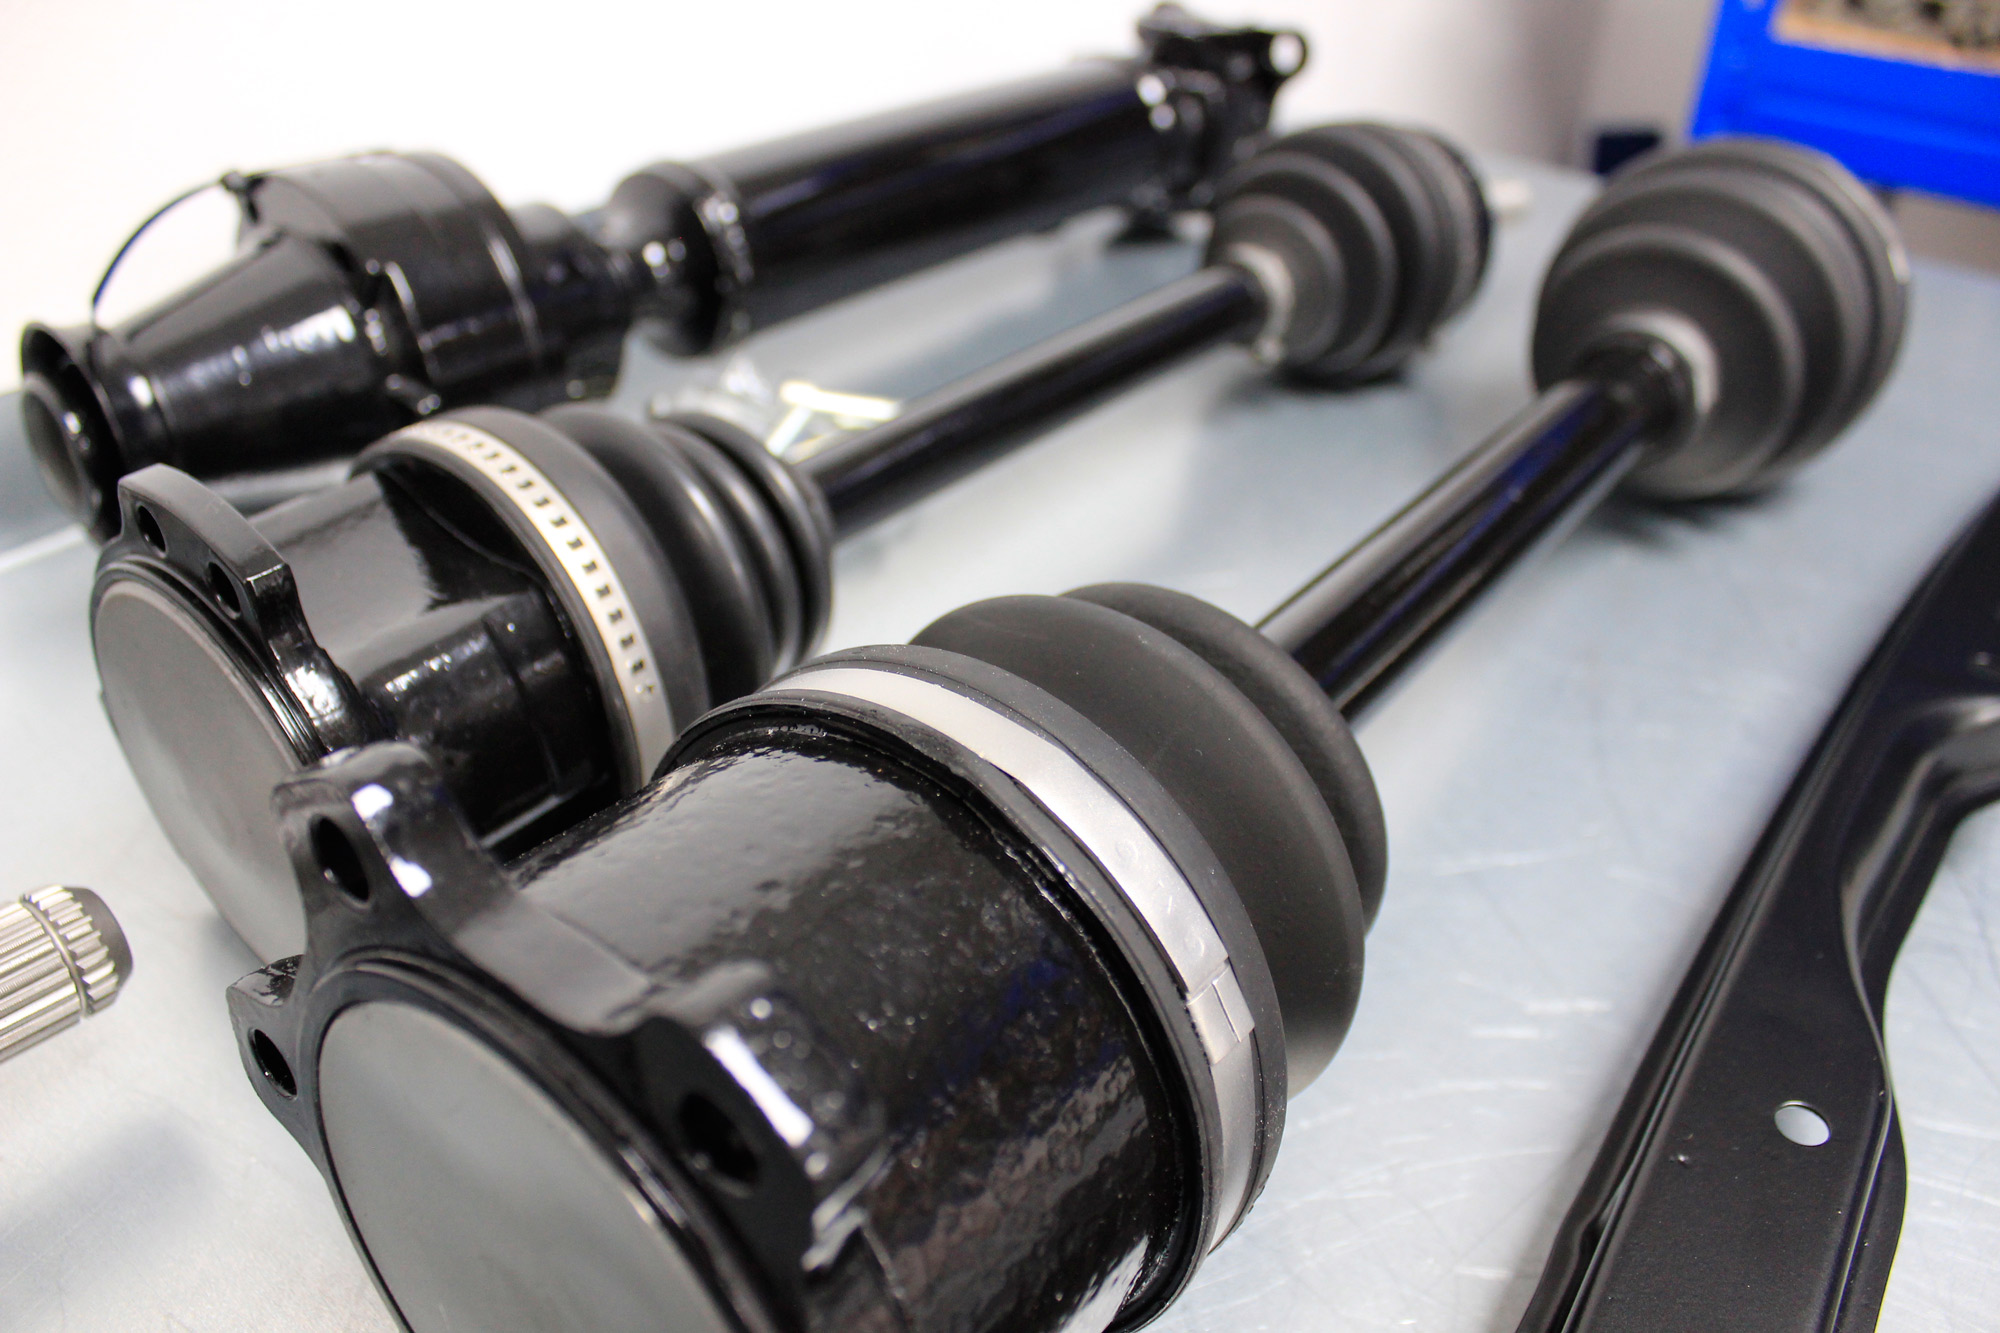
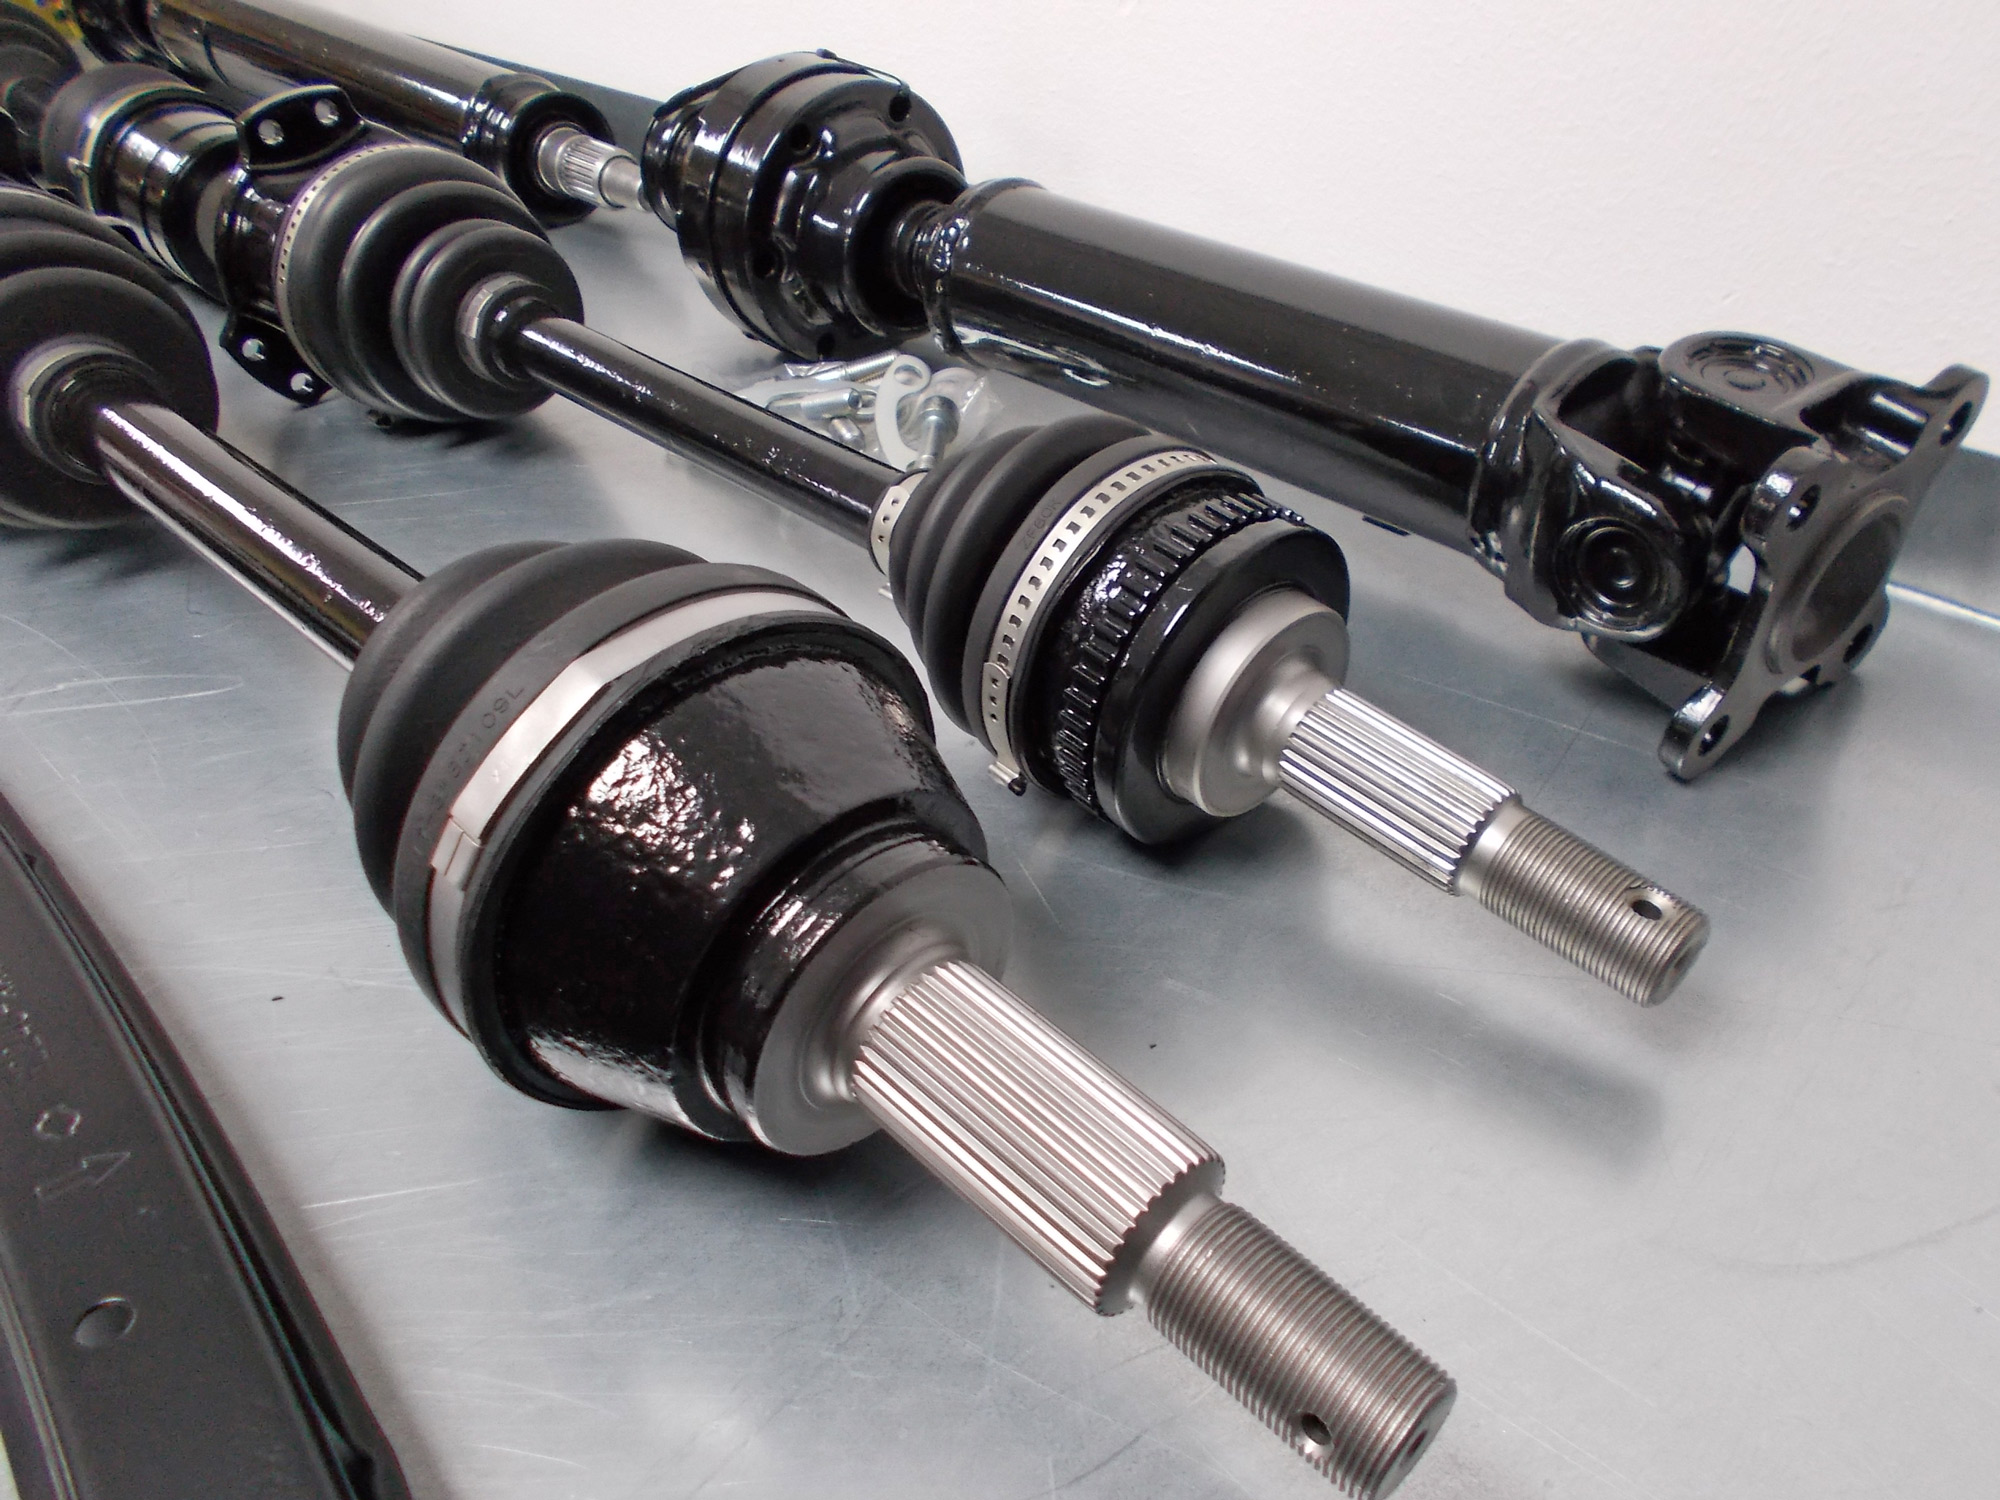
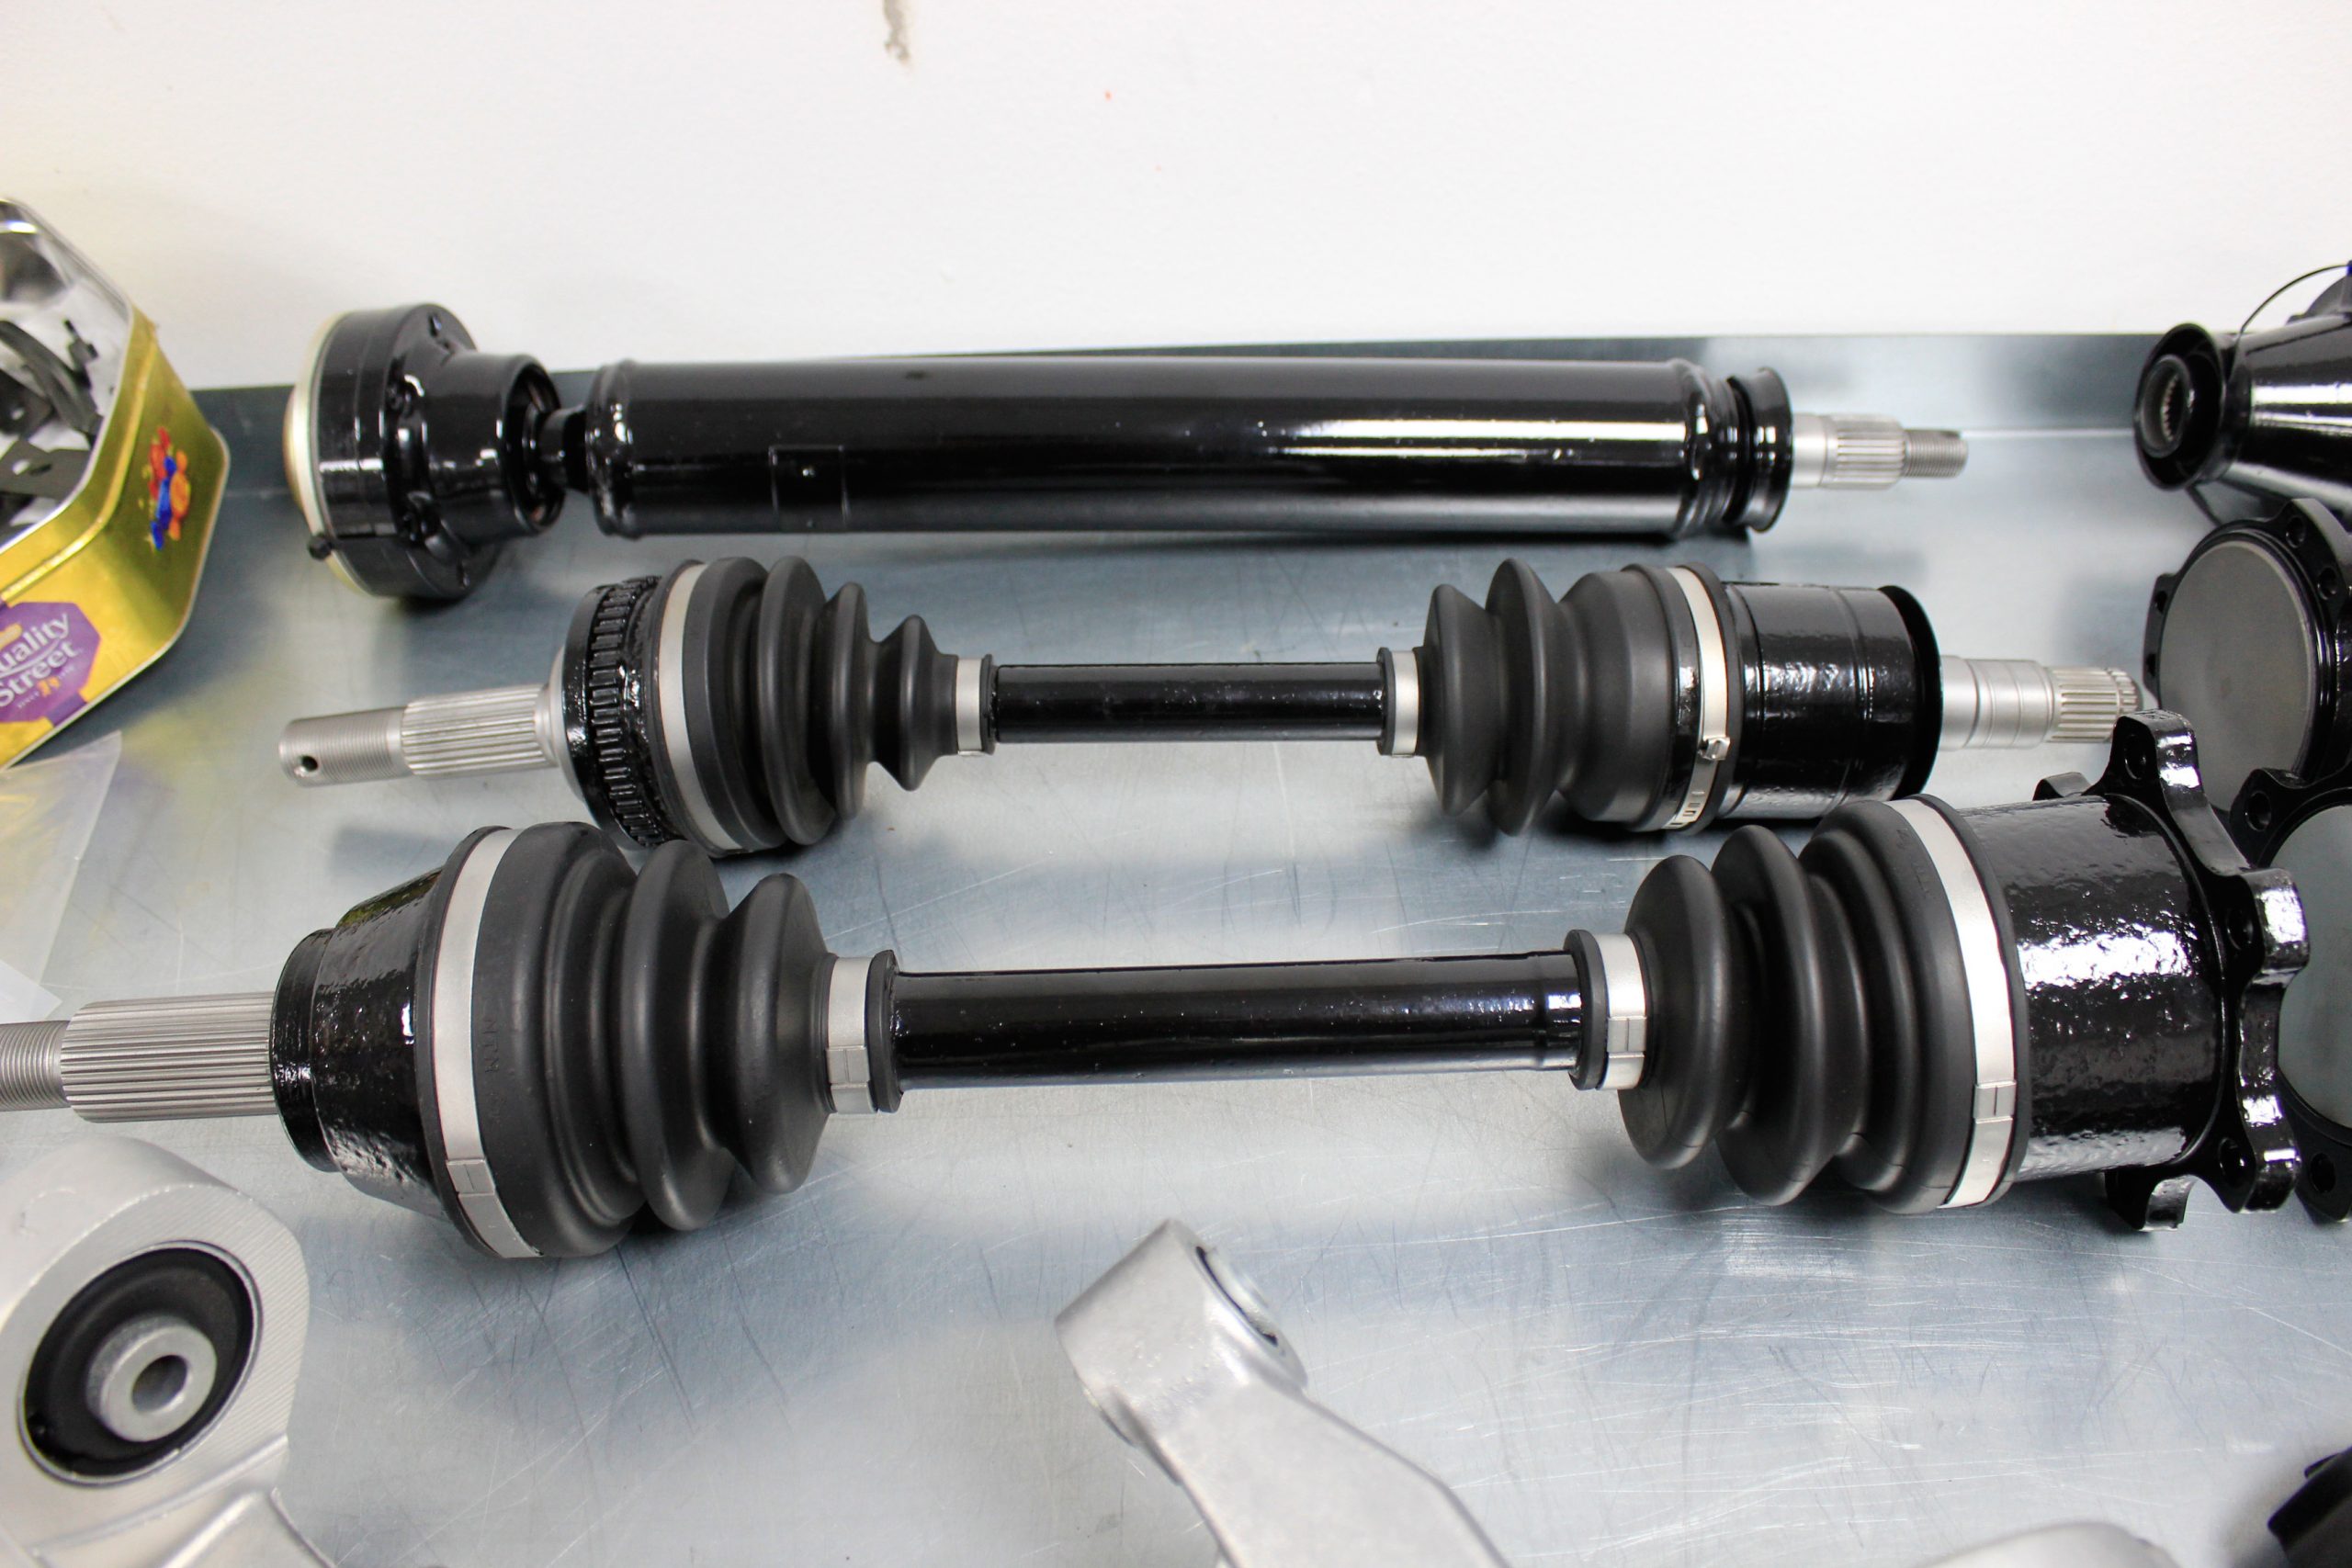
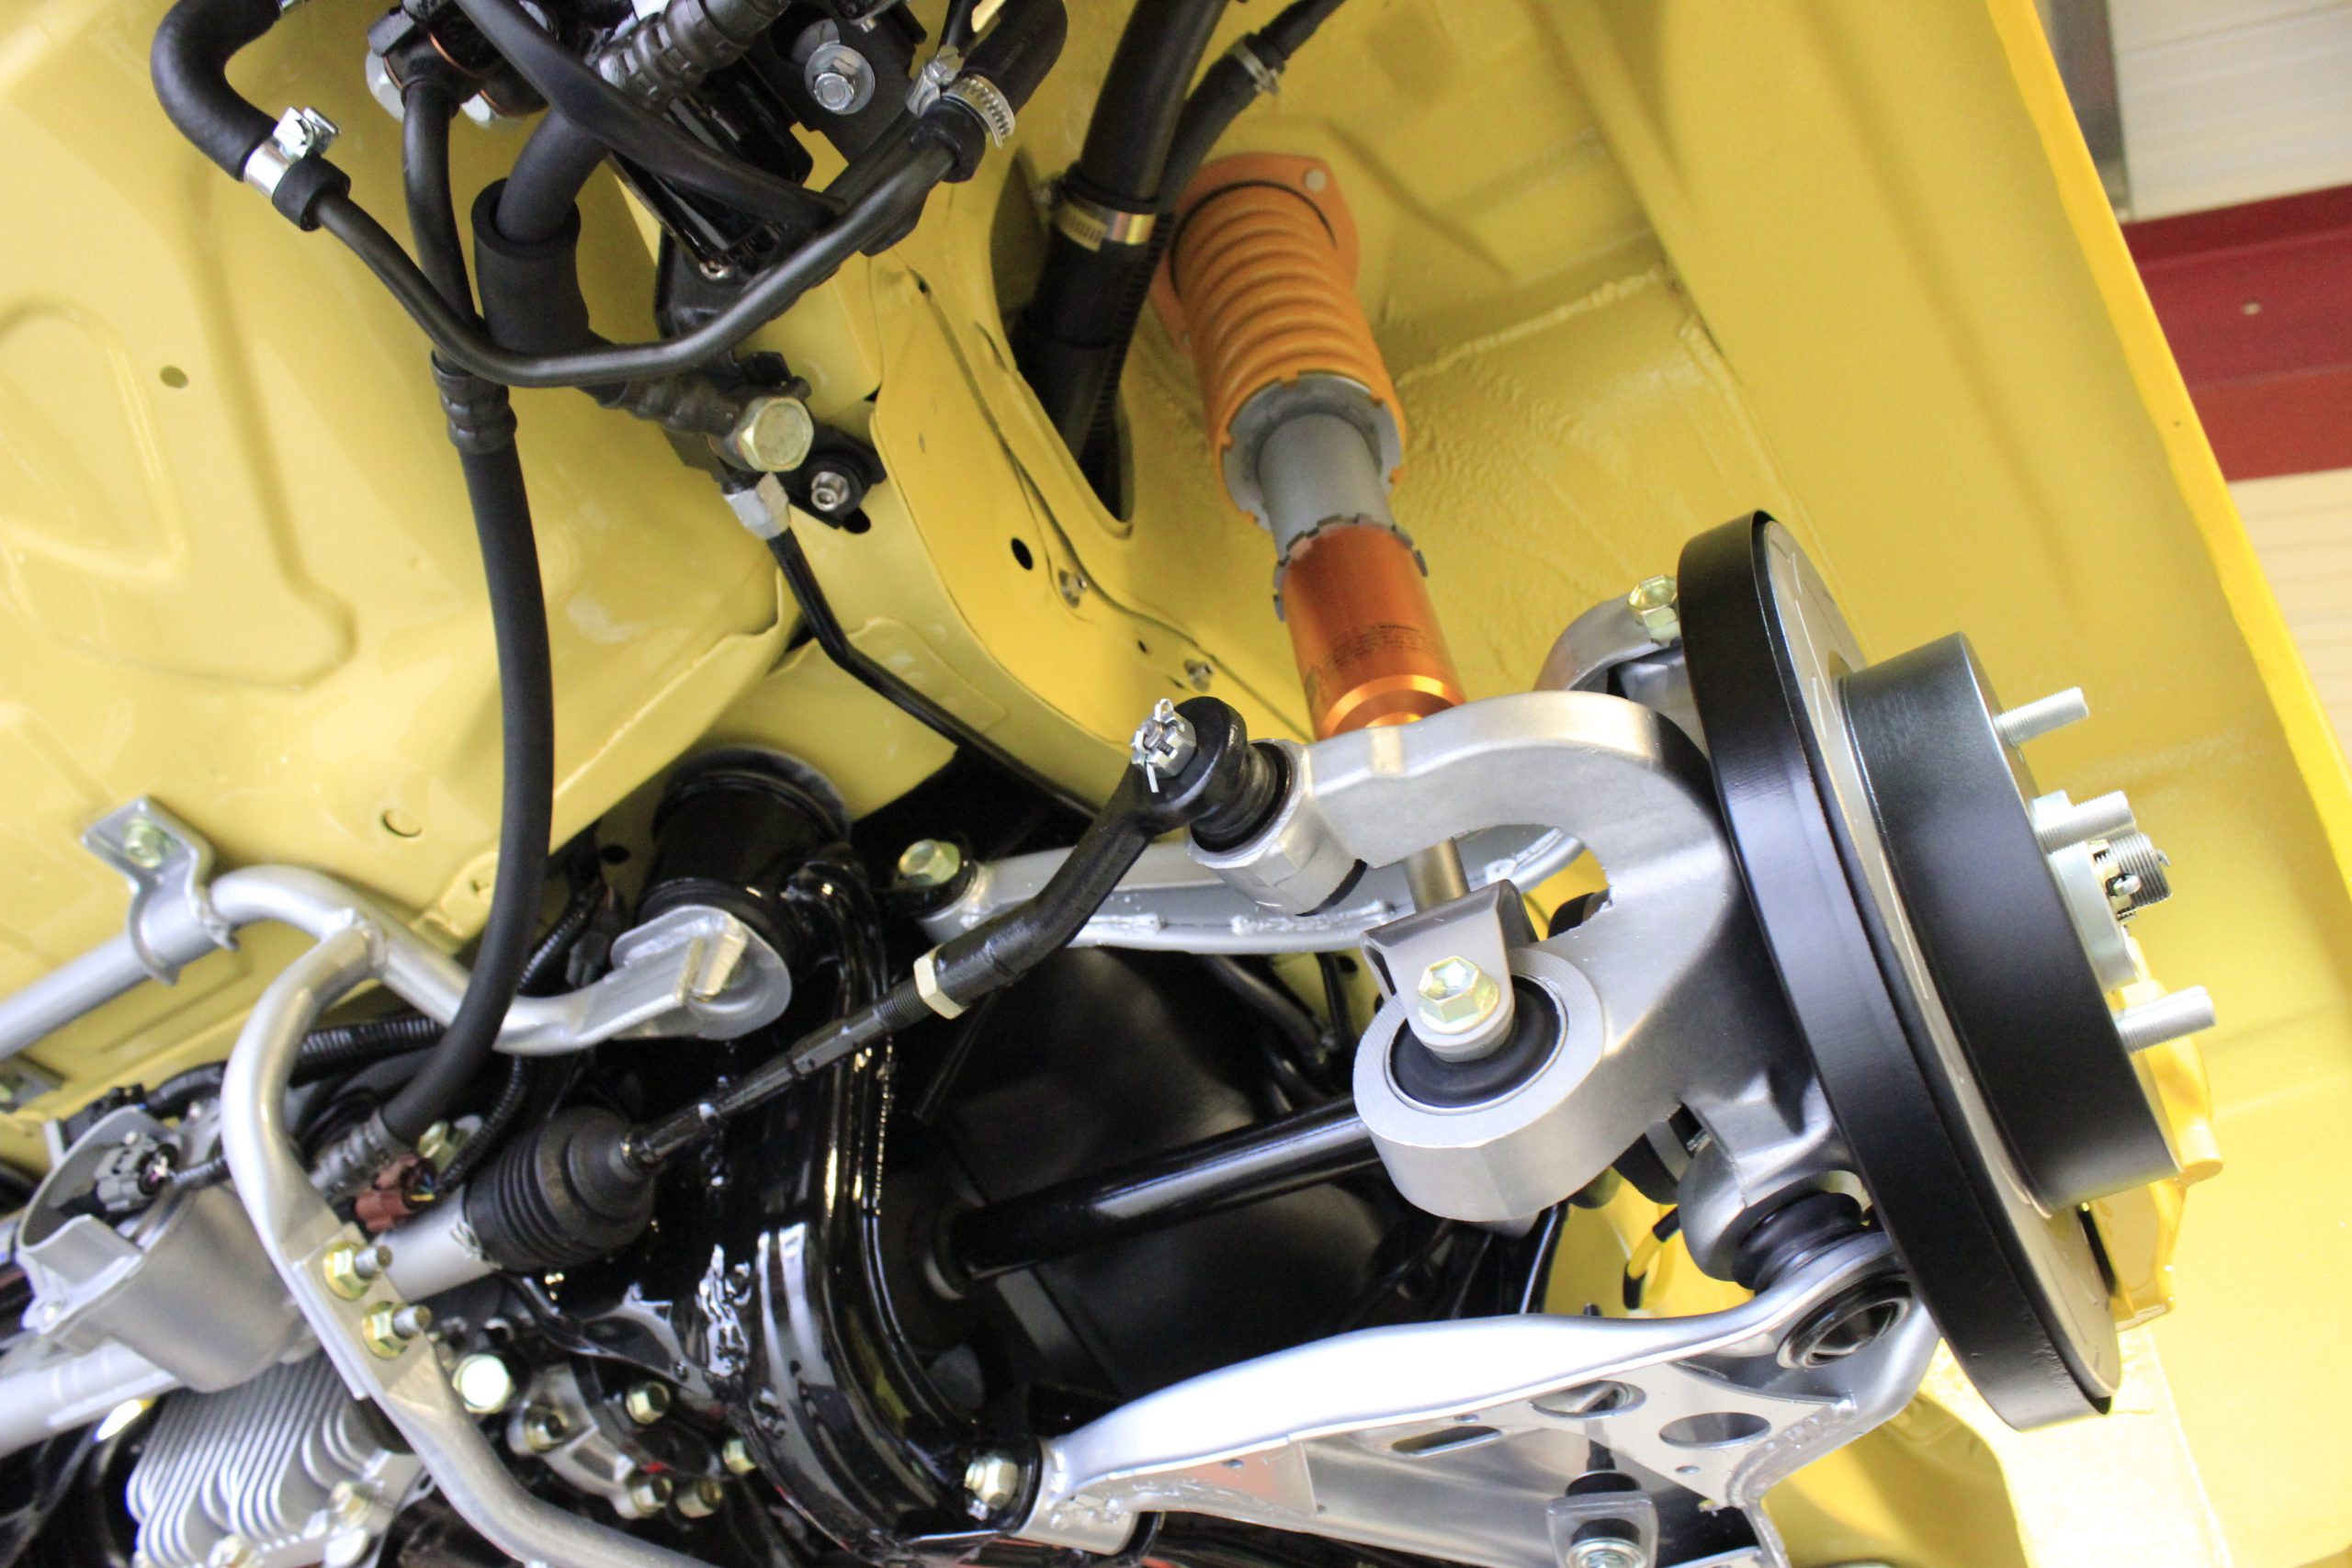
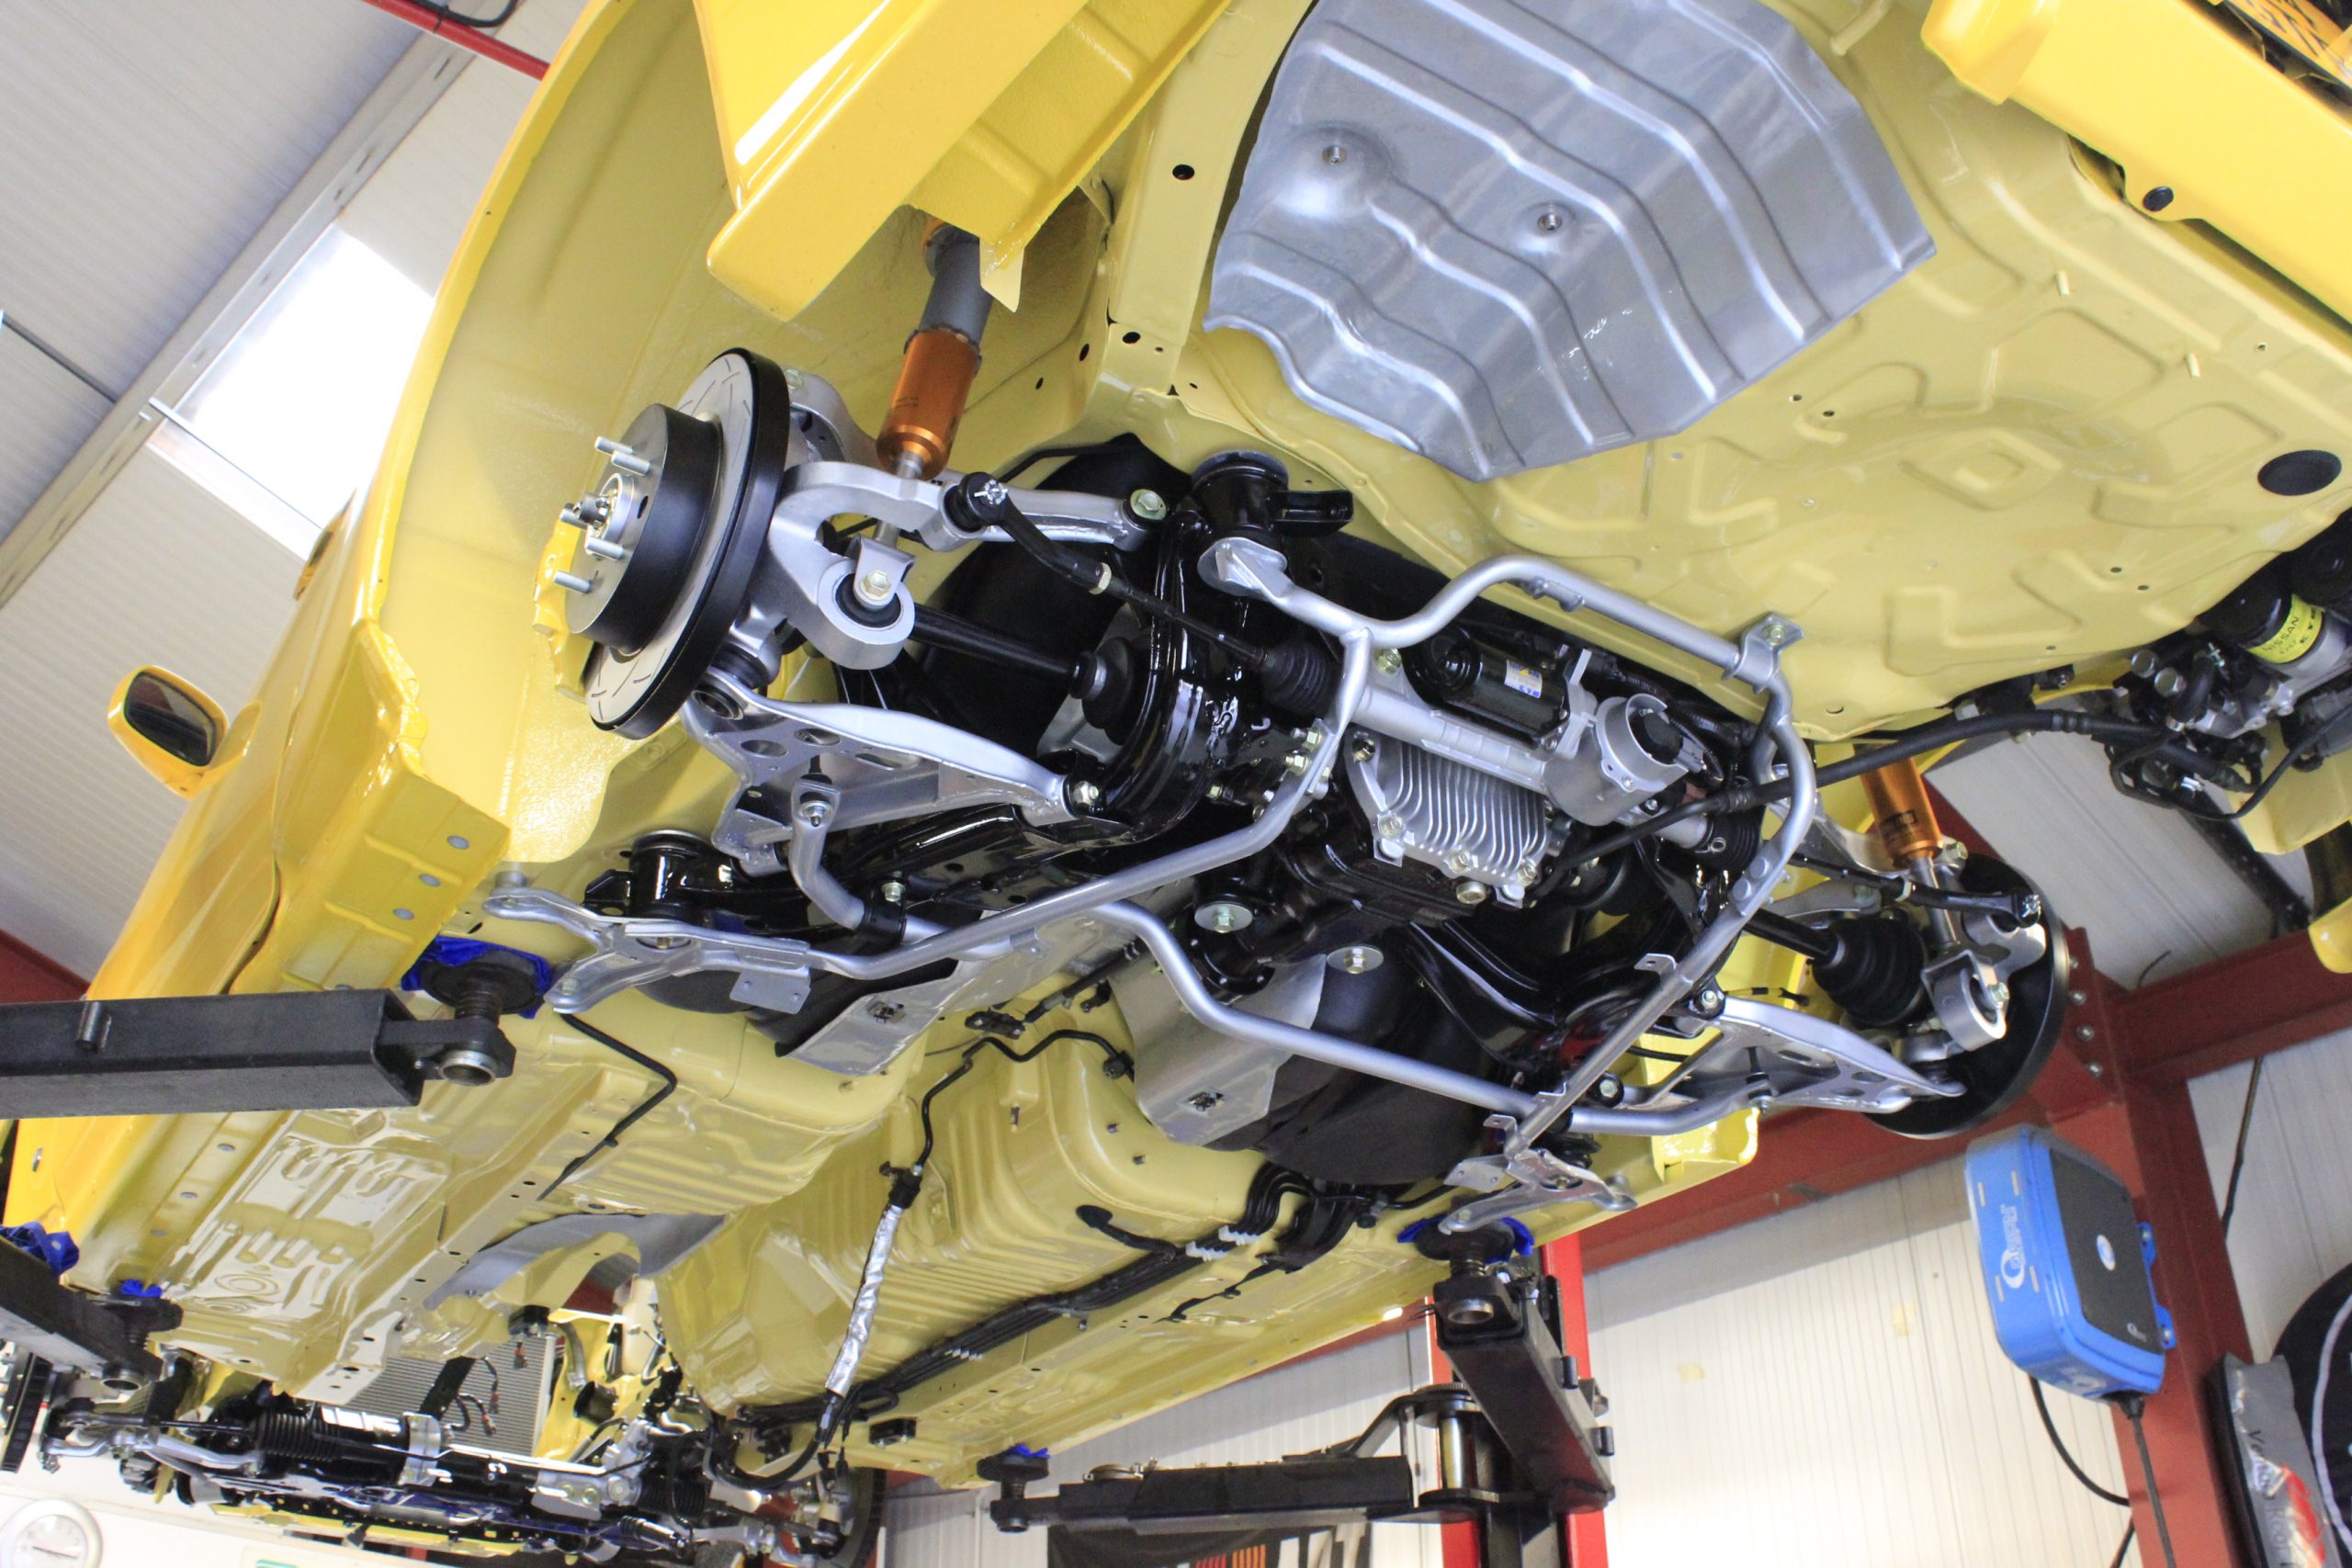
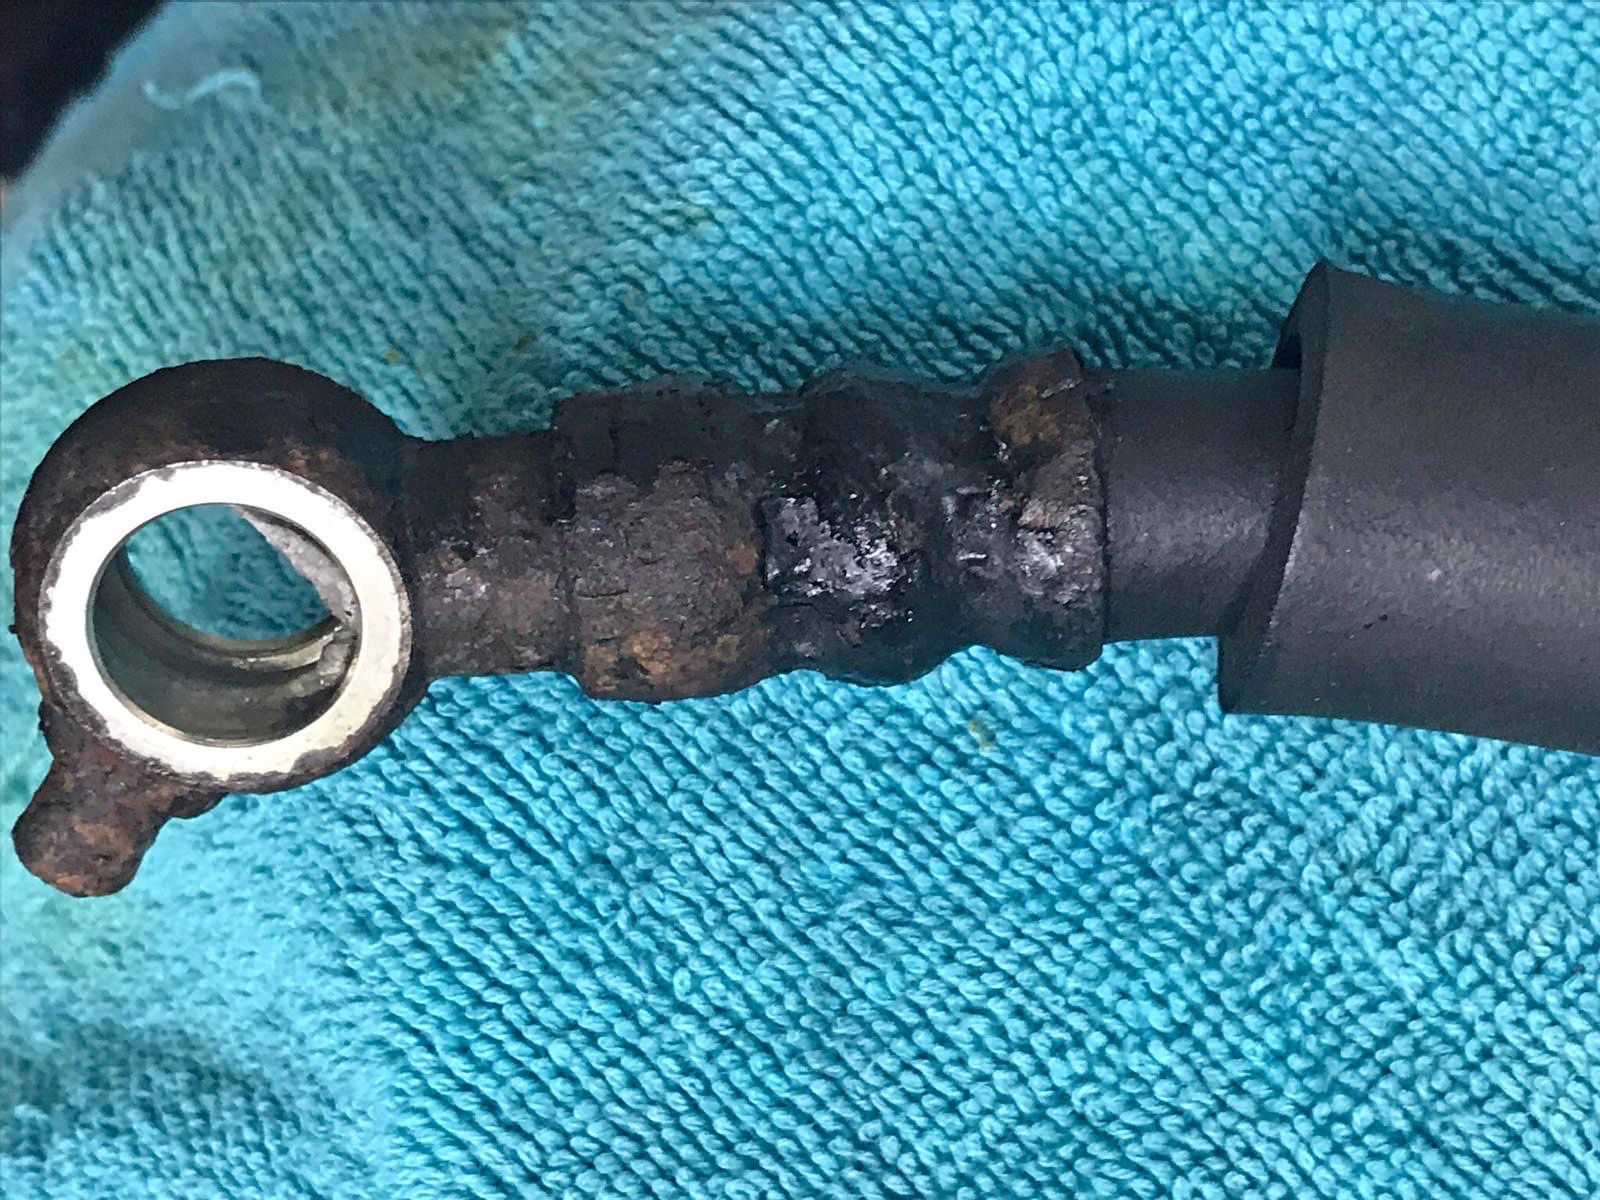
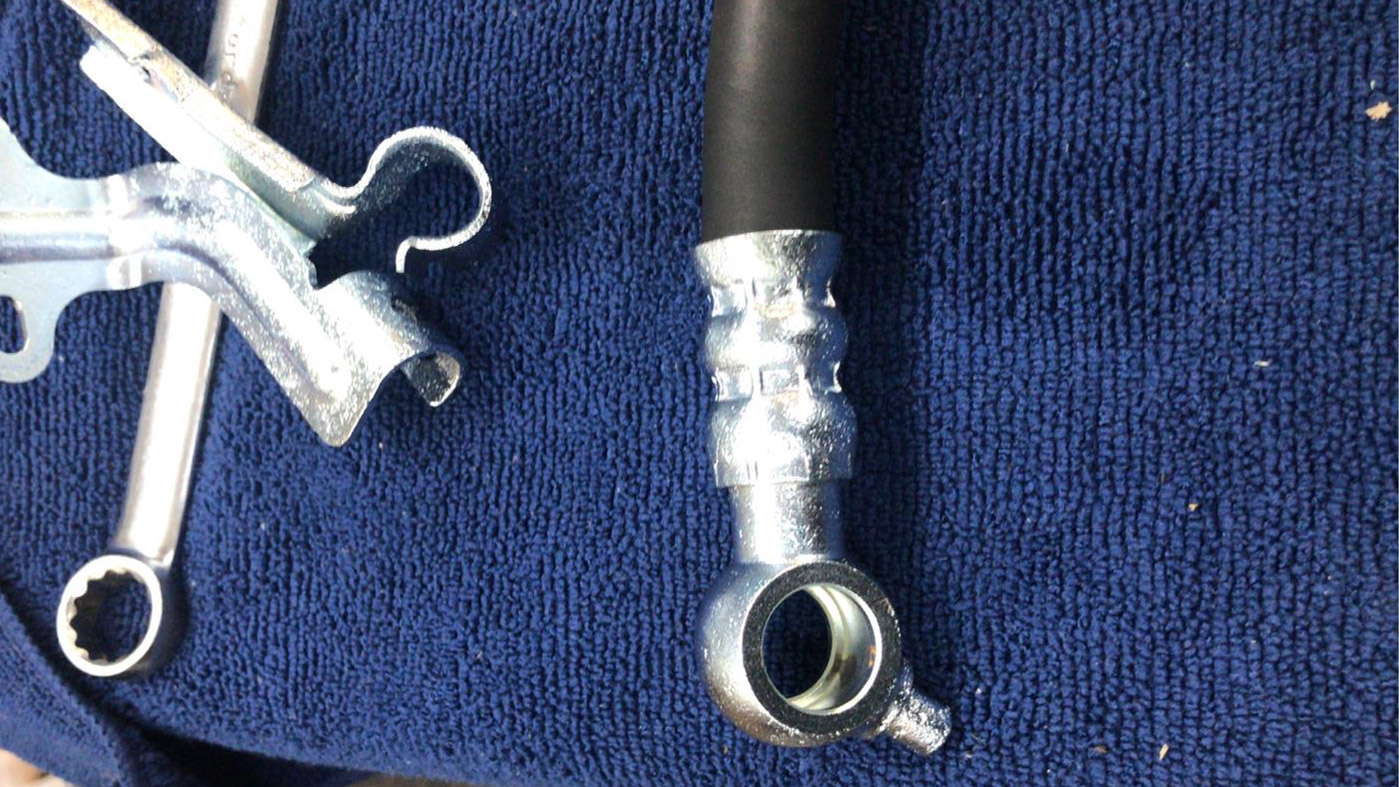
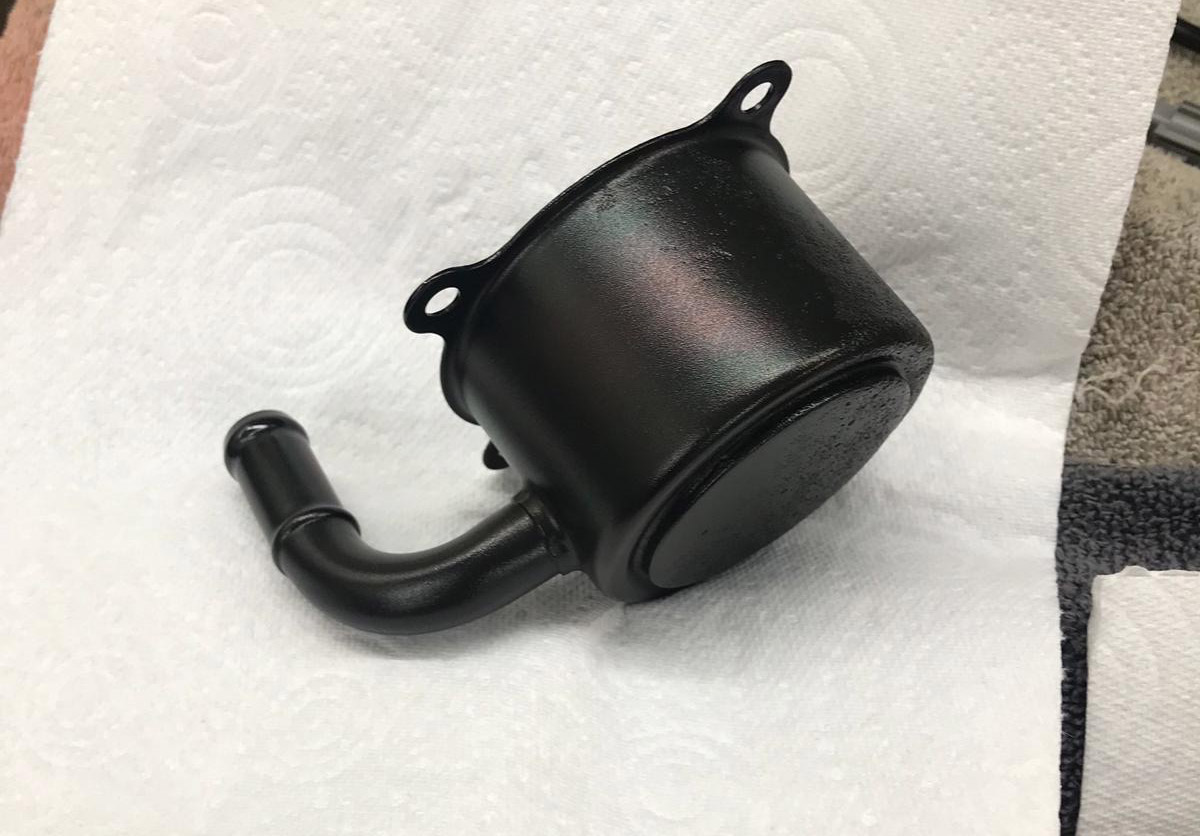
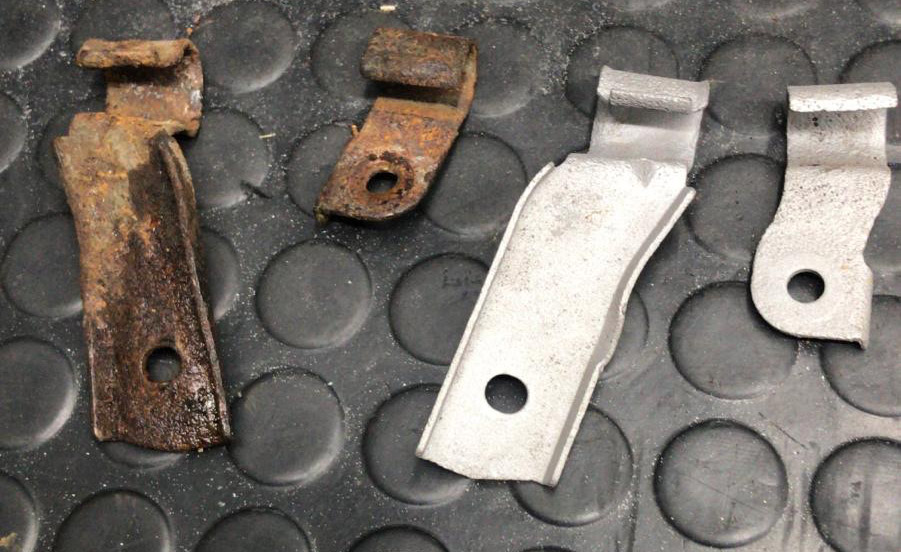
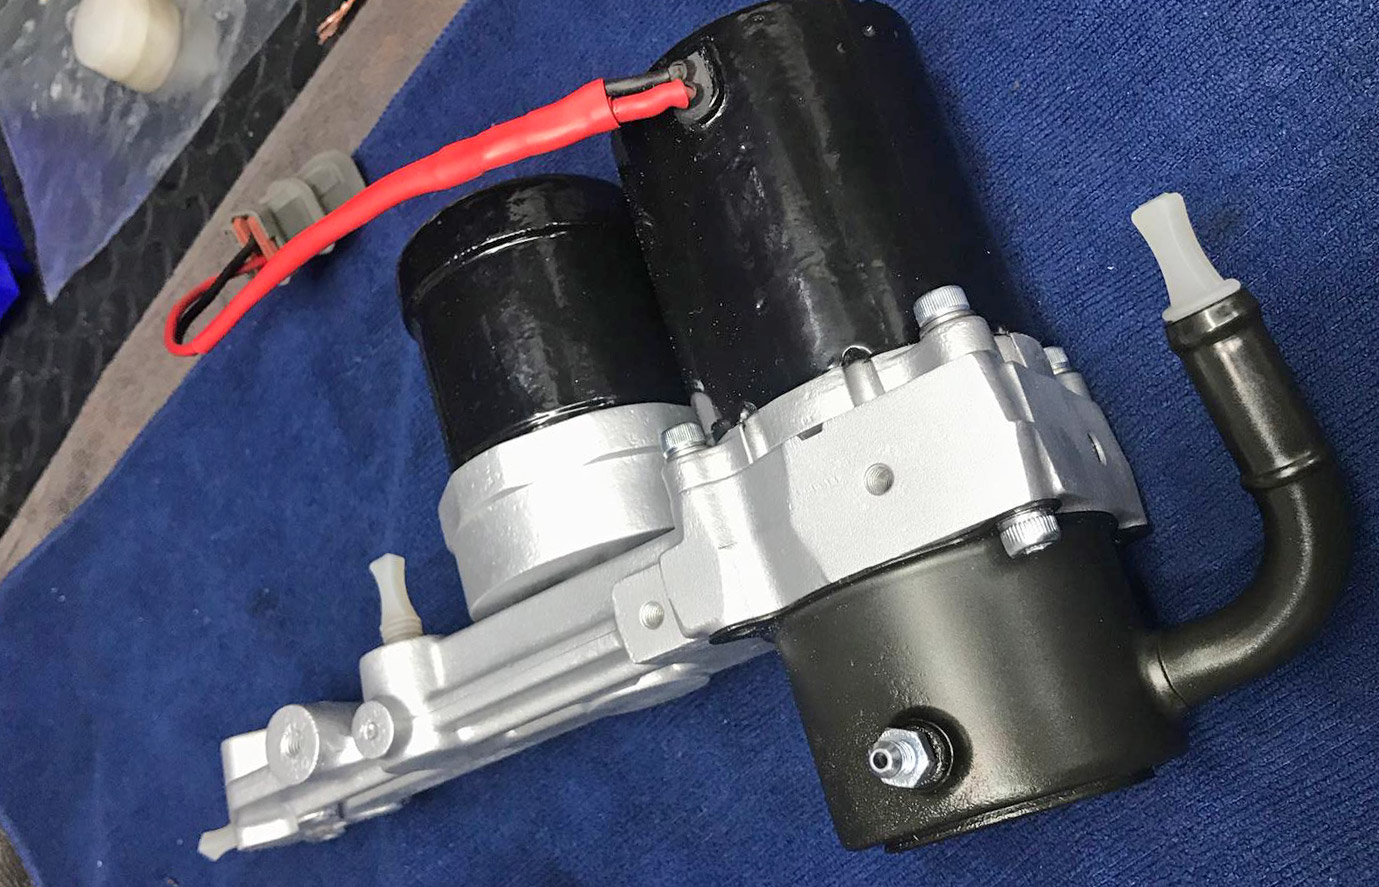
While all this was going on every part we’d taken off of the car was restored to its former glory, the subframes sandblasted and powder-coated then-new Nismo bushes fitted, new Nismo arms were ordered. The suspension uprights, braces, brackets, and fixings all powder-coated, all the alloy components vapour blasted, new wheel bearings and bushes fitted all round. Even the little things like the hand brake cables, battery cables, pipes, hoses all vapor blasted and their brackets zinc plated. The pumps, racks, and master cylinders all stripped, rebuilt, coated or plated, driveshafts, prop shaft and diff all blasted coated and treated, all the nuts and bolts acid dipped then zinc plated.
Once back from paint, first was to chase out all the threads in the chassis, then to fill all the chassis and cavities with Dinitrol cavity wax. All the looms, wires, and connectors were cleaned and re-taped before being clipped back in place. The refurbished fuel and brake lines were all secured with new clips, the fuel tank steam cleaned and fitted. We had to source a second-hand fuel tank heat shield as the original was too corroded, all the heat shields were then powder coated to stop them corroding again.
The subframes were assembled using all the refurbished parts, re zinc’d nuts and bolts, and new bushes and bearings.
The engine and gearbox were in good shape with no leaks, so received good steam clean and the external parts like covers, pumps, pipes, and brackets all removed for coating, polishing, zinc, paint, etc. While in there a new genuine water pump and cam belt was fitted too.
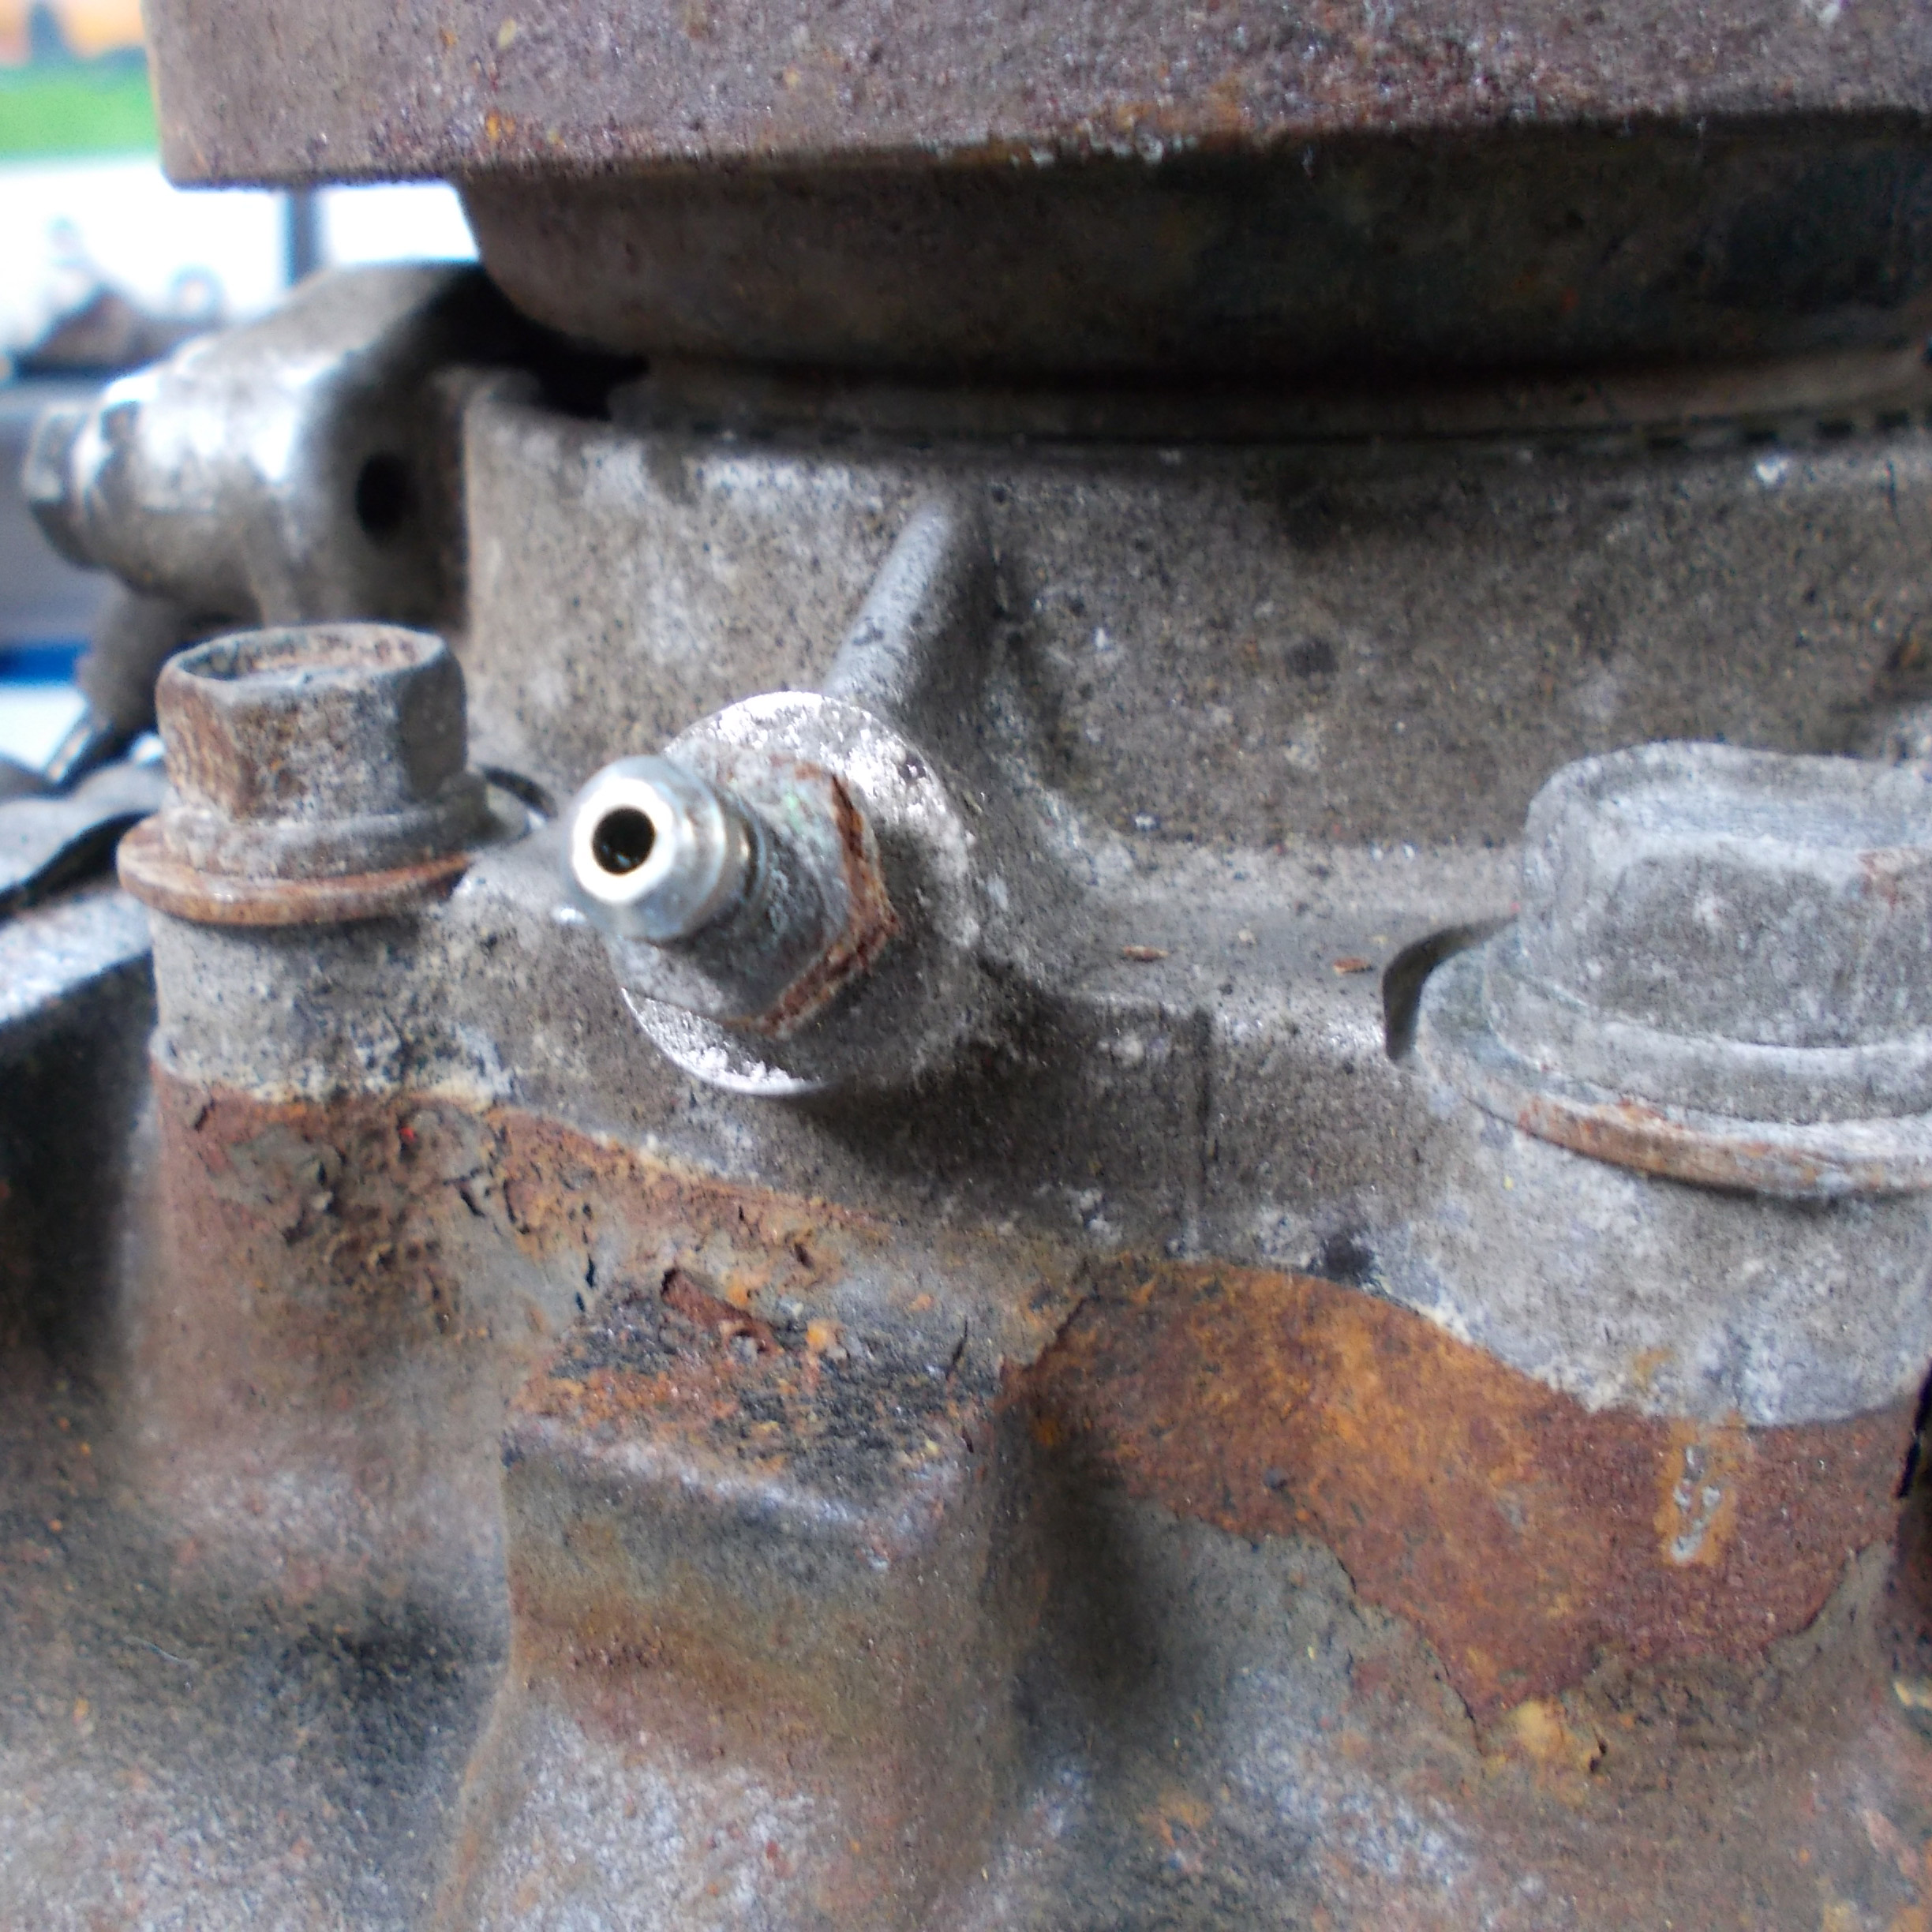
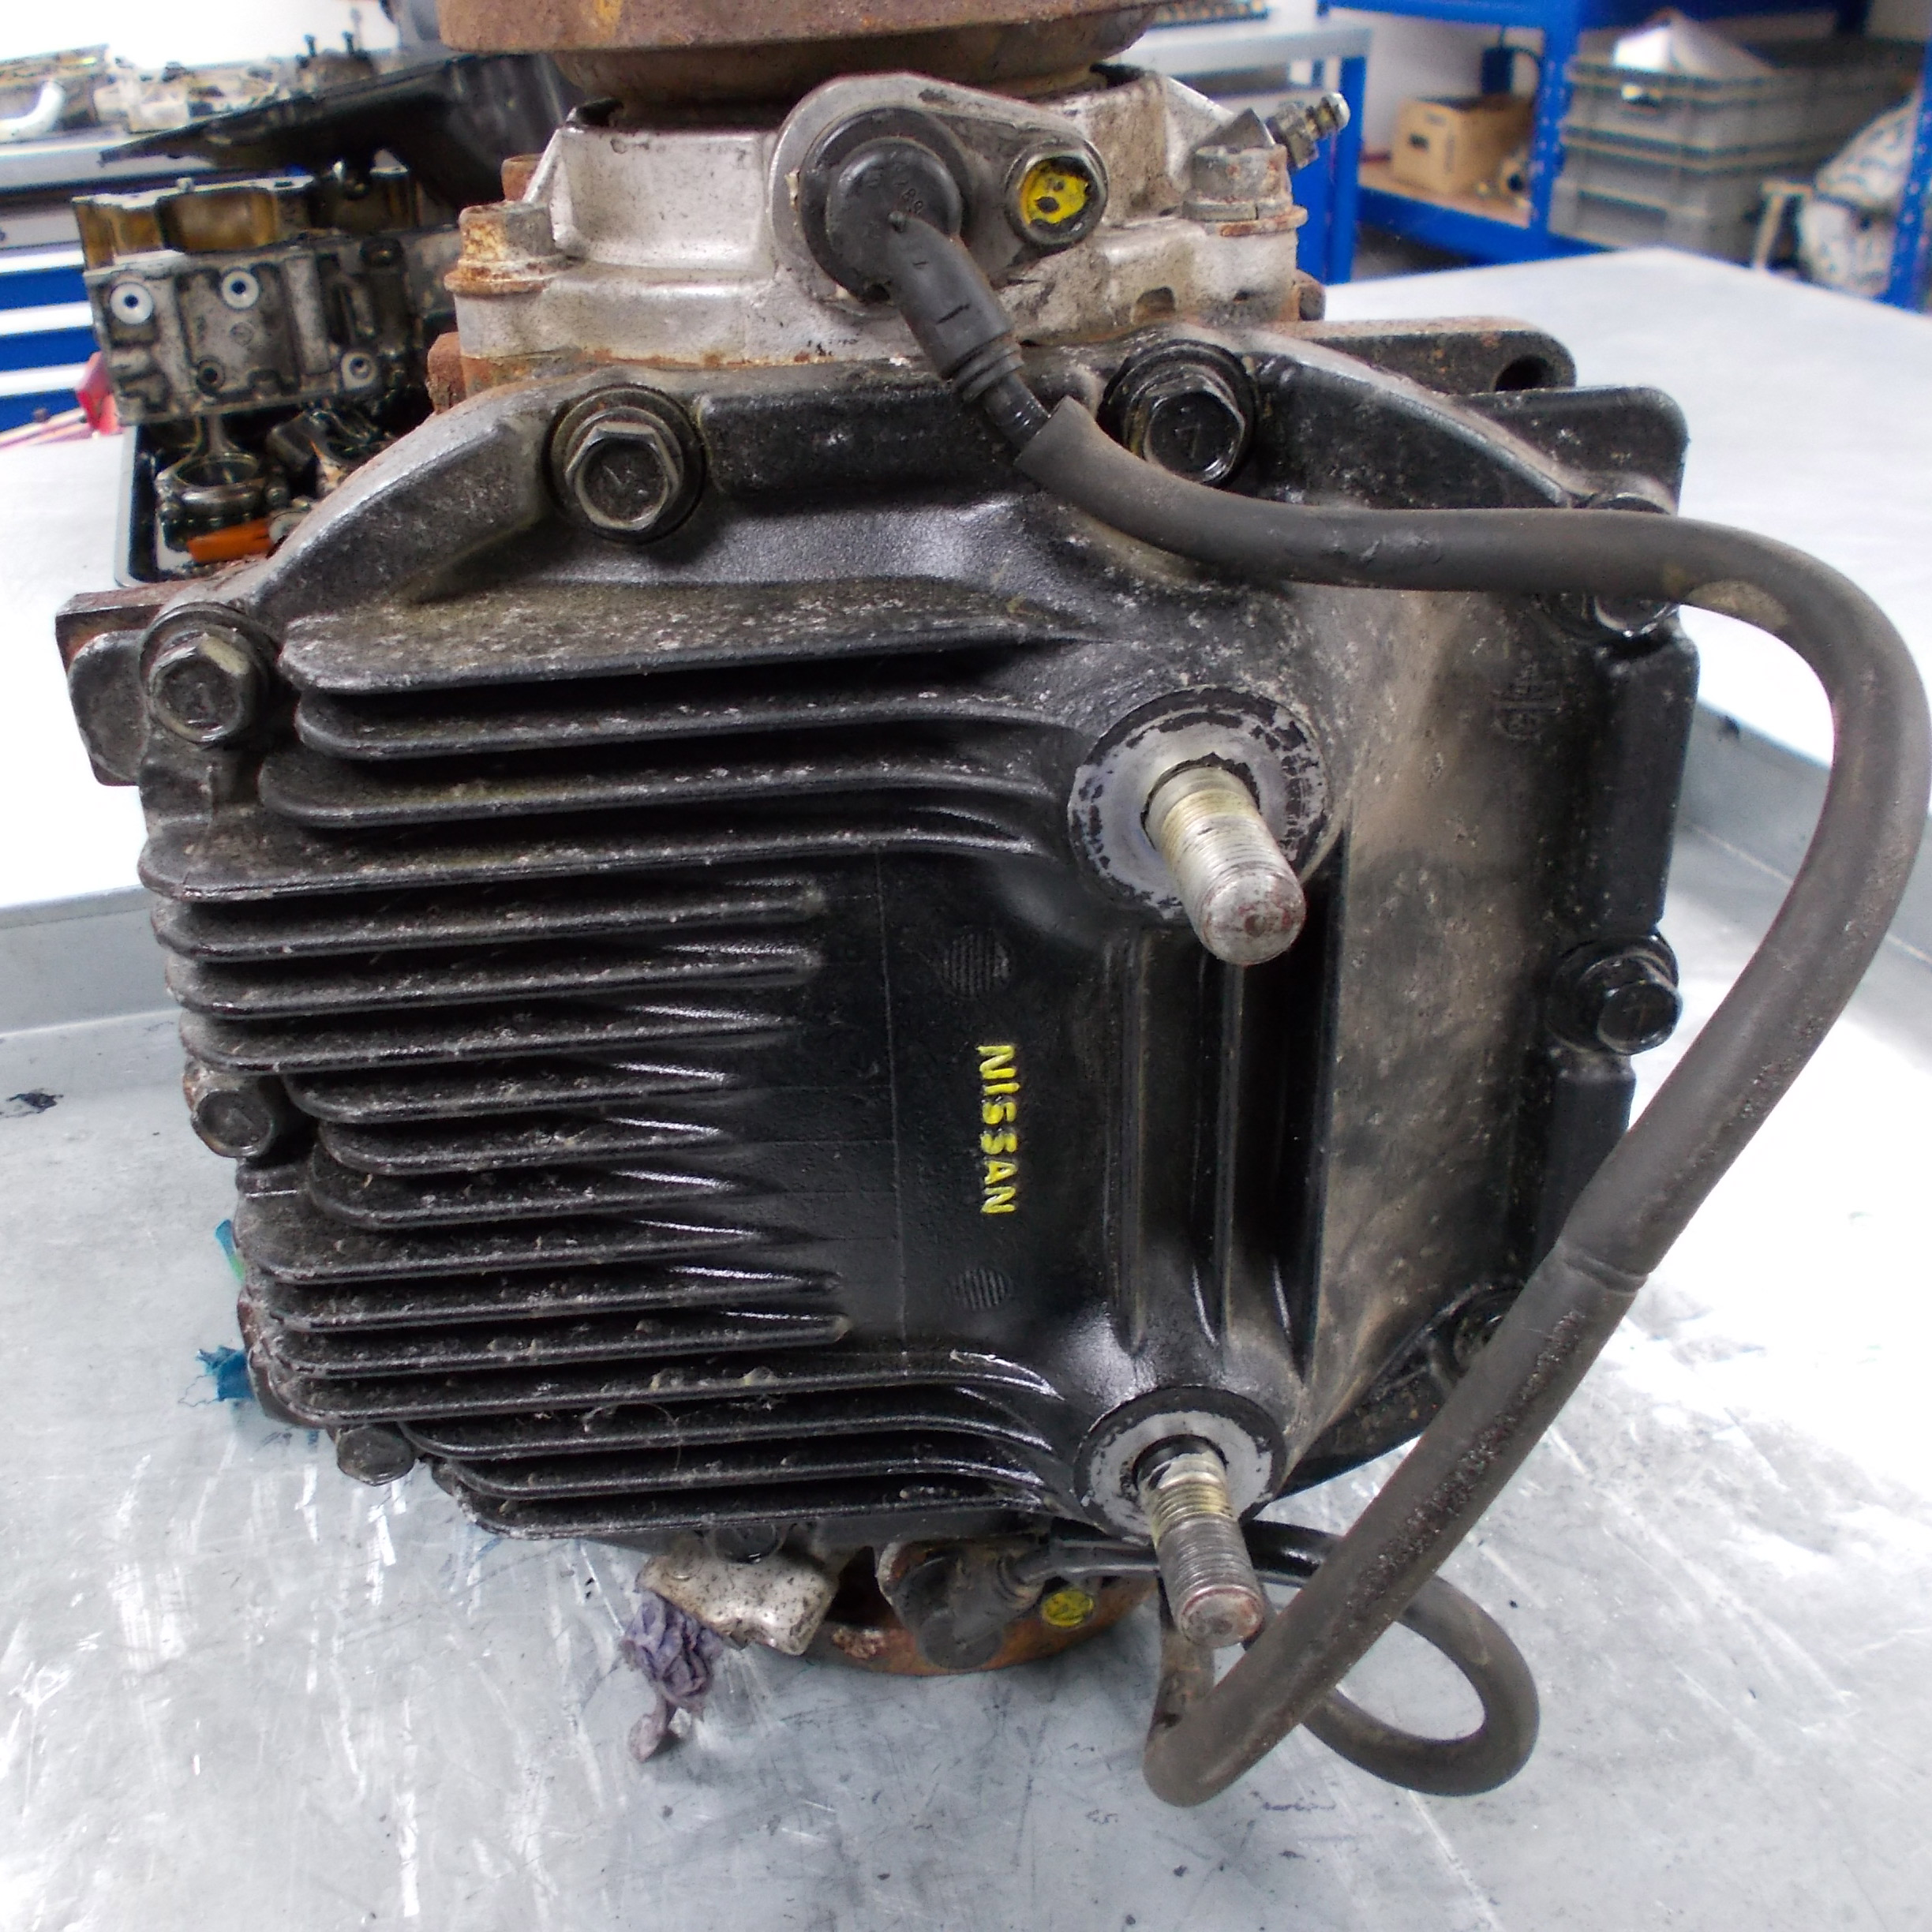
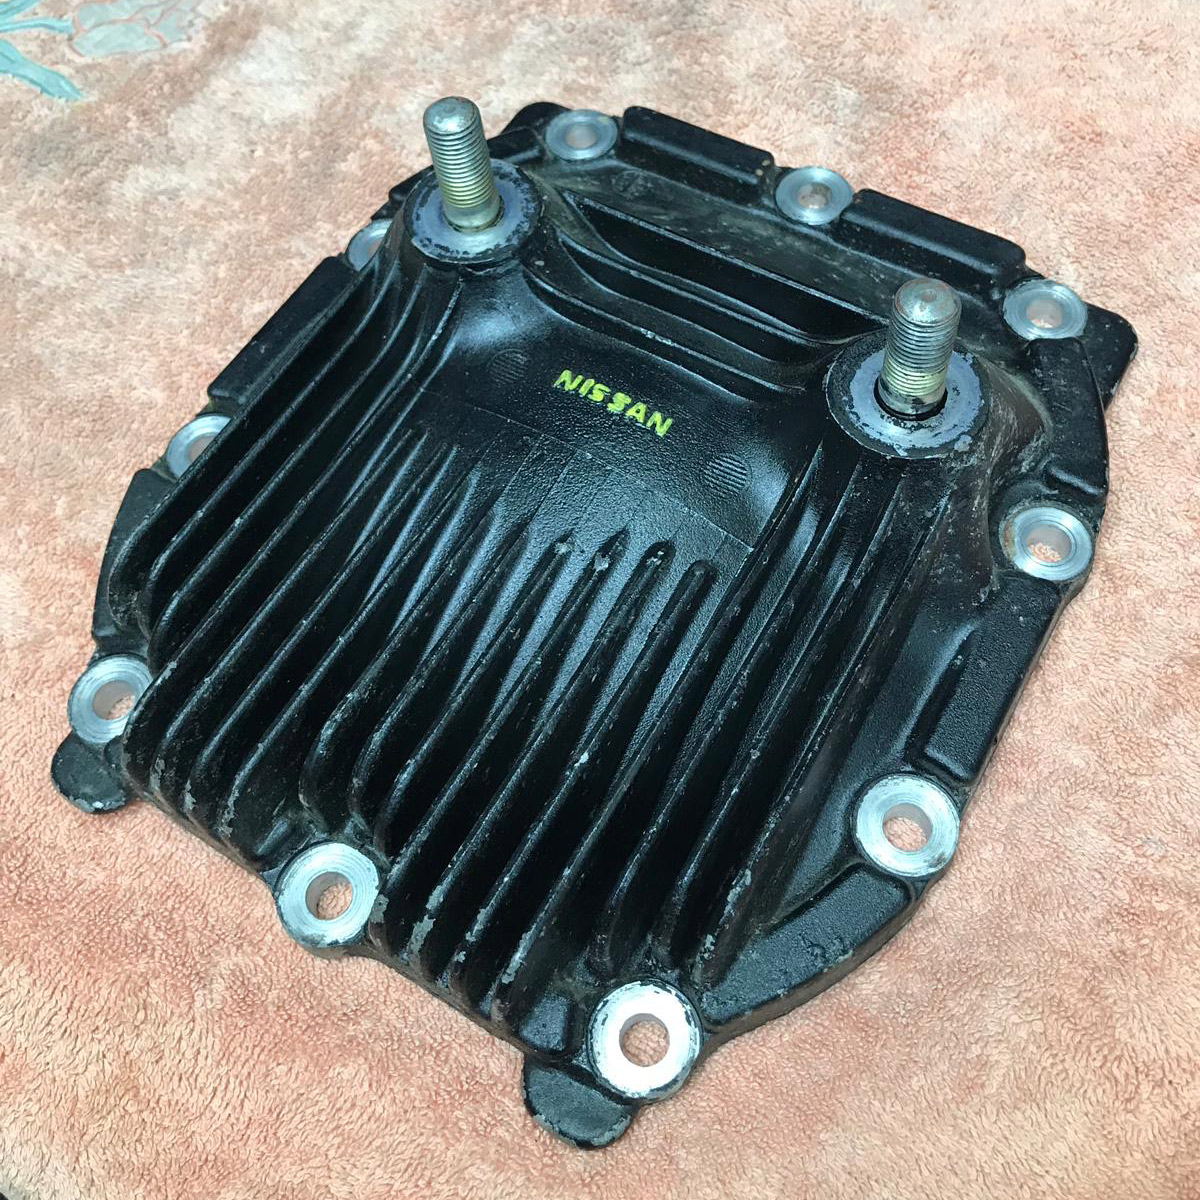
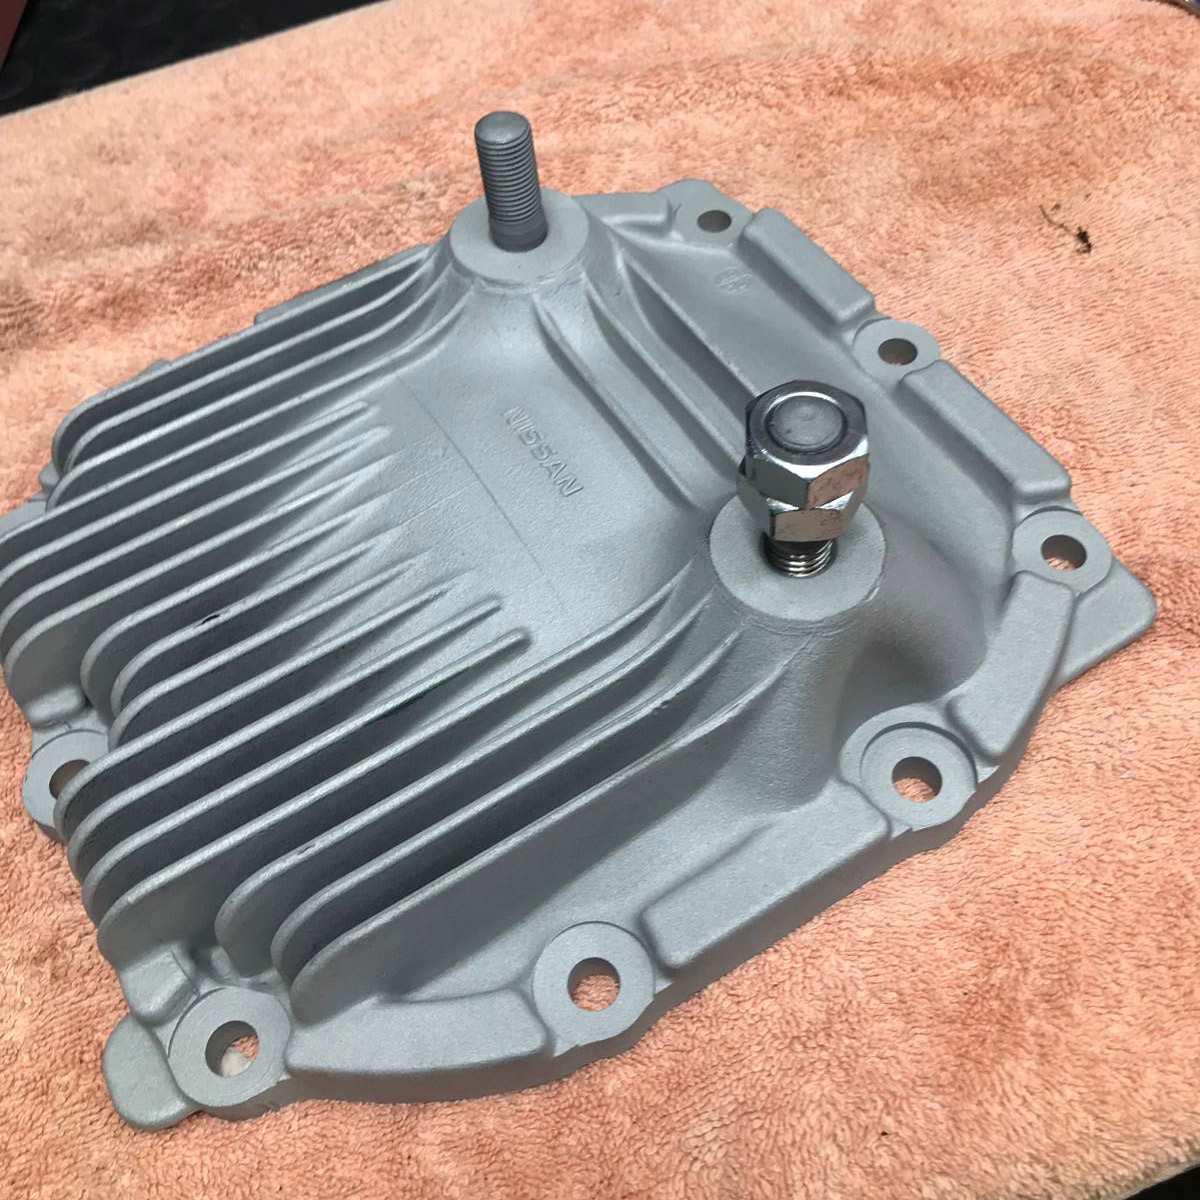
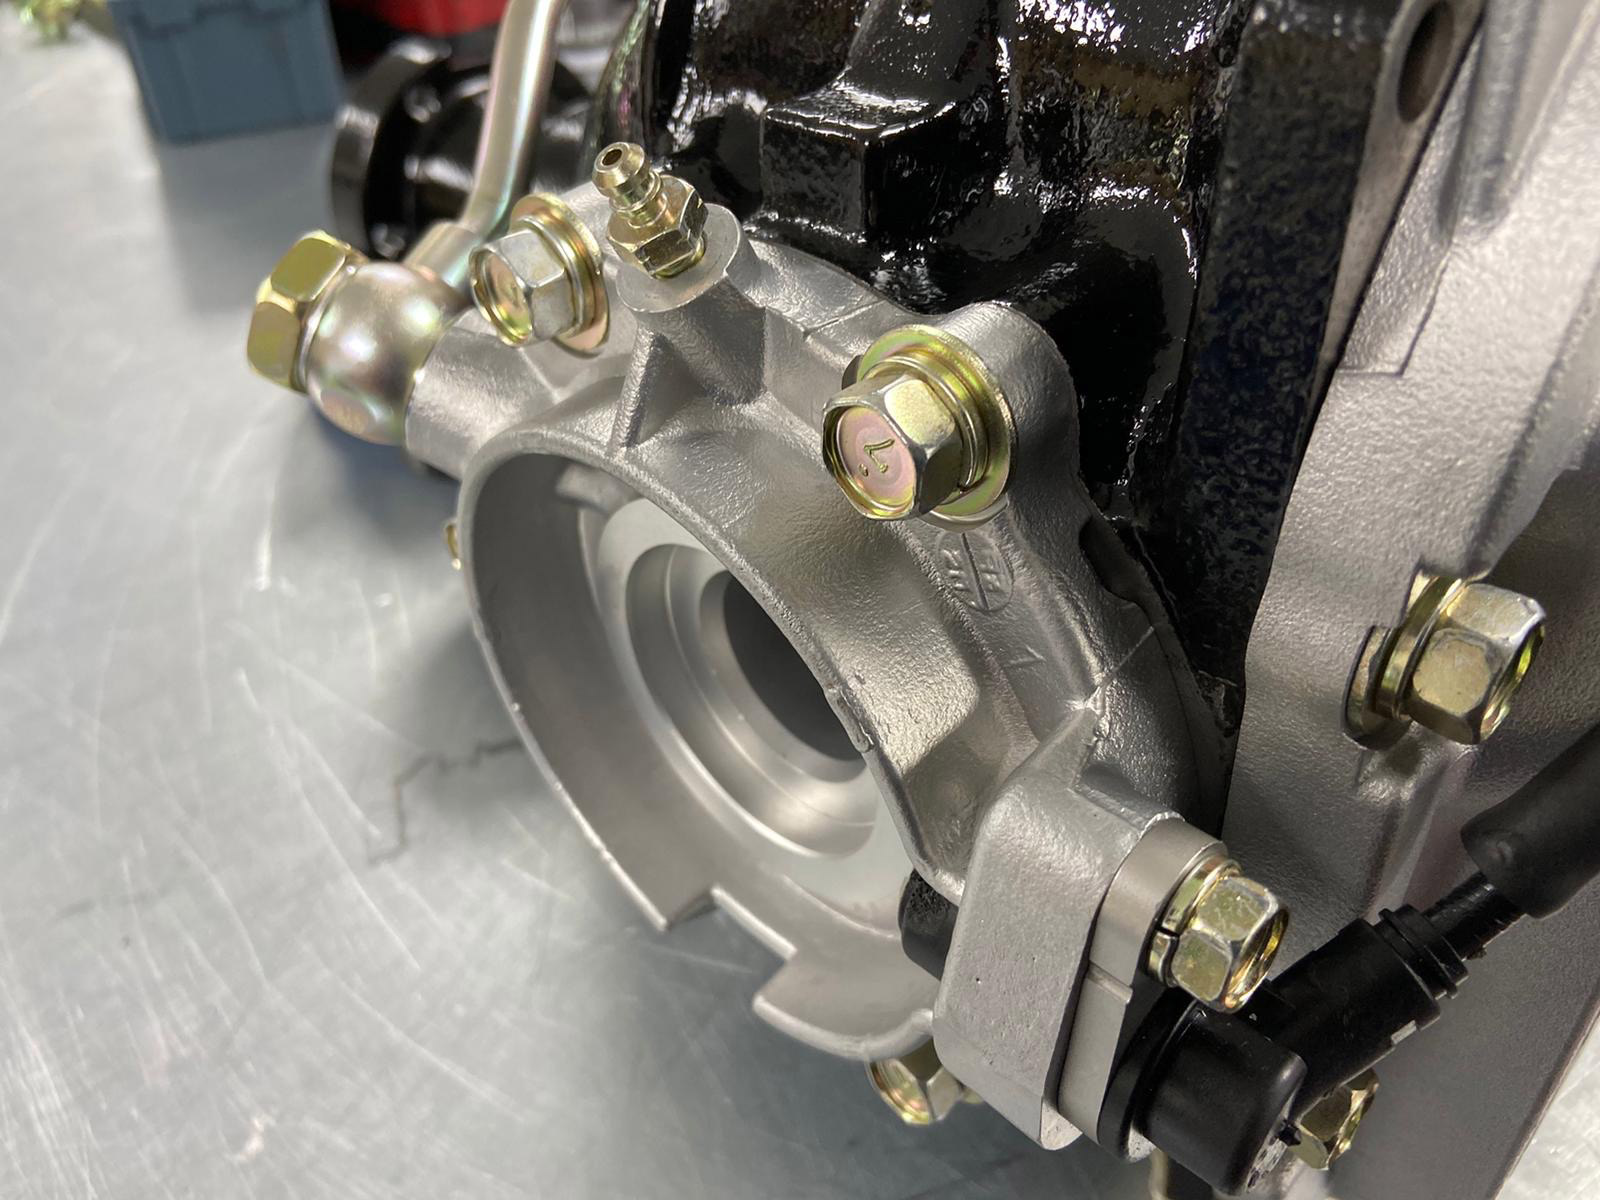
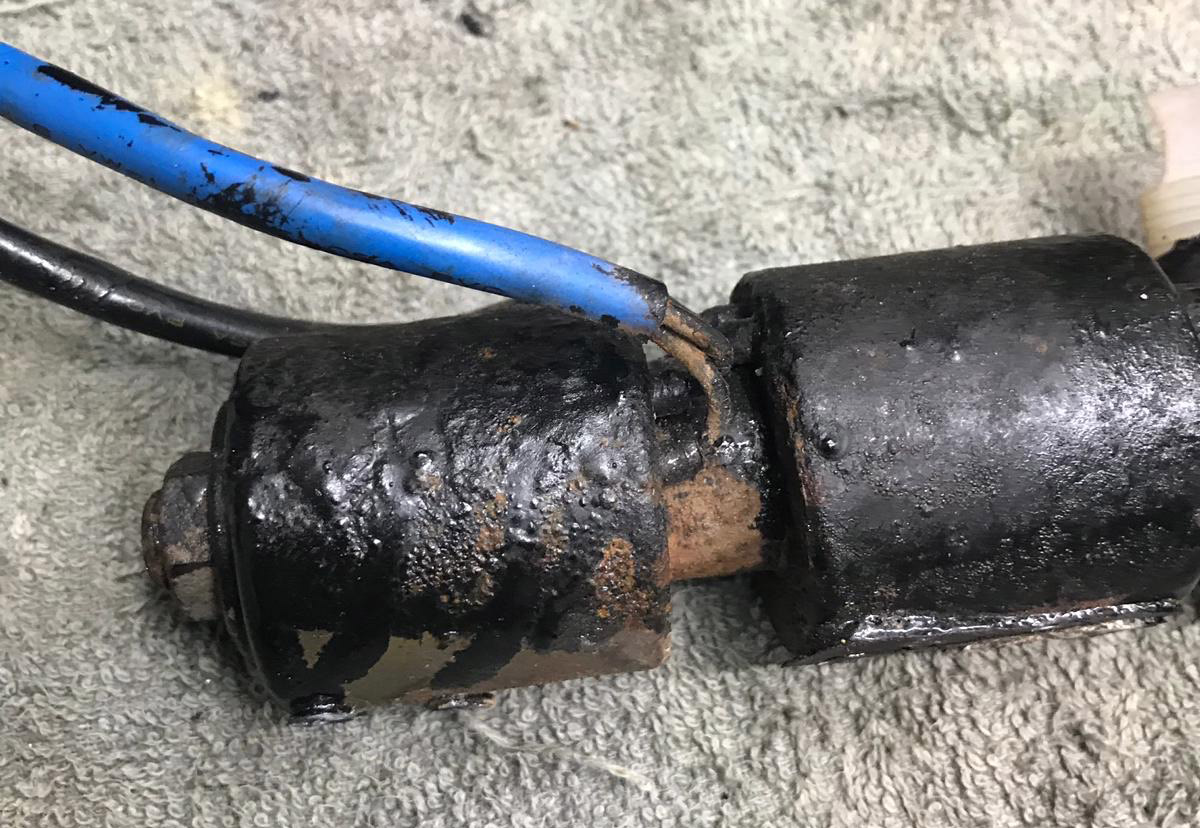
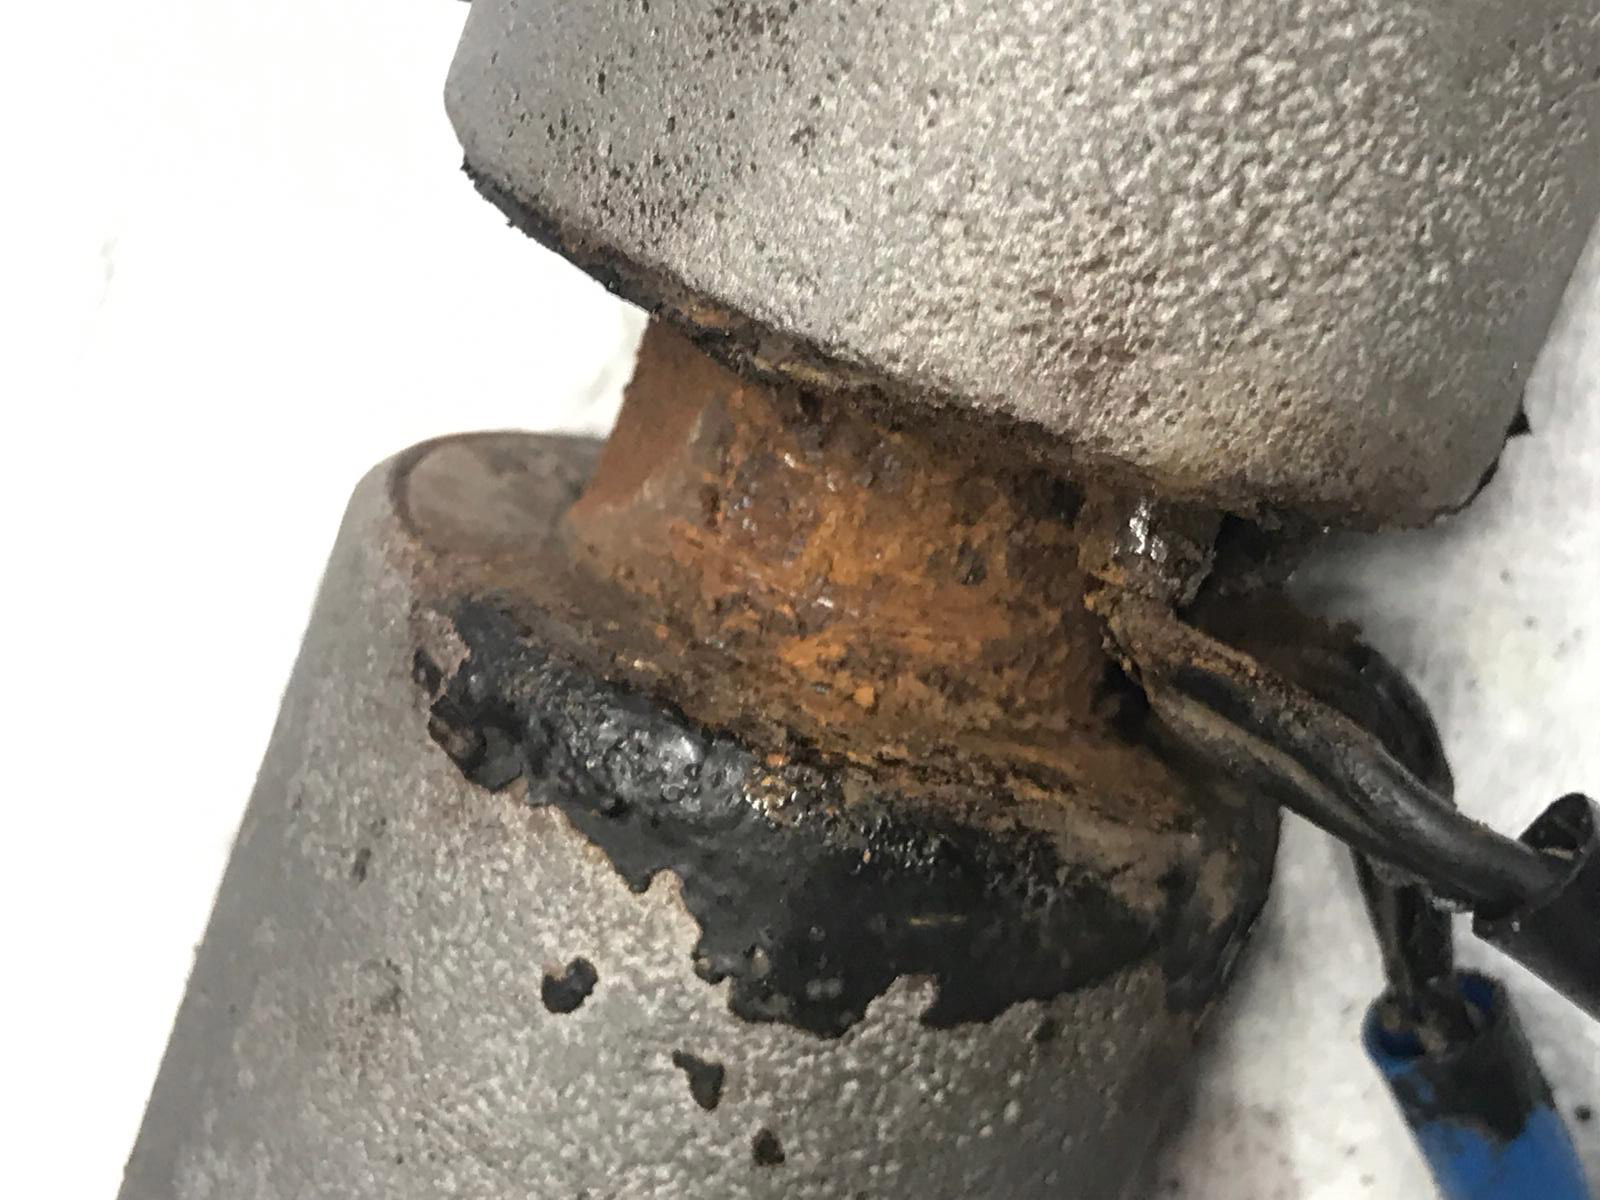
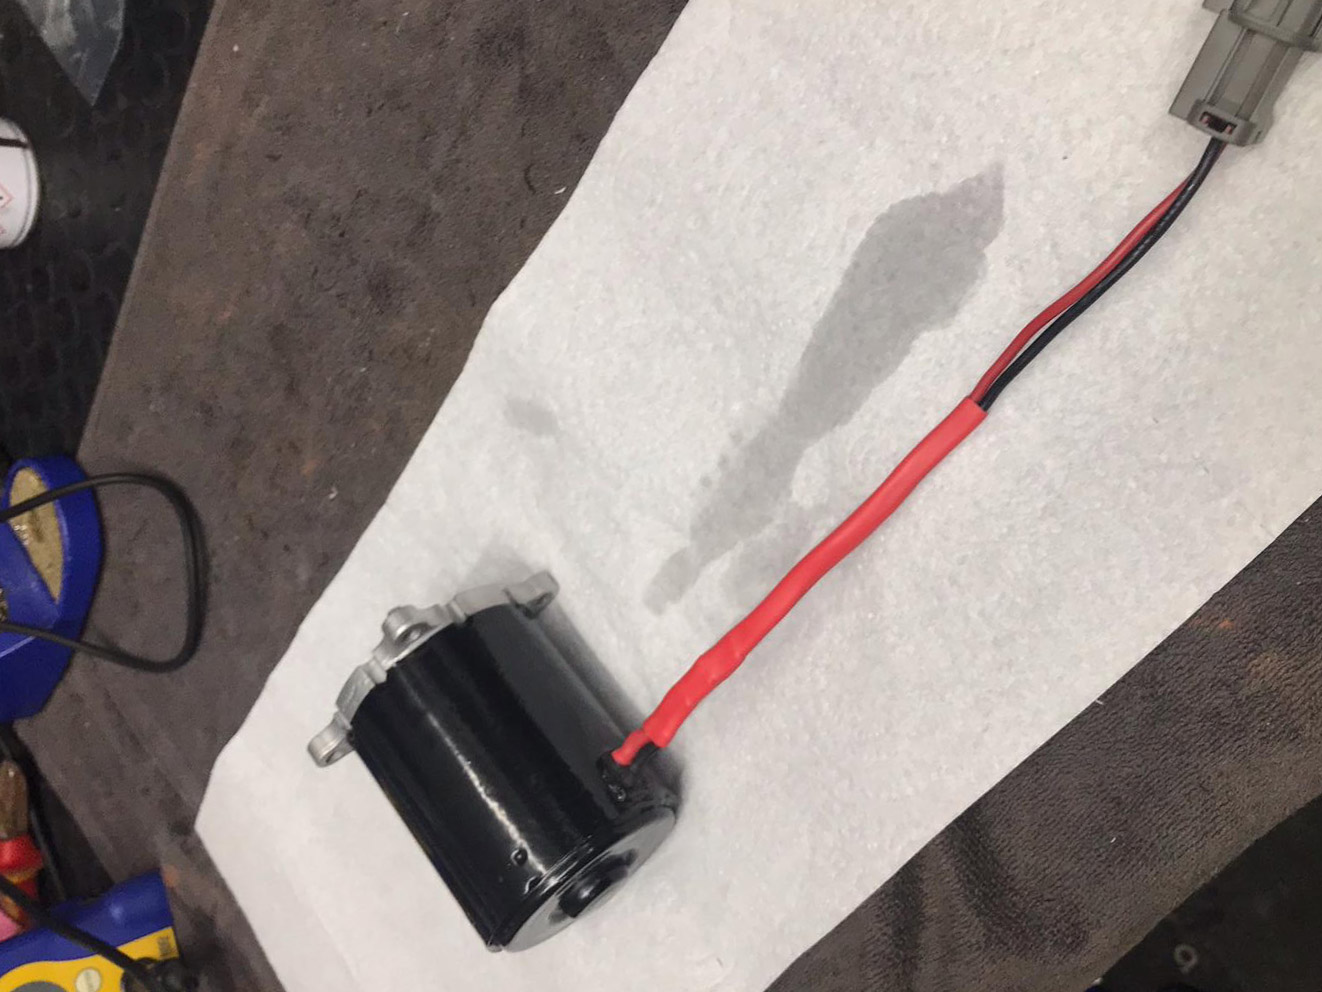
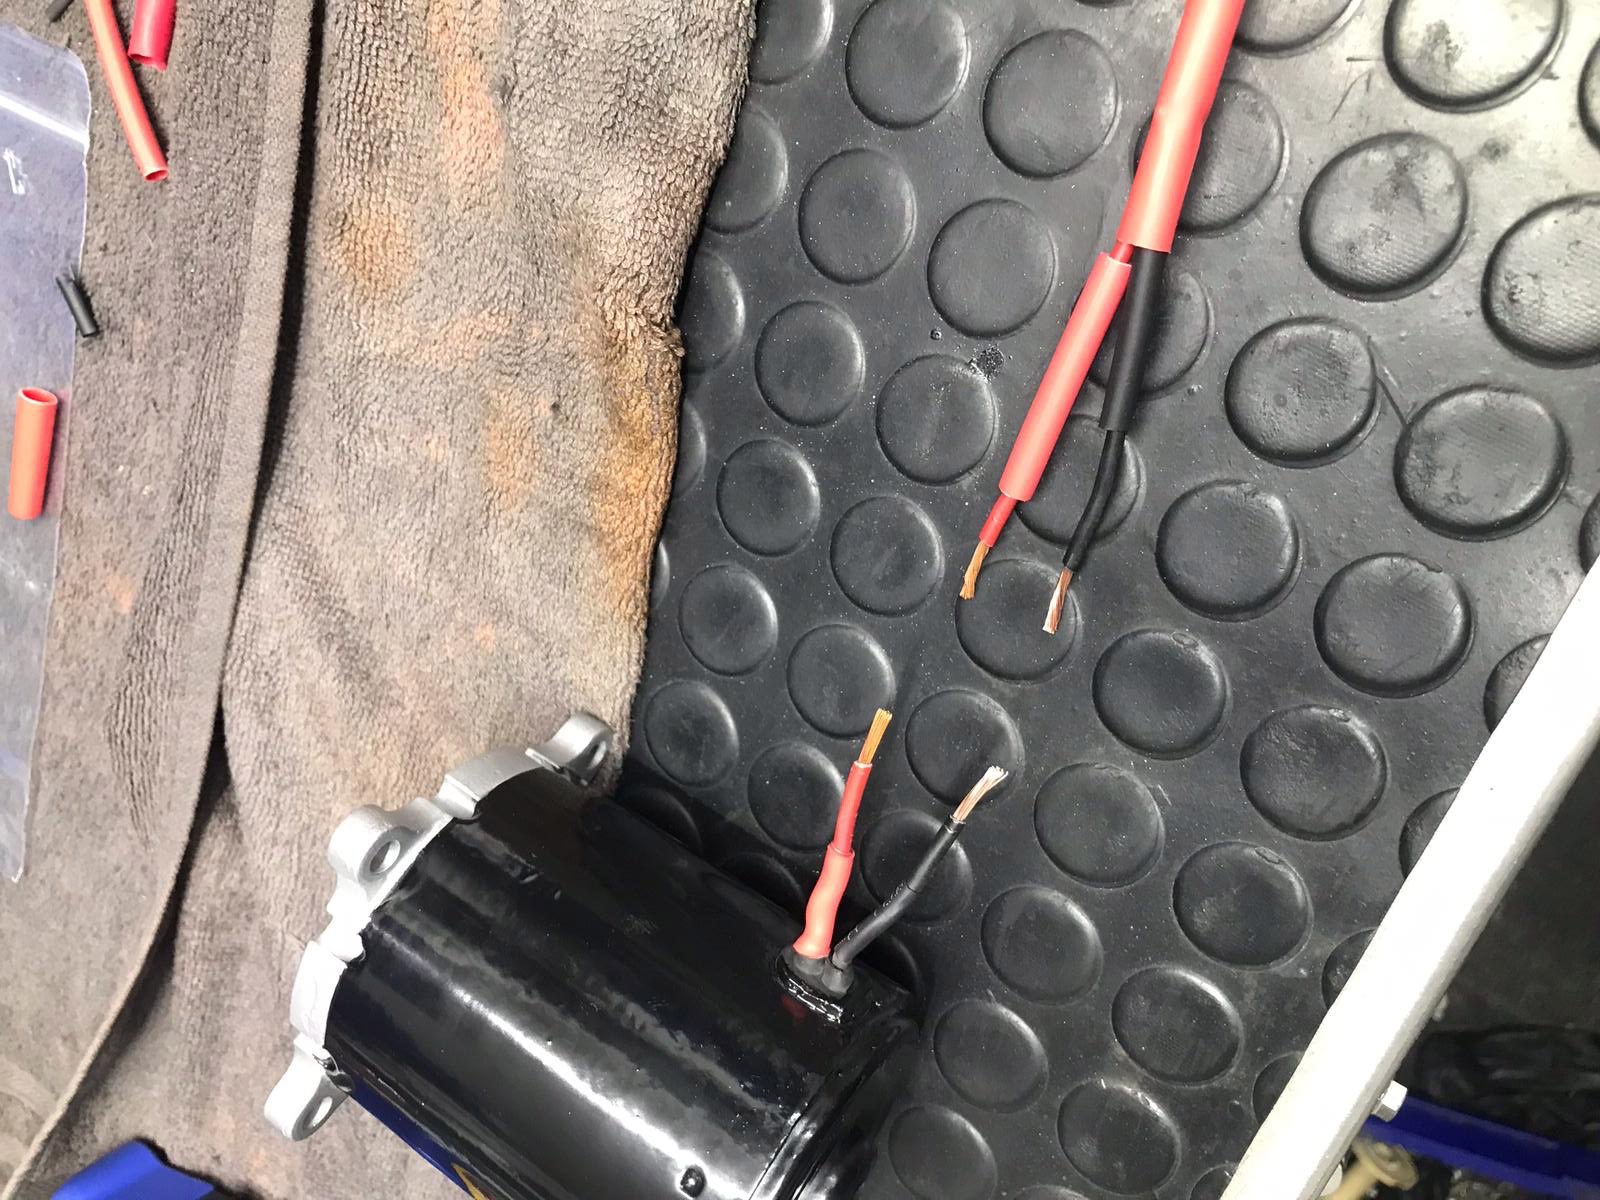
The gallery shows the detail we go to on each and every component, part, pump and fitting on this restoration. The part below is the Attesa 4WD pump
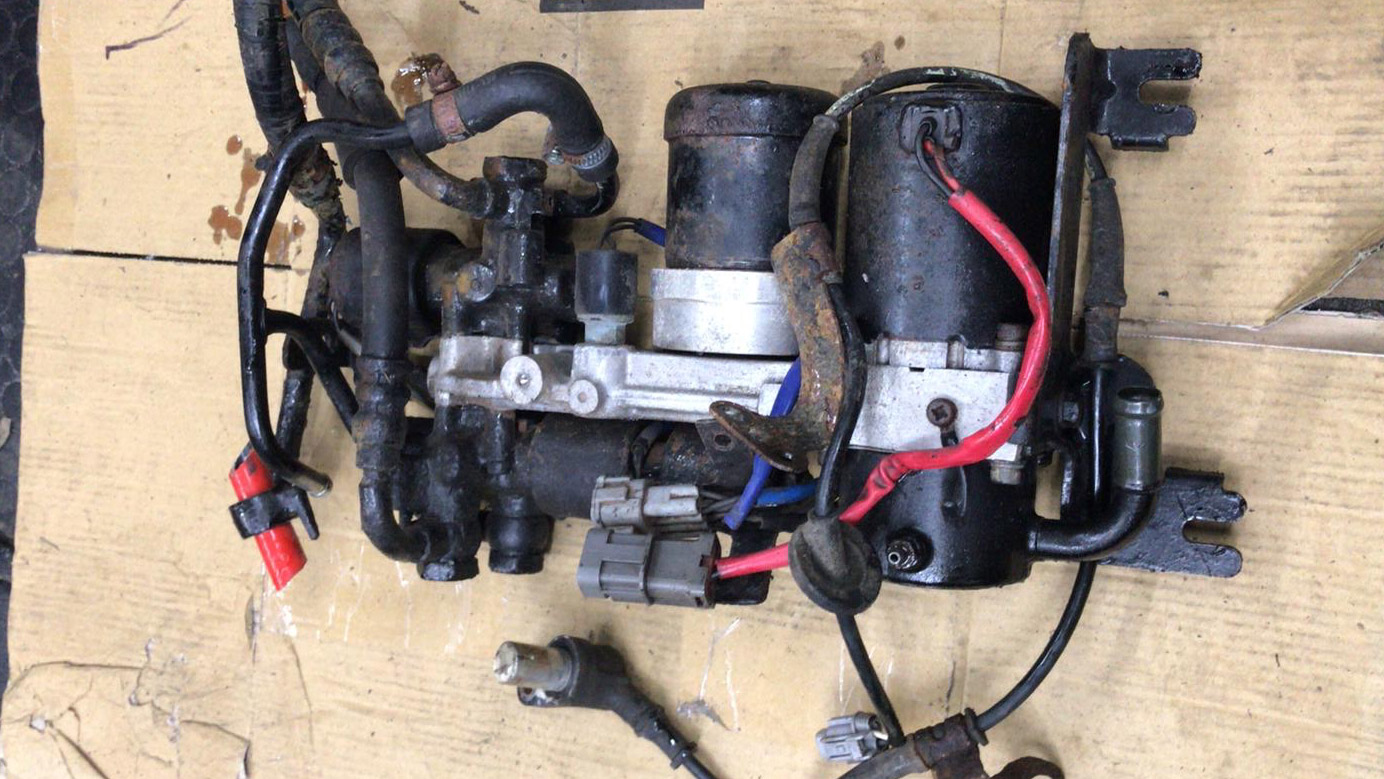
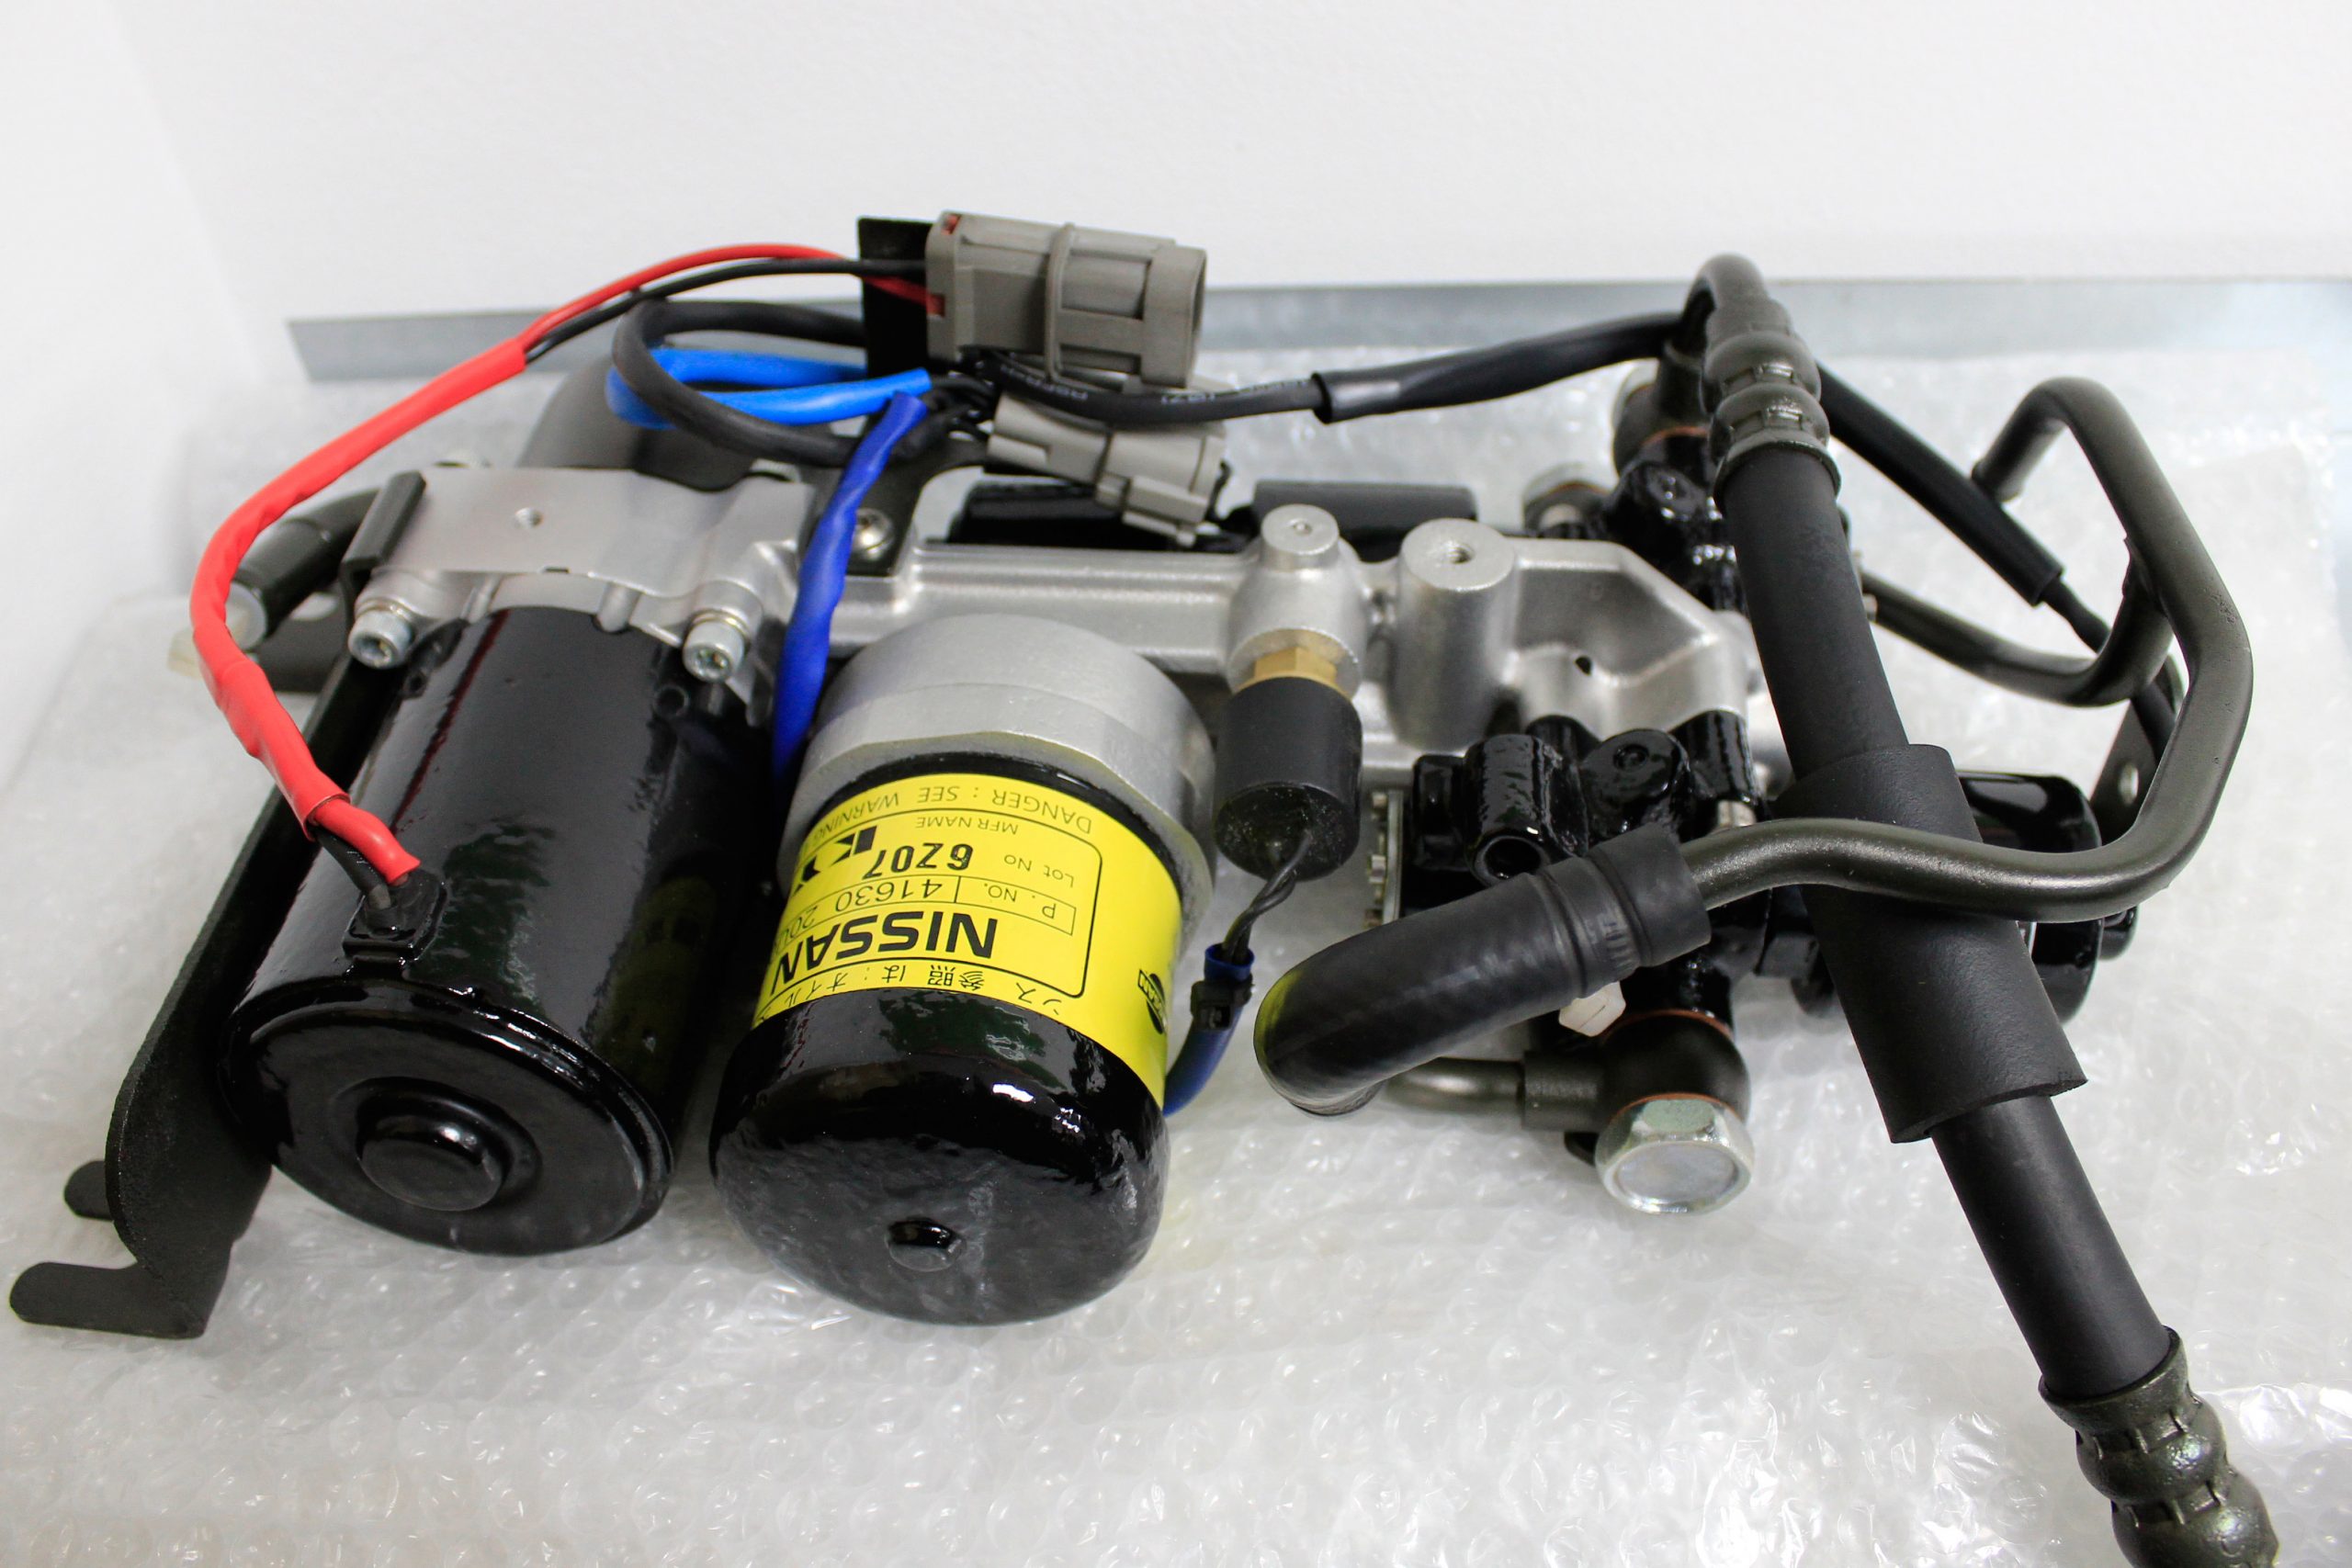
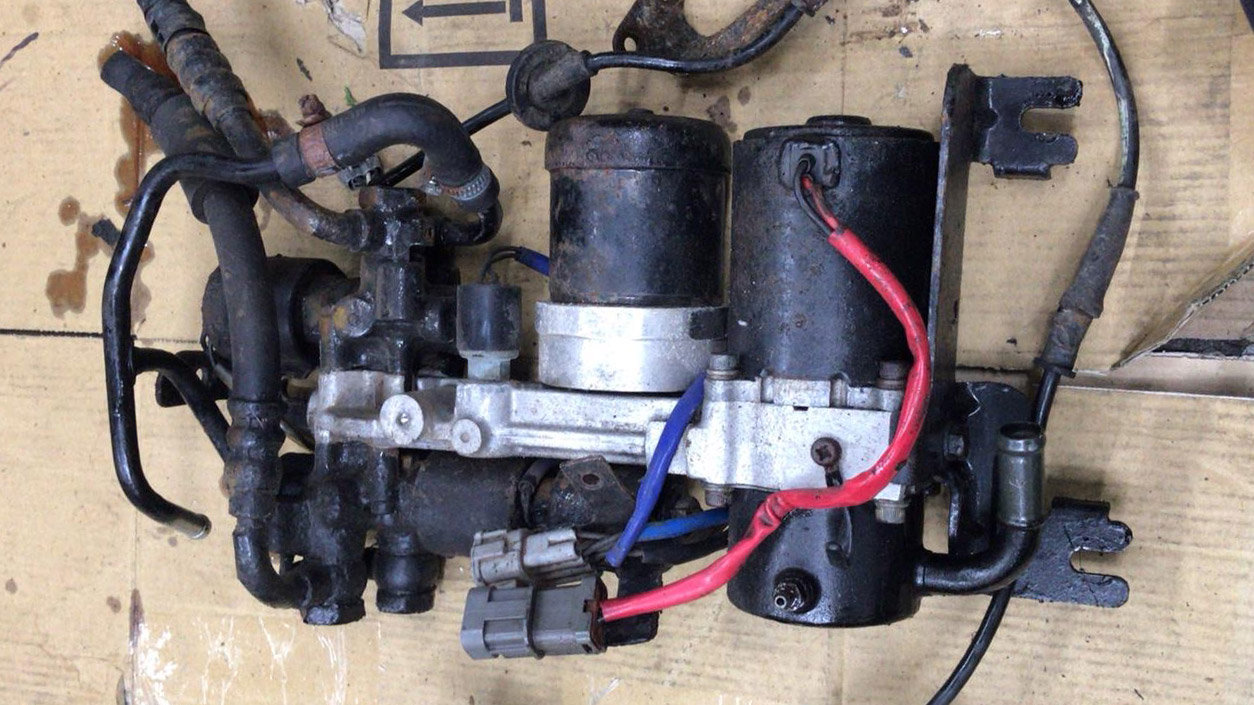
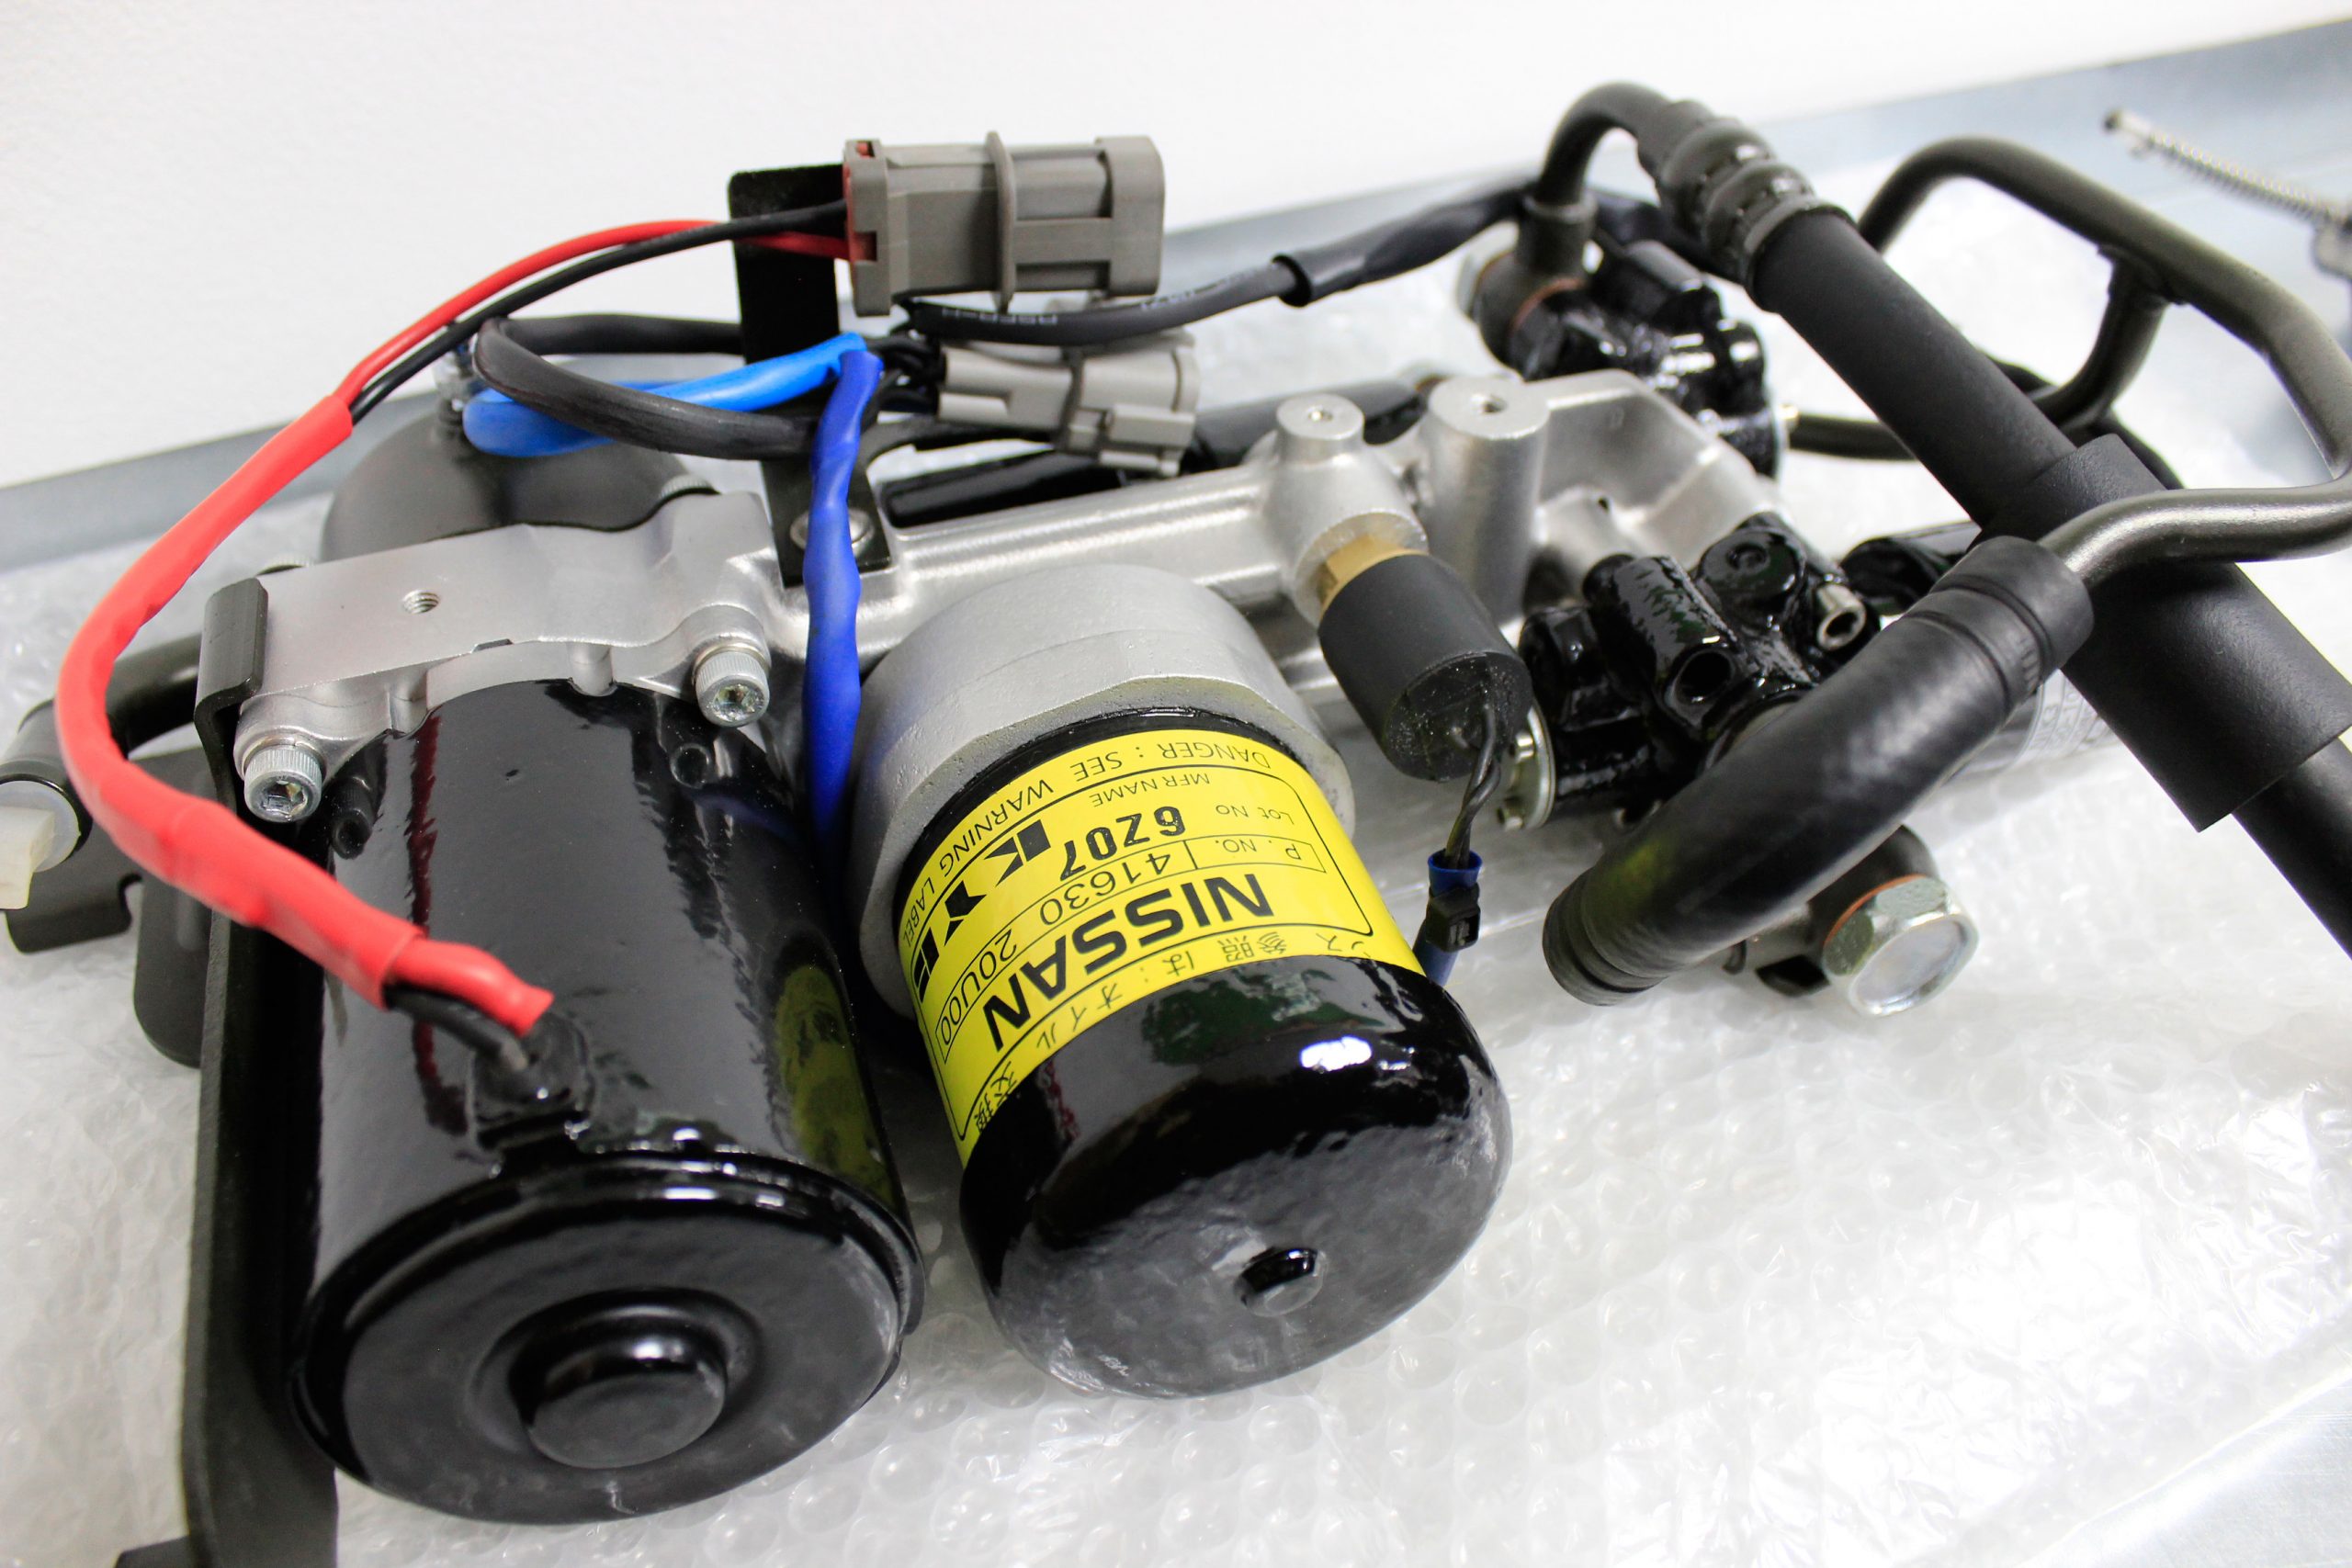
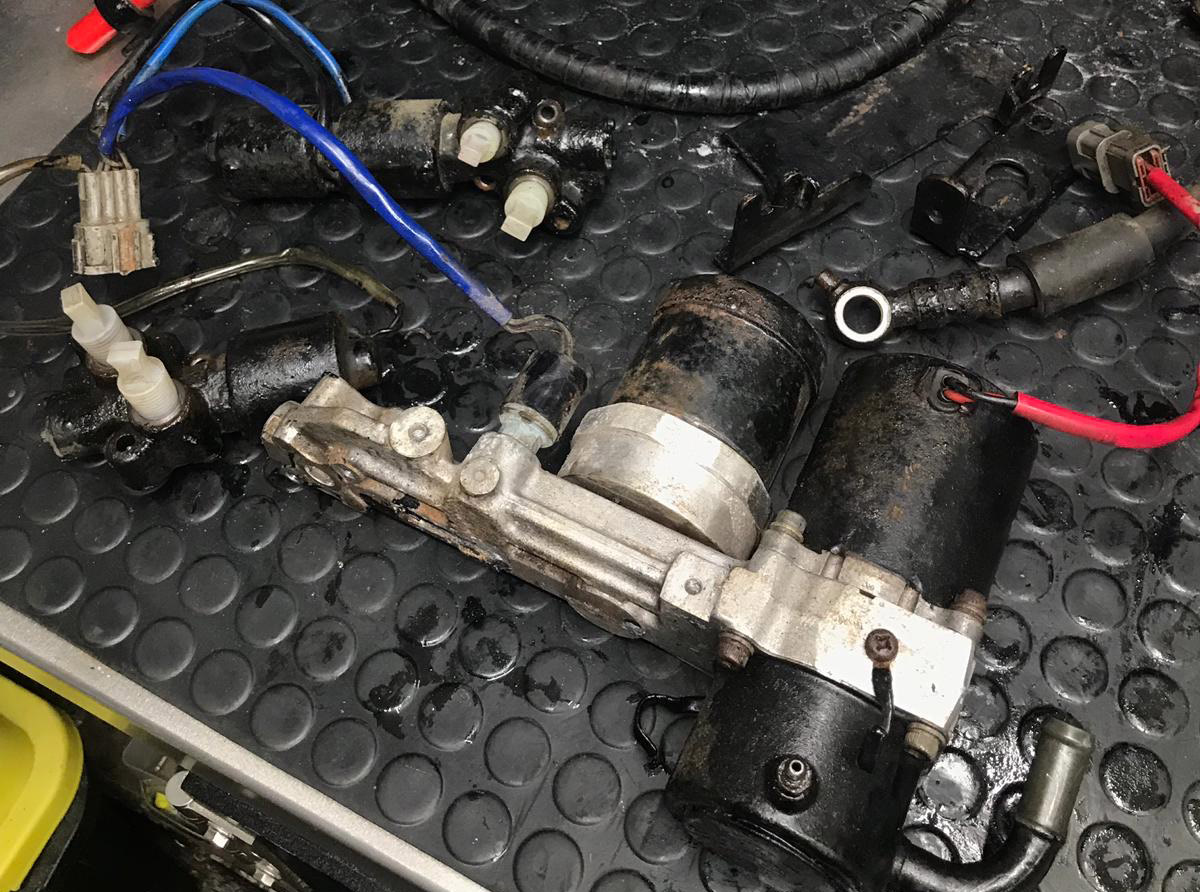
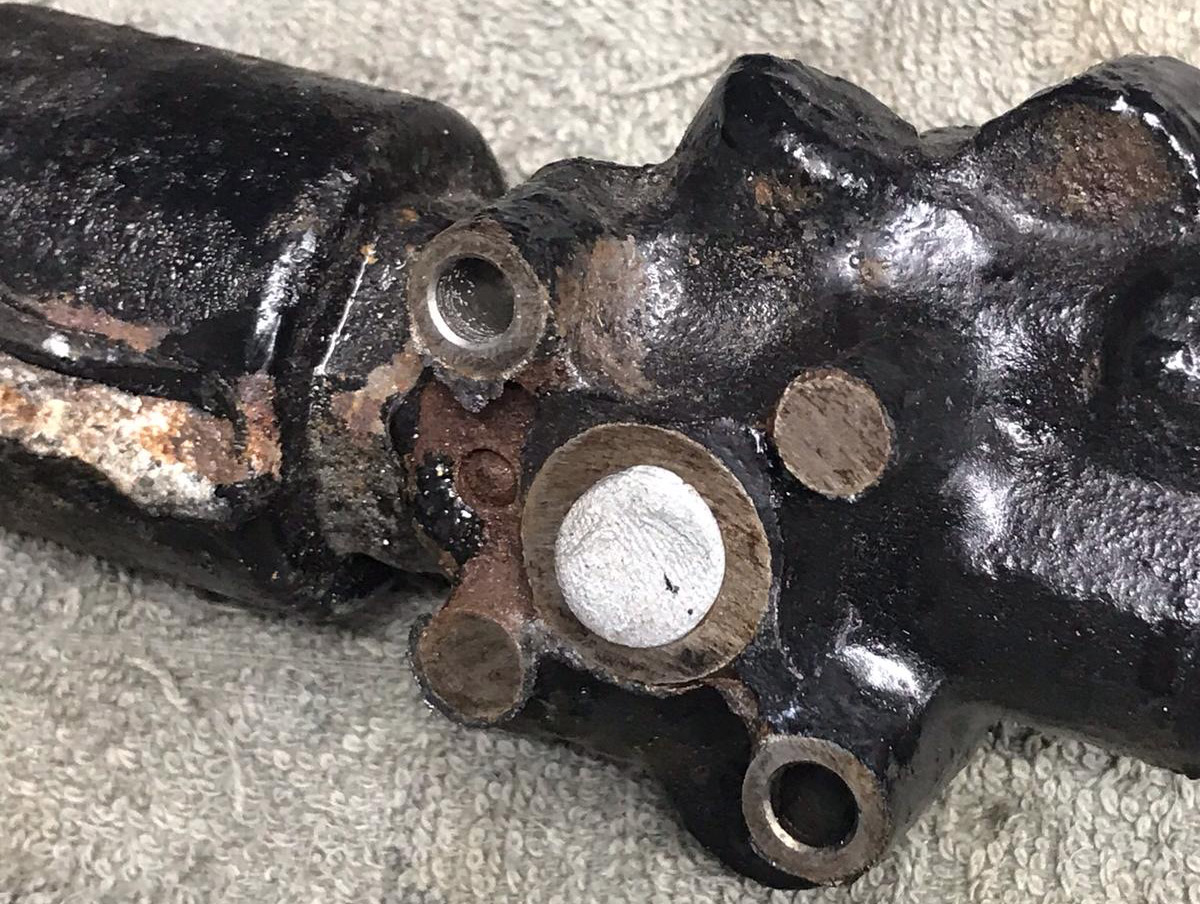
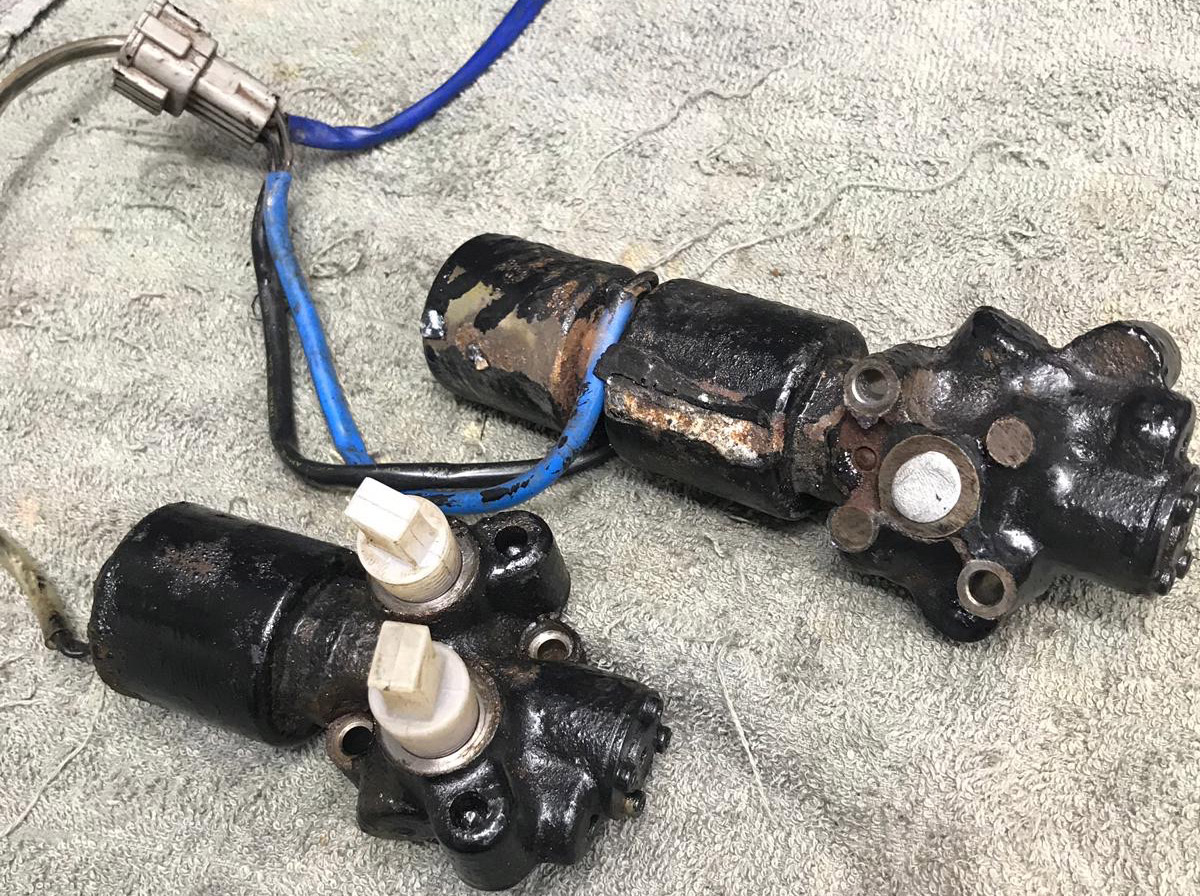

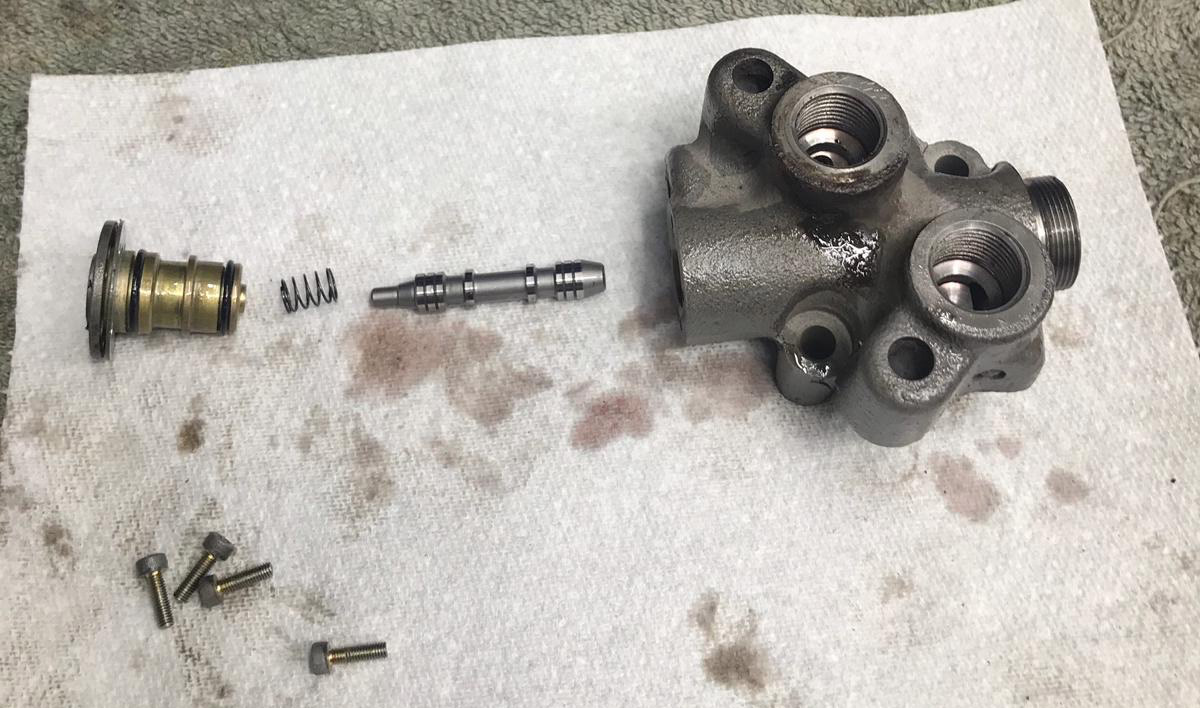

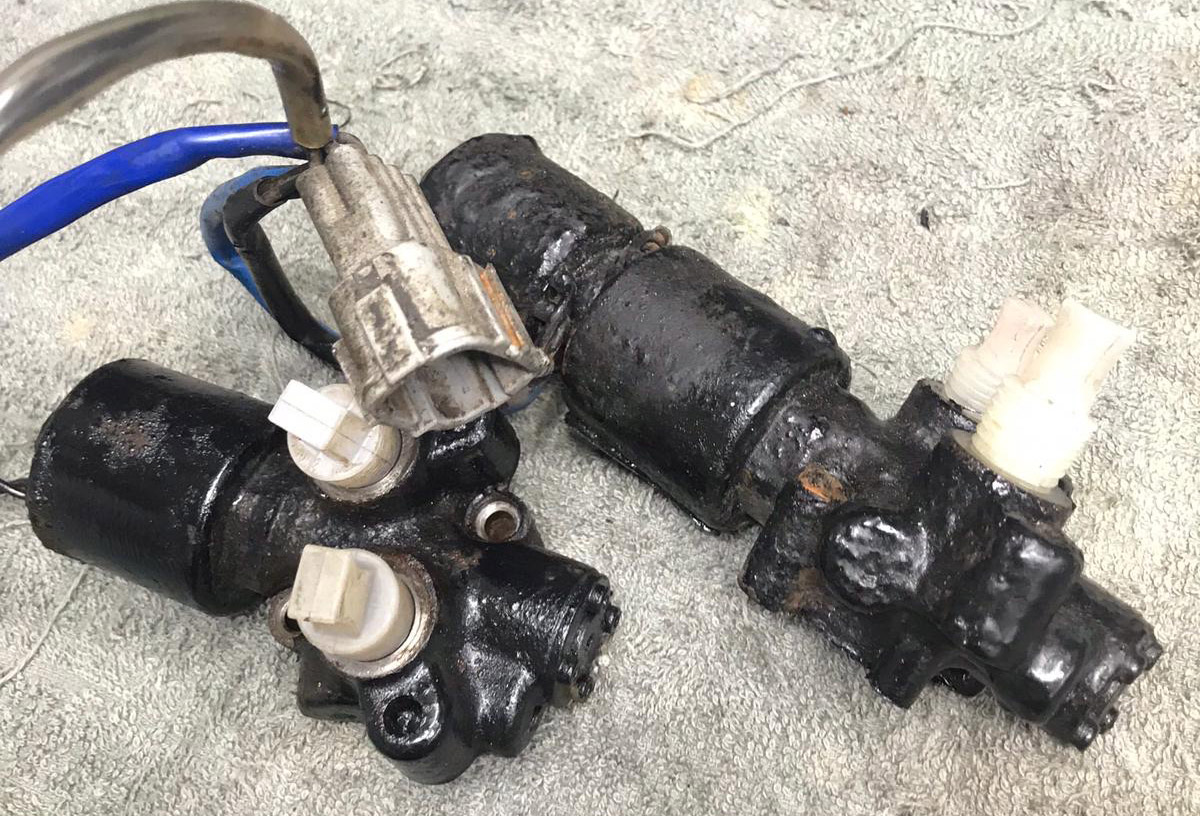
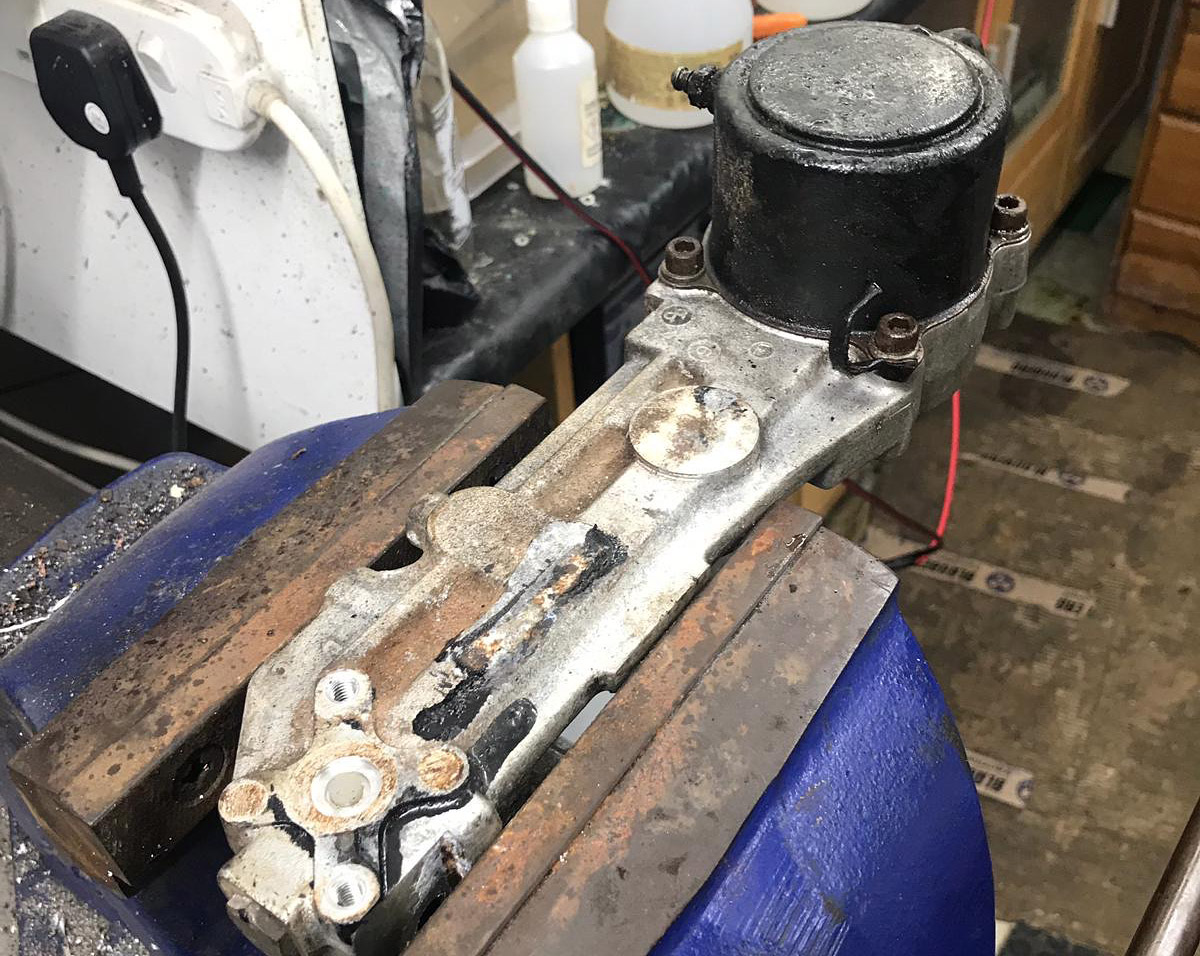

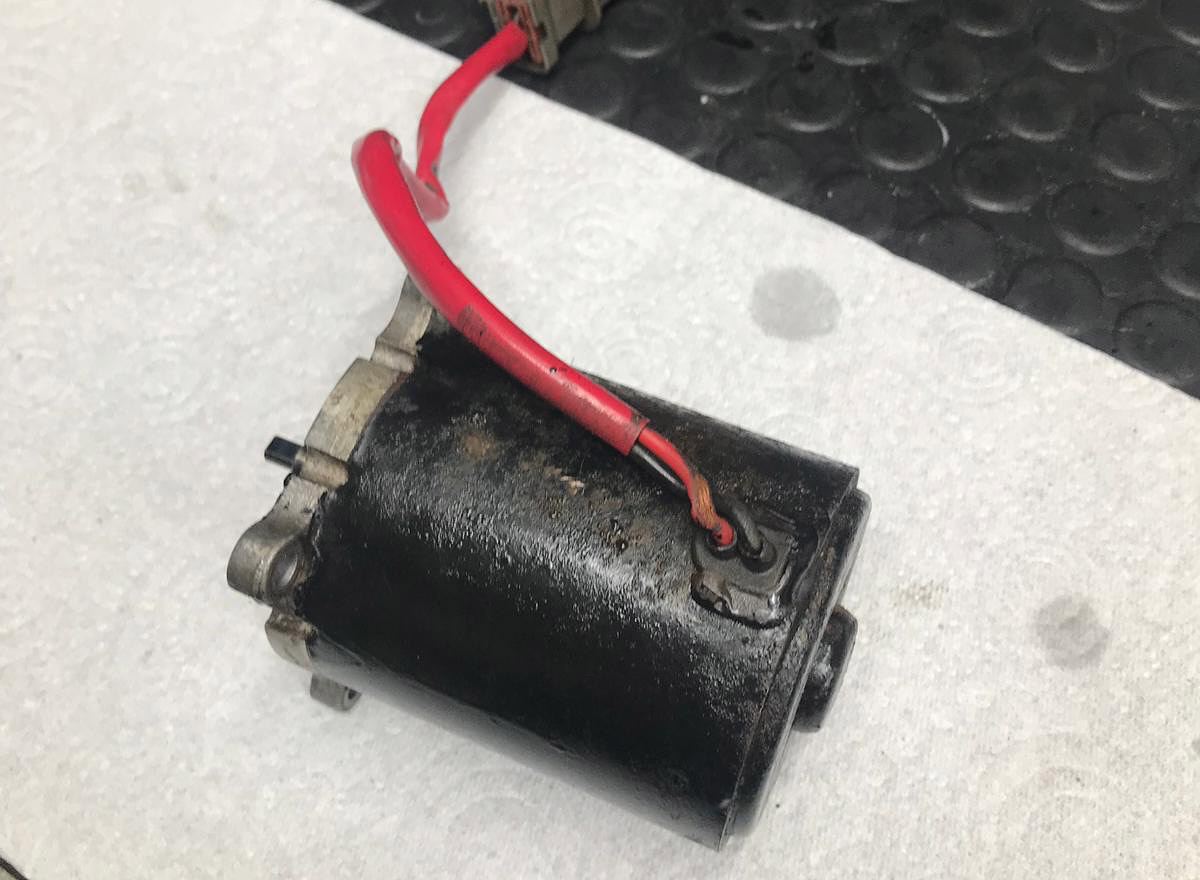


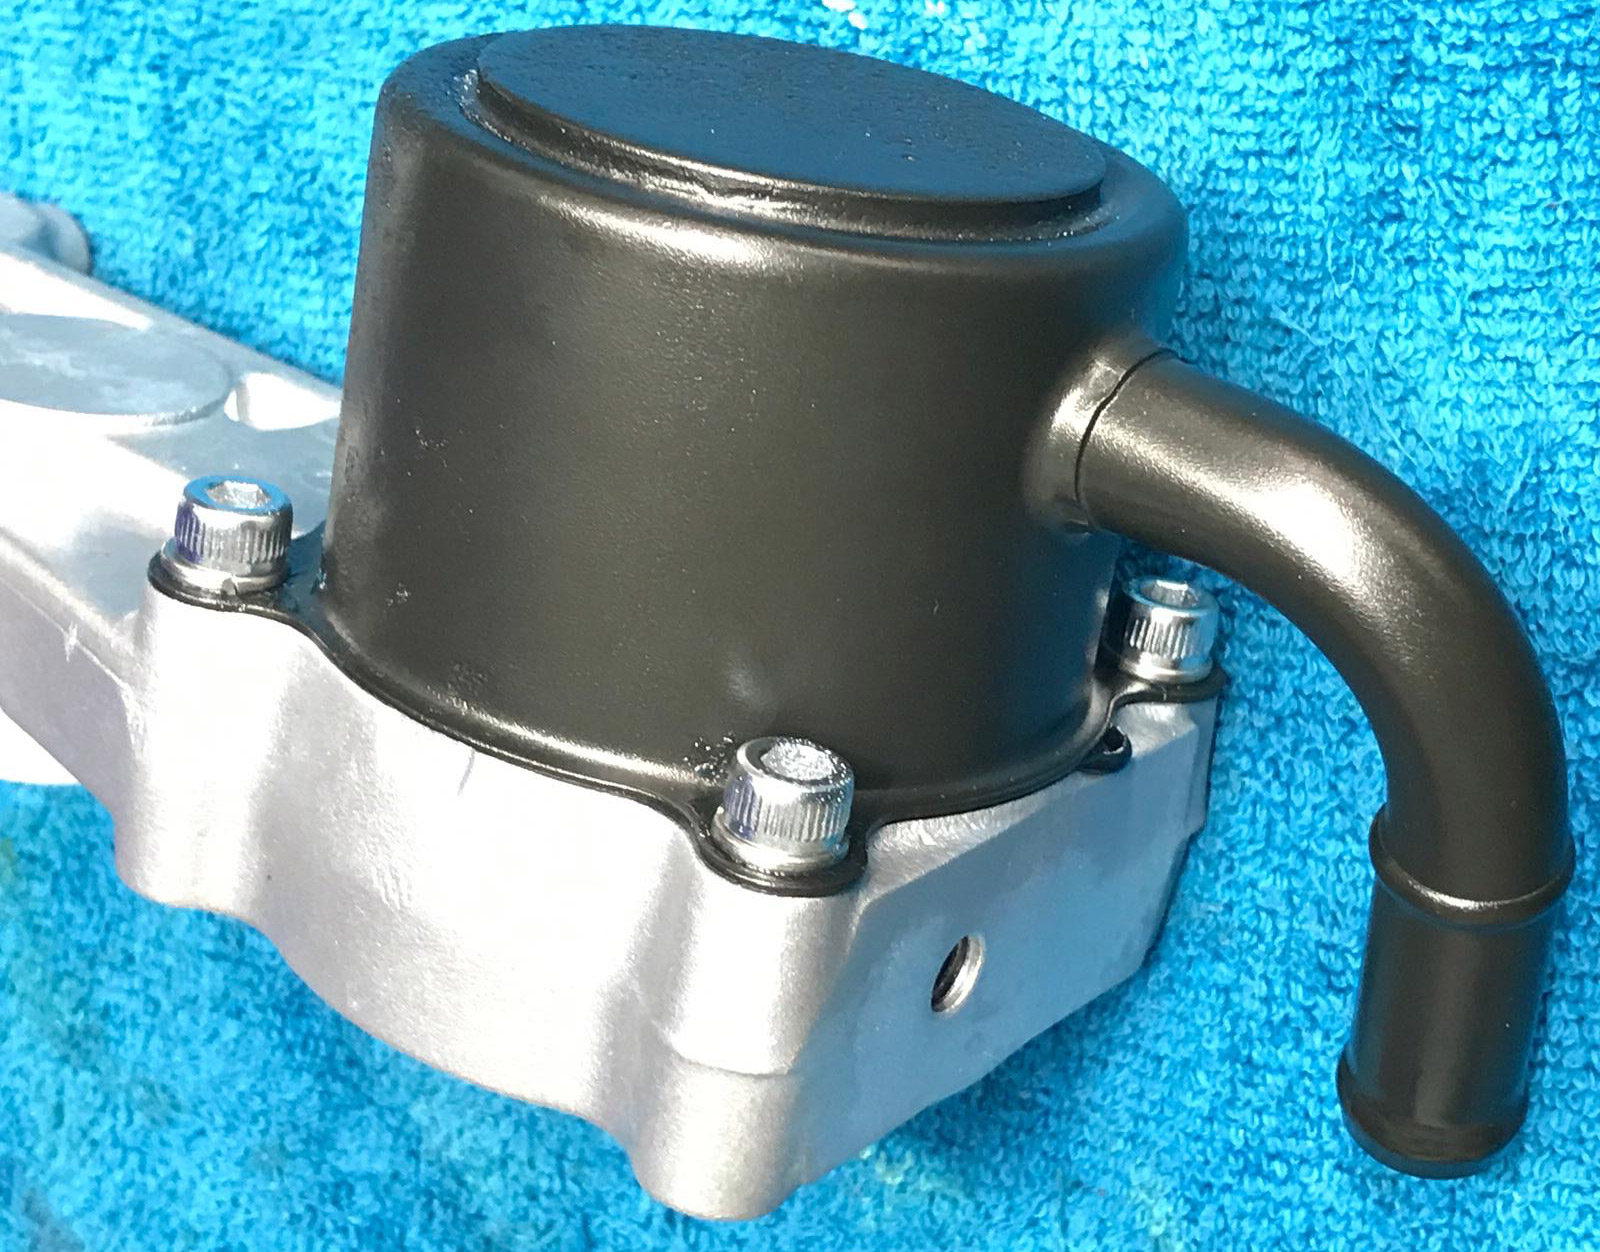
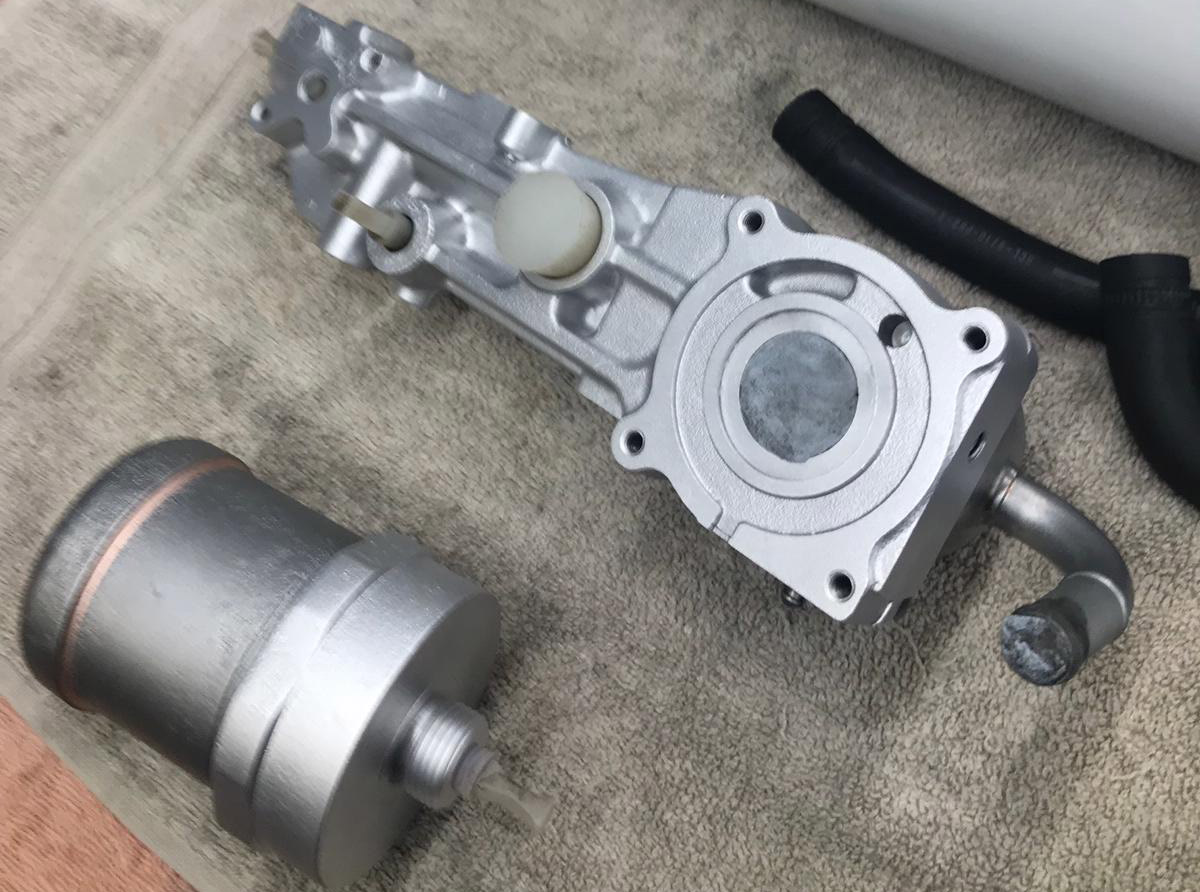
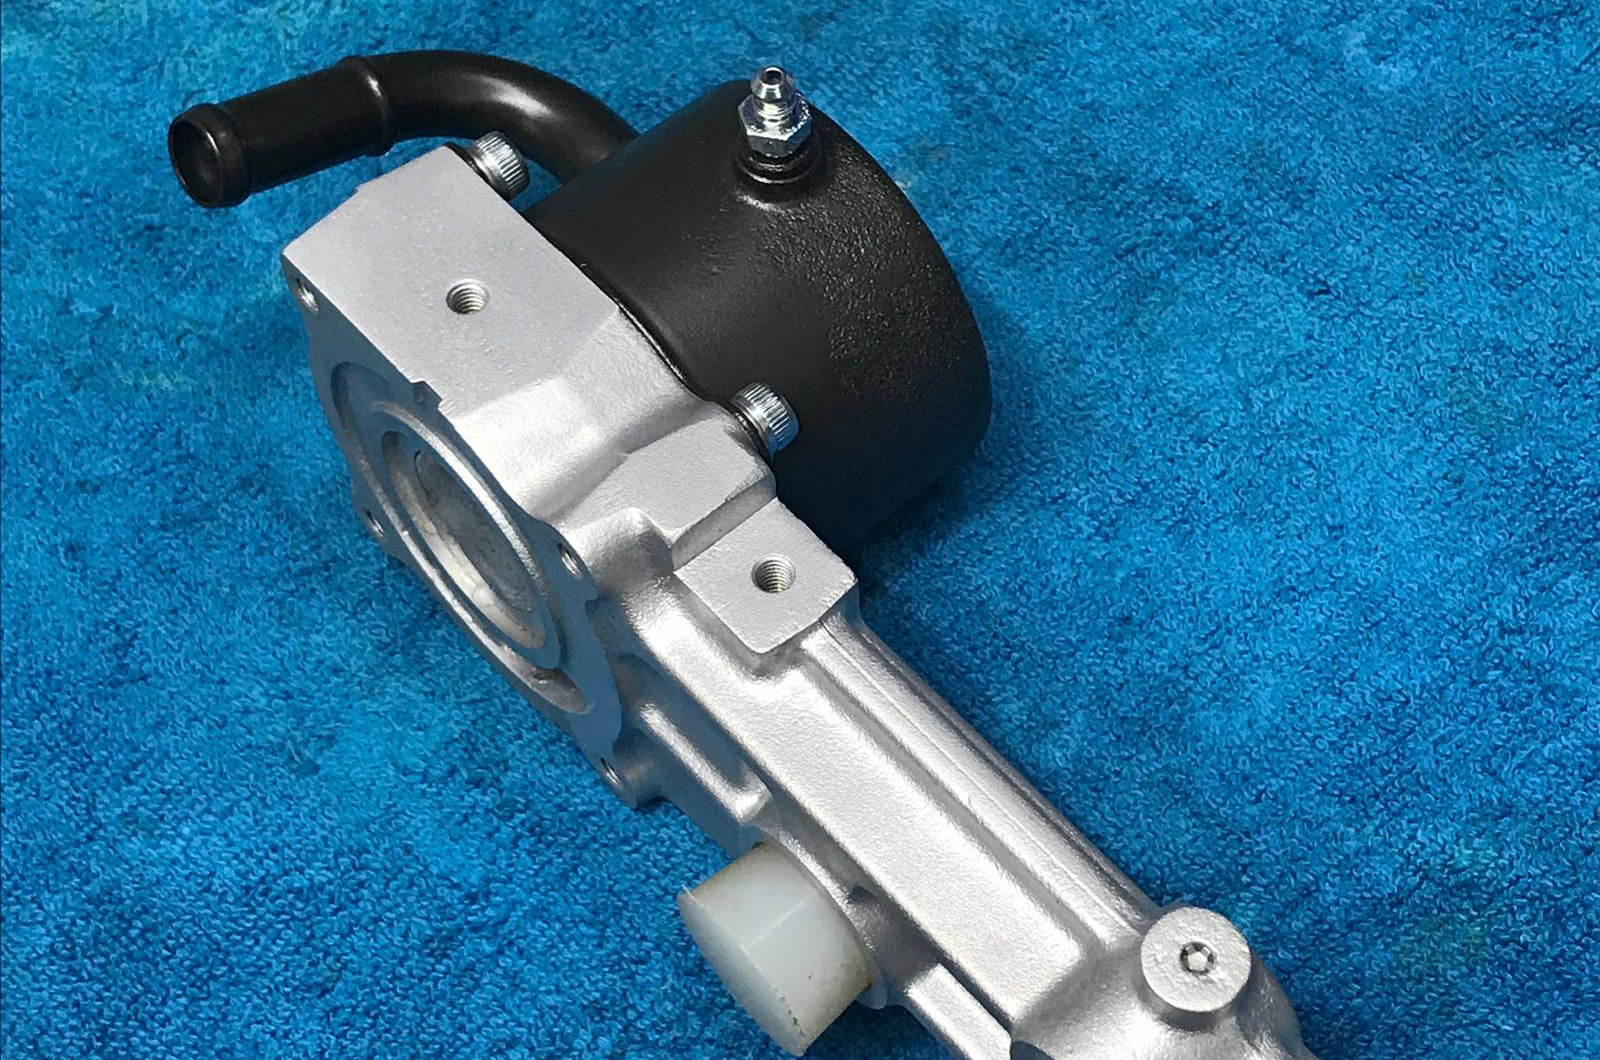

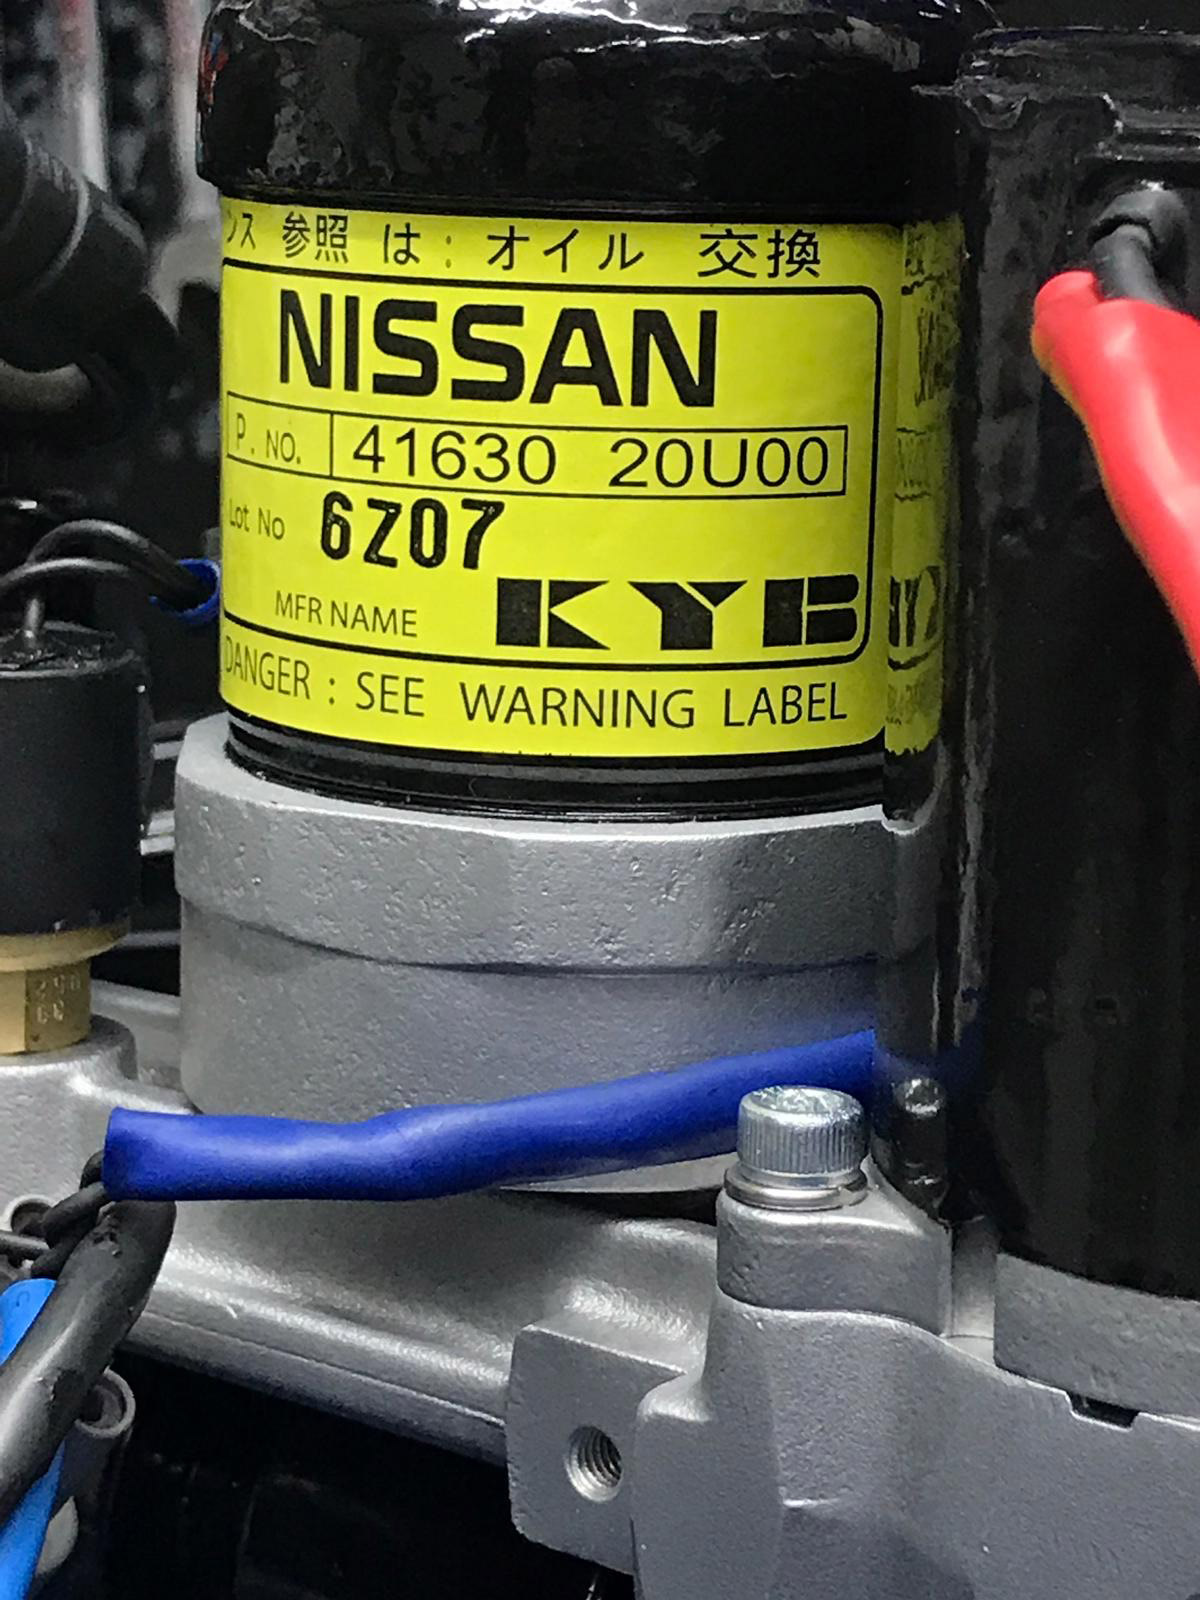
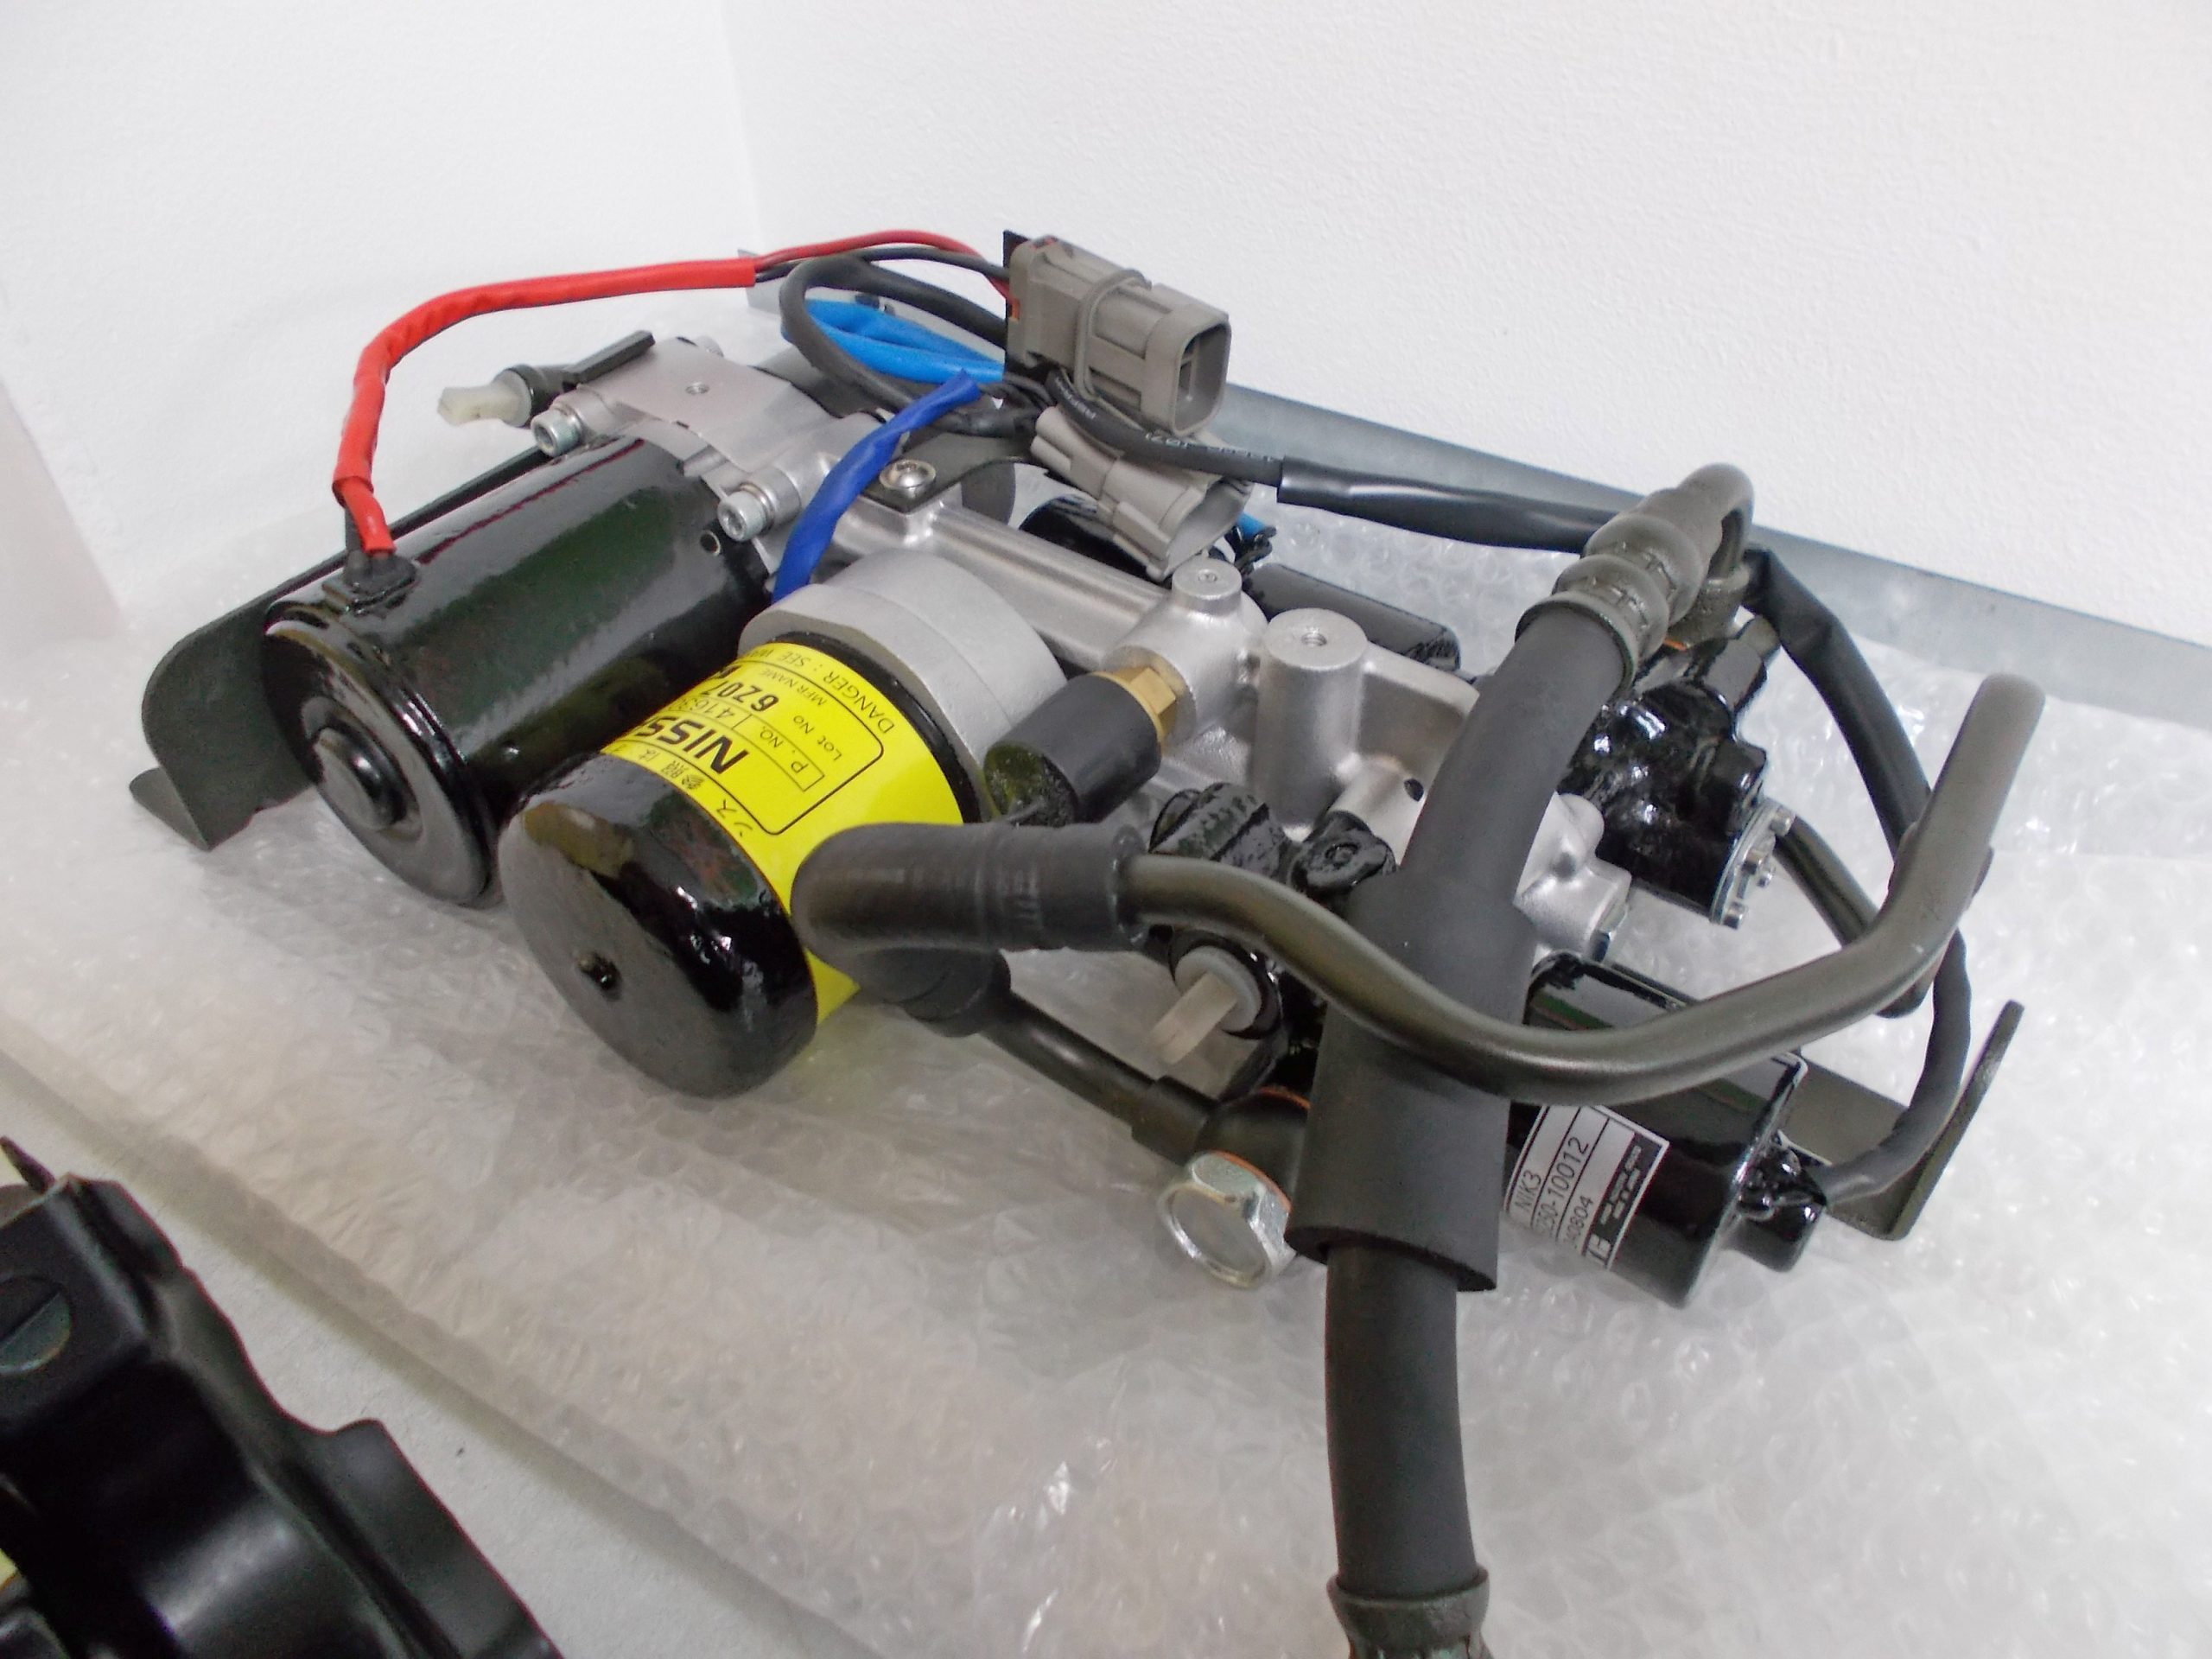

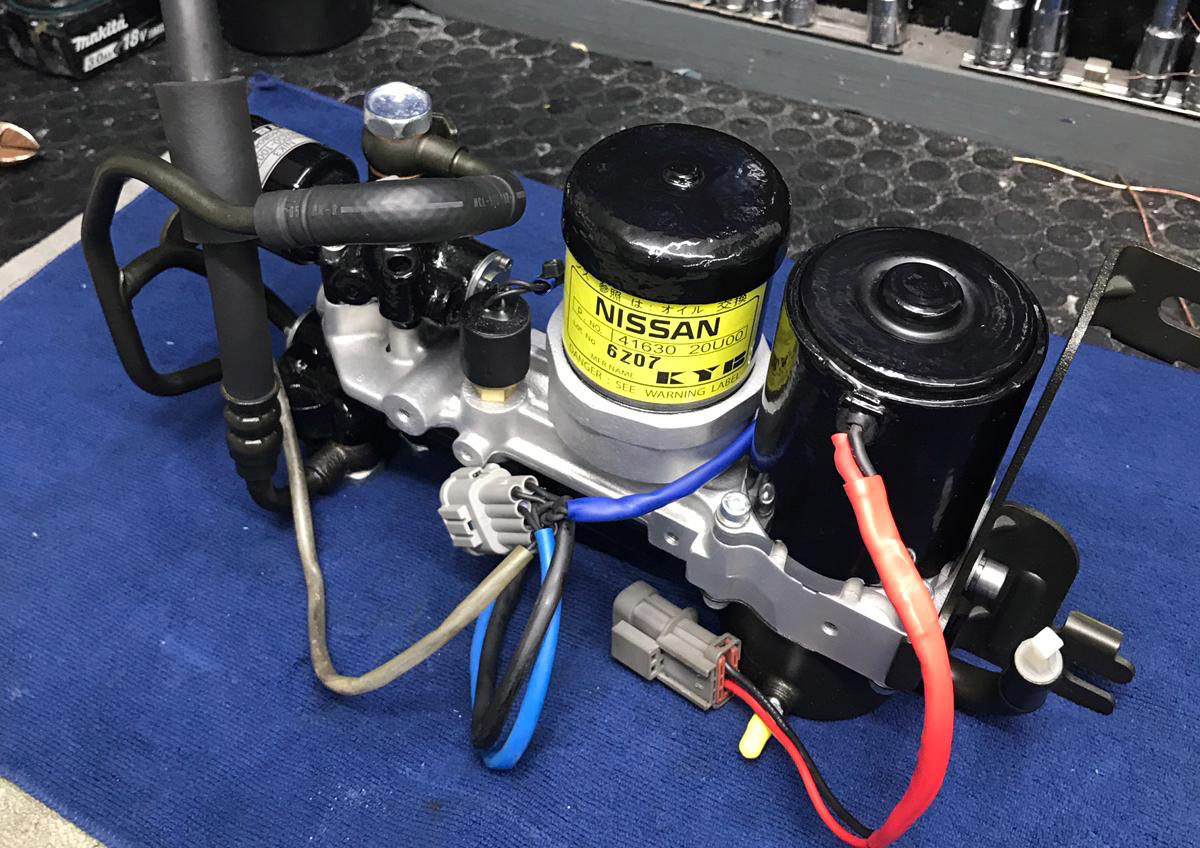
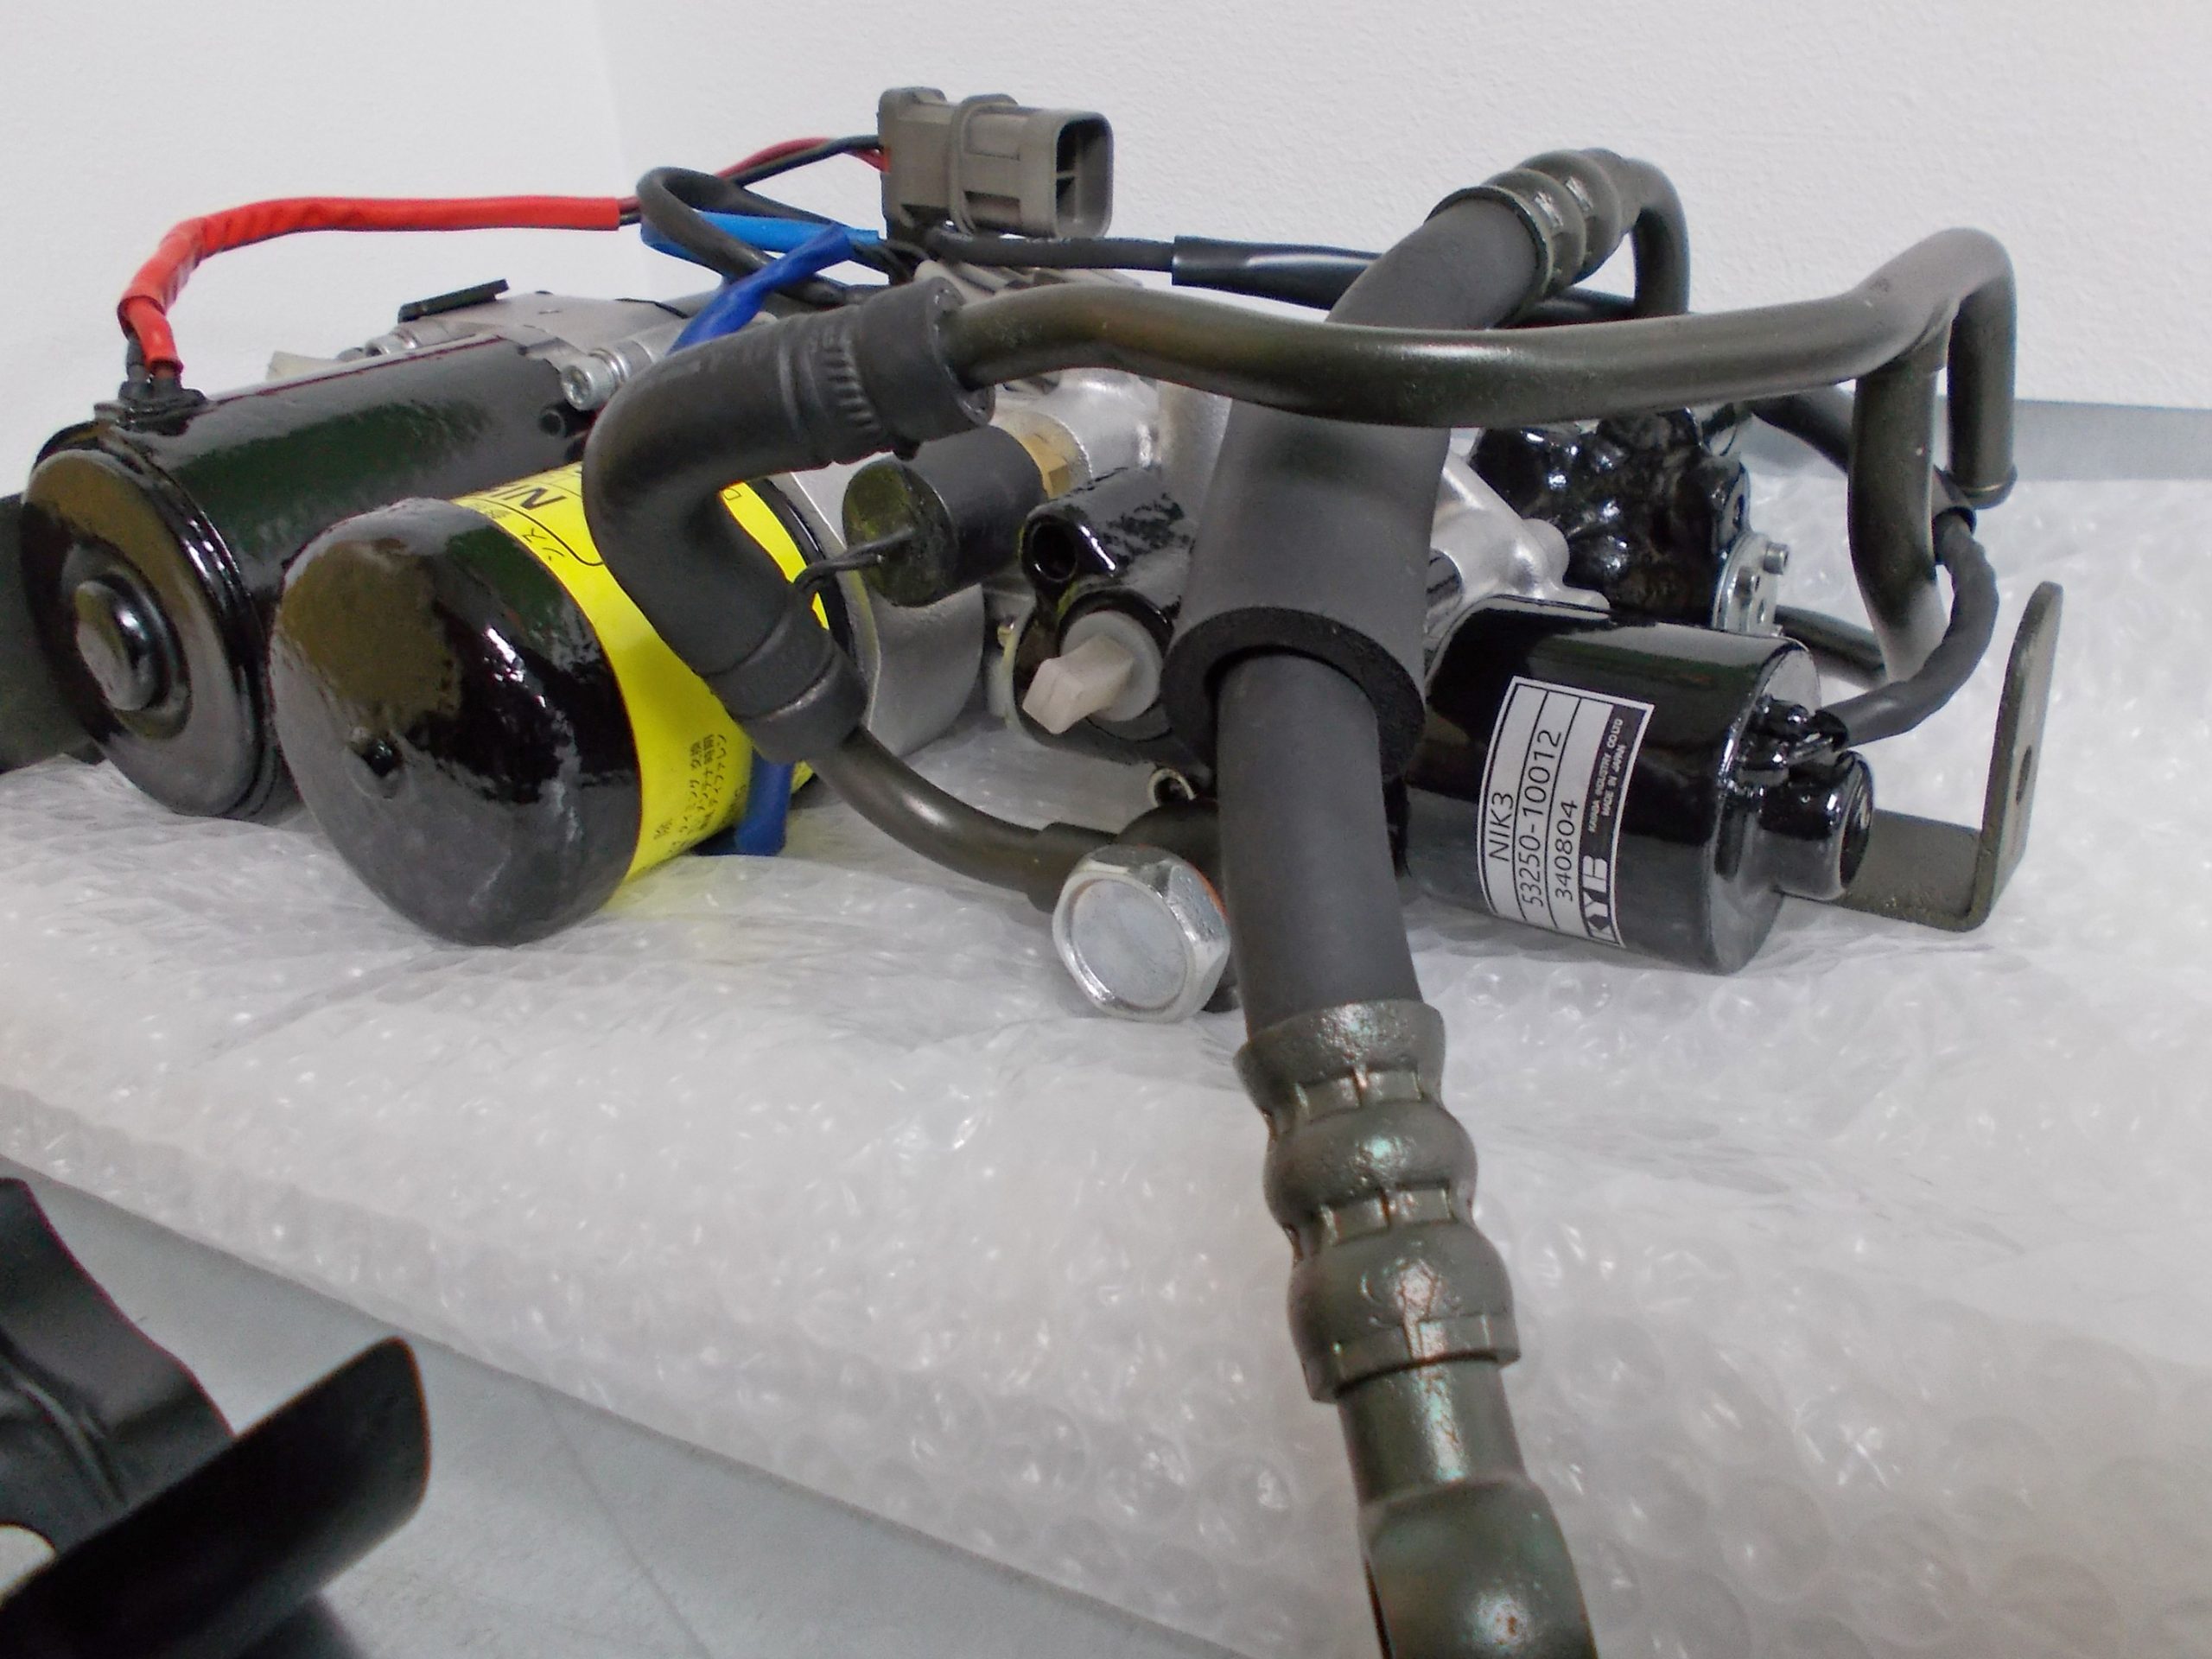
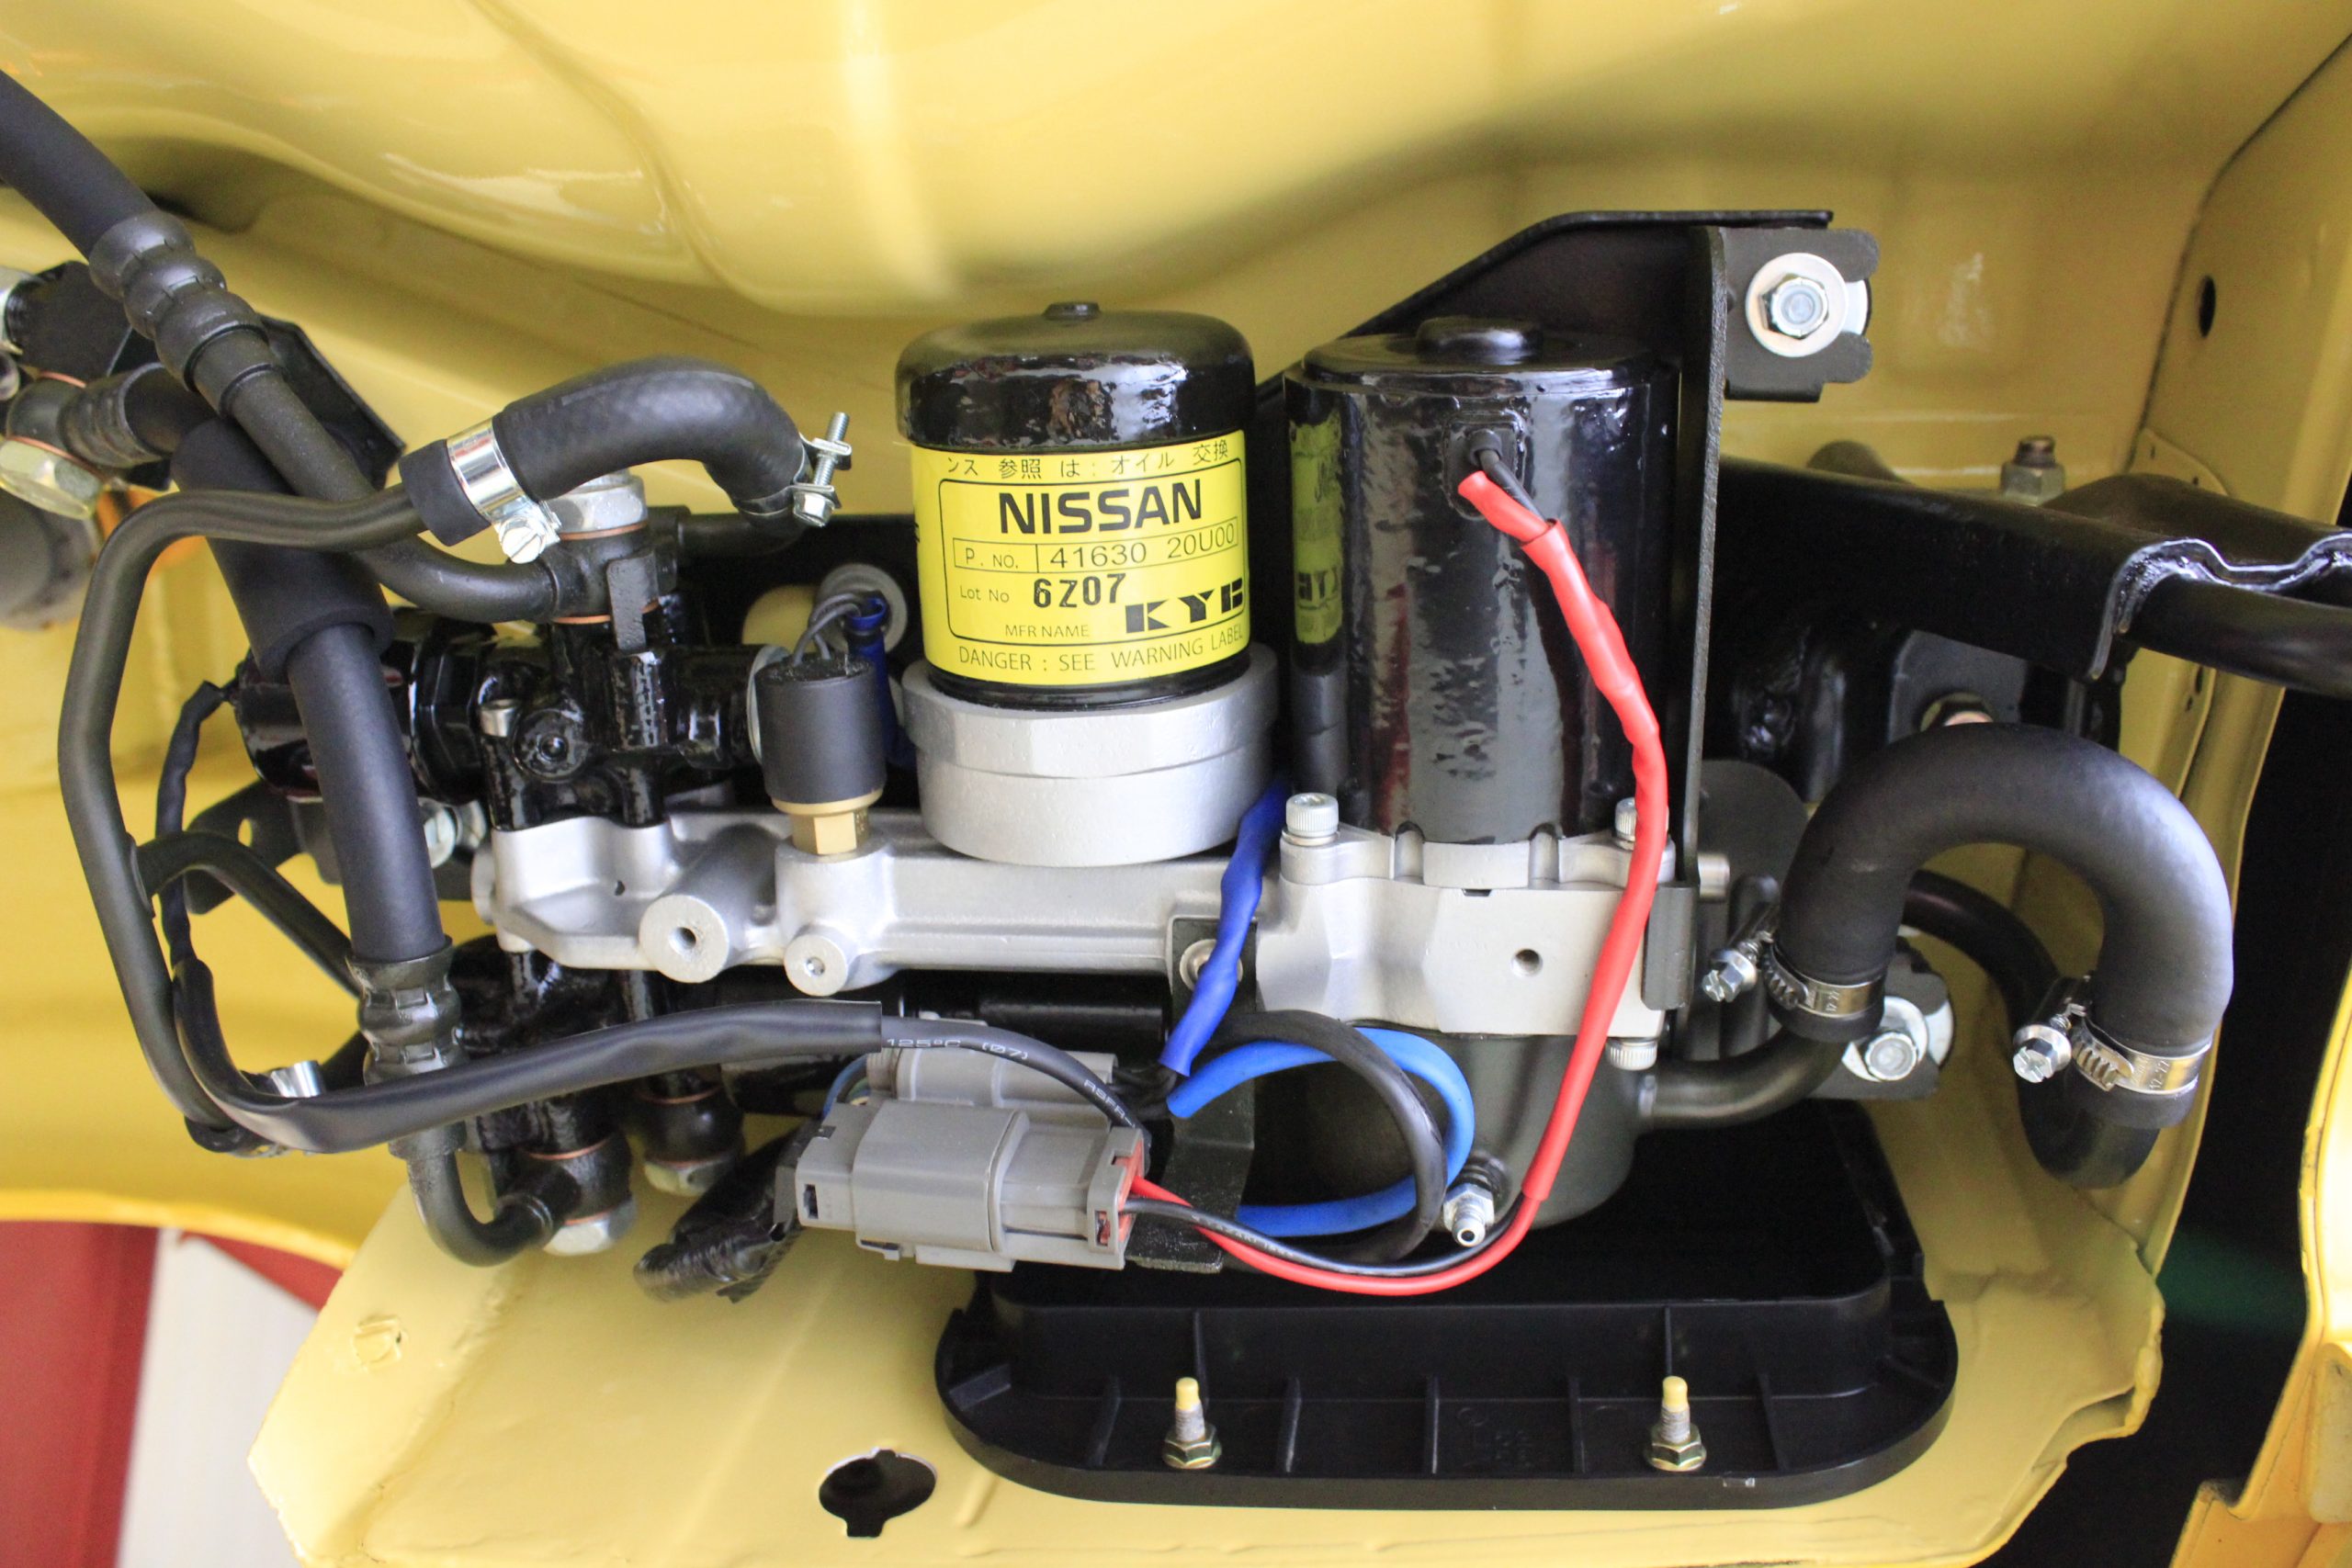
ATTESA (Advanced Total Traction Engineering System for All-Terrain) is a four-wheel-drive system used in the R34 GTR produced by the Japanese automaker Nissan, including some other models.
The ‘mechanical’ ATTESA system was developed for transverse layout vehicles and introduced with the RNU12 Bluebird in the Japanese market, entering production in September 1987. The system ran right throughout the U12 series (RNU12/HNU12) and was fitted to numerous U12 models with the differing engine and transmission combinations. An almost identical system is fitted to the RNN14 GTi-R Pulsar and the HNU13 Bluebird and the HNP10 Primera, finding usage in numerous other Nissan models.
Quite similar to offerings from other manufacturers, the drive passes from the gearbox to a centre viscous limited-slip differential, into a transfer case splitting drive to a co-located front differential, and a tail shaft connected to the vehicle’s rear differential.
From 2000 model year onwards, the system received an update where, as with a typical FWD car, the transaxle now contained a differential that drives the front wheels. However, an extra shaft from this differential also drives a bevel gear housed in the transfer case that permanently turns a driveshaft for the rear wheels (i.e. there is no longer a “centre” differential). Housed in the rear differential is a viscous coupling that in normal conditions is disengaged. This means that for general driving, the system is FWD only. When the computer detects slippage of the front wheels, the viscous coupling engages and transfers up to 50% of the torque to the rear wheels. This system is superior in some aspects since the standard operation is FWD there is less power lost due to friction. However, it is no longer a full-time 4WD system, and since the coupling is in the rear differential, the driveshaft itself is constantly driven even though it’s not connected to anything, which saps some power and efficiency (the analogue being the front driveshaft of a part-time 4×4 truck
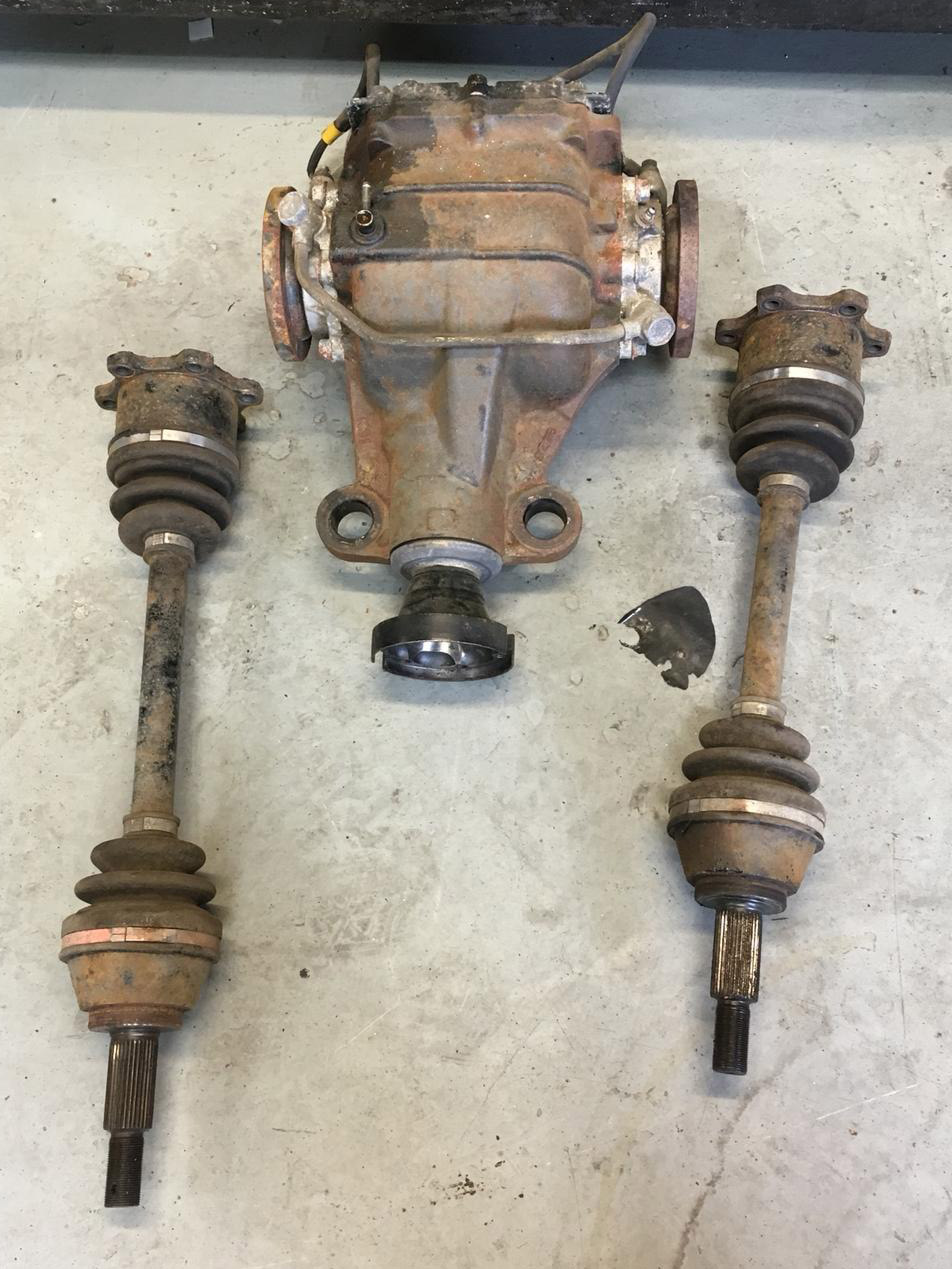
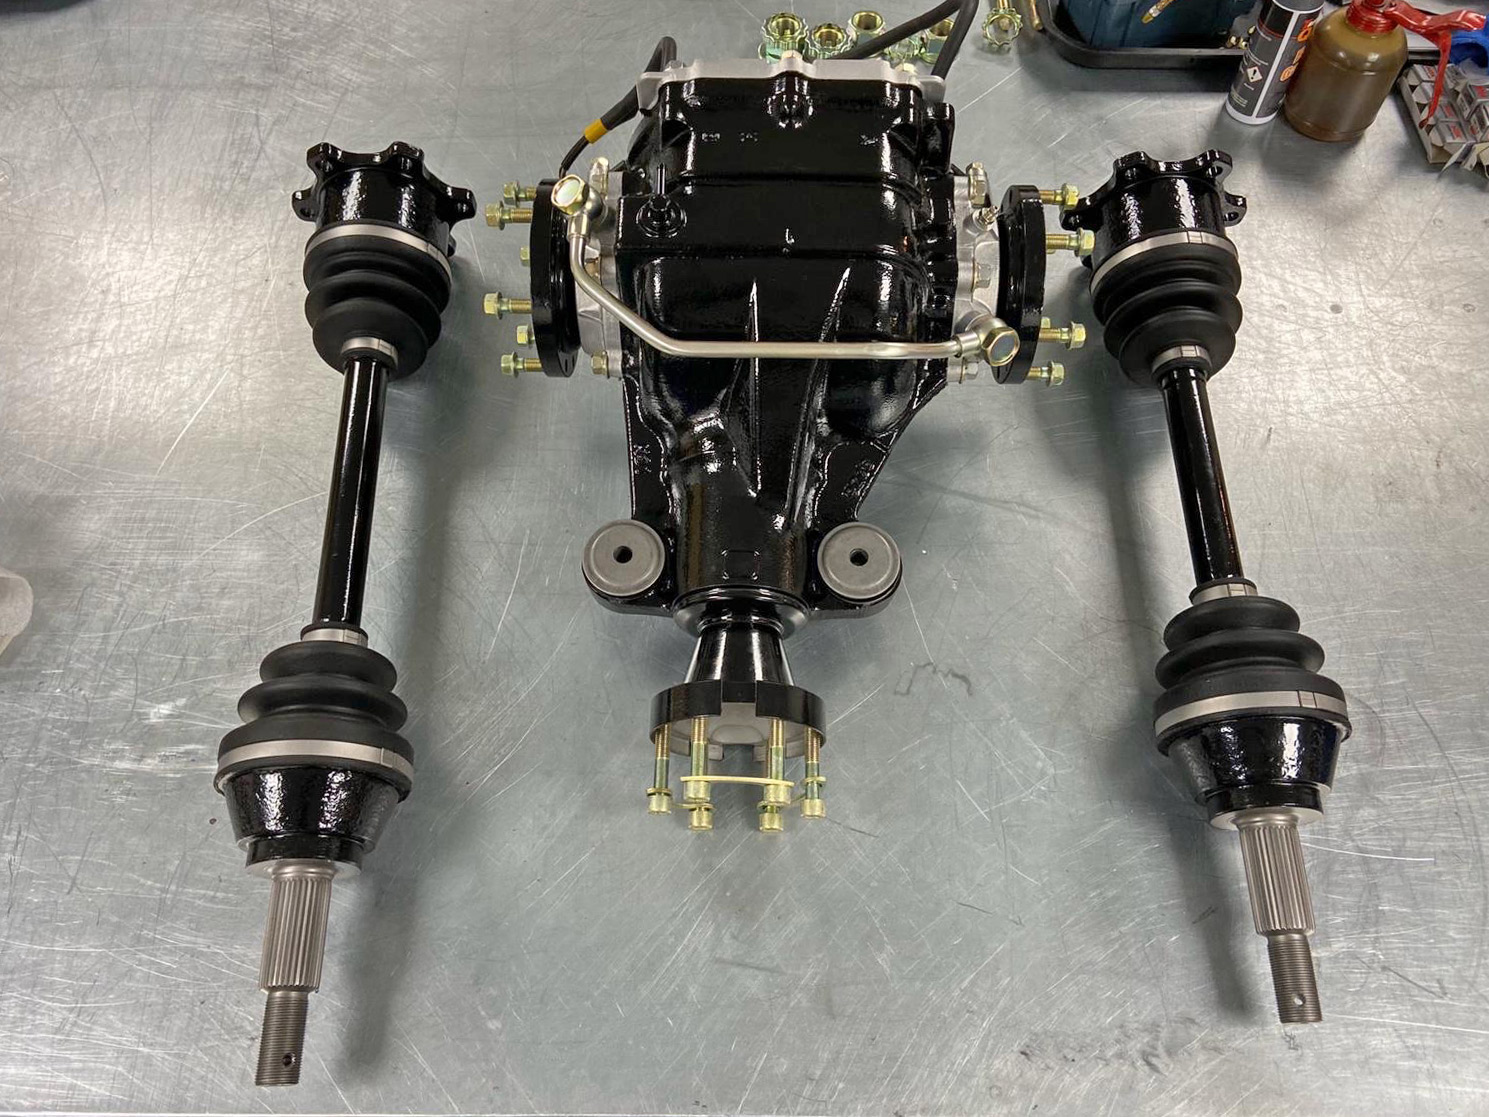
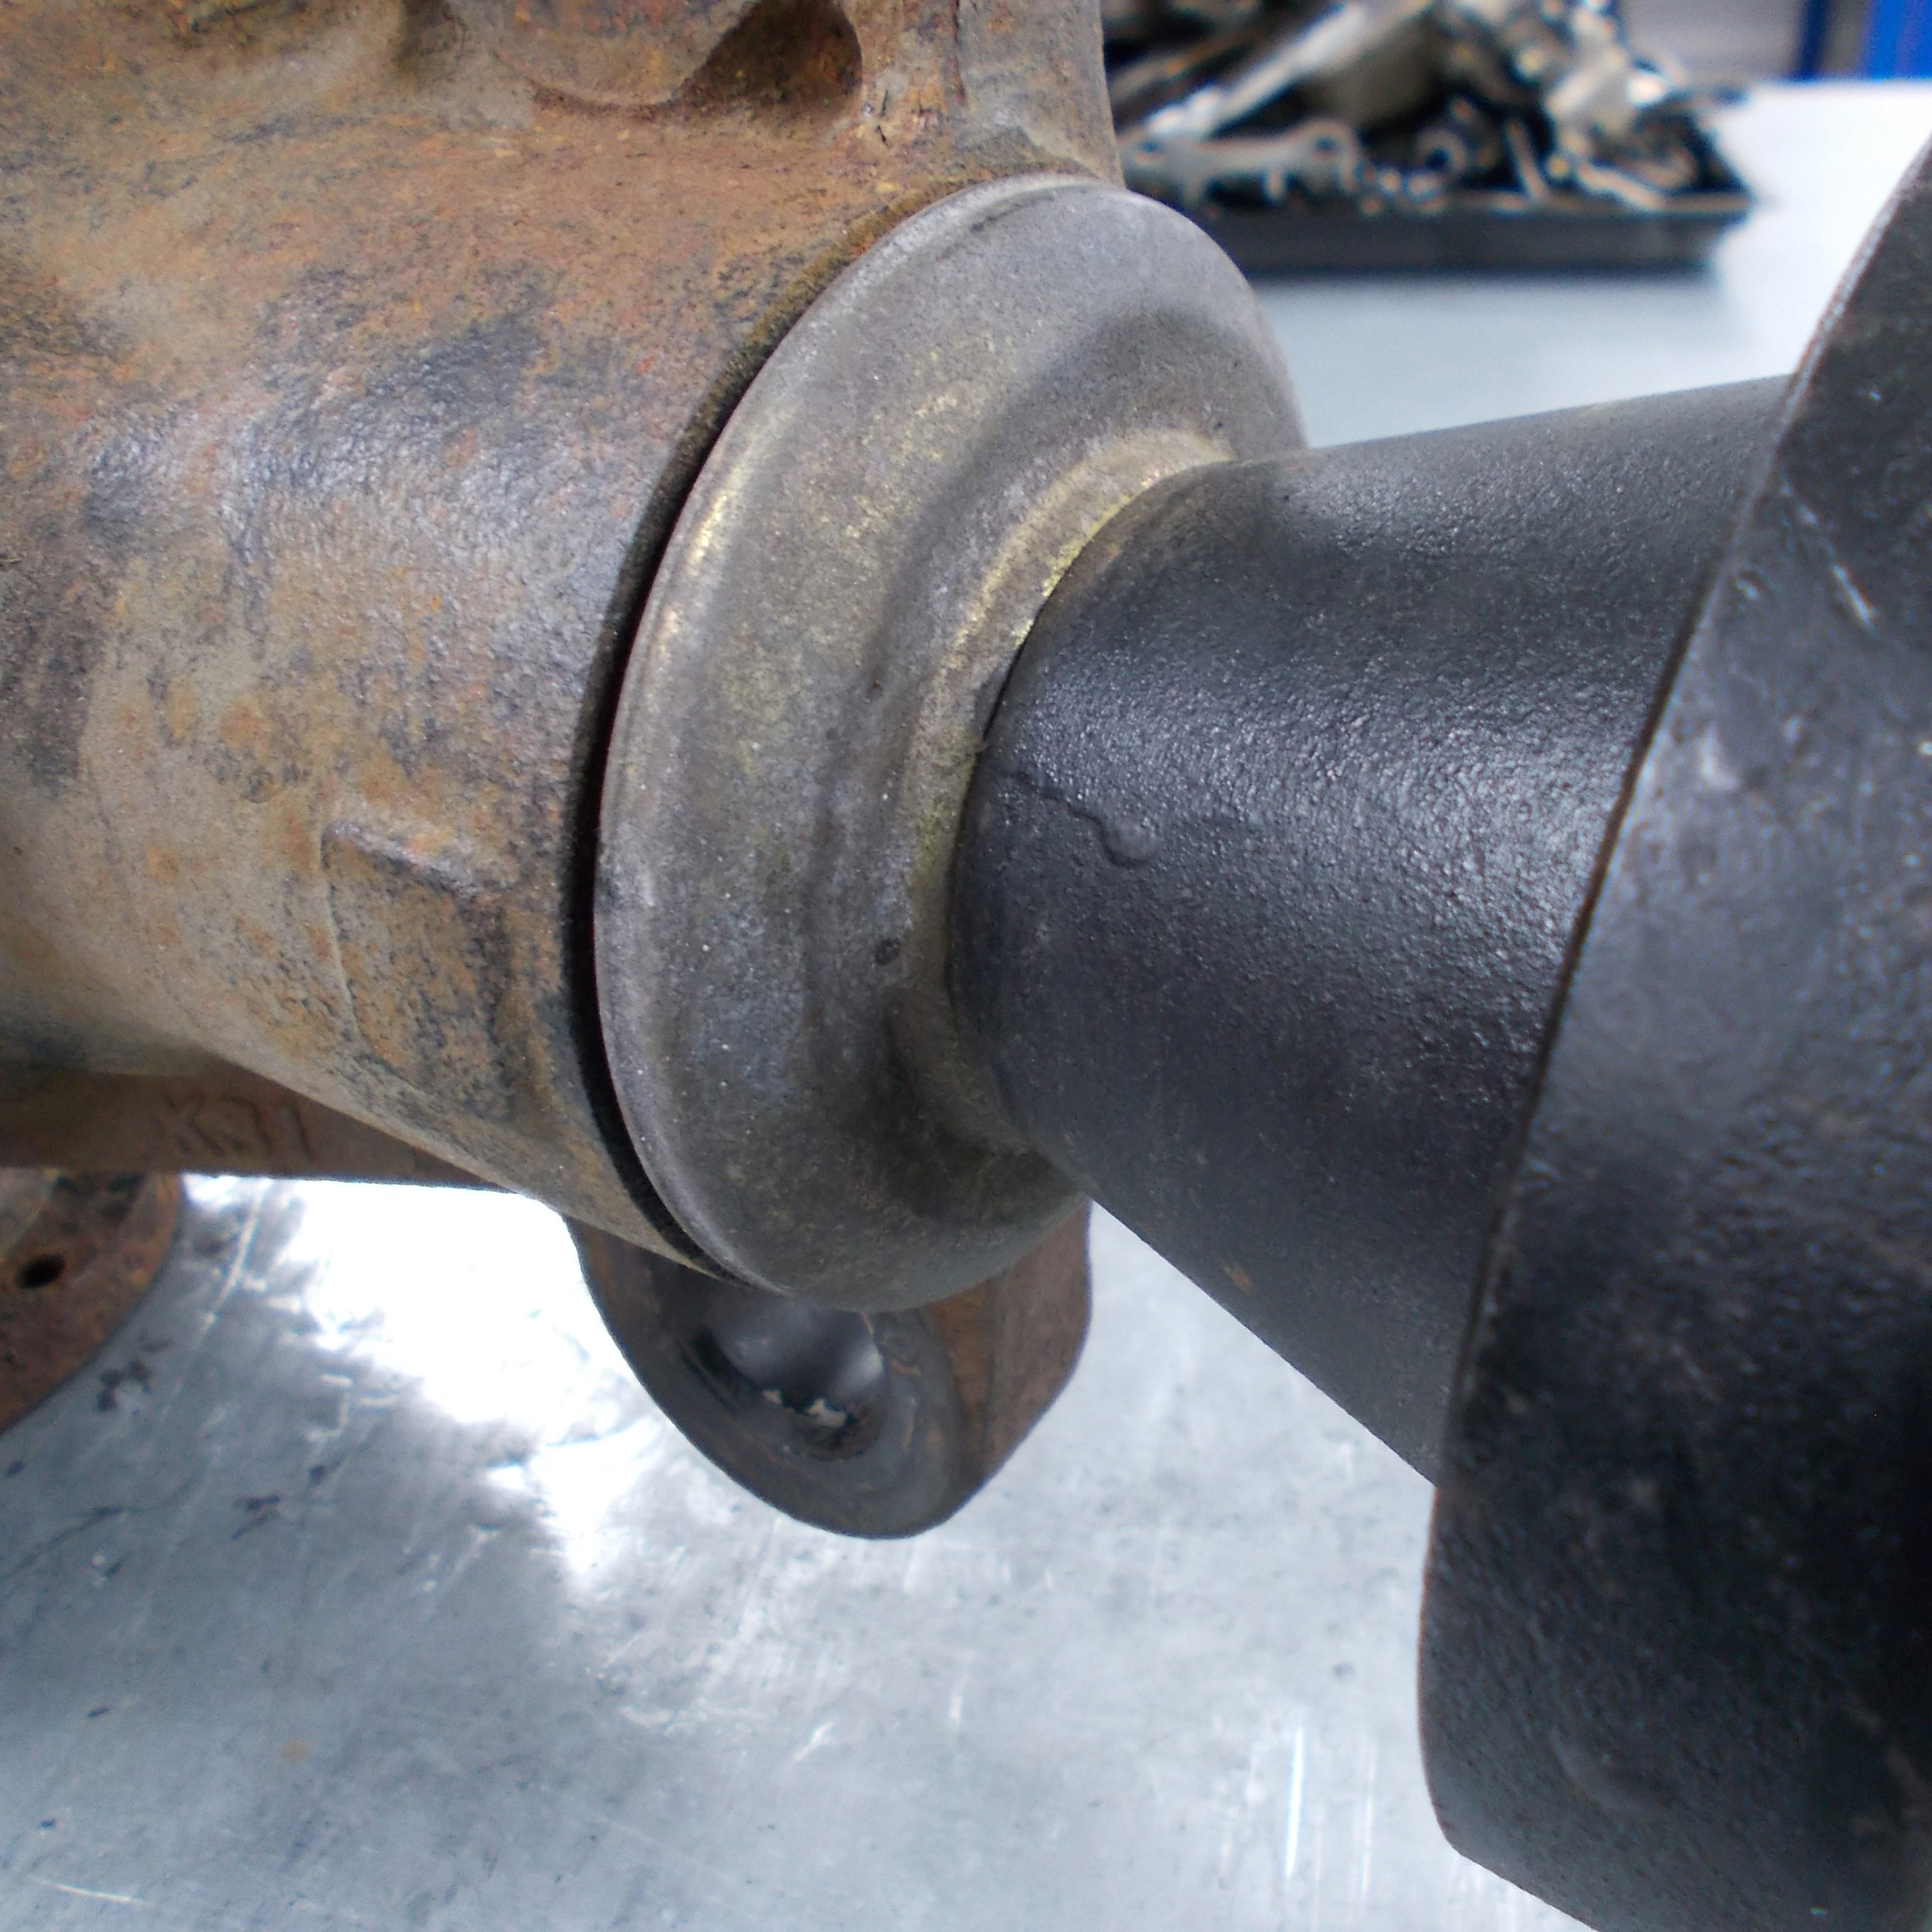
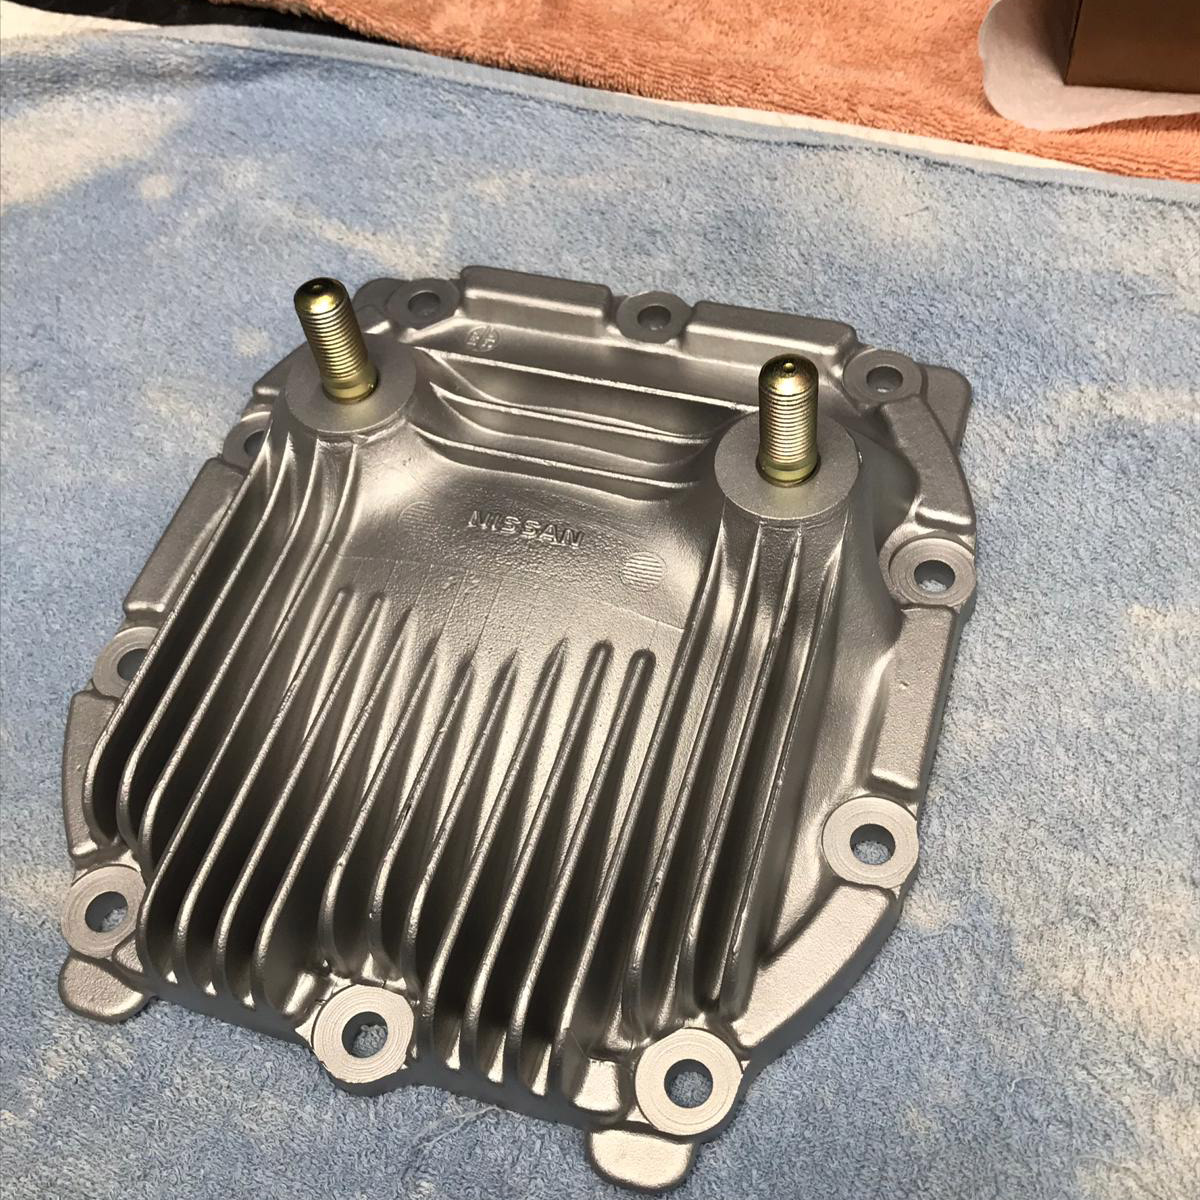
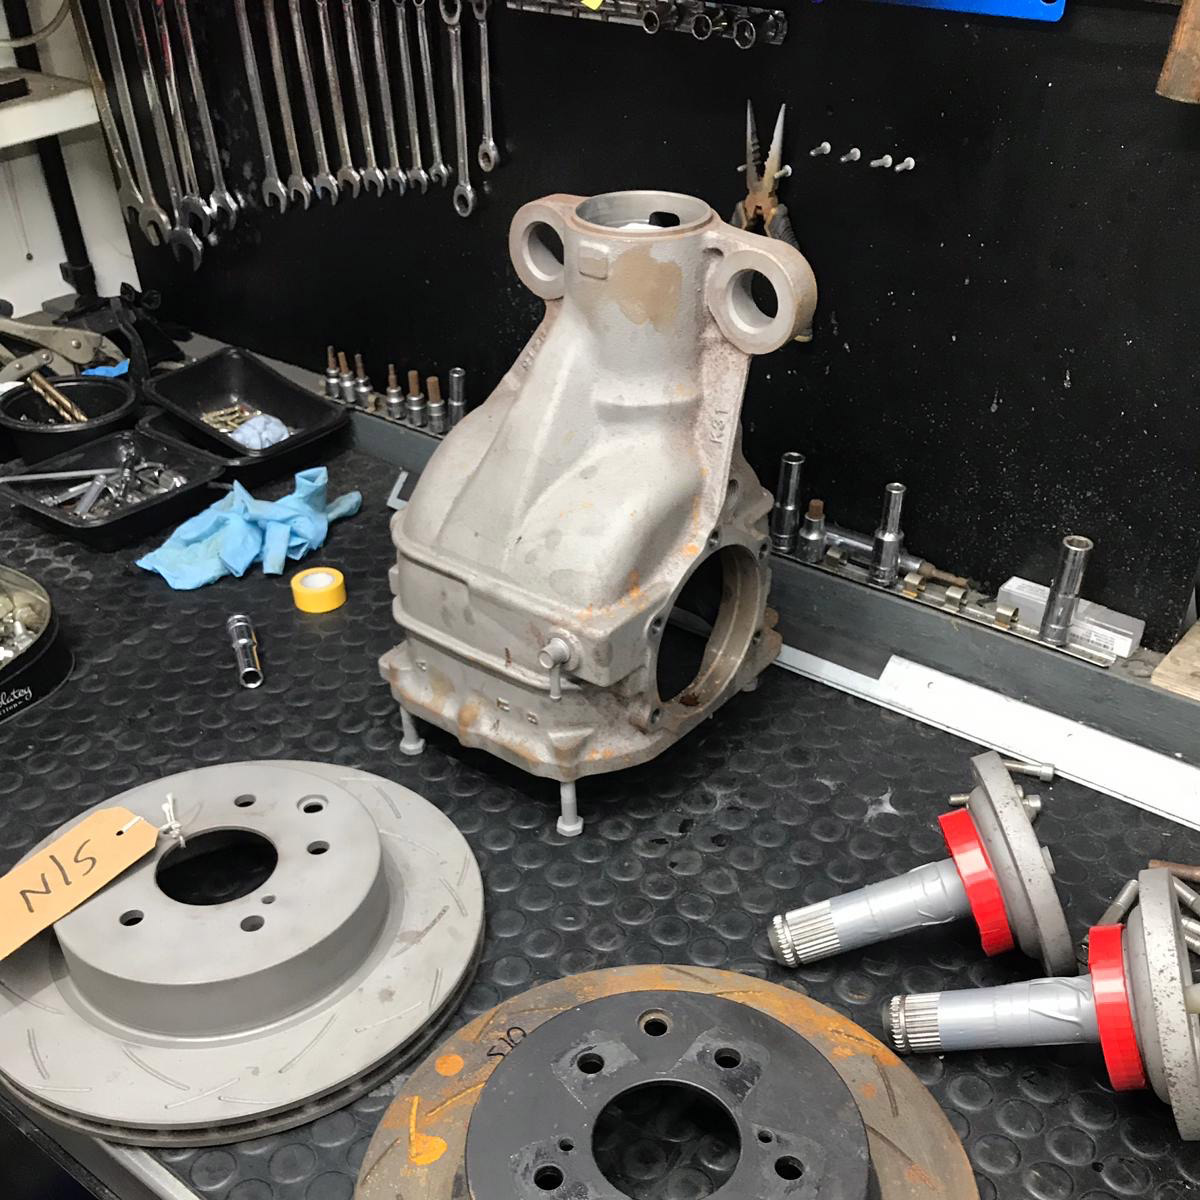
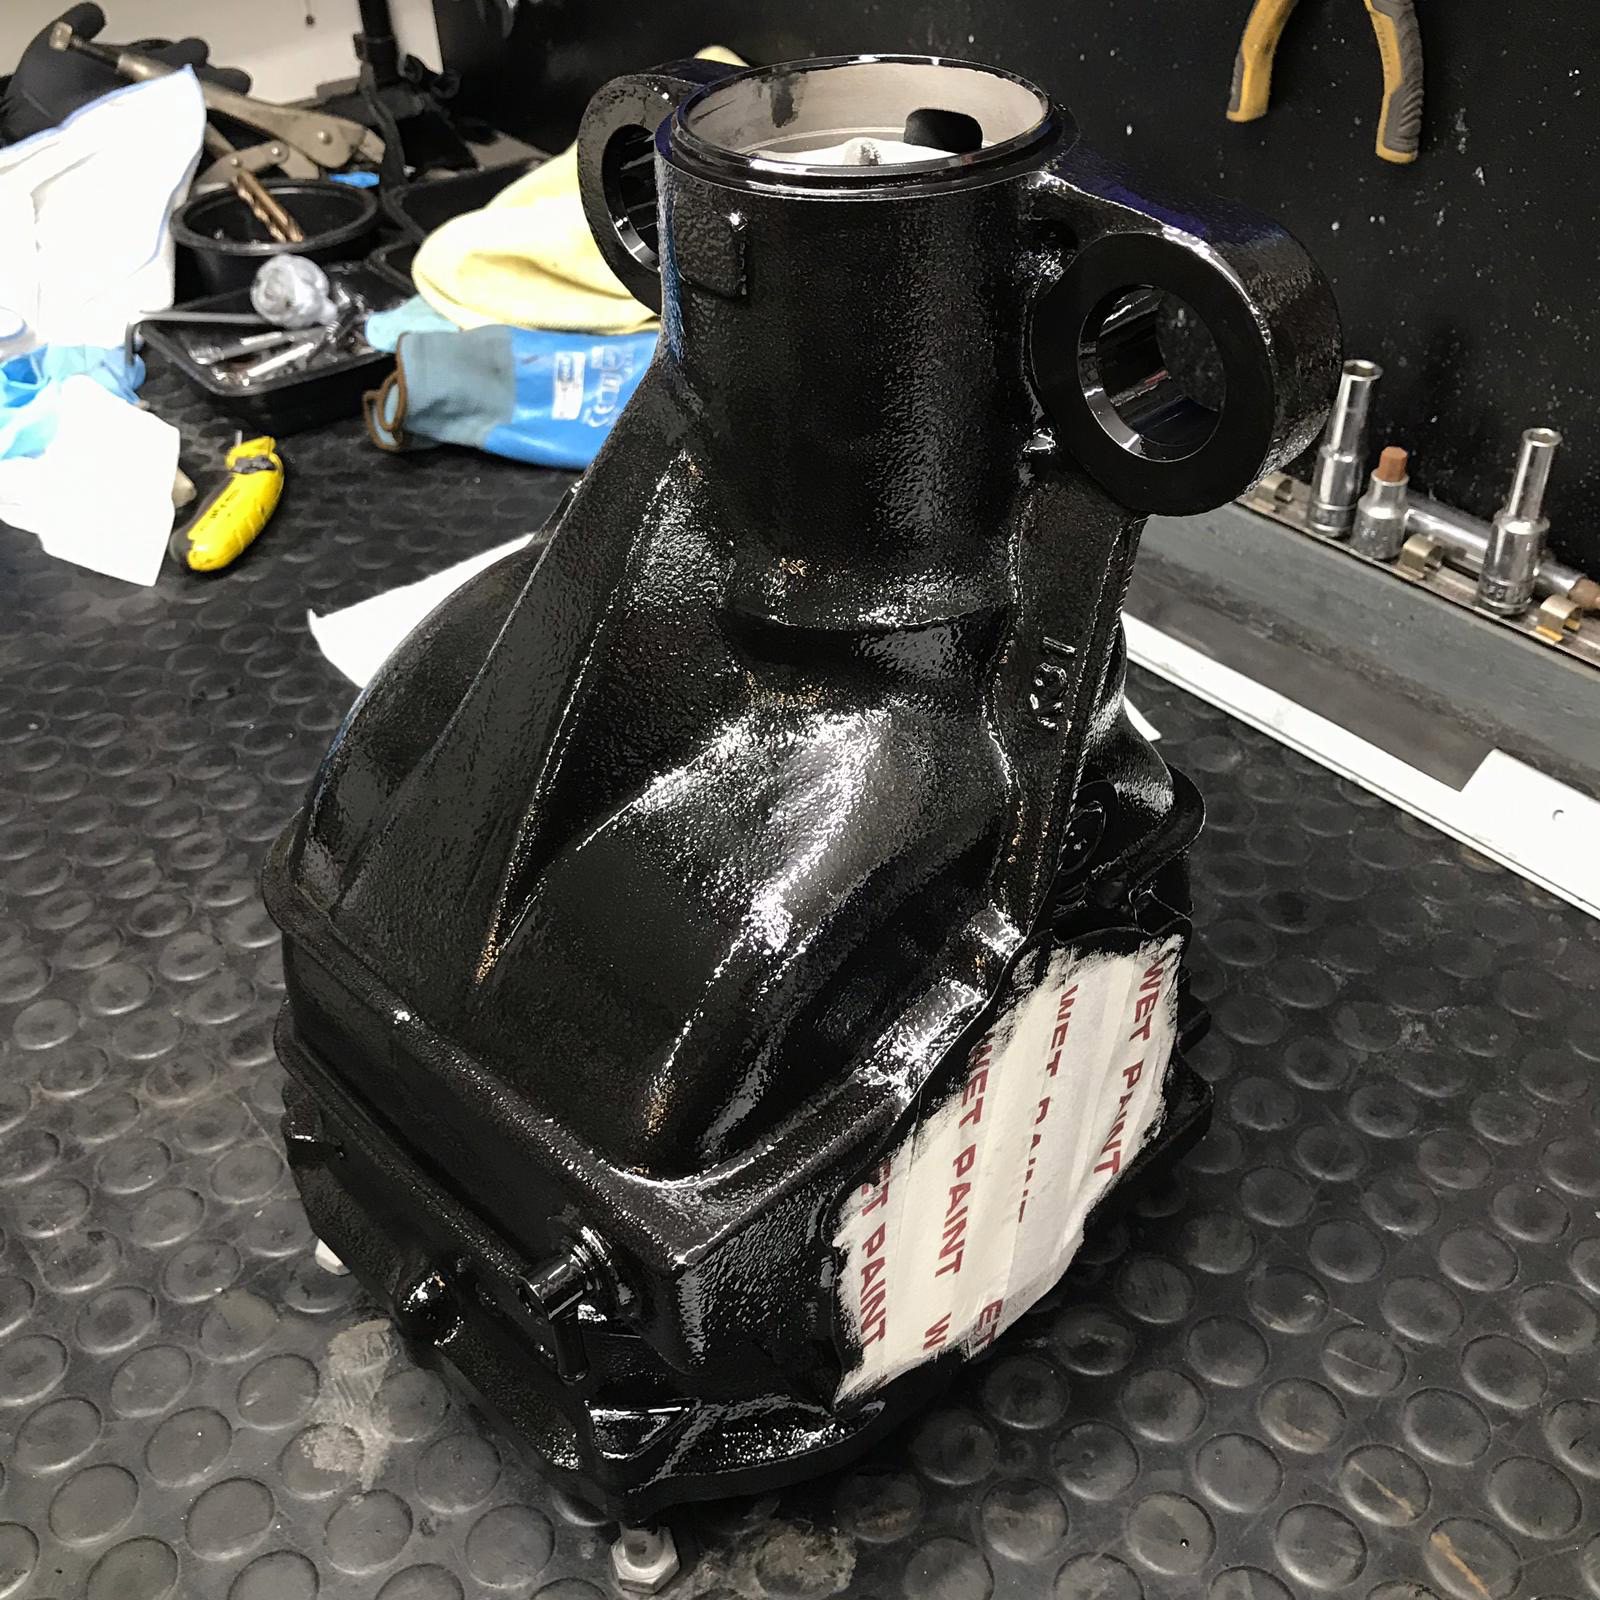
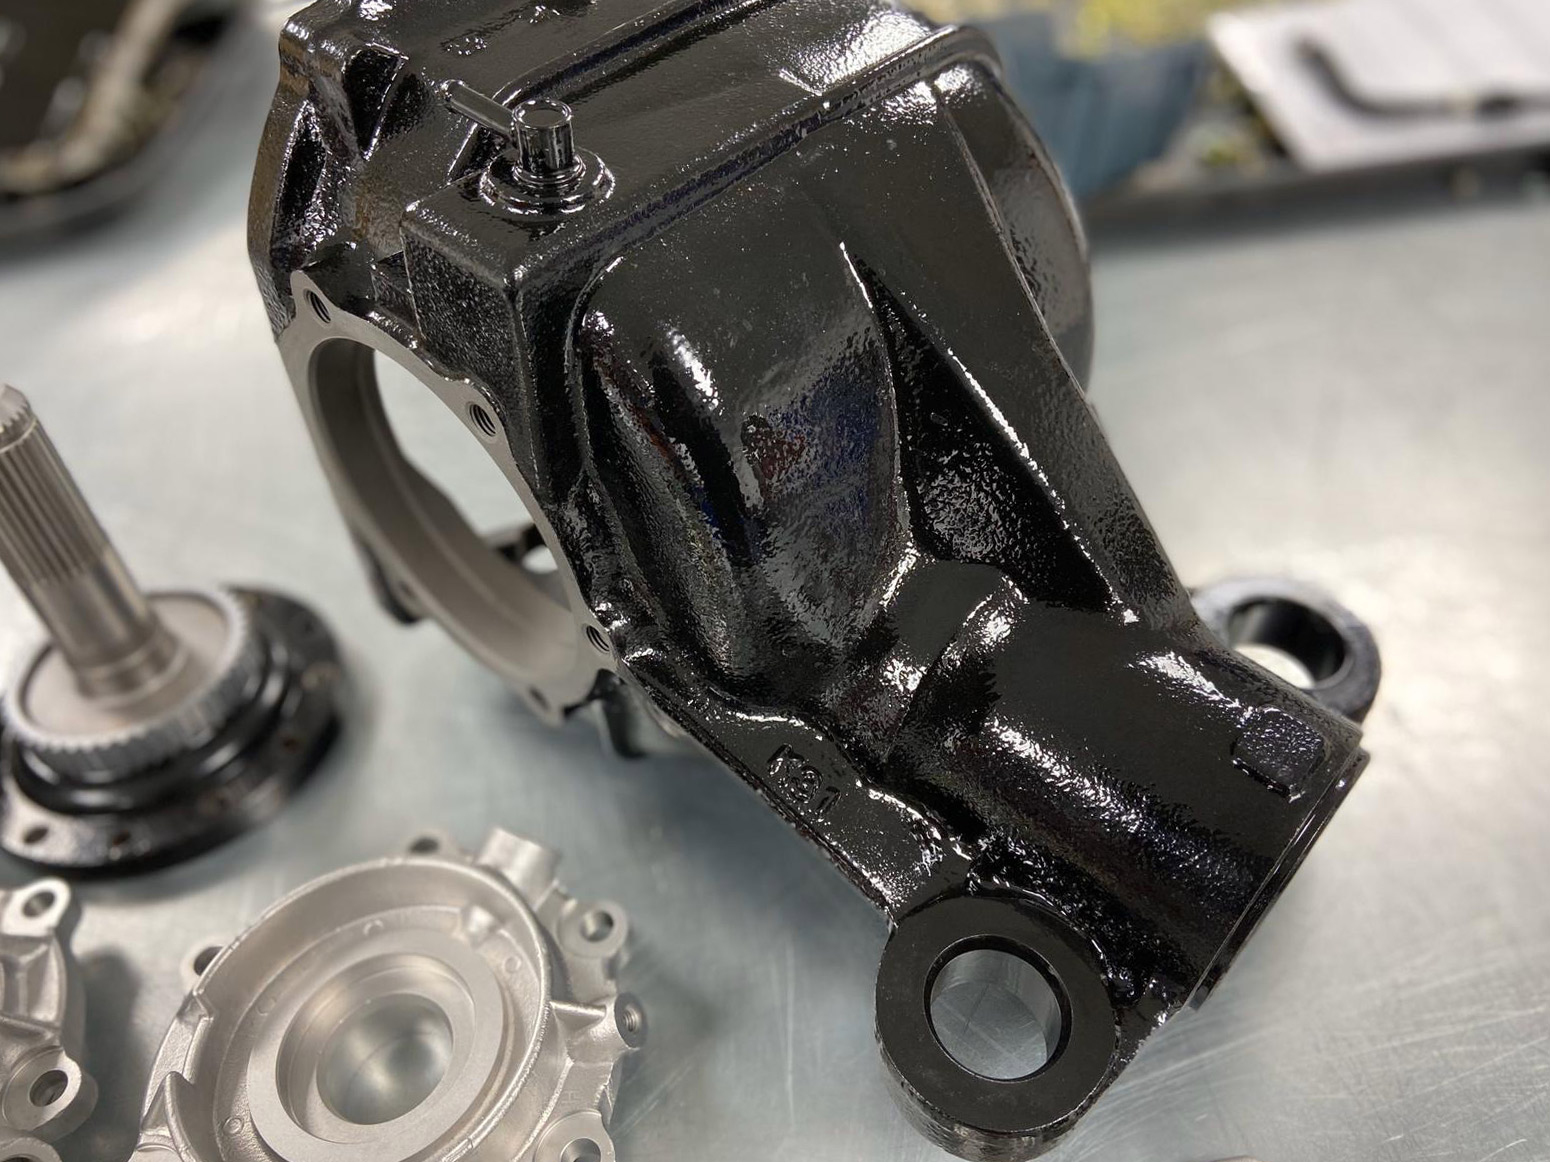
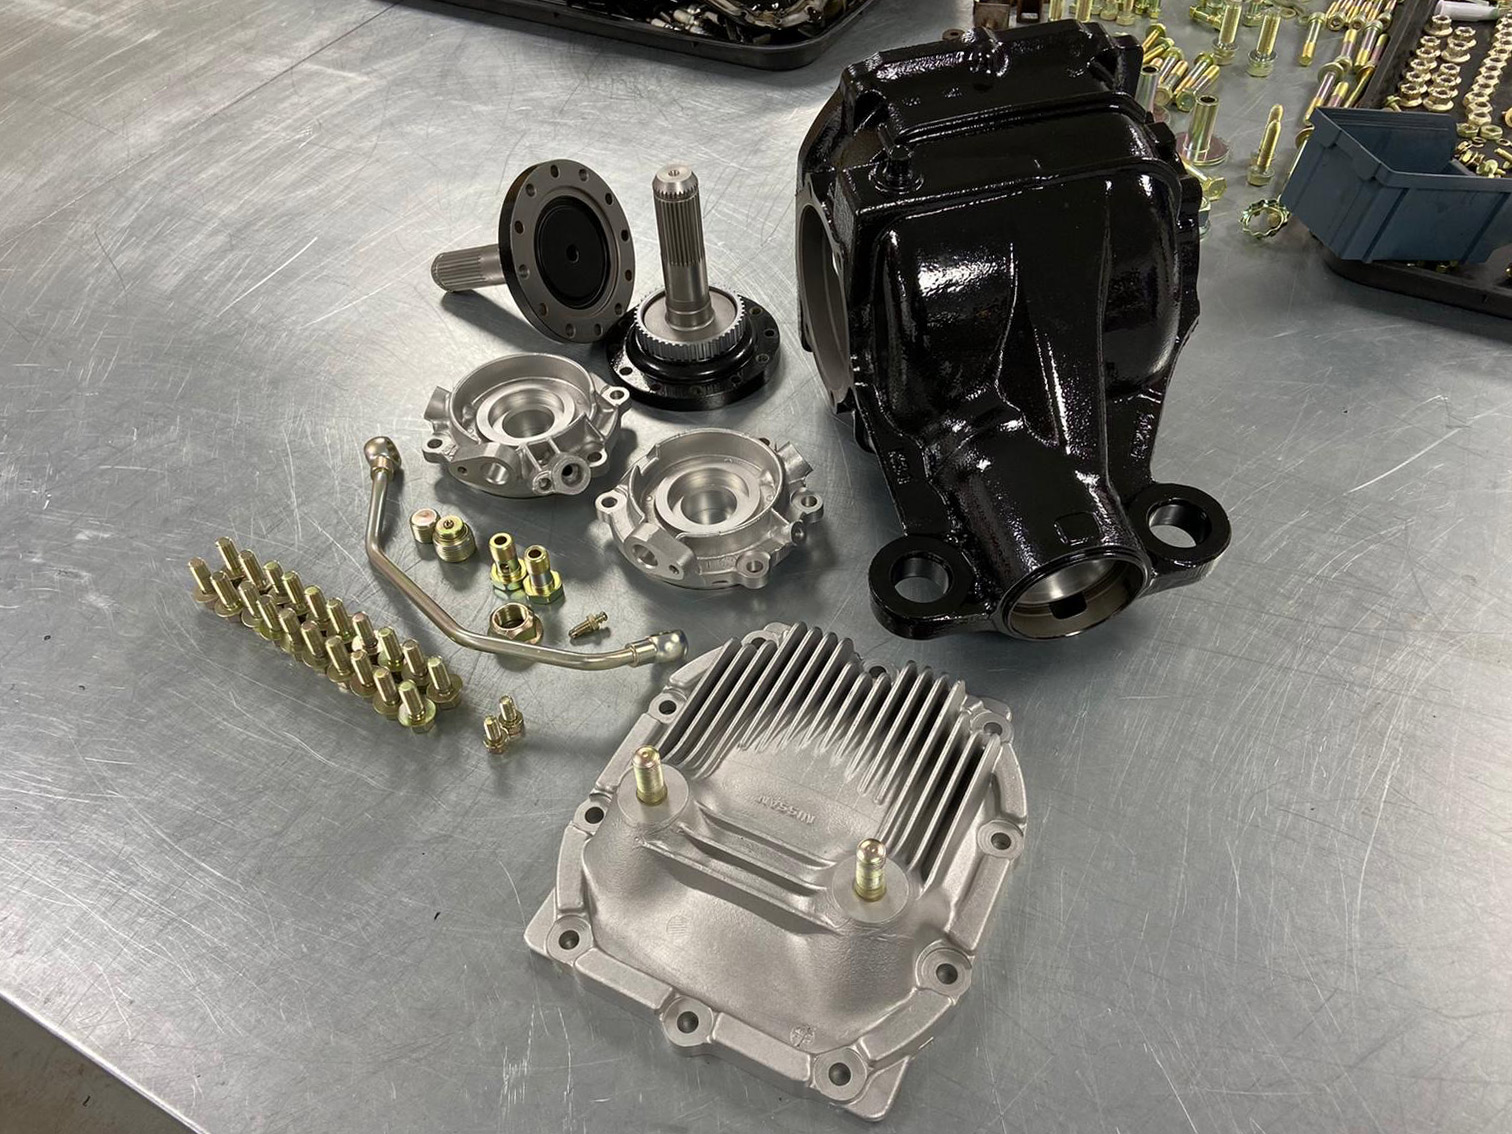
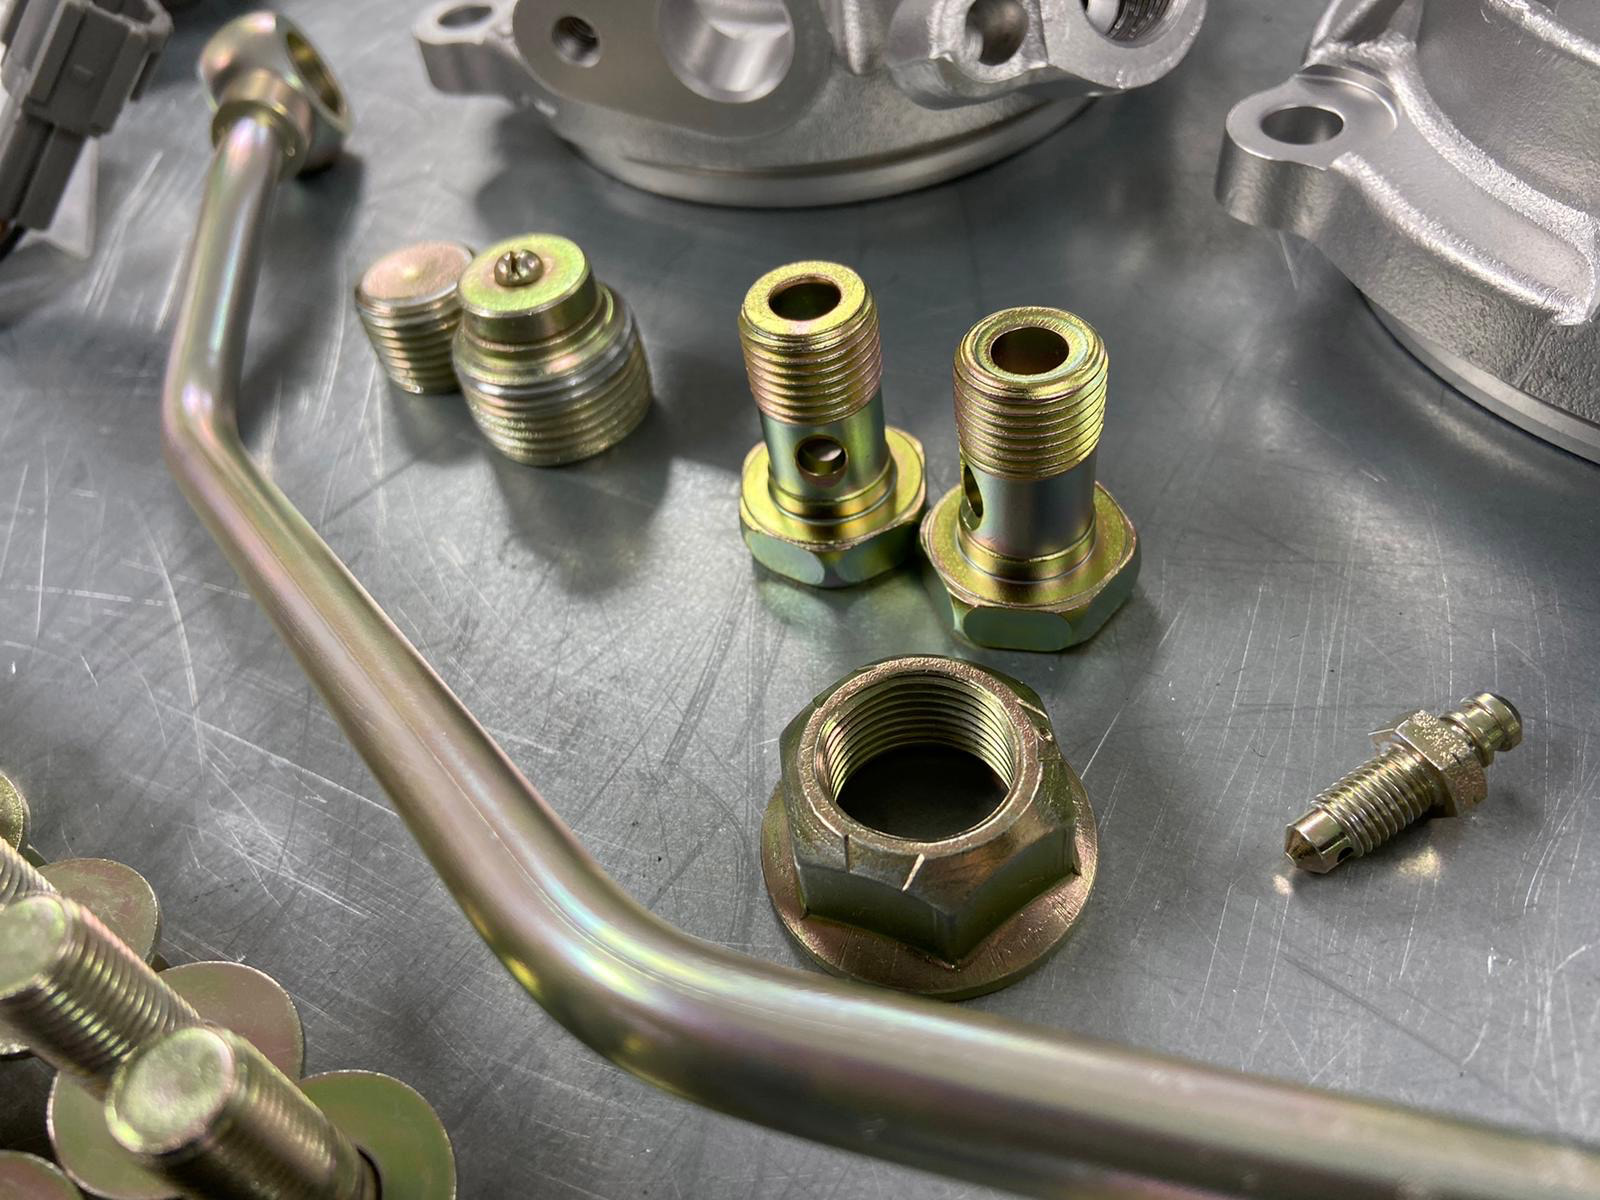
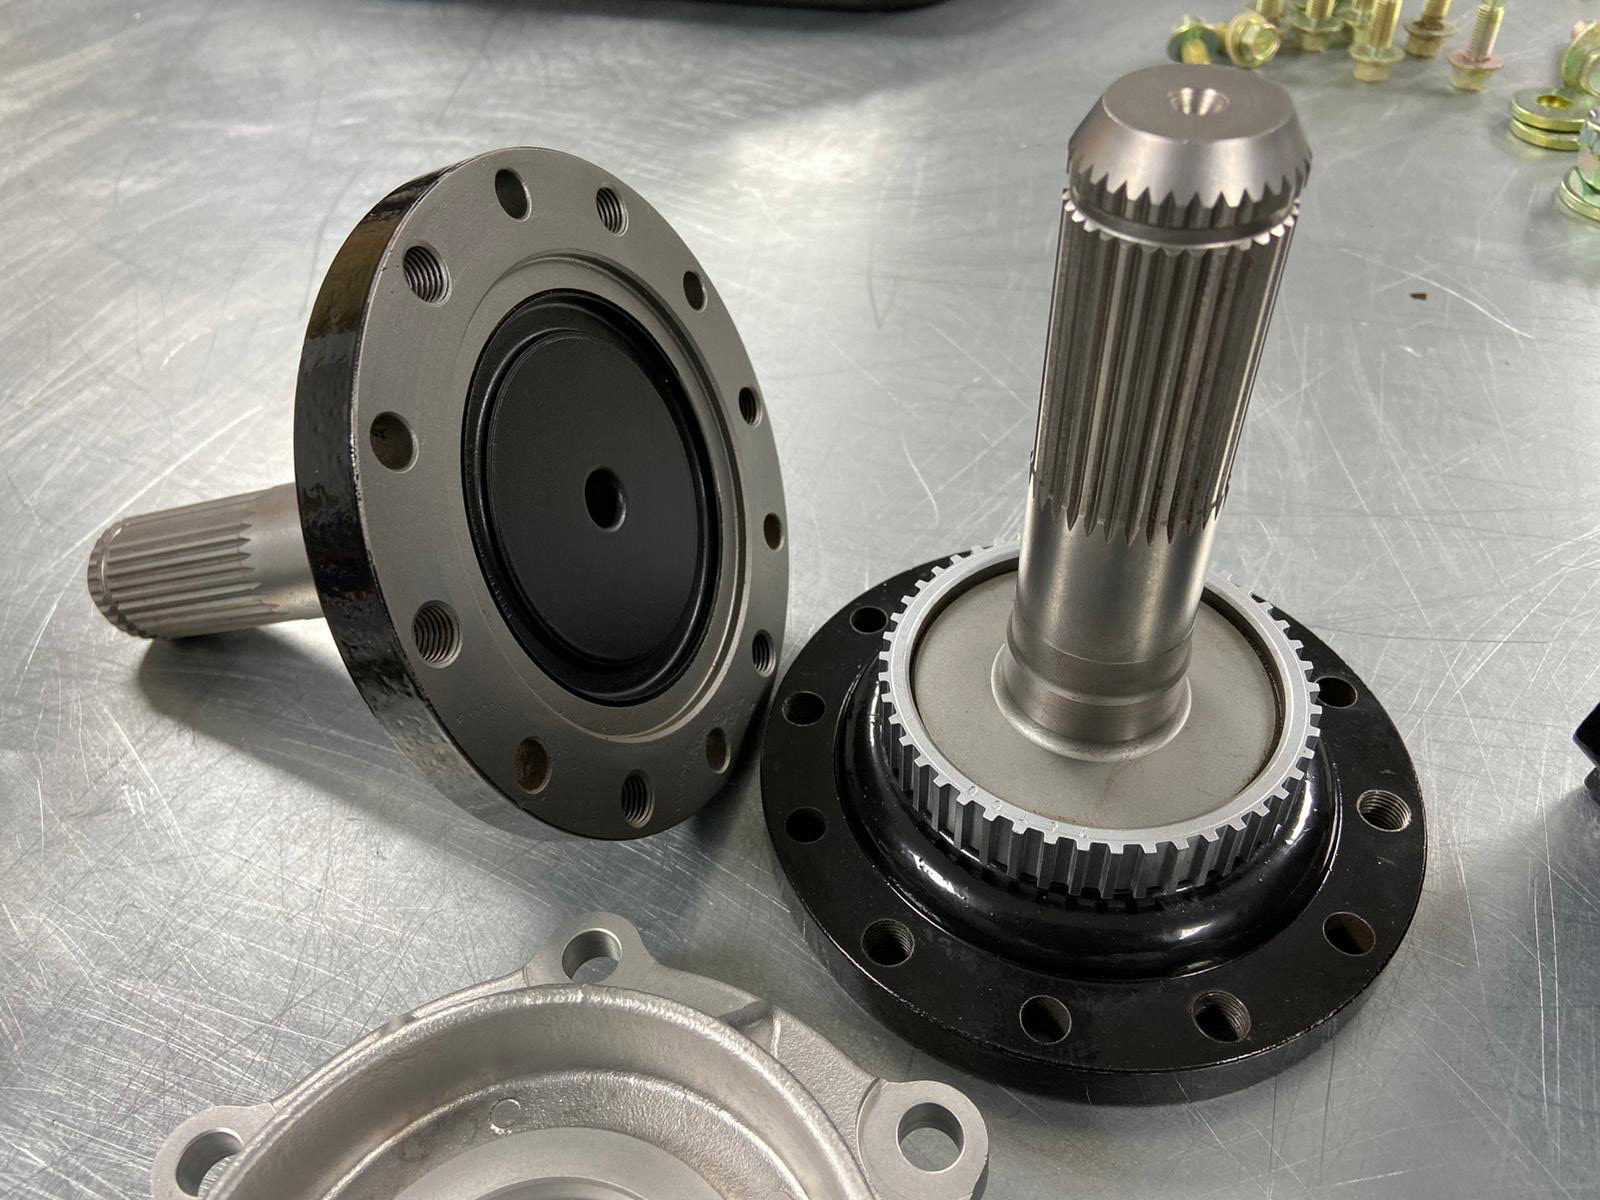
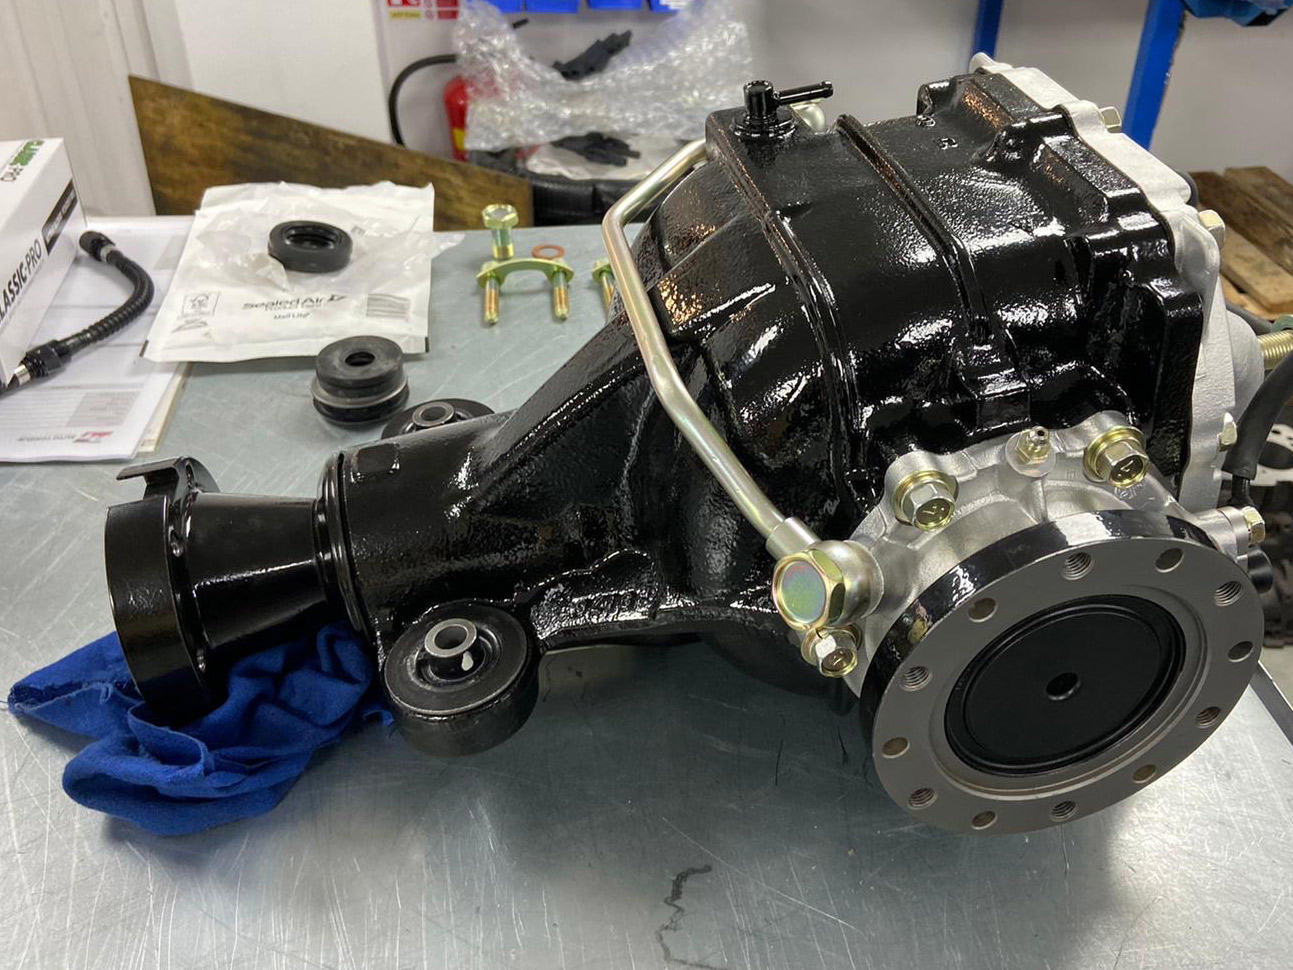
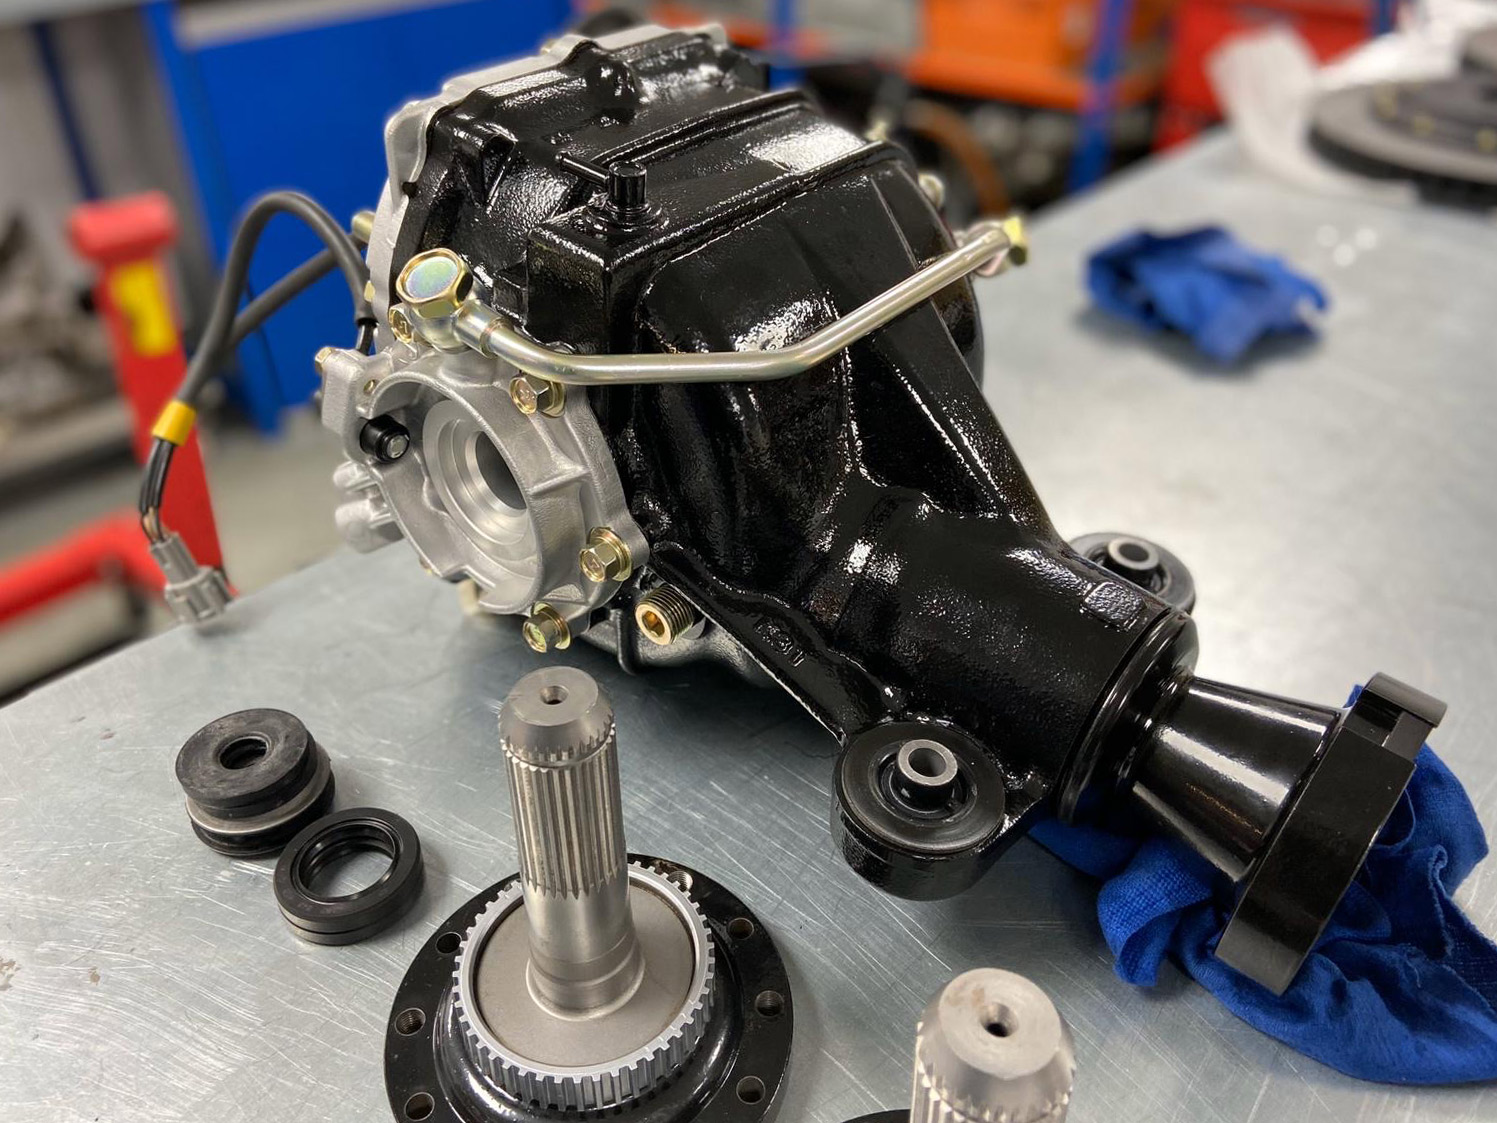
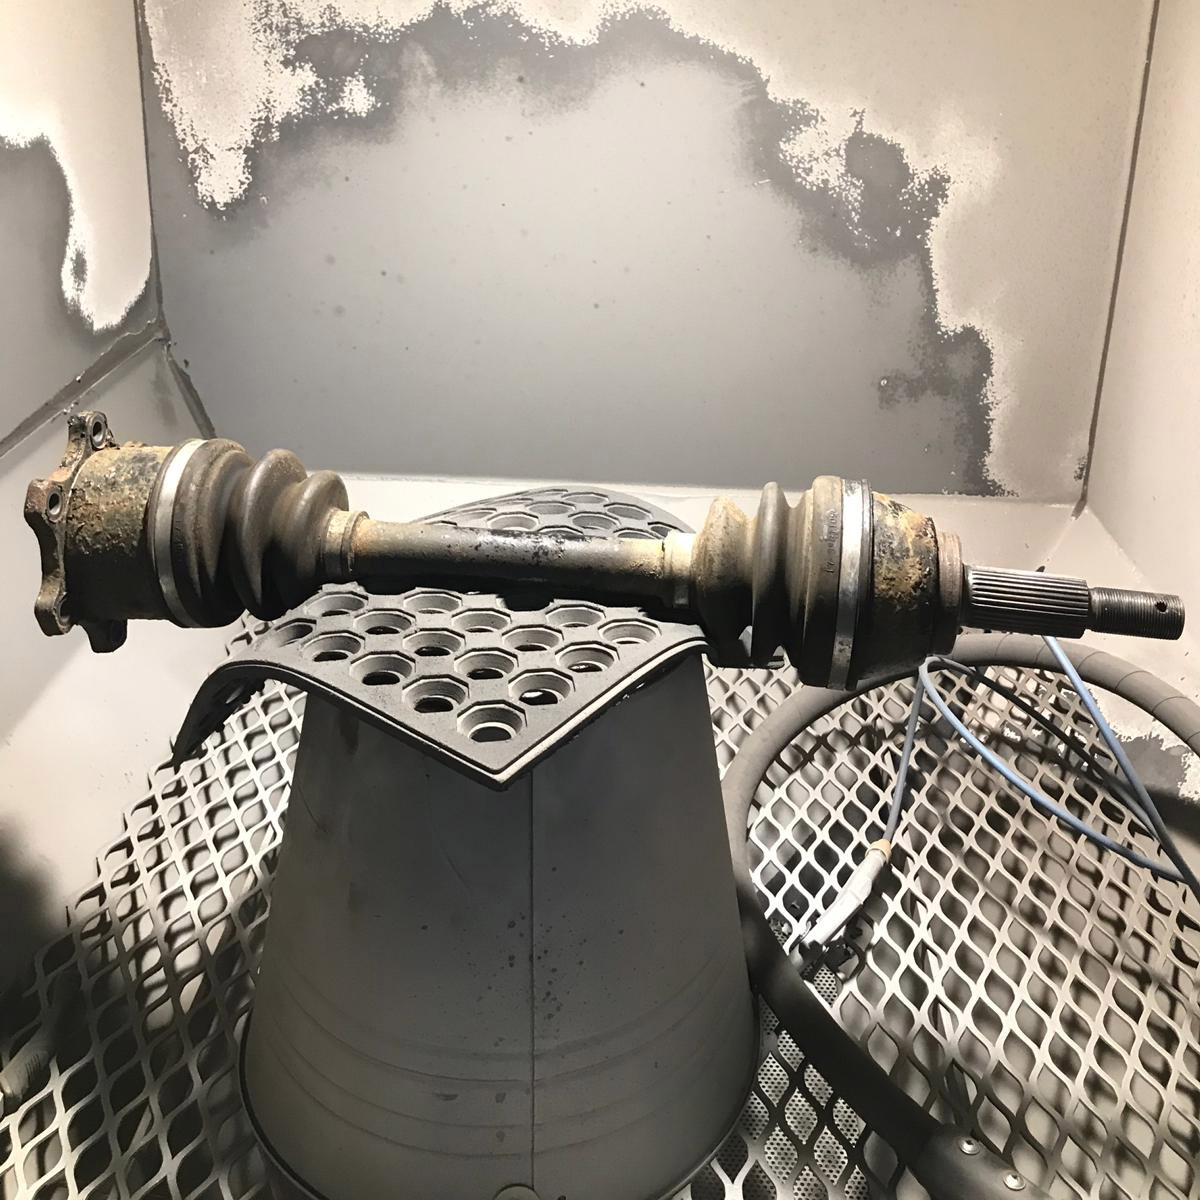
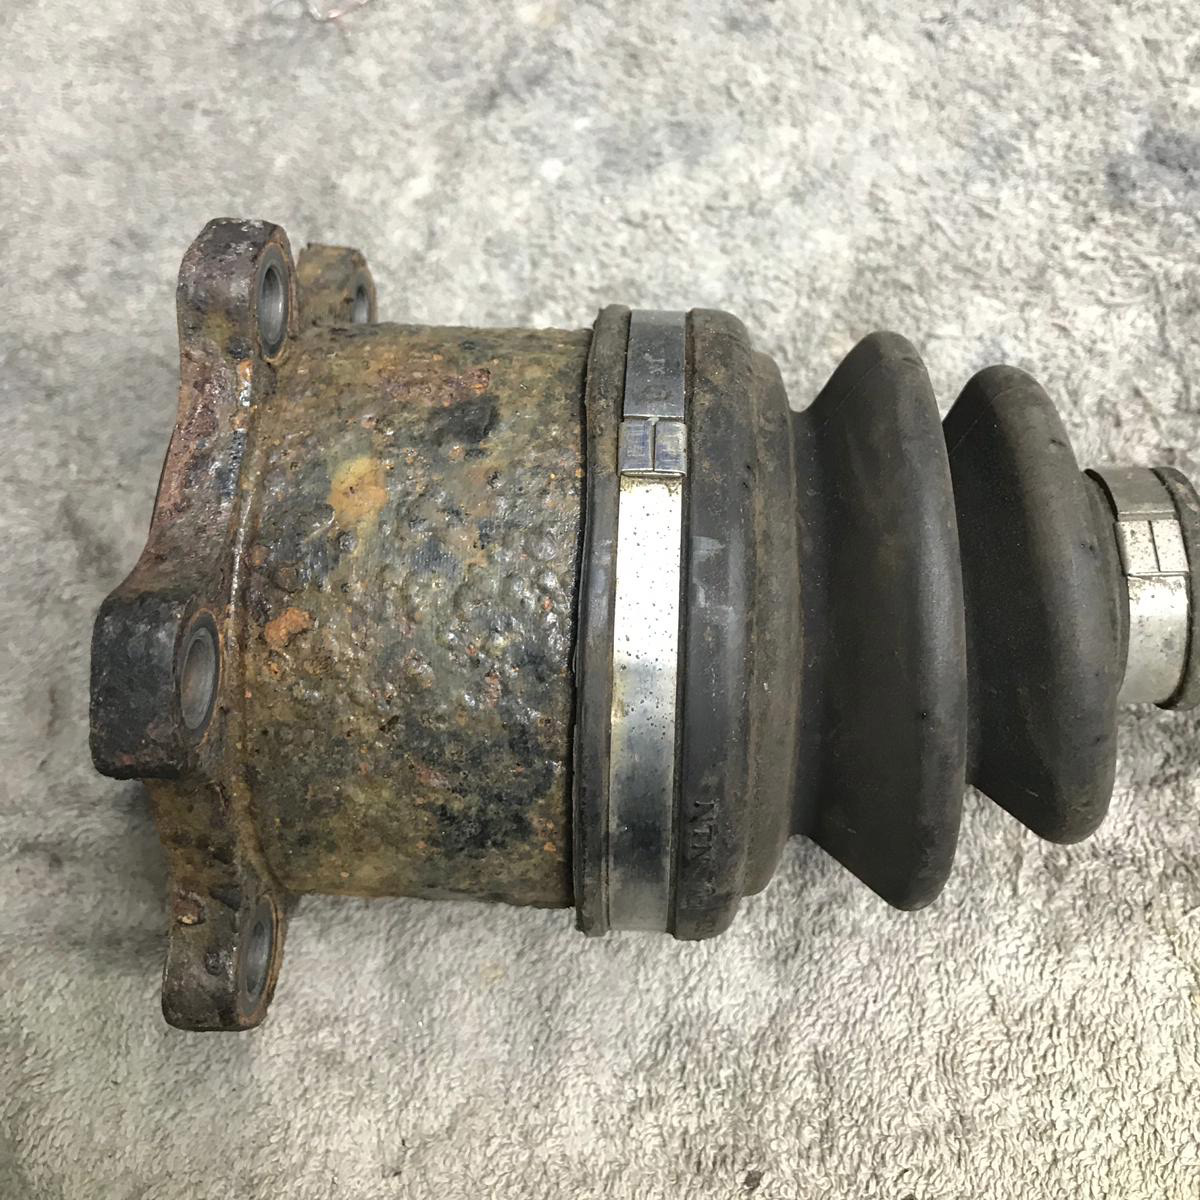
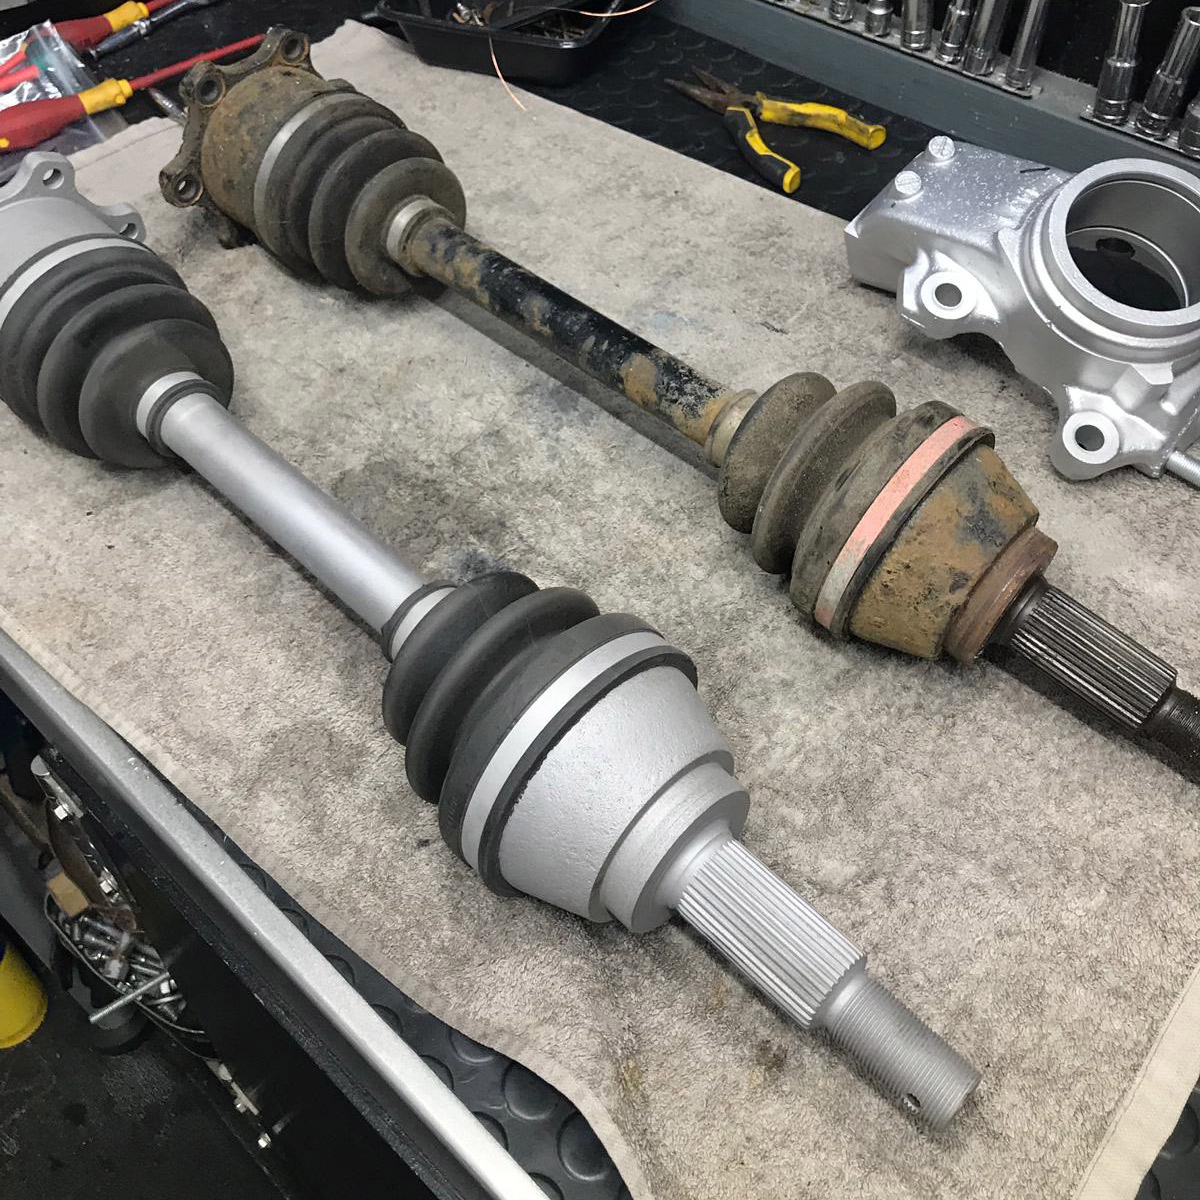
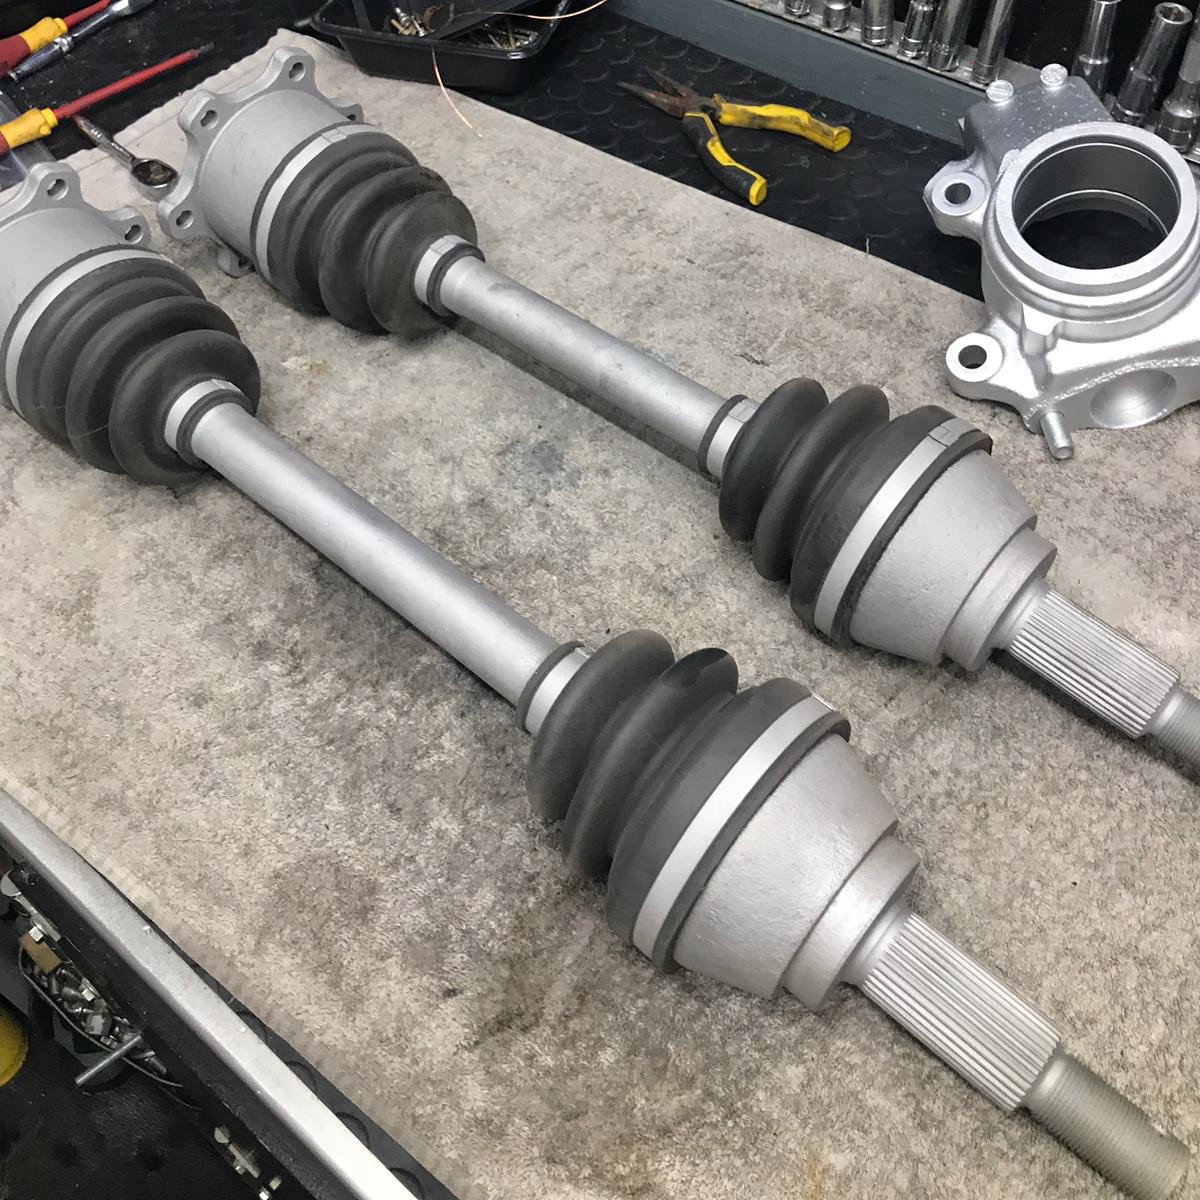
Rear diff and drive shafts
The below gallery shows the process of the rear diff and driveshafts refurbishment. using our two-stage blasting process (dry then vapour) the parts are either painted black in POR15 or zinc-coated accordingly.