One of our customers was kind enough to provide us with this in-depth article as well as photos of a repair and reinforcement project we undertook for him recently.
So, as per the post title I have had my E46 M3 repaired and reinforced by Auto Torque. (If you want to skip the blurb scroll down to the images.)
During the COVID-19 lockdown I contacted a number of BMW specialists to obtain information on their methods of repairing the Achilles’ heel of our cars, and their prices. This process, which I initially thought would be relatively easy, actually turned out to be quite frustrating. To illustrate, some of the garages I spoke to claimed they could repair my car within 2 days (which was an alarm bell for me), whilst others quoted an arm and a leg. There seemed to be no happy medium. At one point, I even considered throwing in the towel and to look for another car altogether instead.
However, I test-drove some other cars, which I had big expectations for, but was let down, which then made me realise how good the E46 M3 is — despite its “floors”.
One evening, I had an idea. Surely, our cars are not the only cars which suffer from chassis cracking and underside rust. I then remembered that one of my colleagues, whom I used to work with, had owned a Ferrari F355. These cars are known for cracking C pillars. My colleague told me that he had to spend upwards of £5,000 on fixing the issue. But the fix only lasted a few thousand miles and then cracks began to reappear again.
He ended up selling the vehicle shortly thereafter.
Now, I knew that I couldn’t take my M3 to a Ferrari specialist (for obvious reasons). I started to think about other cars that suffered from related problems. Somehow, I found myself browsing a Mitsubishi Evo forum and came across a particular thread showing the rot and chassis damage (cracks, holes, spot-weld failure, etc.) of an Evo VI. The car was so bad it actually required new chassis rails so that it could be repaired properly.
Nevertheless, the underside of the car was restored by Auto Torque, which then made me look at their website in more detail. In particular, I came across a section titled Underbody Restoration which encompasses a portfolio of some of the cars which they have undertaken resto work on. Although none were E46 M3s, I was extremely impressed with their attention to detail, welding and finishing, and so decided to get in contact with the owner, Chris Marshall.
Long story short, after an exchange of emails, I was invited for a tour of their premises (which included looking at a Nissan R35 GTR which had just undergone an underside restoration) to see their set-up and their work in the flesh, and also for my car to be assessed by Chris. To his surprise, he noticed that the seam sealer on our cars was much thicker than that of the Japanese cars he and his team were used to working on and was confident that he could repair the issues found with my car. As I had ordered most of the parts from either BMW, and some from forum sponsor MS Motorsport, I arranged for the car to be booked in at the end of the month.

The repair itself can be split into 3 sections:
Underside
- RACP stripped and assessed for cracks and popped spot welds
- Any cracks found stop drilled and welded
- Good-quality plate reinforcement kit welded in (i.e., Redish Motorsport or PSDesigns)
- Nearside rear inner wheel arch stitch or seam welded (due to separation)
- Spring perches stitch-welded (only if signs of separation found)
- Rear trailing arm pockets stitch-welded (only if signs of separation found)
- Any areas of corrosion treated
- Underside rear painted and protected via proper undersealing (i.e., primer, seam sealer, e-coat and cavity wax)
- Subframe shot-blasted and powder coated
- Worn bushes replaced (i.e., differential, subframe, anti-roll bar, rear trailing arm, etc.)
- Worn components replaced (will vary by car, however common parts are: propshaft giubo, shock, springs, etc.)
- Brake lines assessed for corrosion (only replace if corroded — if not, clean up instead).
Internals
- Internal cavities assessed for cracks and popped spot welds
- Any cracks found stop drilled and welded
- Good quality internal brace welded in (i.e., VinceBar + Gussets Kit, SME Weld In Kit or CMP Topside Beam Kit)
- Internal cavities painted and protected in factory finish + cavity wax application.
Ancillary
- Car put back together and reassembled
- Hunter 4 Wheel alignment conducted
- Road test conducted
- Car valeted and handed back to customer.
It is worth mentioning that there is a lot of talk within the M3 community in general on the different ways of repairing and reinforcing the E46 M3. In the early days, it was commonly believed that underside plates alone would solve the problem. However, over time, it became apparent that some of the cars (not all) which had only received plating were failing again (i.e., cracking again). In particular, there were a few forum threads on the long-lost M3Forum where owners’ cars had cracked again shortly after new plates had been welded in. In Iirc there was a case where an owner welded in reinforcement plates, took his car on just one track-day, only to find his car had cracked again.
As a result of instances like these, companies such as Practical Performance RnD, SME and CMP Auto Engineering looked further into the RACP and realised that the spot-welds within the internal cavities, in particular the rear seat panel and the rear boot cavity, were failing — which in turn led to the development of internal braces.
After looking at what was available on the market I decided to opt for the Vincebar + Gussets Kit due to the following reasons:
- The bar itself ties in the chassis rails and so relieves load from the RACP
- The gussets address the front internal mig welds behind the rear bench which are generally the first point of failure (but are often missed by garages that offer these repairs)
- Both bar and gussets are bolted to the subframe itself which ensures all 4 points are reinforced
- The set-up is not visible and so does not intrude on boot space
- The set up has been tried and tested since 2016 with no reported failures.


I also found this video very useful in obtaining a visual for how the Vincebar addressed the problem:
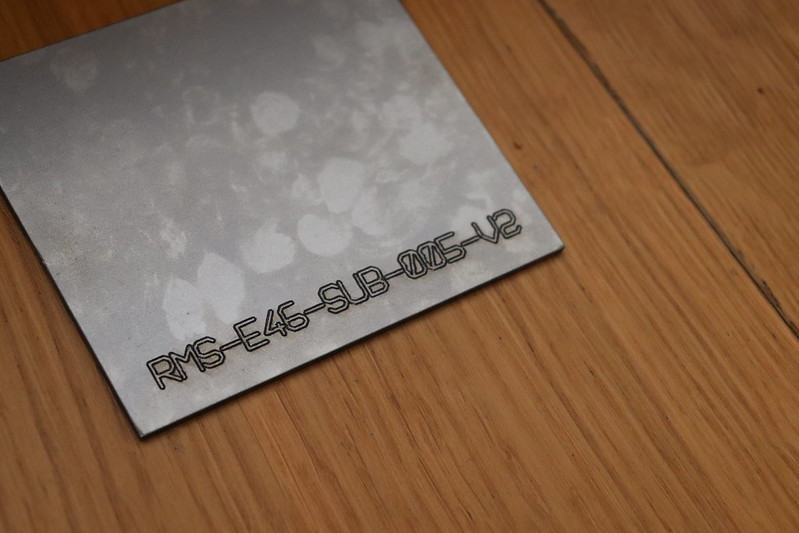
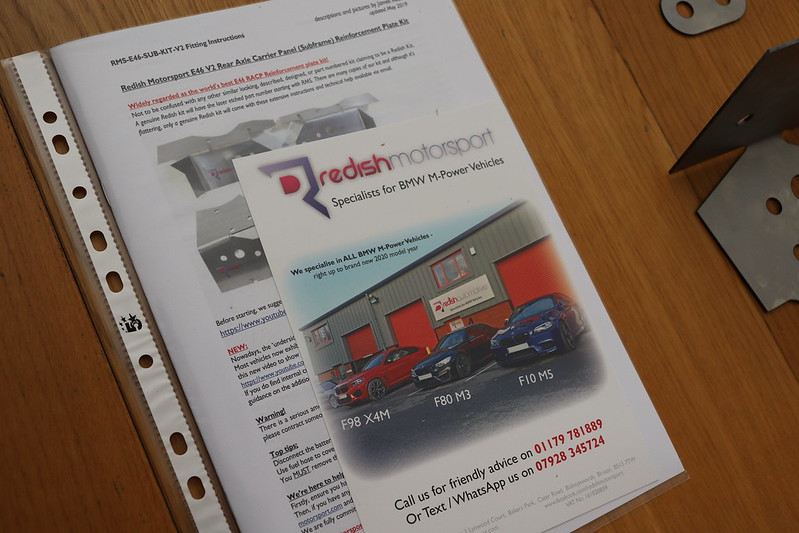
In terms of underside plates, I opted for the Redish Motorsport V2 Reinforcement Kit because it is of high quality and is also tried and tested.
50358064026_b7c760374c_c

50358225697_585c3c71d0_c
50357361953_dfbc2296eb_c

50358230462_3754f5d83c_c
50357366598_19f847d34e_c
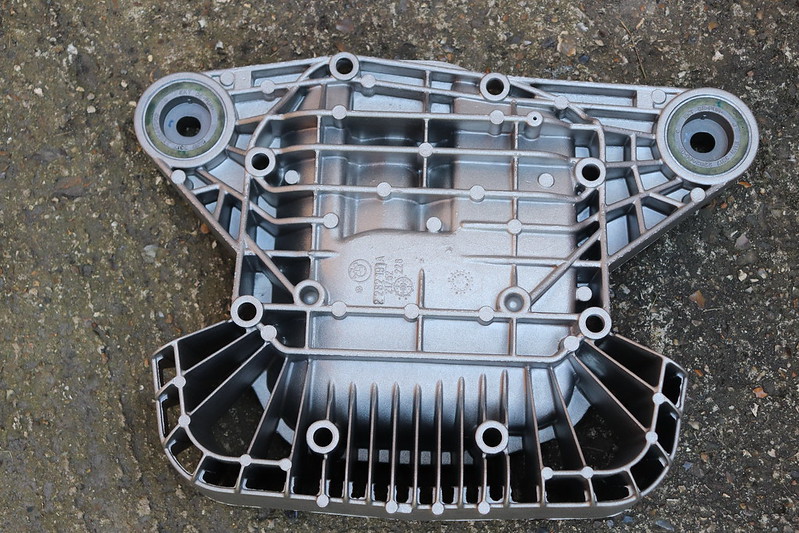
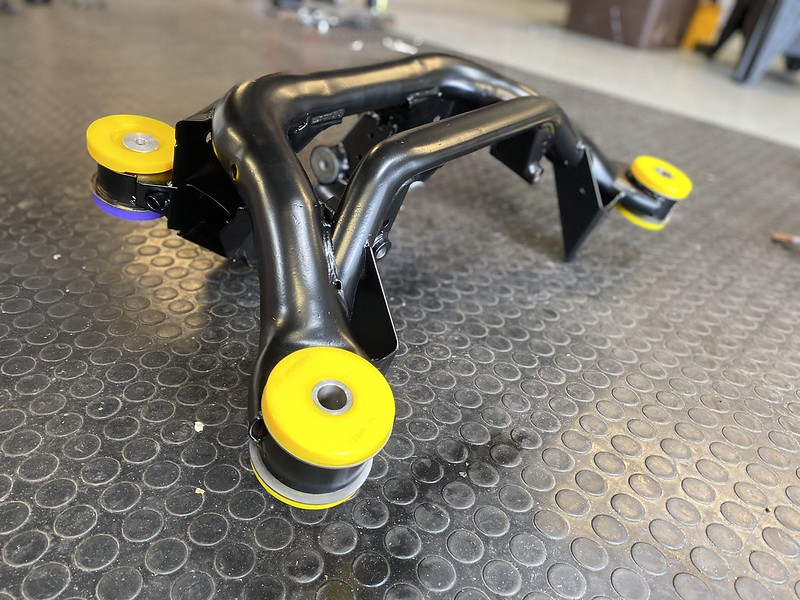
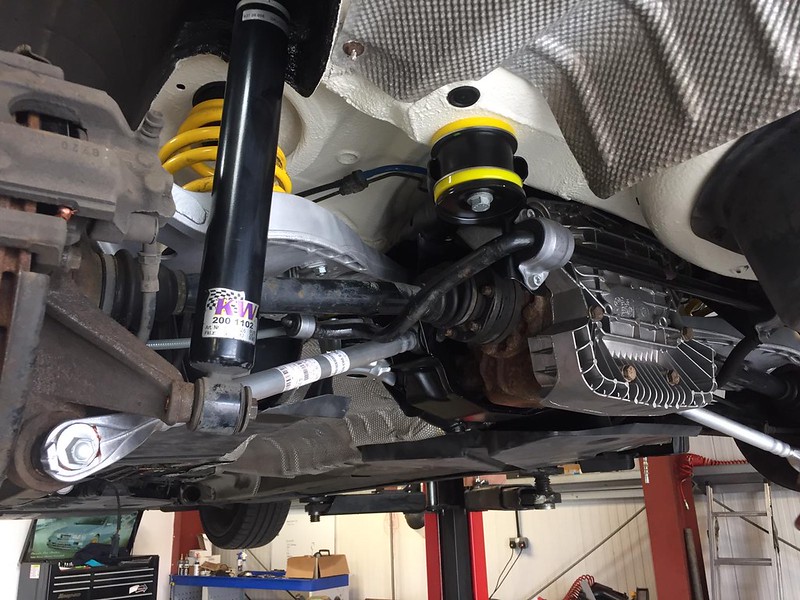
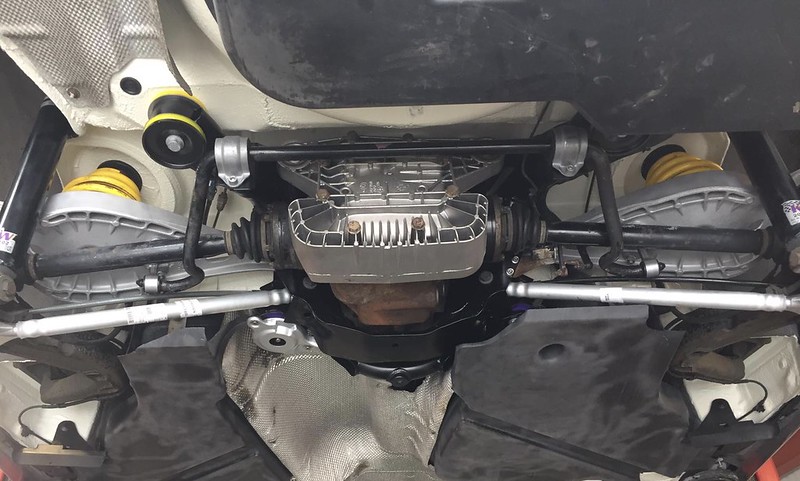
My subframe bushes were worn and so I went with Powerflex Yellow/Purple Subframe Bushes. These were recommended to me by Redish Motorsport at my inspection in Oct 2019. The durometer of these bushes are spot on (70A/80A). They absorb the torque from the diff without transmitting it into the floor of the car. If the bushes are too soft then, over time, this will exacerbate movement on the mounting points leading to cracking (like the stock ones do). However, if they are too hard, you could also be reducing the life of the RACP as the floor is no longer cushioned by the likes of solid bushings.
It is worth noting that there were reports of the previous gen. Powerflex Yellow Subframe Bushes mushrooming. Nevertheless, there have been no reports of this since they were revised in 2017 u2014 see official bulletin from Powerflex here: link.

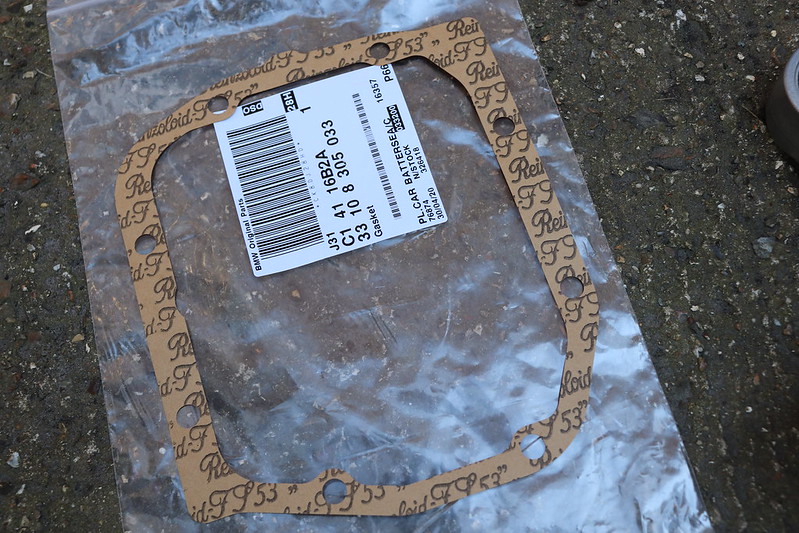
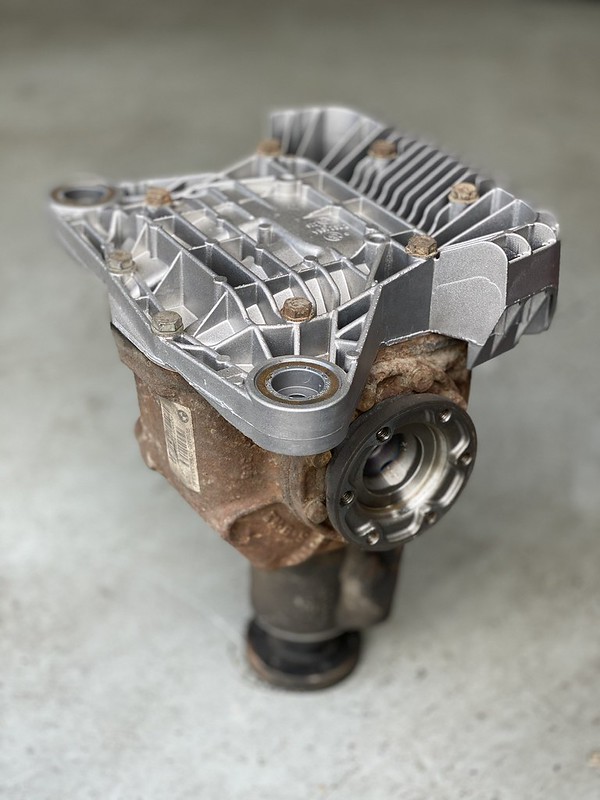
My differential bushes were also worn and so I replaced with OE (stock) bushes. Unlike polybushes, these bushes do not transmit any extra NVH into the cabin and are good for 80,000 – 100,000 miles. Note there are 3 bushes (and bolts & washers) which should be replaced u2014 (2 rears and 1 front). The rear bushes cannot be bought separately from BMW and so must be bought with the rear diff cover (parts listed below). If not done already, it may also be worth uprating your rear bolts as they were revised by BMW post-production following a PuMA case in 2007.
Moreover, I also decided to order a set of CSL rear camber arms. Internet rumours led me to believe that these were NLA however after getting in contact with various parts departments at BMW I was able to retrieve a set which came on backorder from Munich. From a camber adjustability perspective there is no real benefit as such, however the arms are made of aluminium and so are lighter than the stock E46 M3 arms. They also look cooler too.

Finally, I wanted to highlight the importance of proper undersealing when undertaking this job. It is not just a simple case of welding in plates and a brace. The colour itself does not matter to an extent and is mainly down to personal preference (although I prefer a finish as close to factory as possible), however it is vital to ensure that any corrosion found is treated. (Luckily, my car did not have much.). Any bare metal welding is protected with weld-through primer, and exposed areas are undersealed with appropriate primers, base/topcoats and cavity wax to prevent rust from occurring in the future.
Unfortunately I have seen cases on a forum where owners who had their cars done by garages which did not follow these steps were left with cars that began to develop rust not long after their “repairs”. In fact, one chap had to sell his car because the rust had started to manifest on his actual reinforcement plates – link.
Specific list of parts ordered for the job:
Redish Motorsport V2 Plate Reinforcement Kit
- Order from here: link
Practical Performance RnD Vincebar + Gussets Kit*
- Email [email protected] to purchase
*The kit comes with longer subframe bolts and so you do not re-use the existing bolts or need to purchase new bolts from BMW.
Genuine BMW differential bushes, bolts & washers
- 33112282482 x1 (rear diff cover with bushes)*
- 33108305033 x1
- 33172282484 x1
- 33177840535 x1
- 23001222891 x2
- 07119901766 x2
*It may be worth ordering the M10 hex bolts/screws and washers for the diff cover itself as I unfortunately forgot to do this – part numbers: 07119905641 x2, 07119905818 x2, 31106772199 x2, 33506771928 x2.
Powerflex Yellow/Purple Subframe Bushes
- PFR5-4610M3 x1
- PFR5-4611 x1
Genuine BMW rear anti roll bar bushes & bolts
- 31352229711 x2
- 33556780707 x2
- 07119904101 x4
- 33552283743 x2
- 33556782120 x2
- 33326760669 x4
- 07119905374 x4
- 07119903076 x2
- 83192405829 x2 (only required if DIY)


Genuine BMW exhaust hangers, bolts & nuts
- 18201401797 x3
- 18211436309 x2 (decided to powder coat originals rather than replace with new)
- 18307620549 x6
- 07119902955 x3
- 07119927022 x3
- 07119905529 x4
- 07143413174 x4

Genuine BMW fuel filter under tray & fixings
- 51717892953 x1 (replaced due to part missing from my car)
- 07119901299 x10

Genuine BMW V-brace & bolts
- 33312229899 x1
- 33306760652 x2

Genuine BMW subframe stopper plates
- 33312282251 x2 (decided to powder coat originals rather than replace with new)
Genuine BMW aqua plane guards & fixings
- 51718244045 x1
- 51718244046 x1
- 51118174185 x6

Genuine BMW CSL rear camber arms
- 33322283074 x2
- 33171090824 x2
- 33326760364 x2
- 33321095102 x2
- 33306786186 x2
- 33326760668 x4
Genuine BMW brake/fuel line brackets
- 34301164005 x9
- 34306773697 x9

Genuine BMW jacking pads
- 51718268885 x4
Genuine BMW propshaft components
- 26117526611 x1
- 26112226527 x1
- 26117635643 x6
- 07129900047 x6
- 26122282495 x1
- 26117574872 x2
- 26127511140 x1
‘E-Coat’ paint / underseal
- Corrostop (anti-rust treatment)
- Weld-through primer
- Etch or epoxy primer
- Sprayable seam sealer
- Brush-able seam sealer
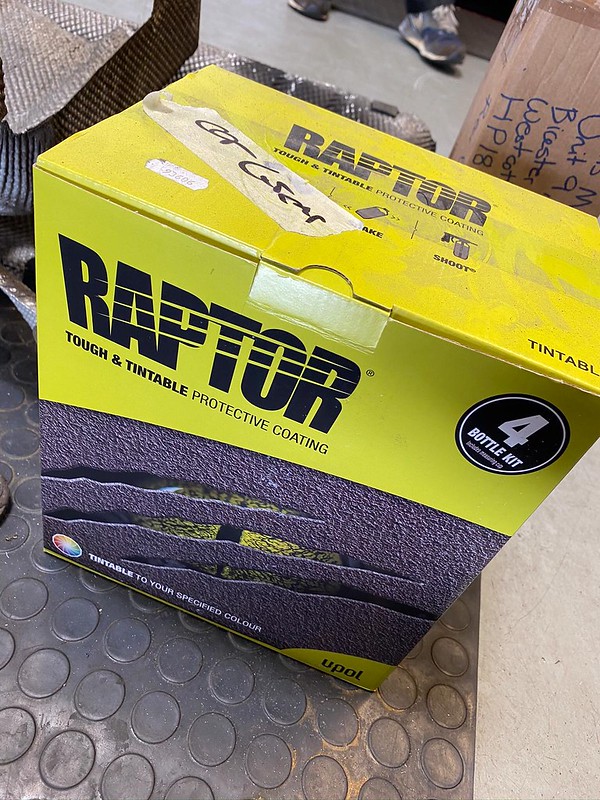
- U-Pol Tough & Tintable Raptor
- Basecoat RAL 1013 (closest match to E-Coat)
- Dinitrol 1000 Transparent Cavity Wax
- Schutz Gun (only required if DIY)

Before I show the repair, I thought it might be helpful to provide a shortened version of the RACP Inspection video which Redish Motorsport gave me in October 2019.
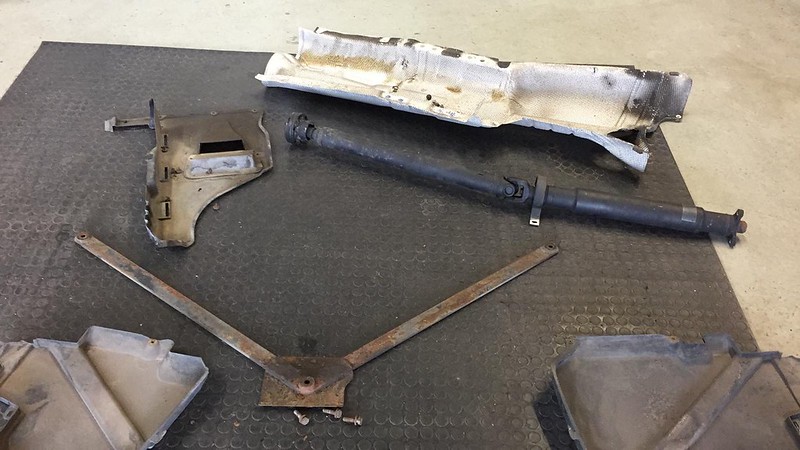
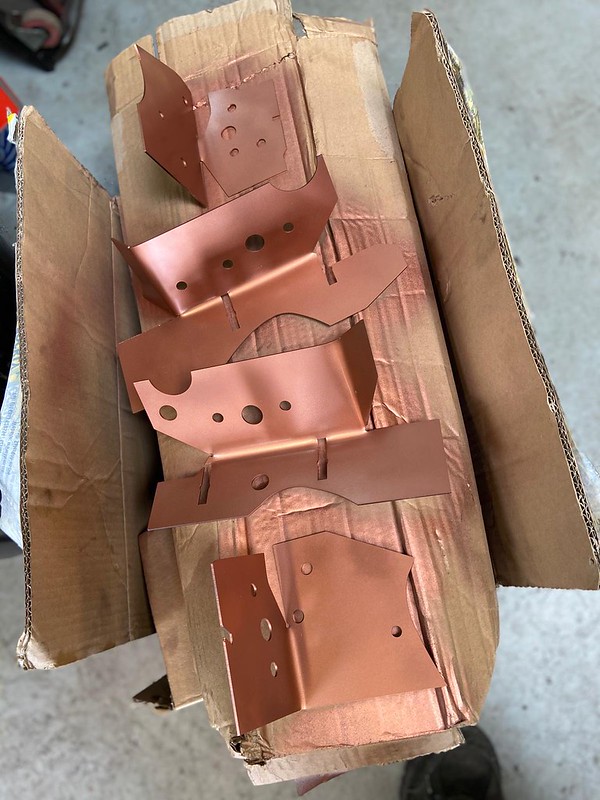
And here is one last pic of all the parts boxed up and ready to be sent to Auto Torque for installation:

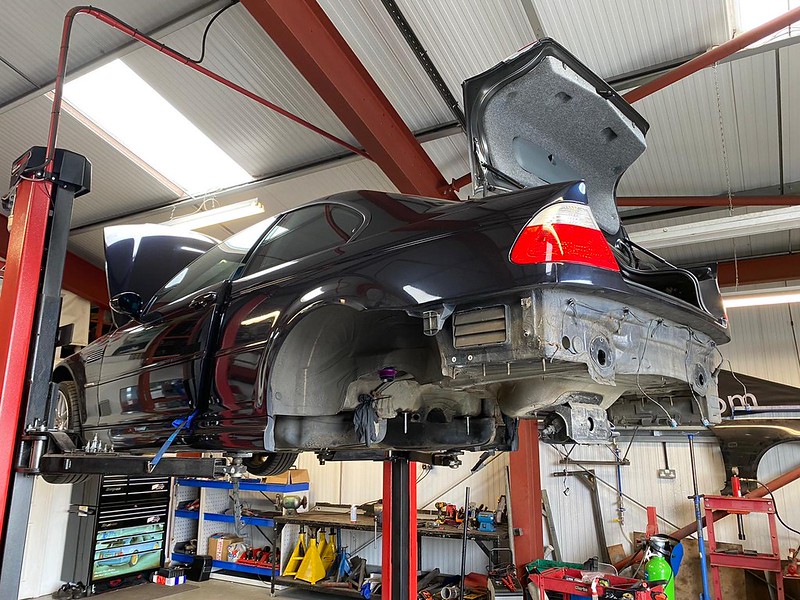
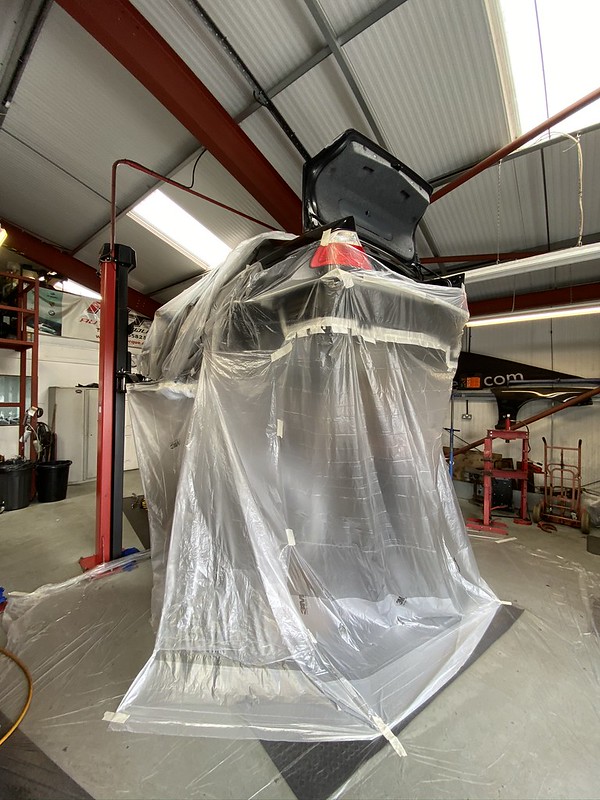
Once all the parts had arrived I took my car up to Auto Torque for the work to be completed. In total they had my car for about a month, but were very thorough and kept me informed with regular WhatsApp updates along the way.
They also documented the process and have created an E46 M3 RACP blog on their website, see here: link.
Below I have set out the process of the repair from start to finish:
Step 1 — Stripping the Car
Stripping car #1
Stripping car #2
Stripping car #3
Stripping car #4
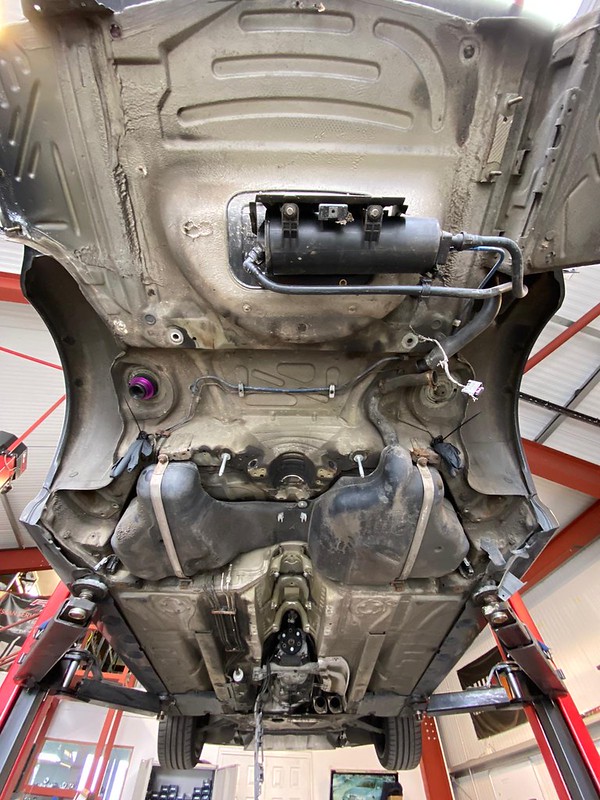
Stripping car #5
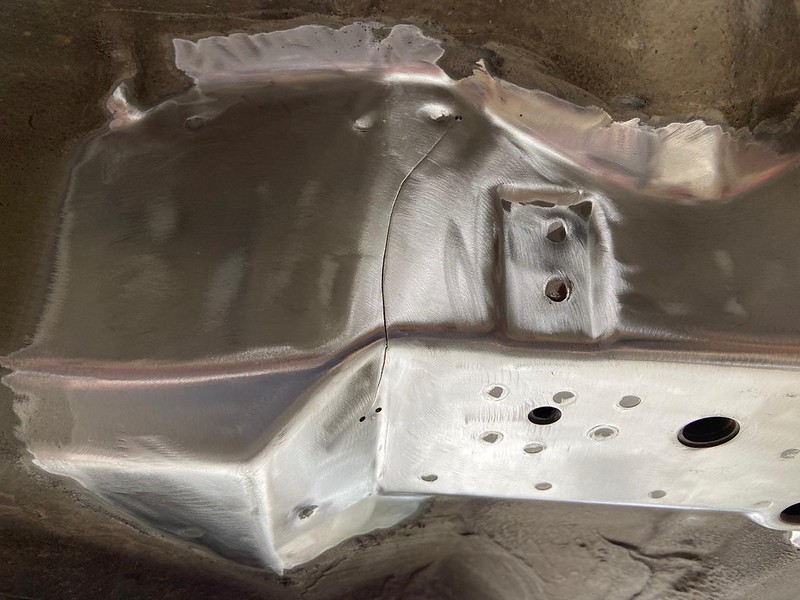
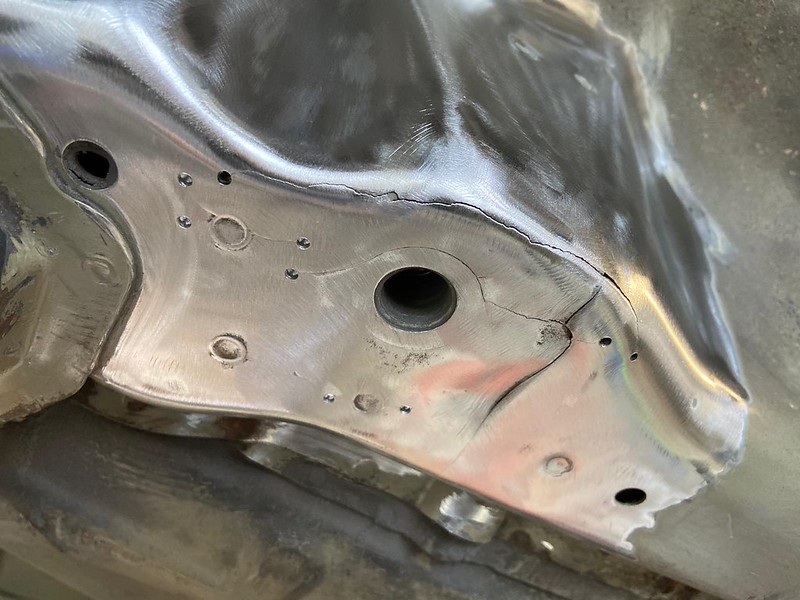
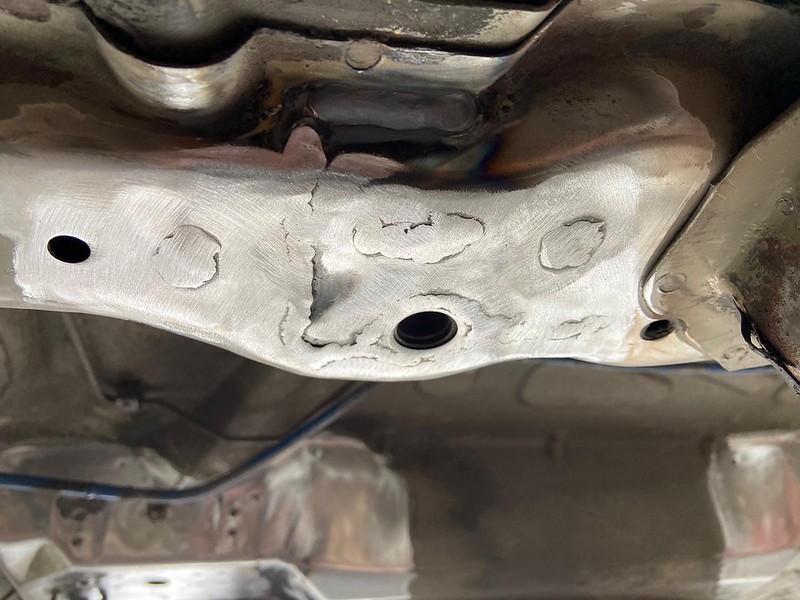
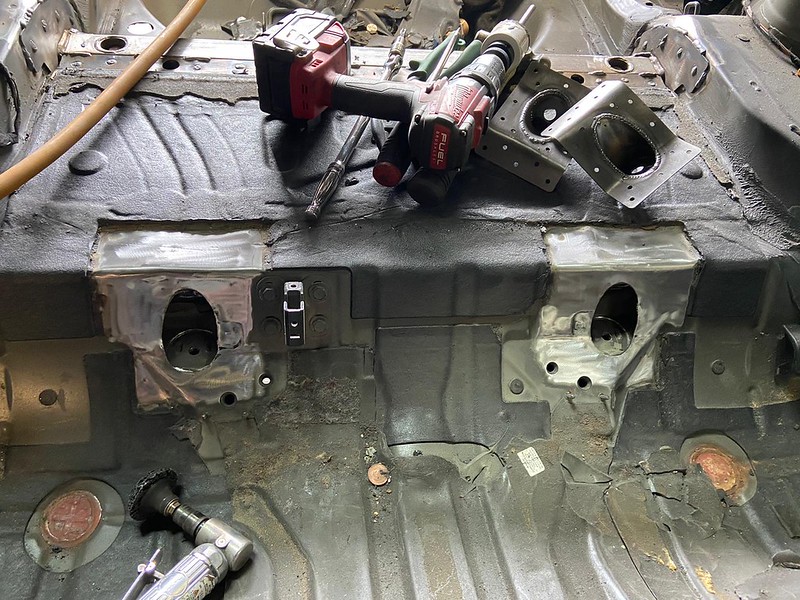
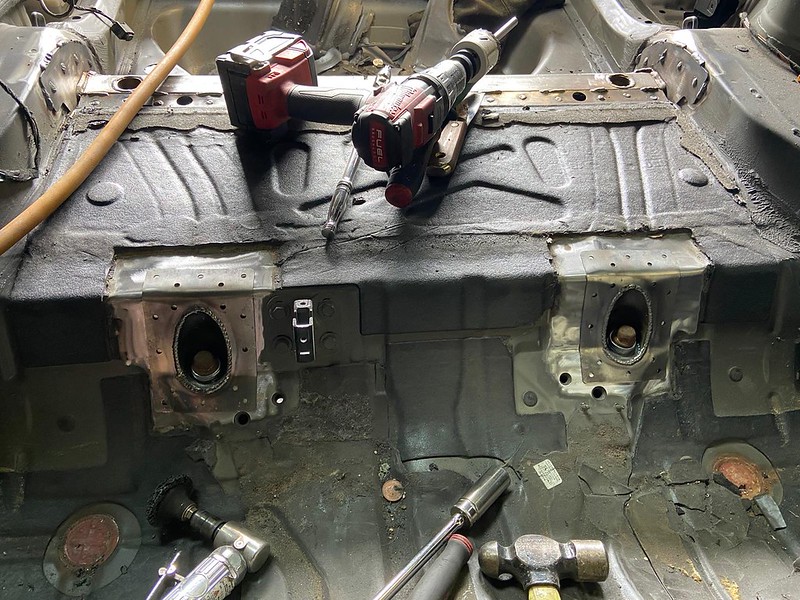
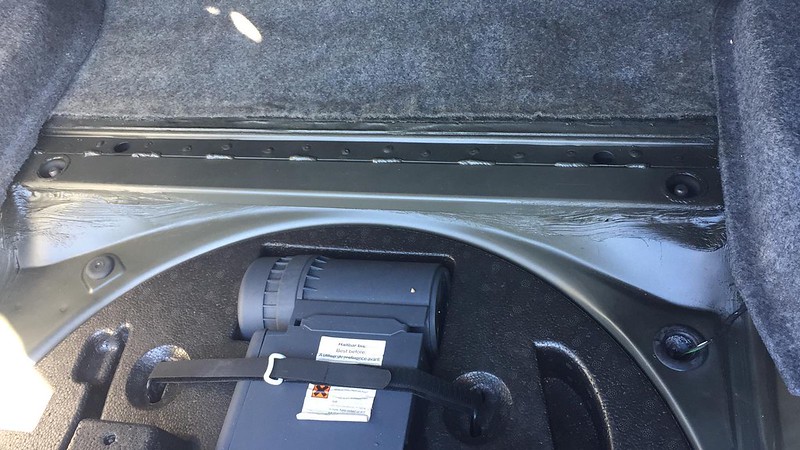
Step 2 — Assessing for cracks and popped spot welds
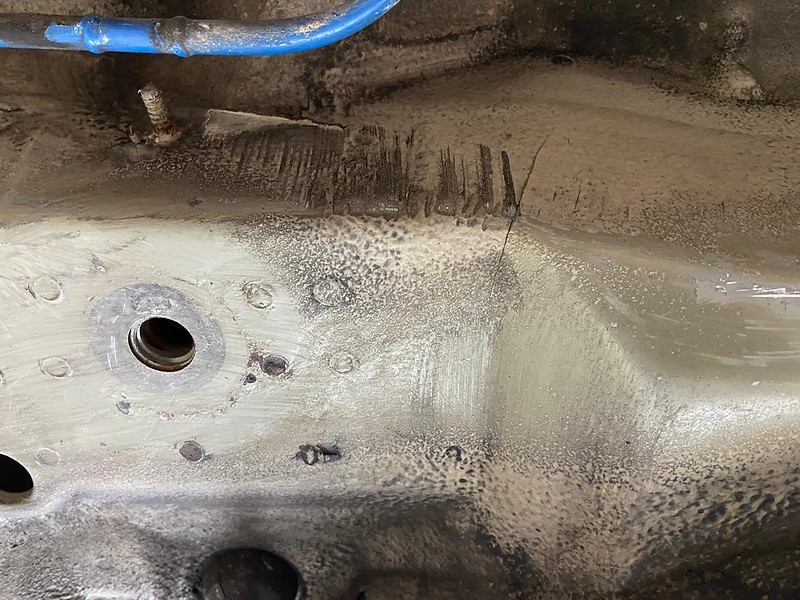
Assessing for cracks and popped spot welds #1
Assessing for cracks and popped spot welds #2

Assessing for cracks and popped spot welds #3
Assessing for cracks and popped spot welds #4
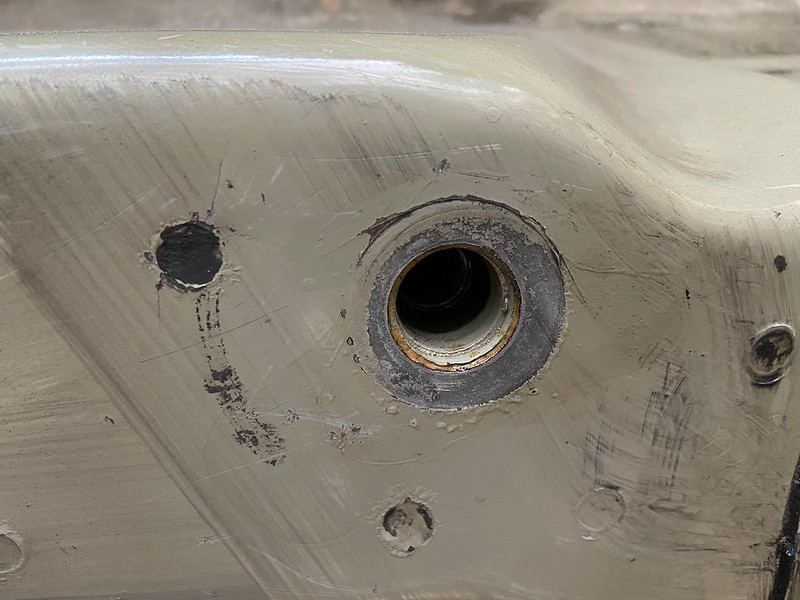
As you can see my car had cracks on all four subframe mounting points, with the front right and rear left suffering the worst.
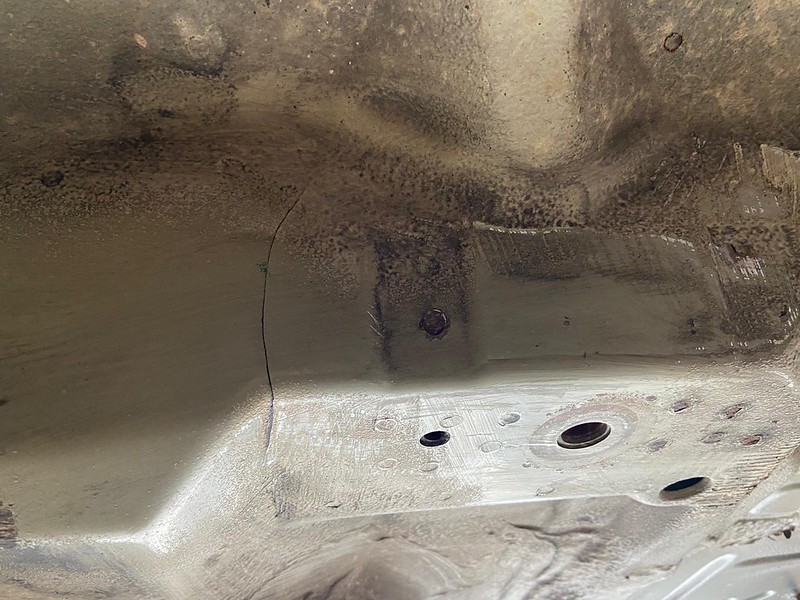
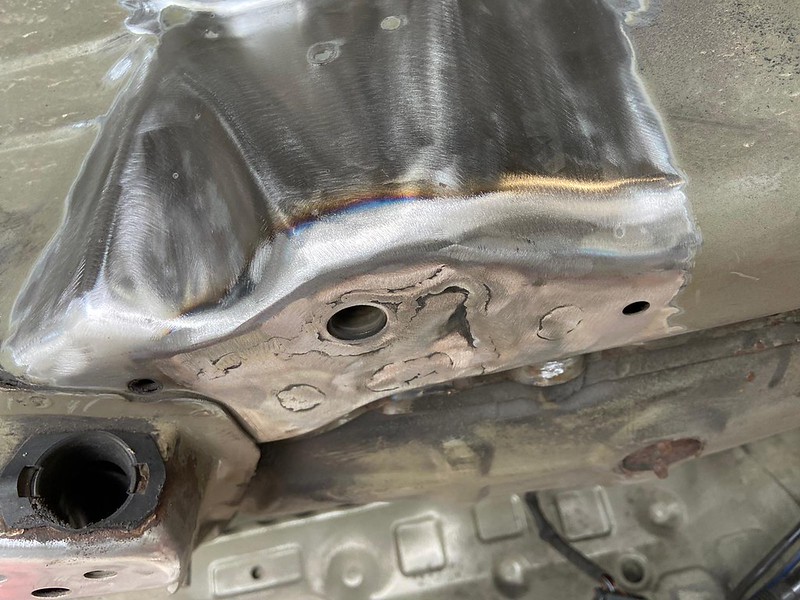
Step 3 — Wire wheel damaged areas back to bare metal and stop-drill cracks
Damaged areas #1

Damaged areas #2
Damaged areas #3

Damaged areas #4

Damaged areas #5
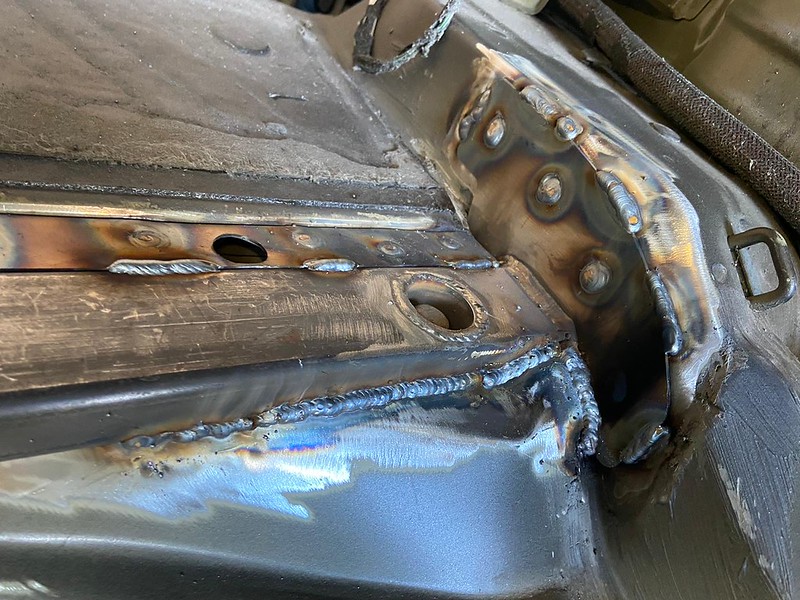
Step 4 — Repair cracks and popped spot welds by welding
Repair cracks #1
Repair cracks #2
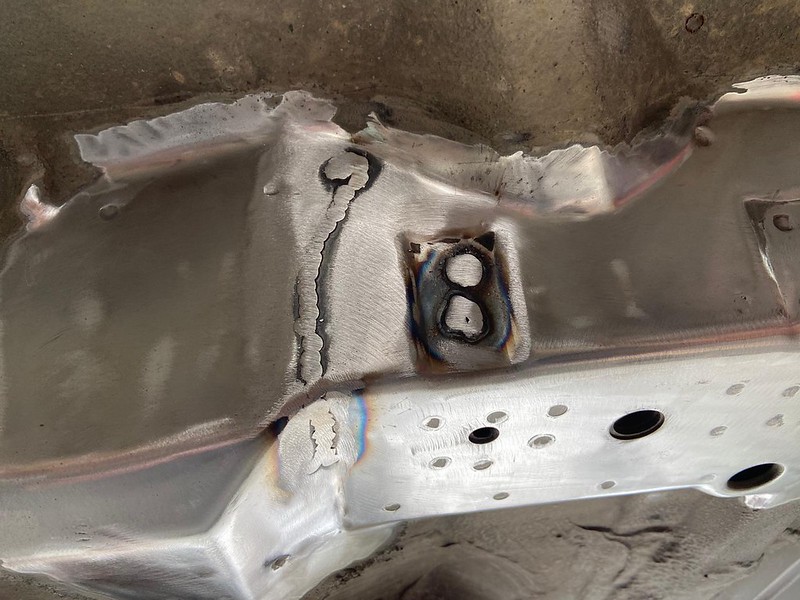
Repair cracks #3
Step 5 — Prep bare metal areas and Redish Motorsport V2 Reinforcement Plates with weld-through primer
Prep bare metal #1
Prep bare metal #2
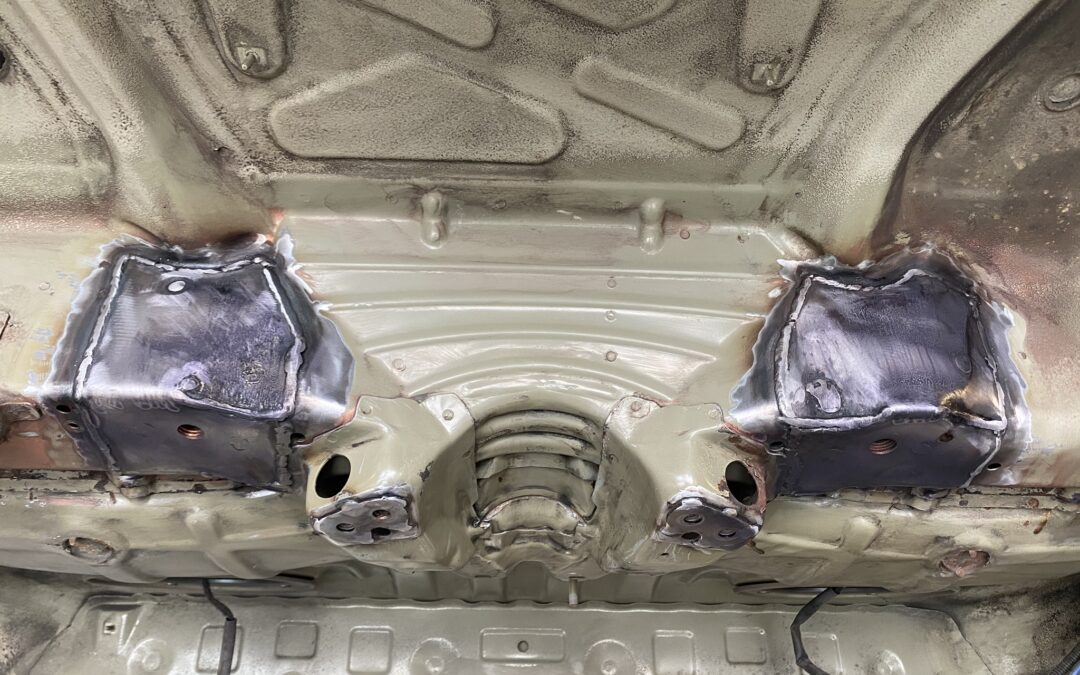
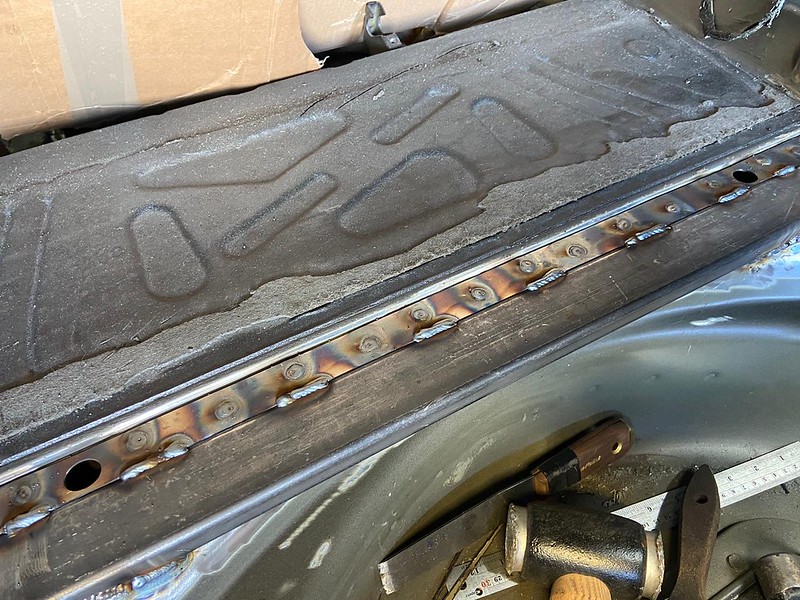
Step 6 — Weld in reinforcement plates
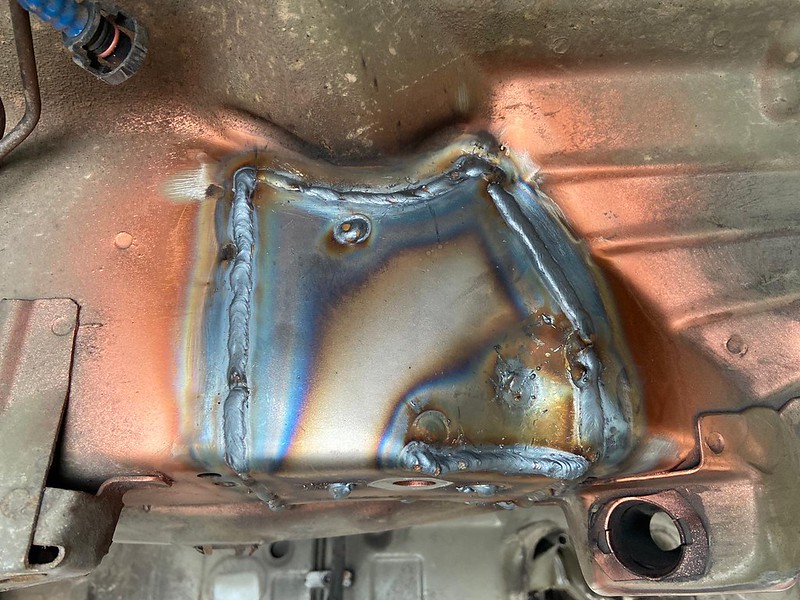
Weld reinforcement plates #1

Weld reinforcement plates #2
Step 7 — Flush welds flat

Flush welds flat #1
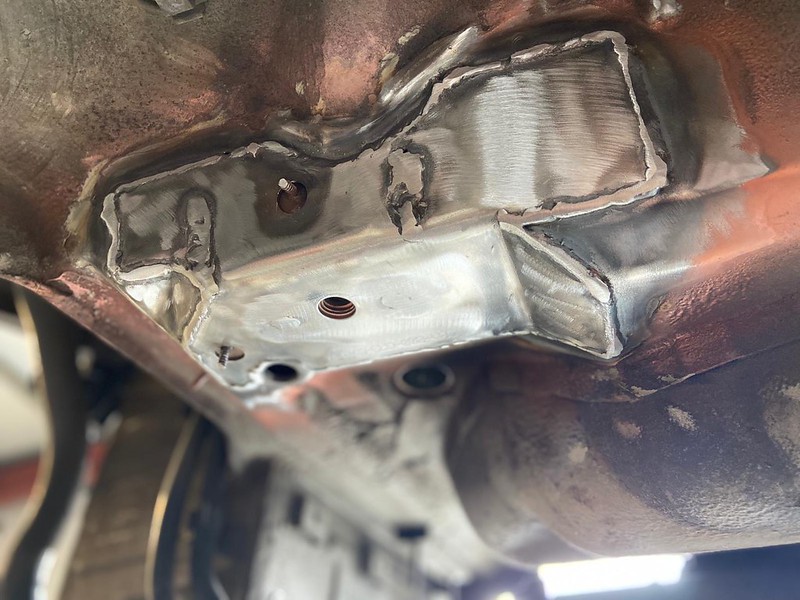
Flush welds flat #2
Step 8 — Treat bare metal (to prevent rust) and any areas of corrosion with rust treatment

Treat bare metal #1
Treat bare metal #2
Step 9 — Apply epoxy primer and seam sealer

Apply epoxy primer #1

Apply epoxy primer #2
Step 10 — Test underseal paint to ensure a good match

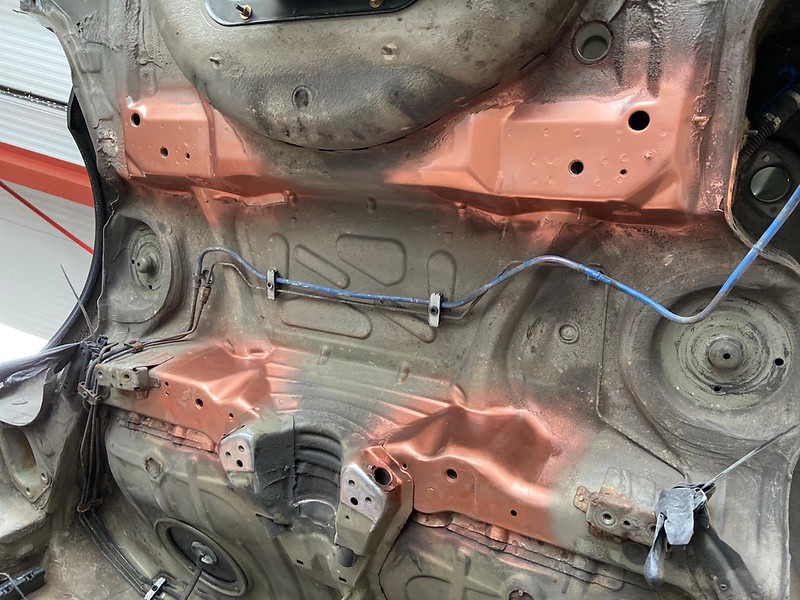
Step 11 – Protect bodywork
- Mix RAL 1013* CMP basecoat with U-Pol Tough & Tintable Raptor and apply textured E-Coat finish and protect with cavity wax
Protect bodywork #1
Protect bodywork #2
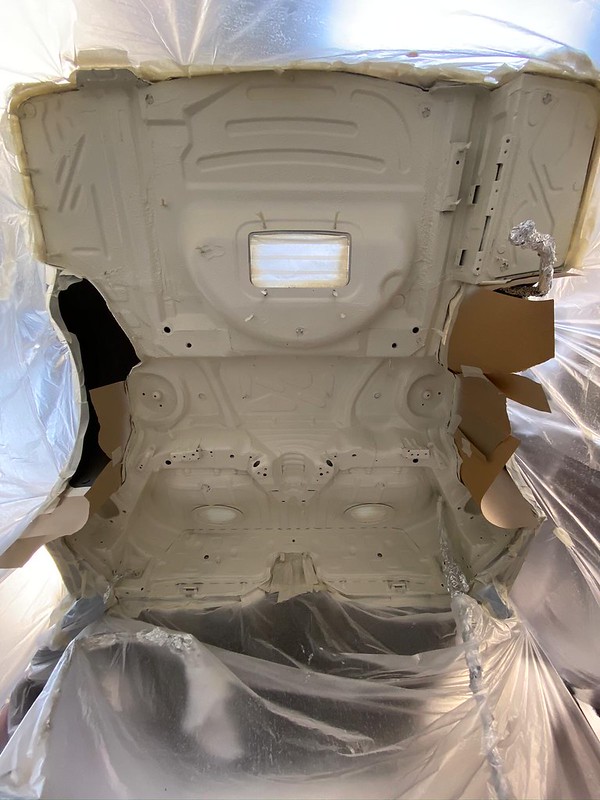
Protect bodywork #3
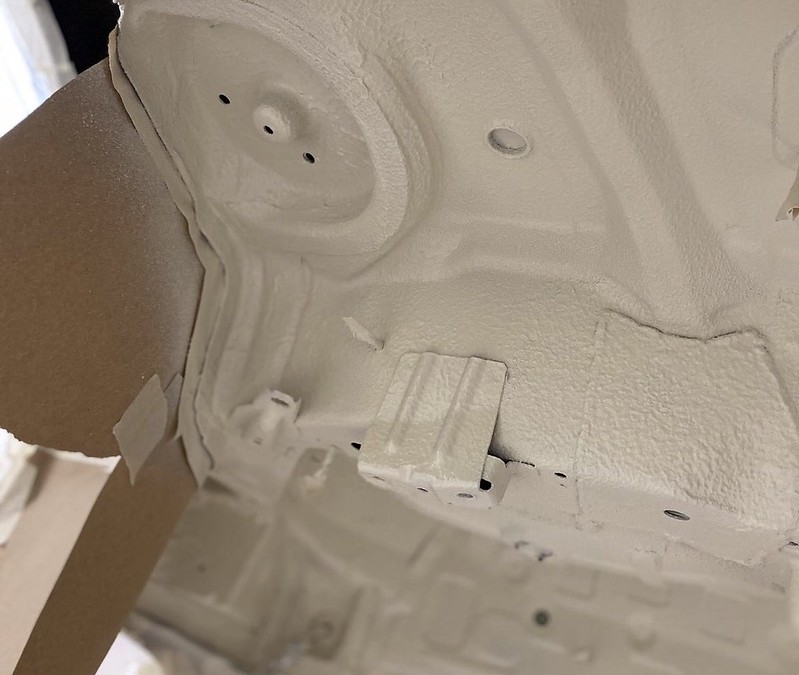
Protect bodywork #4
*I also thought I might share some information on E-Coat as from my experience there seems to be an element of reticence over what colour-code represents a good match. Most of the garages that I got in touch with were not keen to share information on the code that they used; some confirmed they match the colour from the transmission tunnel (which is probably the easiest method) and others simply ignored my request altogether. I must say Barney Halse at Classic Heroes was very helpful and informed me of what products they used to achieve their finish even after I had confirmed that I would not be going ahead with them.
I then did some more digging and found out the following:
- E-Coat (“electro-coat”) is a primer coat that protects the car’s surfaces, edges and cavities from corrosion. It also provides an excellent base for applying the subsequent paint layers.
- BASF is the parent company of the supplier of BMW paints (Glasurit), and their E-Coat is known as Cathoguard 800/900.
- E-Coat is applied at the factory where the car body is dipped in a cathodic electro-coat tank and then the coating particles migrate toward the steel panels with the aid of an electric current, and are deposited. The body is then rinsed before being moved to the oven, where the paint is baked at approx. 180 degrees Celsius. (This I remembered from my visit to the BMW Museum in Munich in May 2018.)
- There is no RAL colour code for E-Coat.
- I got in contact with the E-Coat lab at BASF who confirmed in the past they have recommended RAL 7042, however this colour is quite grey and that colour on paper and colour on substrates are often dissimilar. They recommended that I could try a test patch, but could not guarantee a match. As I was not applying paint to an entire bare metal underbody, I thought it was a better bet to opt for RAL 1013 instead.
This video provides an overview of the E-Coat and paint process at the factory:
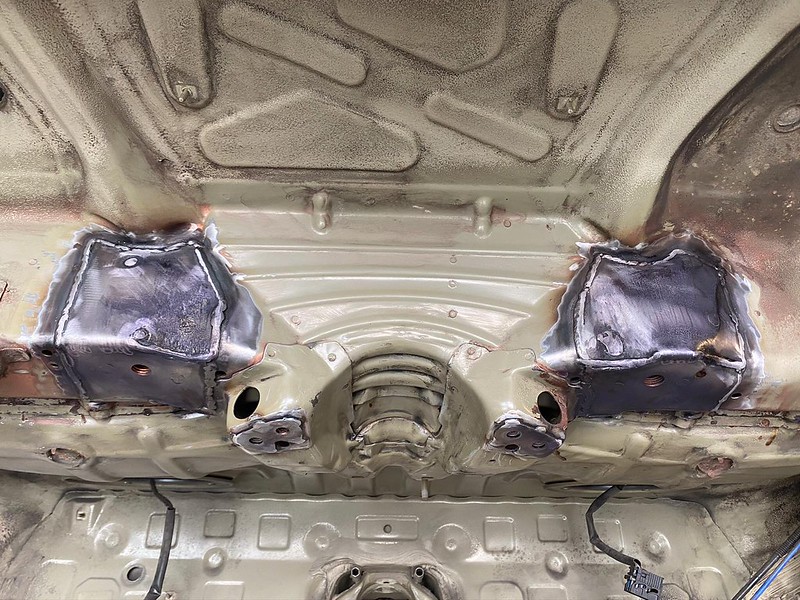
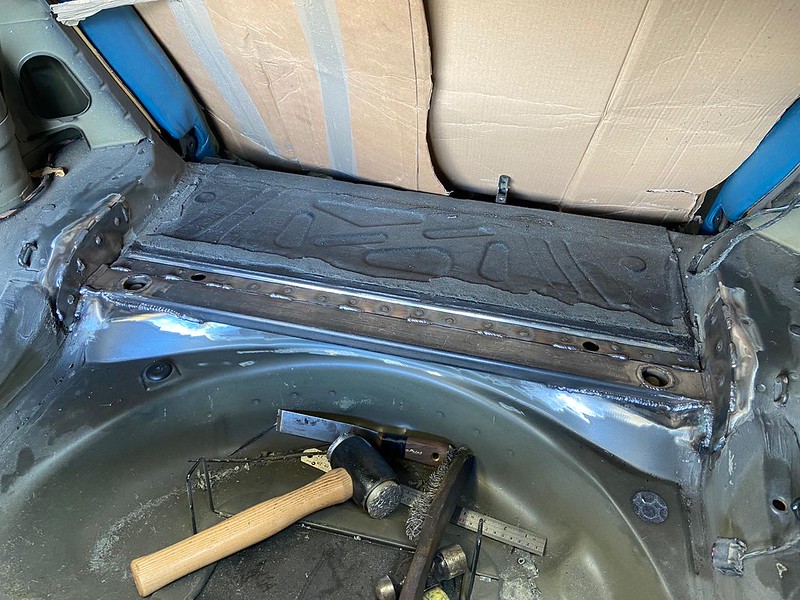
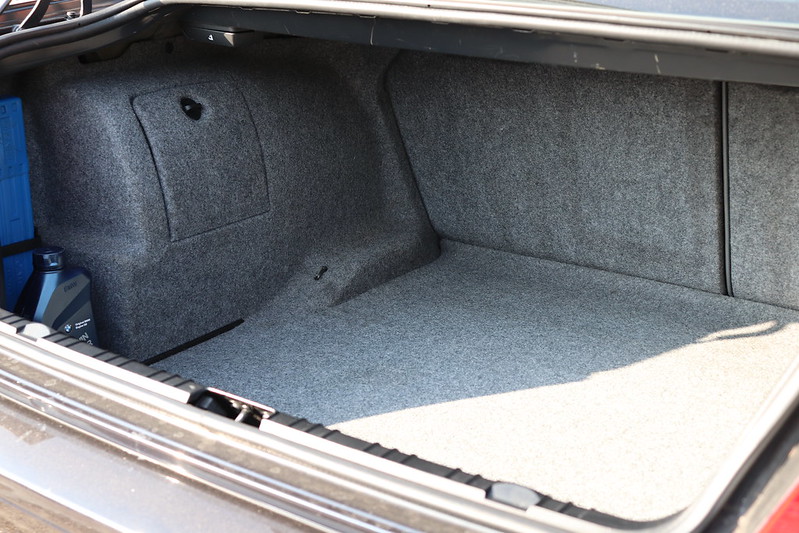
Step 12 — Stripping the boot carpets and rear bench to reveal the internal cavities

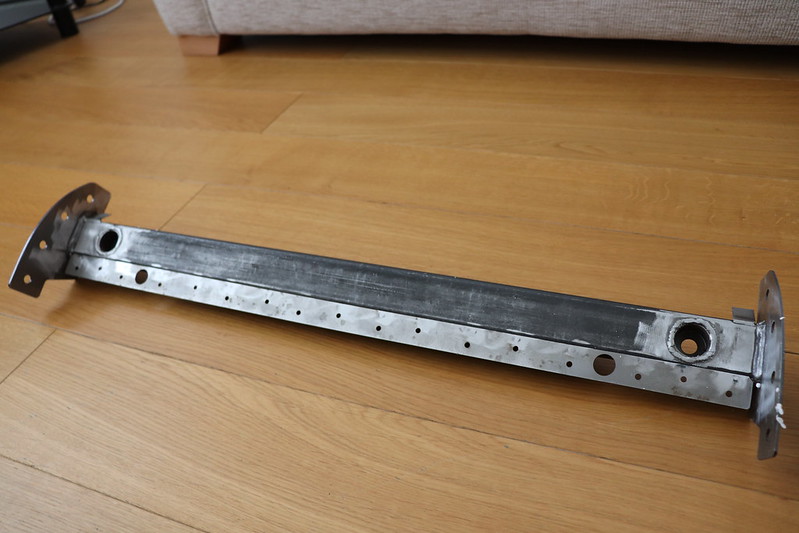
Step 13 — Cut and measure the rear boot cavity for fitment of the Vincebar

Step 14 — Stitch-weld the Vincebar
Stitch-weld the Vincebar #1
Stitch-weld the Vincebar #2
Stitch-weld the Vincebar #3
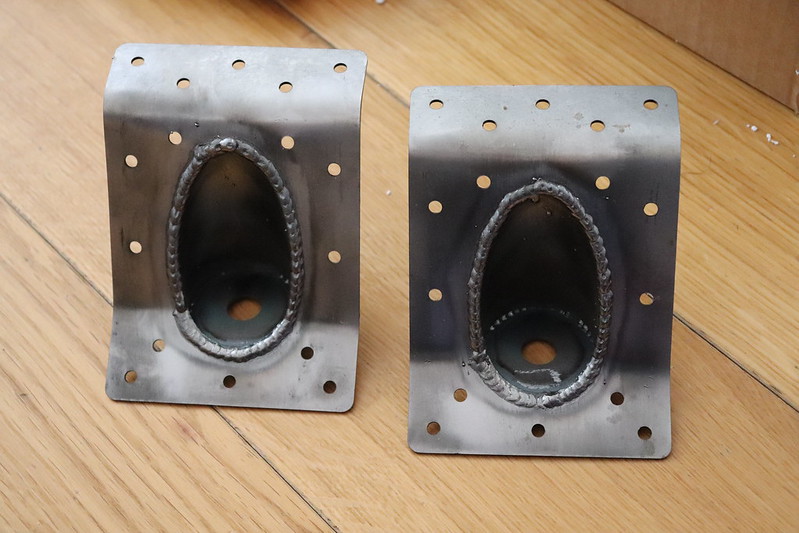
Step 15 — Cut and measure the rear seat panel cavity for installation of the gussets
Rear seat panel cavity #1
Rear seat panel cavity #2
Step 16 — Plug weld in gussets

In addition, I also had some internal cracks/spot weld failures in the mig welds of the internal cavities and even an odd looking crack on the nearside rear seat panel vertical upright strut (refer to 9:13 of my RACP Inspection video courtesy of Redish Motorsport). These were repaired before the Vincebar and gussets were welded in but I did not get any close-ups. Nevertheless, you can clearly see from these pictures how the Vincebar Kit addresses the thin sheet metal of the internal cavities as it vertically bolts all four internal points of the RACP to the subframe mounting points underneath the car and horizontally ties in the chassis rails relieving load from the panel; ultimately ensuring that the issue will not re-occur in the future.
Step 17 — Apply brushed seam sealer, primer and paint in original factory finish and protect with cavity wax
Note: Auto Torque arranged for a professional painter to match the colour of the inner rear boot by eye to the Vincebar. Like E-Coat there is no RAL for this area and it actually varies by car as it is basically e-coat mixed with the colour of the car (i.e., the colour of the inner boot of a Imola Red car will differ to that of a Phoenix Yellow car, etc.). This is due to the overspray from the robots in the factory as they spray the car with no windows – see previous post for video.
In my opinion, Auto Torque did a great job and you cannot see the blend marks even upon close inspection.
Apply brushed seam sealer #1
Apply brushed seam sealer #2
As previously mentioned, the beauty of the Vincebar is that it is not visible once the carpets have been put back together.
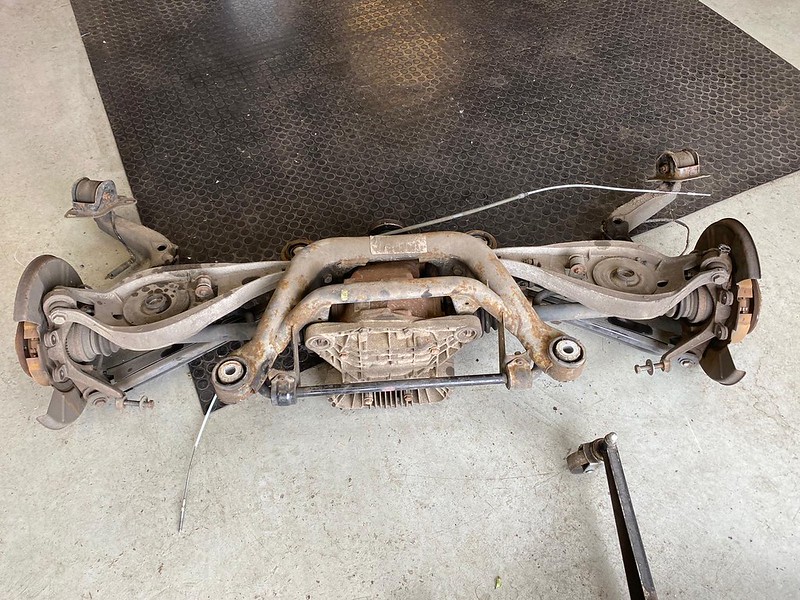
Step 18 — Powder coat subframe, install Powerflex Yellow/Purple bushes, reassemble diff with new cover incl. bushes and vapour blast upper arms
The powder coating colour of choice was Satin Black, to replicate the factory finish.
Powder coat subframe #1
Powder coat subframe #2

Powder coat subframe #3
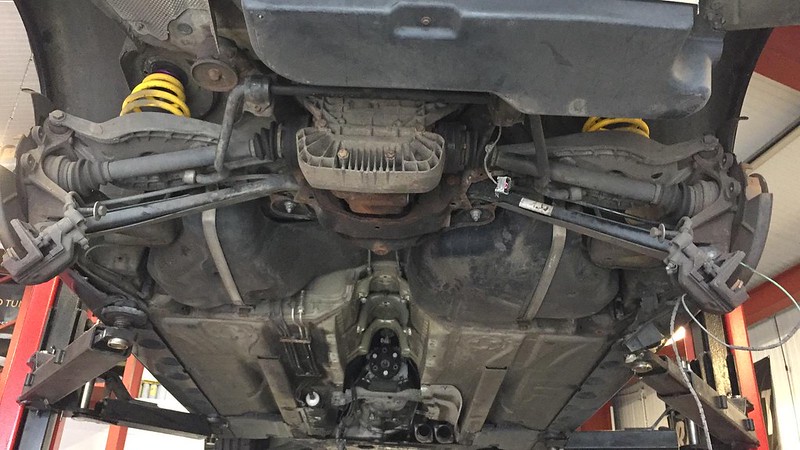
Step 19 — Reassemble subframe and suspension components

My car had also developed a cowbell sound upon take-up of drive. Turns out my giubo was split and the centre UJ was worn. These parts were replaced with Genuine BMW components and I can confirm that my car no longer makes that oh-so-annoying noise.
Cowbell sound #1
Cowbell sound #2
I also had new rear brake pads (p/n 34216761248) fitted as mine were at 3mm.
Step 20 — Hunters 4 Wheel Alignment

Due to installing CSL rear camber arms it was only right that I opted for the CSL alignment this time.
The RACP repair and reinforcement was completed around the end of July 2020 and I would like to give a massive thank you to Auto Torque for their hard work, attention to detail and customer service. I know that many people on a forum I often write on own E46 M3s that are either cracked or have not yet been repaired and I would fully recommend Auto Torque if you are looking to get your car reinforced. I would also like to thank Redish Motorsport for undertaking the initial inspection and providing their extensive knowledge of the problem and how it can be resolved, via their YouTube channel. I would also like to thank Joey Hazell at BMW Park Lane for providing parts at fair prices through the COVID-19 lockdown and forum sponsor Rybrook Warwick for parts thereafter. Finally, I would also like to thank @grchmason for helping me along the way and convincing me to invest in the car rather than taking the easy option and moving on.
To confirm, the car is a 2002 and the work was undertaken when the car had covered circa 93,000 miles.
I have left some links below which I think are helpful for those who are looking to learn more about the repair:
- Repair – youtu.be/4lx1vmnKdOM
- Seam sealer – youtu.be/hhDAQ97WnxA
- Finish – youtu.be/q5sOe17FC-k
- Common corrosion areas – youtu.be/0BsufWhs6r0
- Importance of an internal brace – youtu.be/jm6szwEOb6M
Now some of you may be wondering, does reinforcing the rear-end of the car and installing an internal brace have a noticeable effect on the way the car drives? The short answer to this is yes and I will touch upon it more in a future post where I will be providing an update on my second Nurburgring trip with the E46 M3.